WordPress Blog Speed Optimization Checklist
A practical, blog-focused checklist to improve WordPress speed, Core Web Vitals, caching, images, plugins, hosting, and ongoing performance maintenance.
A slow WordPress blog can quietly hurt user experience, search visibility, conversions, and reader trust. Even great content loses momentum when pages take too long to load, images delay rendering, or plugins add unnecessary weight.
This WordPress blog speed optimization checklist gives you a practical workflow you can follow before publishing, after redesigns, and during monthly maintenance. You will learn how to test performance, clean up common bottlenecks, optimize images, configure caching, improve Core Web Vitals, and keep your blog fast over time.
If you are new to performance metrics, start by understanding the basics of WordPress speed and Core Web Vitals before applying the checklist below.
Prerequisites
Before you make changes, prepare your site so you can work safely and measure real improvements. Speed optimization should be handled like a controlled process, not a random set of plugin changes.
- Administrator access to your WordPress dashboard.
- Access to your hosting control panel or managed hosting dashboard.
- A recent full backup of your files and database.
- A staging site if your blog receives regular traffic.
- A speed testing tool such as PageSpeed Insights, GTmetrix, WebPageTest, or your host’s performance dashboard.
Step 1: Measure Your Current Blog Speed Optimization
Start with a baseline test so you know what is actually slow. Without a baseline, you may spend hours changing settings that do not improve the pages your readers use most.
Test at least three page types: your homepage, one long blog post, and one category archive. These pages usually expose different issues such as oversized hero images, slow ad scripts, heavy related-post widgets, or inefficient archive queries.
- Open your preferred speed testing tool.
- Enter your homepage URL and run the test.
- Repeat the test for a recent blog post and a category archive.
- Record the mobile score, desktop score, Largest Contentful Paint, Cumulative Layout Shift, Interaction to Next Paint, total page size, and request count.
- Save screenshots or export reports so you can compare results after each optimization round.
Checkpoint: You should have a written baseline for at least three important URLs before changing plugins, themes, images, or hosting settings.
Troubleshooting: If results vary widely between tests, run each URL three times and use the median result. Performance tools can fluctuate because of server load, third-party scripts, network conditions, and cache status.
Step 2: Check Hosting, PHP, and Server Resources
Your hosting environment sets the ceiling for your blog’s performance. A well-optimized theme and cache setup will still struggle if the server has slow response times, outdated PHP, limited memory, or overloaded shared resources.
- Log in to your hosting dashboard.
- Check your PHP version and use a currently supported version recommended by your host.
- Review memory limits, CPU usage, disk usage, and database size.
- Enable server-level caching if your host provides it.
- Confirm that HTTPS is active and that your domain resolves consistently with or without www.
In WordPress, go to Tools > Site Health and review the Status and Info tabs. Look for warnings related to outdated PHP, inactive persistent object cache, missing modules, low memory, or background update issues.
Checkpoint: Your server should respond quickly, run a modern PHP version, provide enough memory, and avoid recurring resource-limit warnings.
Troubleshooting: If Time to First Byte stays high even after caching, contact your host and ask whether object caching, full-page caching, PHP workers, database optimization, or a plan upgrade would help your traffic pattern.
Step 3: Speed Optimization Blog Images Before Uploading
Images are often the largest assets on WordPress blogs. Featured images, screenshots, infographics, author photos, and embedded media can slow down posts when they are uploaded at full camera size or served in outdated formats.
Use a consistent image workflow for every post. Resize images to the maximum display width your theme actually needs, compress them, write useful alt text, and avoid uploading duplicate versions of the same graphic.
- Resize large images before uploading them to the Media Library.
- Use WebP or another modern format when your optimization plugin or host supports it.
- Compress images using a reputable image optimization plugin or external tool.
- Set descriptive file names before upload, such as
wordpress-cache-settings-example.webp. - Add meaningful alt text in Media > Library or inside the post editor.
For a deeper image workflow, follow this guide on how to optimize images for WordPress and apply the same standards to every new blog post.
Checkpoint: Your featured images and in-post graphics should be compressed, correctly sized, and served without causing layout shifts or long loading delays.
Troubleshooting: If images still appear large in performance reports, check whether your theme is loading the original image instead of a resized thumbnail. Regenerate thumbnails if you recently changed themes or image dimensions.
Step 4: Configure Page Caching and Browser Caching
Caching helps WordPress serve pages faster by reducing repeated database and PHP work. For blogs, page caching is especially useful because many posts and archives do not change every minute.
Use either your host’s built-in cache or one trusted caching plugin. Avoid stacking multiple full-page caching plugins unless your host specifically documents that setup.
- Choose one primary caching solution.
- Enable page caching for public visitors.
- Enable browser caching for static files such as CSS, JavaScript, images, and fonts.
- Exclude cart, checkout, account, login, preview, and admin pages if your site uses dynamic features.
- Clear the cache after changing themes, menus, widgets, CSS, JavaScript, or major plugin settings.
If you need a full walkthrough, use the complete WordPress caching setup guide to configure cache settings more carefully.
Checkpoint: Repeat your baseline tests. You should see faster repeat visits, fewer server-processing delays, and improved page delivery for cached URLs.
Troubleshooting: If your layout breaks after enabling CSS or JavaScript optimization, disable minification, combine files, and delay JavaScript settings one at a time. Cache features should improve speed without breaking navigation, comments, ads, analytics, or forms.
Step 5: Audit Plugins for Overlap and Bloat
Plugins can improve your blog, but they can also add scripts, styles, database queries, admin notices, cron tasks, and third-party requests. The goal is not to use the fewest plugins possible; it is to use necessary plugins that are well maintained and not duplicating each other.
- Go to Plugins > Installed Plugins.
- Deactivate and remove plugins you no longer use.
- Look for overlapping features such as multiple SEO plugins, multiple cache plugins, multiple image optimization plugins, or multiple analytics plugins.
- Check when each plugin was last updated.
- Test important pages after removing or replacing plugins.
Checkpoint: Your plugin list should be easier to explain. Each active plugin should have a clear purpose, active maintenance, and no unnecessary overlap with another plugin.
Troubleshooting: If removing a plugin breaks a feature, restore from backup or reactivate the plugin and document what it controls. Then look for a lighter replacement or a built-in theme, host, or WordPress feature that can do the same job.
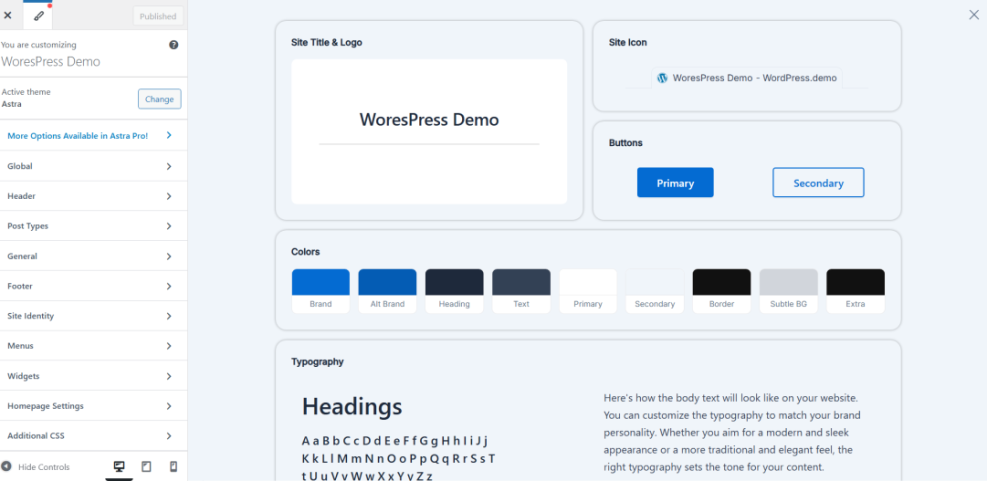
Step 6: Review Theme, Fonts, and Layout Elements
Your theme controls much of what loads on every page. Sliders, icon libraries, custom fonts, animation effects, sticky headers, related-post blocks, and page builder modules can all affect performance.
- Disable homepage sliders if they do not improve engagement.
- Use fewer font families and font weights.
- Remove unused sidebar widgets.
- Avoid loading heavy page builder templates for simple blog posts.
- Keep above-the-fold layouts stable so content does not jump while loading.
Checkpoint: Your blog should load a stable layout quickly, especially on mobile. Readers should see the title, featured image, and first paragraph without distracting shifts or delayed rendering.
Troubleshooting: If performance drops after a redesign, compare old and new templates. Look for added fonts, background videos, animation libraries, social embeds, ad placements, and large hero sections.
Step 7: Clean the Database and Post Revisions
As your blog grows, WordPress stores revisions, transients, spam comments, trashed posts, plugin tables, and metadata. A moderate amount is normal, but years of clutter can slow admin screens and database-heavy tasks.
- Create a full backup first.
- Delete spam and trashed comments.
- Empty trashed posts and pages you no longer need.
- Limit excessive post revisions if your editorial workflow creates hundreds of drafts.
- Use a trusted database cleanup tool only after reviewing what it will remove.
Checkpoint: Your database should be backed up, cleaner, and free from obvious trash, spam, and abandoned clutter.
Troubleshooting: If your admin dashboard becomes slow after cleanup, clear all caches and check whether a plugin is rebuilding data. If errors appear, restore the backup and repeat the cleanup more selectively.
Step 8: Use a CDN for Global Readers
A content delivery network can serve static files from locations closer to your readers. This is helpful when your blog attracts traffic from multiple countries or when image-heavy posts receive search and social traffic.
- Choose a CDN through your host, DNS provider, or performance plugin.
- Enable CDN delivery for images, CSS, JavaScript, and fonts.
- Confirm that HTTPS works correctly on CDN URLs.
- Clear both WordPress cache and CDN cache after major design changes.
- Test pages from different regions if your speed tool supports location testing.
Checkpoint: Static assets should load from CDN-hosted locations without mixed-content warnings, broken images, or missing CSS.
Troubleshooting: If images disappear after enabling a CDN, check SSL settings, image optimization compatibility, and whether hotlink protection or security rules are blocking CDN requests.
Step 9: Reduce Third-Party Scripts
Third-party scripts are common on blogs, but they can be expensive. Ads, analytics, heatmaps, chat widgets, social embeds, video players, affiliate tools, and newsletter popups may all compete for bandwidth and browser processing time.
- Remove scripts that do not support a clear business or editorial goal.
- Load marketing scripts only on pages where they are needed.
- Replace heavy embeds with linked screenshots when appropriate.
- Delay non-essential scripts carefully and test forms, tracking, ads, and consent banners afterward.
Checkpoint: Your request count and main-thread work should decrease after removing unnecessary scripts.
Troubleshooting: If analytics or forms stop working after delaying JavaScript, exclude those scripts from delay settings. Performance gains are not worth broken measurement, lead capture, or required compliance tools.
Step 10: Prioritize Mobile Performance
Most blog readers will experience your site on a mobile device. Mobile performance issues often come from large images, sticky elements, oversized ads, render-blocking files, and layouts designed only for desktop screens.
- Test important posts on a real phone, not only in desktop preview mode.
- Check whether the first screen loads quickly on mobile data.
- Confirm that menus, search, comments, forms, and sharing buttons are usable.
- Remove intrusive popups that cover the main content.
- Watch for layout shifts caused by ads, cookie banners, images, and embedded media.
Checkpoint: A mobile reader should be able to open a post, read the title, see the first paragraph, and scroll smoothly without blocked content or major layout jumps.
Troubleshooting: If mobile scores are much lower than desktop scores, focus first on image size, server response time, unused JavaScript, and above-the-fold layout stability.
Step 11: Add Speed Optimization Checks to Your Publishing Workflow
Speed optimization works best when it becomes part of publishing, not an emergency task after traffic drops. Every new blog post should follow a lightweight pre-publish performance checklist.
- Compress and resize every image before publishing.
- Use only necessary embeds.
- Avoid adding new plugins for one-off post features.
- Preview the post on mobile.
- Clear cache after major layout or content changes.
- Retest high-traffic posts after adding ads, forms, videos, or affiliate widgets.
Checkpoint: Your editorial process should prevent performance problems before they reach readers.
Troubleshooting: If writers or editors skip optimization steps, create a reusable checklist inside your project management tool, editorial calendar, or post template.
Step 12: Schedule Monthly Speed Optimization Maintenance
WordPress performance changes over time. New plugins, theme updates, content additions, hosting changes, ad networks, and traffic growth can all affect speed even if your site was fast last month.
- Run monthly tests on your homepage, top blog posts, and top landing pages.
- Review plugin updates and remove tools you no longer use.
- Check Site Health for new warnings.
- Audit large images added during the month.
- Review Core Web Vitals trends in your SEO or analytics tools.
- Document changes so you can identify what improved or harmed performance.
Checkpoint: You should have a repeatable maintenance rhythm that keeps your blog fast as it grows.
Troubleshooting: If performance declines month after month, look for patterns. Common causes include heavier ads, more tracking scripts, uncompressed media uploads, plugin overlap, and hosting resource limits.
Keep Your WordPress Speed Optimization Blog Fast as It Grows
WordPress blog speed optimization is not a single setting or one magic plugin. It is a practical routine that combines good hosting, smart caching, optimized images, lightweight plugins, clean layouts, careful scripts, and regular testing.
Start with your baseline measurements, fix the biggest bottlenecks first, and retest after each major change. Once the main issues are solved, add the checklist to your publishing and monthly maintenance workflow so your blog stays fast as your content library grows.
Further Reading
- WordPress Performance Checklist for Bloggers
- WordPress CDN Blog Setup
- WordPress Speed Test Checklist
- How to Fix Cumulative Layout Shift in WordPress