Change Your WordPress Theme Safely
A step-by-step WordPress guide to switching themes without breaking your design, content, SEO, or site functionality.

Changing your WordPress theme can refresh your site’s design, improve usability, and make your brand look more professional. But if you switch themes without preparation, you can accidentally break layouts, lose widget placements, disrupt menus, or create SEO issues.
This guide shows you how to change your WordPress theme safely from start to finish. You will learn how to back up your site, test the new theme on staging, review design and functionality, and launch the change with confidence.
The safest workflow starts with a complete site backup. If you have not created one recently, follow this guide on how to backup a WordPress site before touching your active theme.
Prerequisites
Before you replace your active theme, make sure you have the right access, tools, and safety checks in place. A theme controls your site’s templates, layout behavior, widget areas, and sometimes custom features, so you should treat the change like a small redesign project.
- Administrator access to your WordPress dashboard.
- A recent full backup of your files and database.
- Access to your hosting control panel or file manager.
- A staging site or local test copy.
- The new theme installed but not activated on the live site.
- A checklist of key pages, forms, menus, widgets, and SEO elements to review.
Step 1: Create a Full Backup Before Changing Anything
A full backup gives you a recovery point if the new theme causes layout problems, PHP errors, missing widgets, or plugin conflicts. Your backup should include both the WordPress database and site files, because theme settings, content, media, plugins, and uploads are stored in different places.
In your WordPress admin area, go to your backup plugin’s settings and run a manual backup. If your host provides server-level backups, create one there too so you have more than one restore option.
- Log in to WordPress as an administrator.
- Open your backup plugin or hosting backup panel.
- Create a complete backup that includes files and database tables.
- Download a copy or confirm that the backup is stored off-site.
- Check the timestamp so you know the backup was created before the theme change.
Checkpoint: You should have a confirmed backup available with today’s date and time. If your backup tool offers a restore test, run it on staging before continuing.
Troubleshooting: If the backup fails, check available storage space, PHP memory limits, and server timeout settings. Do not continue until the backup completes successfully.
Step 2: Test the New Theme on a Staging Site
A staging site is a private copy of your WordPress website where you can safely test major changes before publishing them. This is the best place to activate the new theme, inspect page layouts, and fix issues without affecting visitors.
If your host offers one-click staging, create a staging copy from your hosting dashboard. If not, use a staging plugin or follow this walkthrough to create a WordPress staging site before activating the new theme.
- Open your hosting dashboard or staging plugin.
- Create a fresh staging copy of your live website.
- Log in to the staging WordPress dashboard.
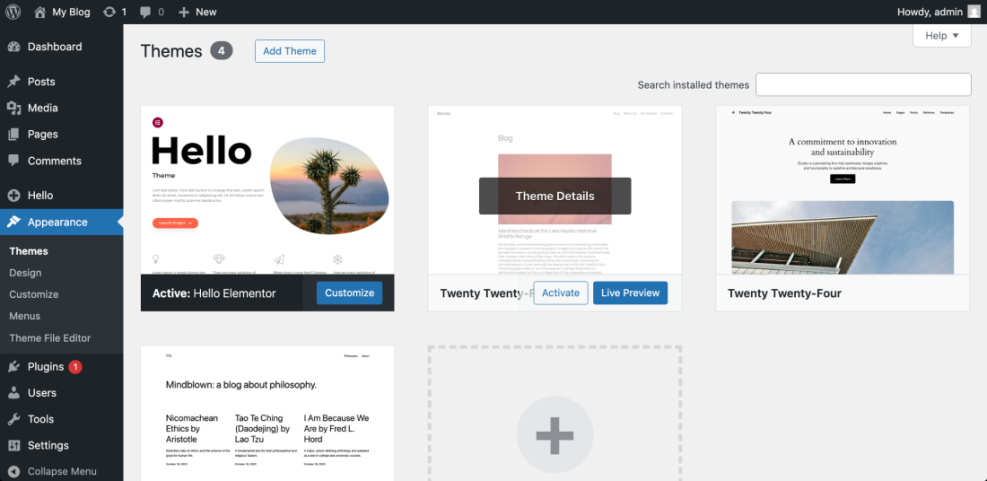
- Go to Appearance > Themes.
- Install the new theme if it is not already available.
- Click Live Preview first, then activate it only on staging.
Checkpoint: The staging site should load with the new theme active while the live site remains unchanged.
Troubleshooting: If staging shows a critical error after activation, disable the theme from your hosting file manager by renaming its folder inside wp-content/themes. WordPress should fall back to another installed theme, allowing you to log in and investigate.
Step 3: Review Your Current Theme Settings and Customizations
Many WordPress users customize their current theme over time without documenting the changes. Before switching, review your current theme settings so you know what needs to be recreated in the new design.
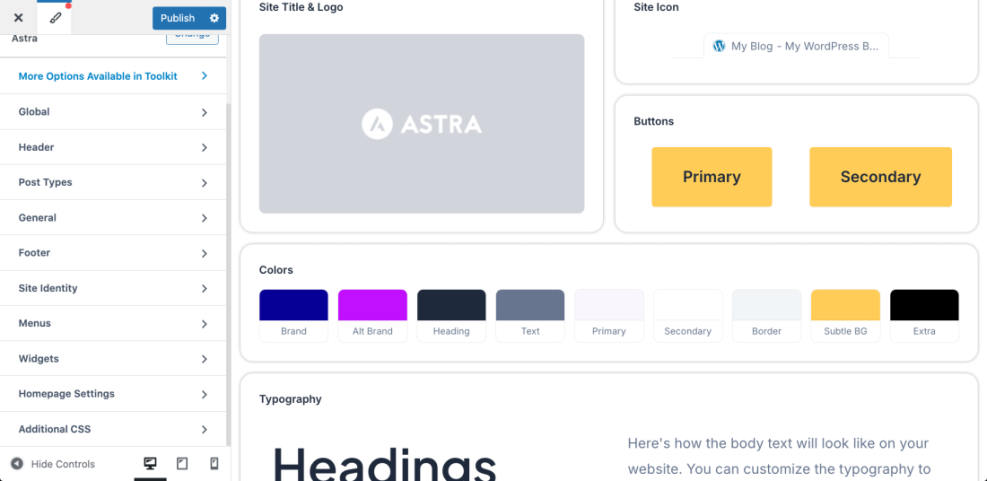
Go to Appearance > Customize and record important settings such as logo, colors, typography, header layout, footer layout, homepage settings, custom CSS, and widget placements. Also check whether your current theme contains custom code snippets, tracking scripts, or template changes.
- Logo and site identity settings.
- Header and navigation layout.
- Footer widgets and copyright text.
- Homepage template or front page settings.
- Custom CSS under Appearance > Customize > Additional CSS.
- Theme-specific shortcodes or blocks.
- Ad placements, analytics scripts, and verification codes.
If you previously edited theme files directly, move those changes into a safer structure before relying on them. For custom template edits, learn how to use a WordPress child theme so updates do not overwrite your work.
Checkpoint: You should have a written list of important design and code customizations that must be recreated or replaced in the new theme.
Troubleshooting: If you cannot remember what was customized, compare your current theme settings with a clean version of the same theme on staging. Also check your site’s header, footer, functions file, and custom CSS panel for manual changes.
Step 4: Install the New Theme Without Activating It on Live
Installing a theme is not the same as activating it. You can safely upload or install the new theme on your live site while leaving the current theme active, but you should still complete your main configuration and testing on staging first.
In WordPress, go to Appearance > Themes > Add New. Search the WordPress theme directory or click Upload Theme if you purchased a premium theme as a ZIP file.
- Go to Appearance > Themes.
- Click Add New.
- Search for the theme or upload the theme ZIP file.
- Click Install.
- Do not click Activate on the live site yet.
Checkpoint: The new theme should appear in your Themes screen as installed, but your current theme should still be active on the live website.
Troubleshooting: If the upload fails, confirm that the ZIP file contains the installable theme folder and not a full package with documentation, license files, or demo content folders. If the file is too large, upload it through your hosting file manager or ask your host to increase the upload limit.
Step 5: Configure the Theme on Staging
Once the new theme is active on staging, configure the design before you judge the result. Many themes look broken immediately after activation because menus, widgets, homepage sections, and image sizes need to be assigned again.
- Go to Appearance > Customize or the theme’s settings panel.
- Upload your logo and favicon if needed.
- Set your site colors, fonts, and layout width.
- Assign your primary menu under Appearance > Menus.
- Review widget areas under Appearance > Widgets.
- Confirm the homepage under Settings > Reading.
- Regenerate thumbnails if the theme uses different image sizes.
Checkpoint: Your staging site should show the correct logo, navigation menu, homepage, footer, and main page layouts.
Troubleshooting: If the homepage looks wrong, check whether the new theme requires a specific page template. Open the homepage in the editor, review the template setting, then check Settings > Reading to confirm the correct page is assigned as the homepage.
Step 6: Test Design, Content, Plugins, and SEO Elements
Theme changes often affect more than visual design. They can change heading structure, schema output, template widths, featured image placement, sidebar behavior, and page builder compatibility.
Open your most important pages on staging and test them like a visitor. Focus on your homepage, top blog posts, service pages, contact page, checkout or lead forms, navigation menus, and any page that receives organic search traffic.
- Homepage layout and hero section.
- Header menu, dropdowns, and mobile menu.
- Blog post layout, featured images, author boxes, and sidebars.
- Contact forms and newsletter forms.
- WooCommerce product, cart, checkout, and account pages if applicable.
- Page builder sections and reusable blocks.
- SEO title and meta description output from your SEO plugin.
- Schema, breadcrumbs, and canonical tags.
- Internal links, buttons, and calls to action.
- Mobile layout on phone and tablet screen sizes.
Checkpoint: Your staging site should be usable on desktop and mobile, with no broken menus, missing forms, unreadable sections, or major layout shifts.
Troubleshooting: If page builder content looks broken, check whether the old theme included custom builder modules. Replace theme-specific elements with standard blocks, shortcodes, or plugin-based modules that will remain portable in the future.
Step 7: Check Speed and Core Layout Stability
A new theme can improve performance, but it can also add large CSS files, JavaScript, web fonts, sliders, animation libraries, or unnecessary template features. Testing performance before launch helps you avoid a design upgrade that makes the site slower.
Run a speed test on staging and compare it with your live site. Pay special attention to mobile performance, Largest Contentful Paint, Cumulative Layout Shift, image loading, and the number of theme assets loaded on each page.
- Test the homepage and at least two important inner pages.
- Check whether large hero images are properly compressed.
- Review whether fonts are loading from too many sources.
- Disable unused theme features such as sliders, animations, or icon packs.
- Clear cache and test again after changes.
Checkpoint: The new theme should perform at least as well as the previous theme on your most important templates.
Troubleshooting: If the new theme is slower, disable optional theme modules first. Then review caching, image optimization, font loading, and script delay settings before deciding whether the theme is suitable.
Step 8: Activate the New Theme on the Live Site
After staging looks correct, schedule the live switch during a lower-traffic period. This reduces risk and gives you time to fix small design issues before most visitors see them.
Before activation, create one more fresh backup. Then go to Appearance > Themes on the live site, click the new theme, and select Activate.
- Create a fresh live backup.
- Put the site in maintenance mode if the change may take several minutes.
- Go to Appearance > Themes.
- Activate the new theme.
- Assign menus, widgets, logo, homepage, and footer settings if needed.
- Clear all WordPress, plugin, server, and CDN caches.
- Open the site in a private browser window and test key pages.
Checkpoint: The live site should display the new design with working navigation, readable content, correct homepage layout, and no visible error messages.
Troubleshooting: If the site breaks after activation, switch back to the previous theme from Appearance > Themes. If you cannot access the dashboard, use your hosting file manager to rename the new theme folder, then restore the backup if needed.
Step 9: Run Post-Launch Checks
The first hour after launch is important. Some issues only appear on the live site because of caching, CDN rules, ad scripts, analytics scripts, or production plugin settings.
- Visit the homepage, blog posts, landing pages, contact page, and checkout pages.
- Submit a test contact form.
- Check menus on desktop and mobile.
- Review the footer, sidebar, and widget areas.
- Confirm analytics tracking is still firing.
- Check your SEO plugin output for titles, meta descriptions, canonicals, and schema.
- Review Search Console over the next few days for crawl or indexing issues.
Checkpoint: Visitors should be able to navigate, read, search, submit forms, and complete key actions without confusion.
Troubleshooting: If you see old styling mixed with new styling, clear every cache layer: WordPress cache, optimization plugin cache, browser cache, hosting cache, and CDN cache. If the issue remains, inspect the page for old theme shortcodes or hardcoded CSS classes.
Step 10: Know When to Roll Back
A safe theme change includes a rollback plan. If the new theme causes serious errors, lost revenue, broken forms, or major SEO template problems, restoring the previous setup may be smarter than trying to fix everything live.
Rollback when the issue affects core site functionality and cannot be fixed quickly. Examples include checkout failures, contact form failures, blank screens, broken navigation, or missing content on important pages.
- Reactivate the previous theme if the dashboard still works.
- Restore the pre-launch backup if settings or content changed unexpectedly.
- Clear all caches after rollback.
- Document what failed so you can fix it on staging.
- Try the launch again only after the issue is resolved.
Checkpoint: Your site should return to its previous working design and functionality after rollback.
Troubleshooting: If rollback does not restore the site fully, restore both files and database from the backup created immediately before launch. Restoring only files may not recover theme settings stored in the database.
Switch Themes With Confidence, Not Guesswork
Changing your WordPress theme safely is all about reducing risk before you click Activate. A backup protects your site, staging reveals problems early, and a careful post-launch checklist helps you catch issues before they affect visitors or search performance.
Take your time with testing, especially on mobile layouts, forms, menus, widgets, and SEO elements. Once the new theme is stable, document your settings and remove any unused theme files later as part of routine maintenance.
Further Reading
- How to Install and Activate a WordPress Theme
- How to Customize a WordPress Theme
- How to Update a WordPress Theme
- How to Clear Cache in WordPress
Frequently Asked Questions
Can I change my WordPress theme without losing content?
Why did my homepage look broken after changing themes?
What should I do if the new theme causes a critical error?
wp-content/themes, then restore your backup if needed.