Can You Assign Multiple Tags to a WordPress Post
Learn how WordPress post tags work, how to add more than one tag, and how to use tags without hurting your site structure or SEO.
Yes, you can assign multiple tags to a WordPress post. Tags are one of the simplest ways to describe the specific topics covered in a post, especially when one article naturally touches on several related ideas.
In this guide, you will learn how to add multiple tags in the WordPress editor, when multiple tags make sense, and how to avoid creating a messy tag archive structure. If you are still learning how WordPress organizes content, start with this related guide on categories and tags in WordPress.
By the end, you will know how to tag posts confidently without overusing tags or creating duplicate SEO problems.
Step 1: Understand How WordPress Tags Work
Tags are descriptive labels that help group related posts together. Unlike categories, which usually define broad sections of your site, multiple tags identify smaller topics, details, or recurring themes inside your content.
For example, a post about improving blog SEO could use tags such as On-Page SEO, Internal Linking, and Content Strategy if those topics are all covered meaningfully in the article.
- Categories organize posts into broad content groups.
- Tags describe specific topics inside the post.
- Multiple tags are allowed when it is accurately represents the content.
Checkpoint: You should understand that assigning several tags is normal in WordPress, but each tag should have a real purpose.
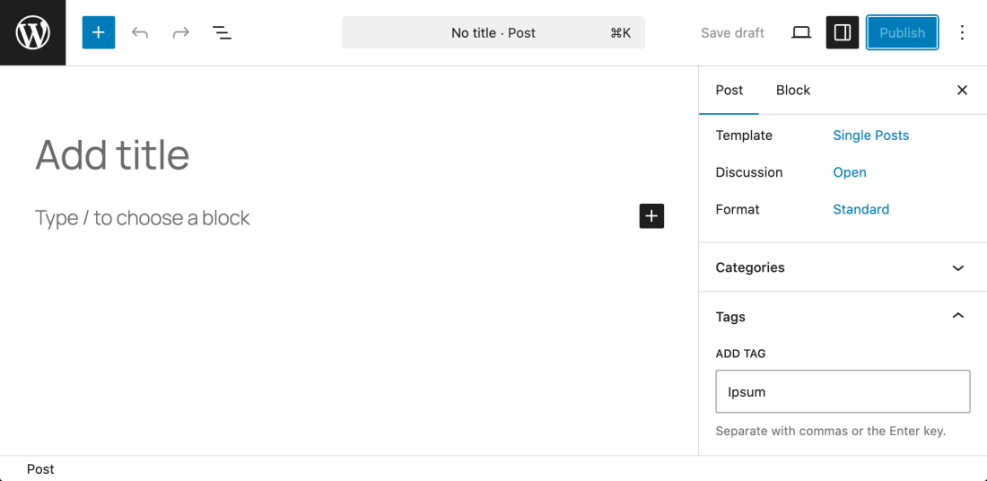
Step 2: Add Multiple Tags in the WordPress Editor
You can add multiple tags directly from the post editing screen. The exact layout may vary slightly depending on whether you use the Block Editor or Classic Editor, but the process is similar.
- Log in to your WordPress dashboard.
- Go to Posts > All Posts.
- Open the post you want to edit, or click Add New.
- Find the Tags panel in the post settings sidebar.
- Type a tag name and press Enter or click Add.
- Repeat the process for each additional tag.
- Click Update or Publish to save your changes.
Checkpoint: After saving, the tags should appear in the post settings panel and may also appear on the front end if your theme displays post tags.
If you are new to the dashboard, this guide on how to log in to WordPress can help you access the correct admin area before editing your post.
Step 3: Add Tags in the Classic Editor
If your site uses the Classic Editor, the tags box usually appears on the right side of the post editing screen. You can enter multiple tags by separating them with commas.
- Open the post in the WordPress admin area.
- Look for the Tags box on the right side of the editor.
- Type your tags separated by commas, such as
WordPress Basics, Blogging, SEO Basics. - Click Add.
Checkpoint: Each tag should appear as an individual tag item inside the Tags box after you click Add.
Troubleshooting: If you do not see the Tags box, click Screen Options at the top of the Classic Editor screen and make sure Tags is enabled.
Step 4: Choose Tags That Actually Help Readers
Adding many tags is technically possible, but that does not mean every post needs a long tag list. It can help readers discover related content and help you build a cleaner content structure.
Use it only when you expect to publish more than one post about that topic. A tag archive with only one post usually adds little value and can create thin archive pages.
- Use tags for recurring subtopics.
- Avoid creating tags that are just slight variations of each other.
- Use clear, readable tag names.
- Keep capitalization consistent.
- Review old tags before creating new ones.
Checkpoint: Each selected tag should describe an important topic in the post and connect naturally to future or existing content.
Step 5: Avoid Tag SEO Problems
Multiple tags do not automatically hurt SEO. Problems usually happen when a site creates too many thin, duplicate, or overlapping the archive pages.
For example, using separate tags like SEO, SEO Tips, WordPress SEO, and SEO Basics without a clear reason can split related content across several similar archives. That makes your site harder to manage and less useful for readers.
For broader search optimization, review this guide on WordPress SEO for beginners so your tagging strategy supports your larger SEO structure.
- Do not create a new tag for every keyword variation.
- Do not use it as a replacement for categories.
- Do not assign unrelated popular tags just to chase traffic.
- Do not leave hundreds of unuse in your database.
Checkpoint: Your tags should improve navigation and topic grouping, not create duplicate archives or confuse users.
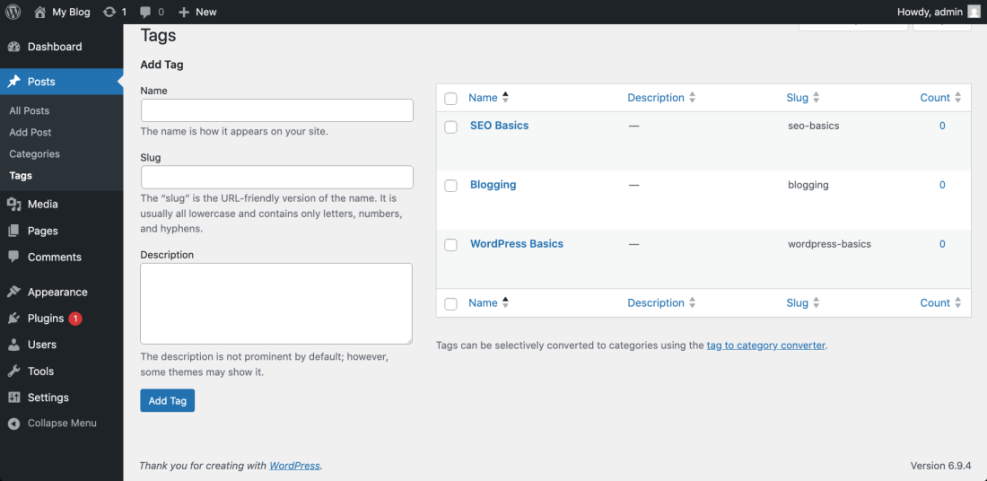
Step 6: Manage Existing Tags from the Dashboard
WordPress lets you edit, delete, and review from one central screen. This is useful when your site has duplicate, misspelled, or older tags that no longer fit your content strategy.
- Go to Posts > Tags.
- Use the search box to find an existing tag.
- Click Edit to change its name, slug, or description.
- Click Delete only if you no longer need the tag.
- Review the Count column to see how many posts use each tag.
Checkpoint: Your Tags screen should show a cleaner list with fewer duplicates and more useful topic labels.
Troubleshooting: If deleting a tag worries you, remember that deleting a tag does not delete the posts assigned to it. It only removes that tag relationship.
Use Multiple Tags with a Clear Purpose
You can assign multiple tags to a WordPress post, and doing so is often helpful when the post covers several meaningful subtopics. The key is to use it intentionally instead of adding every related phrase you can think of.
A good tagging system makes your site easier to browse, easier to manage, and more useful for readers. Start with a small set of consistent tags, reuse them when appropriate, and clean up duplicates as your blog grows.
Further Reading
- How to Create a WordPress Blog
- How to Add Keywords in WordPress Without Hurting Your SEO
- Internal Linking in WordPress for Beginners
- Beginner Checklist for Optimizing WordPress Blog Posts


