How to Use a CDN with WordPress
A step-by-step guide to speeding up WordPress with a global content delivery network
Is your WordPress site fast for visitors near your server, but painfully slow for people on the other side of the world? Those long load times often come from distance: every image, script, and style file has to travel all the way from your hosting server to your reader’s browser.
A content delivery network (CDN) fixes this by copying your static files to data centers around the globe and serving each visitor from the location closest to them. In this guide, you’ll learn exactly how to use a CDN with WordPress—from choosing a provider, to connecting your domain, integrating it with plugins (including popular caching tools), and testing that everything works.
A CDN is just one part of a healthy performance stack. If you’re completely new to speed optimization, you may also want to read our overview of WordPress performance and speed optimization so you understand where a CDN fits into your overall strategy.
Prerequisites
Before you start changing DNS or plugin settings, make sure you have the basics covered. This will keep your WordPress site safe and help you avoid downtime while you configure the CDN.
- A working WordPress site on your own domain (not just a temporary URL).
- Administrator access to the WordPress dashboard.
- Access to your domain’s DNS settings (usually at your domain registrar or hosting control panel).
- A recent full backup of your WordPress site (files + database).
- Ideally, a caching plugin already installed and active (you’ll integrate the CDN through it in a later step).
Step 1: Choose a CDN provider for your WordPress site
Not all CDNs work the same way. Some act as a full reverse proxy for your entire site, while others only serve static assets like images, CSS, JavaScript, and fonts from a separate CDN domain. Before you start signing up, think about how you want the CDN to sit in front of WordPress.
Understand the main types of CDNs
- Proxy CDNs (DNS-based): You point your domain’s nameservers to the CDN. They proxy all traffic, provide caching, and usually offer extra features like DDoS protection and a web application firewall.
- Pull-zone CDNs (asset-only): You keep your nameservers where they are. The CDN “pulls” static files from your origin server and serves them from a separate hostname such as
cdn.yoursite.com.
Both approaches work well for WordPress. Proxy CDNs are often simpler to set up for non-technical users, while pull-zone CDNs give you more granular control over exactly which assets are served from the CDN.
Key features to look for
- Points of presence (POPs) near your main audience regions.
- HTTP/2 or HTTP/3 support for faster asset loading.
- Easy WordPress integration (official plugin or good documentation).
- Clear pricing (per GB or flat plans) and transparent bandwidth limits.
- Optional extras: image optimization, WebP conversion, bot protection, and WAF.
Step 2: Connect your domain to the CDN
Once you’ve chosen a CDN provider, you need to connect your WordPress site so the CDN can start caching and serving your content. There are two common patterns depending on the type of CDN you selected.
Option A: Proxy CDN (change nameservers)
If your CDN is also your DNS provider, they will ask you to change your domain’s nameservers:
- Log in to your CDN dashboard and add your domain (for example,
example.com). - Let the CDN scan your existing DNS records and import them.
- Note the new nameservers they give you (such as
ns1.cdnprovider.comandns2.cdnprovider.com). - Log in to your domain registrar and update the domain’s nameservers to the ones from your CDN.
- Wait for DNS to propagate (this can take anywhere from a few minutes to 24 hours).
During propagation, some visitors may still see your site via the old DNS, while others go through the CDN. This is normal.
Option B: Pull-zone CDN (create a CDN hostname)
If you’re using a pull-zone CDN, you’ll typically create a CDN “zone” and then point a subdomain to it:
- In your CDN dashboard, create a new pull zone and set your origin URL to your main site (for example,
https://example.com). - The CDN will give you a CDN URL like
example.cdnprovider.net. - Optional but recommended: create a friendly CNAME in your DNS, such as
cdn.example.com, pointing to the CDN URL.
You would create the CNAME record in your DNS panel like this:
cdn CNAME example.cdnprovider.netThis record is created in your DNS manager at your host or domain registrar, not inside WordPress.
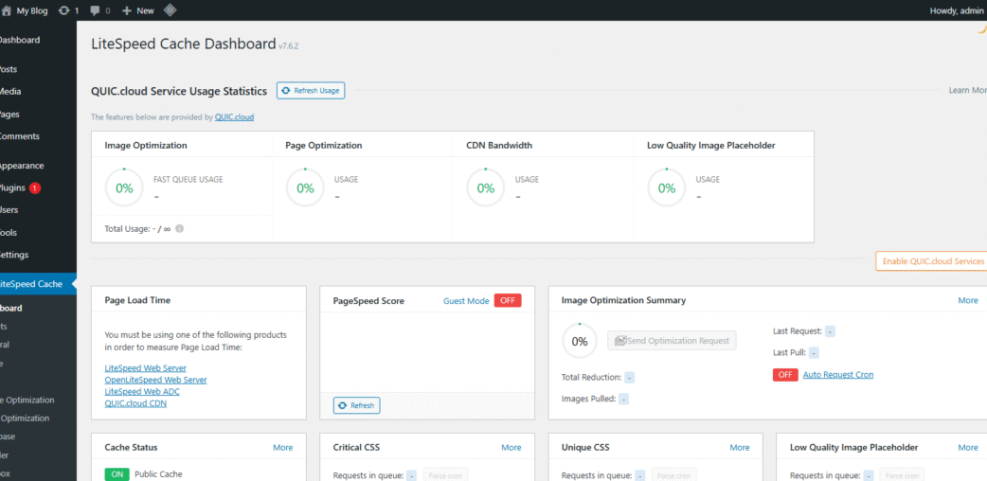
Step 3: Install and configure a CDN plugin in WordPress
With the CDN connected to your domain, you now need WordPress to use it for static files. The easiest way is through a caching plugin or a dedicated CDN plugin that rewrites asset URLs to your CDN hostname.
Install a CDN-aware plugin
- Log in to your WordPress dashboard as an Administrator.
- Go to Plugins > Add New.
- Search for your caching plugin (or the CDN’s official plugin) and click Install Now, then Activate.
- Open the plugin’s settings page (often under Settings or its own menu item in the left sidebar).
Configure the CDN URL
Most performance plugins have a “CDN” or “Content Delivery Network” tab. There you can enter your CDN hostname and choose which file types should be served from the CDN.
- In the plugin’s settings, find the CDN section.
- Enable the CDN option.
- Enter your CDN hostname (for example,
https://cdn.example.com). - Select the file types to offload (images, CSS, JS, fonts, and other static assets).
- Save changes and clear the plugin’s cache.
If your caching plugin is not fully configured yet, take a moment to do that first. A good starting point is our Complete WordPress Caching Setup Guide, which shows you how to combine page caching with browser caching and other key options.
/wp-admin/) or login page through the CDN. These should stay uncached and served directly from your origin server to avoid login issues. Step 4: Test that your CDN is working correctly
With everything wired up, you need to confirm that your static assets are actually loading from the CDN and that your pages are faster—not broken. This is where testing tools and browser dev tools are invaluable.
Clear all caches
- Clear your WordPress caching plugin’s cache.
- Purge the CDN cache from your CDN dashboard.
- If your host has server-side caching, purge that as well.
- Open an incognito/private window in your browser to bypass old cached copies.
Check asset URLs in your browser
- Open a key page on your site (for example, your homepage or a popular blog post).
- Right-click and choose Inspect to open the browser’s developer tools.
- Go to the Network tab and reload the page.
- Look for requests to images, CSS, and JS files. Their domains should now be your CDN hostname (such as
cdn.example.com), not justexample.com.
Use a command-line check (optional)
If you are comfortable with the command line, you can also use curl to inspect response headers. Run this in your local terminal (macOS Terminal, Windows PowerShell) or over SSH on your server:
curl -I https://cdn.example.com/wp-content/uploads/2025/01/sample-image.jpgLook for headers that indicate the CDN is serving the file, such as the provider’s name or a cache status header (for example, cf-cache-status or similar, depending on your CDN).
Measure performance from multiple regions
Finally, run a full page speed test from several locations. Tools like global speed testers can show you how much the CDN improves load times for international visitors. Focus on metrics such as time to first byte (TTFB) and how quickly images and scripts load.
Step 5: Fine-tune your CDN and caching rules
At this point, your CDN is live and serving static assets. Now it’s time to fine-tune the configuration so you get maximum speed without breaking dynamic functionality like carts, user dashboards, and membership areas.
Exclude sensitive and dynamic URLs
- Ensure
/wp-admin/,/wp-login.php, and any user dashboard URLs are excluded from both page caching and the CDN. - If you run SEO and UX, and where you will see it in daily work.”>WooCommerce, exclude the cart, checkout, and “My Account” pages from caching and CDN delivery.
- In your caching plugin, use the “Exclude” or “Do Not Cache” settings to list these URLs explicitly.
Set sensible cache lifetimes
- Static files (images, CSS, JS) can usually be cached for days or weeks because they don’t change often.
- HTML pages should have shorter TTLs if you publish frequently or show dynamic content (for example, 10–60 minutes).
- Use your CDN’s Page Rules or Cache Rules feature to override defaults where needed.
Avoid double-optimization conflicts
- If your CDN provides minification or compression for CSS/JS, avoid enabling the same features in your caching plugin to reduce the risk of broken layouts.
- Likewise, if the CDN offers automatic WebP conversion or image resizing, disable overlapping image optimization features in other plugins and keep one tool in charge.
If you run a content-heavy blog, you can combine this setup with more blog-specific optimizations such as smarter pagination and category caching. Our guide on setting up a CDN for WordPress blogs explores those patterns in more detail.
Lock in your WordPress CDN gains
By now, you’ve chosen a CDN provider, connected your domain, integrated the CDN with WordPress via plugins, and tested that your static assets are loading from a global edge network. Your visitors—especially those far from your hosting server—should already notice faster page loads.
Remember that a CDN is part of an overall performance strategy, not a magic switch. Keep an eye on your analytics and speed tests, adjust caching rules as your site grows, and revisit your configuration after major theme or plugin changes. With a solid CDN setup in place, your WordPress site is far better equipped to handle traffic spikes and global audiences.
Further Reading
- Beginner Guide to WordPress Speed Optimization
- WordPress Performance Tuning: Beginner Guide
- Caching Plugin Comparisons for WordPress Performance
- Redis Object Cache WordPress Beginner Guide
- WordPress Speed Optimization Checklist for Busy Site Owners
Frequently Asked Questions
Do I really need a CDN for my WordPress site?
Why did my WordPress admin or cart stop working after enabling the CDN?
/wp-admin/, /wp-login.php, or WooCommerce cart/checkout pages) are cached or served through the CDN. Exclude these URLs from both page caching and CDN delivery in your caching plugin and your CDN’s page rules, then purge caches and test again. My images are broken after turning on the CDN. How do I fix this?
cdn.example.com) points to the CDN’s URL. Next, check the CDN settings in your WordPress plugin and make sure the CDN URL is entered correctly, including https://. Finally, purge the CDN cache and your plugin cache, then reload the page in a private browser window.