Step by Step Guide to WordPress Speed Optimization
A practical workflow to diagnose, fix, and maintain a faster WordPress site without breaking your design or SEO.

A slow WordPress site can hurt user experience, conversions, and search performance. The good news is that most speed problems come from a small group of fixable issues: heavy images, poor hosting, too many plugins, weak caching, bloated themes, and unoptimized scripts.
In this step-by-step guide, you will learn how to test your current speed, make safe improvements, configure caching, optimize images, reduce plugin load, use a CDN, and verify your results. If you are still diagnosing the root cause, start with this guide on why WordPress is so slow before making major changes.
The goal is not just to get a better speed score once. The goal is to build a repeatable speed optimization process you can maintain every month as your site grows.
Prerequisites
Before you start, make sure you can safely edit your site and reverse changes if something goes wrong. Speed optimization can affect layouts, forms, checkout pages, tracking scripts, and logged-in user experiences.
- Administrator access to your WordPress dashboard.
- Access to your hosting control panel or managed hosting dashboard.
- A recent full-site backup, including files and database.
- A staging site if your site receives traffic, sales, or leads.
- A speed testing tool such as PageSpeed Insights, GTmetrix, WebPageTest, or your host’s performance dashboard.
Step 1: Measure Your Current Speed Baseline
You need a baseline before you optimize. Without one, you will not know whether your changes actually improved load time, Core Web Vitals, or real user experience.
Open your speed testing tool and test at least three important URLs: your homepage, a high-traffic blog post, and a conversion page such as a contact, service, product, or checkout page. Run each test more than once because single tests can be affected by temporary network conditions.
- Copy the URL you want to test.
- Paste it into your chosen performance testing tool.
- Record mobile and desktop scores separately.
- Write down Largest Contentful Paint, Cumulative Layout Shift, Interaction to Next Paint, total page size, and number of requests.
- Save screenshots or export the report for comparison later.
Checkpoint: You should have a simple before-optimization record for your key pages. This baseline will help you identify which fixes created measurable improvement.
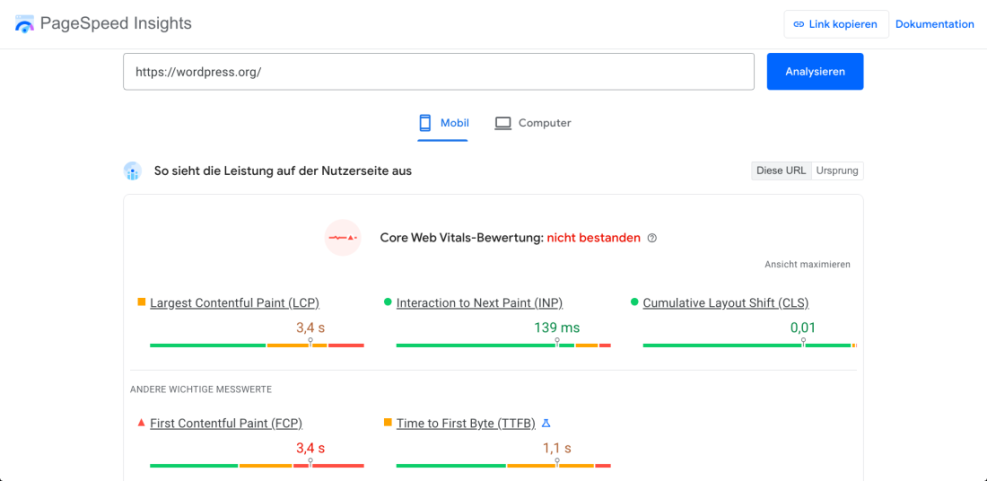
Troubleshooting: If your test results change dramatically between runs, test again using the same location, device type, and connection setting. Also confirm that your caching plugin or host cache is not being cleared between every test.
Step 2: Back Up Your WordPress Site First
Speed optimization often involves caching, minification, database cleanup, plugin changes, and theme adjustments. A backup protects you if a setting breaks your layout, hides content, or causes a plugin conflict.
Create a full backup before you change anything. If you are unsure what to include, follow a complete WordPress backup process so both your files and database are protected.
- Go to your backup plugin, hosting dashboard, or cPanel backup area.
- Create a full backup that includes WordPress files, uploads, themes, plugins, and database tables.
- Download a copy or confirm it is stored off-site.
- Check the backup timestamp so you know it was created before optimization started.
Checkpoint: You should have a restorable backup created on the same day you begin optimization.
Step 3: Review Hosting, PHP, and Server Settings
Your hosting environment sets the ceiling for WordPress performance. Even the best caching plugin cannot fully compensate for an overloaded server, outdated PHP version, weak memory limits, or slow database response times.
Log in to your hosting dashboard and review the basics. Look for PHP version, server resource usage, object cache availability, CDN options, and whether your host offers built-in page caching.
- PHP version: Use a modern supported PHP version recommended by your host and compatible with your plugins.
- Memory limit: Check whether WordPress has enough memory for your theme, plugins, and admin tasks.
- Server cache: See whether your host already provides page caching or object caching.
- Database performance: Watch for slow queries, high CPU usage, or recurring resource limits.
- Data center location: Choose a server region close to your main audience when possible.
Checkpoint: Your site should be running on stable hosting with modern PHP, no frequent resource limit warnings, and a clear understanding of which caching features are handled by your host.
Troubleshooting: If your site is still slow with a lightweight page and caching enabled, hosting may be the bottleneck. Contact your host with your speed test results and ask whether CPU, memory, database, or SEO and UX, and where you will see it in daily work.”>Time to First Byte issues are visible on their side.
Step 4: Configure Page Caching Correctly
Page caching stores a ready-made version of your pages so the server does not rebuild them from scratch for every visitor. This is one of the highest-impact WordPress speed optimization steps for blogs, business sites, and content-heavy websites.
You can use your host’s built-in caching or a dedicated caching plugin. If you need help choosing one, compare options in this guide to the best WordPress caching plugins.
- Go to your hosting cache settings or your caching plugin settings in WordPress admin.
- Enable page caching for public pages.
- Enable browser caching if the option is available.
- Exclude cart, checkout, account, login, and dynamic form pages when needed.
- Clear the cache after saving changes.
- Open your site in an incognito window and confirm pages load normally.
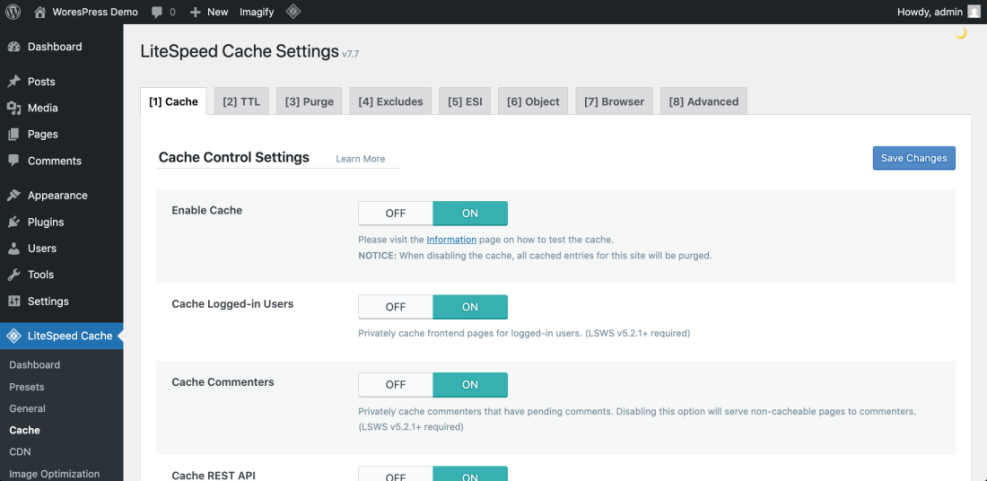
Checkpoint: Public pages should load faster on repeat visits, and your caching plugin or host dashboard should show that cache is active.
Troubleshooting: If updates do not appear on the front end, clear your page cache, browser cache, CDN cache, and any server cache. If a form or checkout page stops working, exclude that page from caching and test again.
Step 5: Optimize Images and Media Files
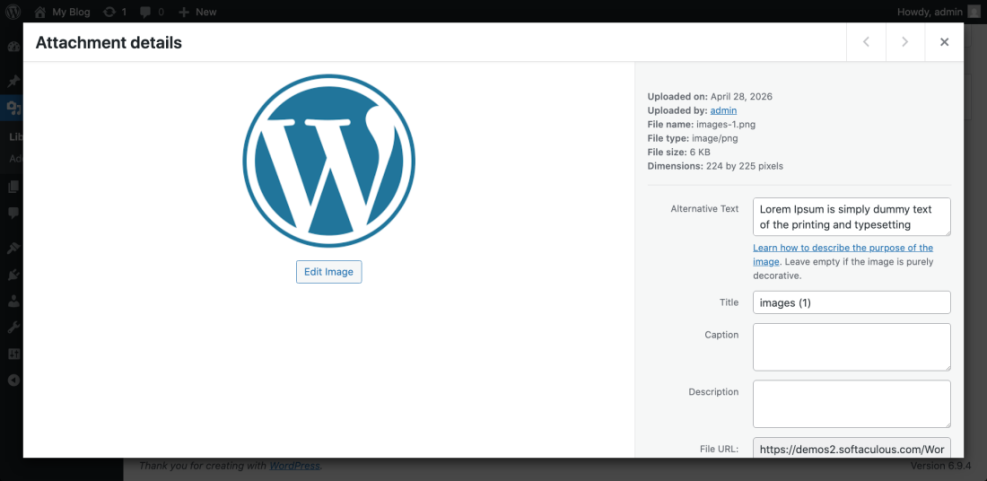
Large images are one of the most common causes of slow WordPress pages. A single oversized hero image can delay the main content, increase bandwidth, and hurt mobile performance.
Start with the images that appear above the fold: hero images, featured images, banners, logos, and product images. Then optimize the rest of your media library over time.
- Resize images before uploading when possible.
- Compress existing images with a trusted image optimization plugin or server tool.
- Use modern formats such as WebP when supported by your setup.
- Enable lazy loading for images below the fold.
- Set correct image dimensions to prevent layout shifts.
- Avoid uploading massive screenshots when a smaller cropped image would work.
Checkpoint: Your largest images should be smaller in file size, visually clear, and properly sized for their display area.
Step 6: Audit Plugins and Remove Unnecessary Load
Plugins can add scripts, stylesheets, database queries, external requests, and admin overhead. You do not need to remove every plugin, but you should remove unused, duplicated, or poorly maintained plugins.
- Go to Plugins > Installed Plugins in your WordPress dashboard.
- Deactivate plugins you no longer use.
- Delete inactive plugins after confirming they are not needed.
- Look for overlapping features, such as multiple SEO plugins, security plugins, form plugins, or optimization plugins.
- Update remaining plugins after creating a backup.
- Test important pages after each removal or update.
Checkpoint: Your plugin list should be lean, updated, and free of duplicate functionality.
Troubleshooting: If removing a plugin breaks a feature, restore it or replace it with a lighter alternative. If a plugin loads assets on every page even when needed only on one page, check whether your optimization plugin can disable assets selectively.
Step 7: Reduce CSS, JavaScript, and Font Bloat
CSS, JavaScript, and web fonts can slow down rendering, especially on mobile connections. Your goal is to reduce unused code, delay nonessential scripts, and keep critical visual elements loading smoothly.
In your caching or performance plugin, look for settings such as minify CSS, minify JavaScript, defer JavaScript, delay JavaScript execution, remove unused CSS, and optimize Google Fonts. Enable these carefully because aggressive settings can break menus, sliders, popups, forms, and tracking scripts.
- Enable CSS minification first and test the site.
- Enable JavaScript minification and test again.
- Defer or delay noncritical JavaScript.
- Exclude scripts that break interactive features.
- Optimize fonts by limiting font families, weights, and external requests.
Checkpoint: Your site should keep the same visual design while reducing render-blocking resources and unnecessary requests.
Troubleshooting: If your mobile menu, slider, popup, or form stops working, disable JavaScript delay first. Then re-enable it with exclusions for the affected script files.
Step 8: Clean the WordPress Database Safely
Over time, WordPress stores post revisions, trashed content, expired transients, spam comments, plugin leftovers, and temporary data. Cleaning the database can improve admin performance and reduce unnecessary clutter.
Use a trusted database cleanup tool from your hosting dashboard or a reputable WordPress optimization plugin. Always back up the database before cleanup because database changes are harder to reverse manually.
- Create a fresh database backup.
- Go to your optimization plugin’s database section or your host’s database tools.
- Review cleanup options before selecting them.
- Remove spam comments, trashed posts, expired transients, and old revisions if safe.
- Avoid deleting unknown custom tables unless you know which plugin created them.
- Run the cleanup and test your site afterward.
Checkpoint: Your database should be cleaner without losing posts, settings, orders, forms, memberships, or plugin data.
Step 9: Add a CDN for Faster Global Delivery
A content delivery network stores copies of static assets on servers closer to your visitors. This can reduce latency for images, CSS, JavaScript, fonts, and other static files.
Many hosts offer built-in CDN integration. You can also use a third-party CDN through DNS settings, a WordPress plugin, or your hosting dashboard.
- Choose your CDN provider or enable your host’s CDN option.
- Connect your domain using the provider’s setup instructions.
- Enable caching for static assets.
- Confirm SSL works correctly on both the main site and CDN-served files.
- Purge the CDN cache after major design or content updates.
Checkpoint: Static files should load from CDN locations, and your site should remain secure with no mixed content warnings.
Troubleshooting: If images disappear or styles break after enabling the CDN, purge the CDN cache and check SSL settings. If your browser shows mixed content warnings, make sure all asset URLs load over HTTPS.
Step 10: Improve Mobile Performance and Layout Stability
Most WordPress performance problems become more visible on mobile. Slower processors, smaller screens, and weaker connections make heavy themes, large images, ads, popups, and third-party scripts more expensive.
Test your homepage and key landing pages on a real phone, not just a desktop browser. Pay special attention to the first screen visitors see.
- Keep the hero section lightweight.
- Avoid oversized sliders above the fold.
- Delay nonessential popups and chat widgets.
- Set width and height attributes for images, ads, embeds, and iframes.
- Use fewer font weights and icon libraries.
- Make tap targets large enough for mobile users.
Checkpoint: Your mobile pages should load usable content quickly, avoid large layout jumps, and remain easy to read and tap.
Troubleshooting: If Cumulative Layout Shift is high, inspect images, ads, embeds, cookie banners, and late-loading fonts. Reserve space for elements before they load so the page does not jump.
Step 11: Retest and Compare Results
After you complete the major optimization steps, test the same URLs you tested at the beginning. Use the same tools, device type, and test conditions so your comparison is meaningful.
- Clear your site cache, server cache, and CDN cache.
- Load the page once to warm the cache.
- Run your speed tests again.
- Compare Core Web Vitals, page size, request count, and load time against your baseline.
- Manually test navigation, forms, search, checkout, login, and mobile menus.
Checkpoint: You should see measurable improvement without broken layouts, missing assets, or failed forms.
Troubleshooting: If scores improved but users still report slowness, check real user monitoring, hosting logs, third-party scripts, and geographic performance. Lab scores are useful, but real visitor experience matters more.
Step 12: Build a Monthly Speed Maintenance Routine
WordPress speed optimization is not a one-time task. New plugins, theme updates, images, ads, analytics scripts, and content changes can gradually slow your site again.
Create a monthly routine so your site stays fast without needing a major cleanup every few months.
- Run speed tests on your most important pages.
- Update WordPress core, themes, and plugins after backing up.
- Review newly added plugins and scripts.
- Compress new images and remove unused media when appropriate.
- Check caching, CDN, and backup settings.
- Review Core Web Vitals trends in your preferred analytics or search tool.
Checkpoint: Your site should have a repeatable maintenance process that prevents performance problems from building up unnoticed.
Your Faster WordPress Site Starts With a Repeatable Process
WordPress speed optimization works best when you follow a clear sequence: measure first, back up, improve hosting basics, configure caching, optimize images, reduce plugin and code bloat, clean the database, use a CDN, and retest carefully.
You do not need to chase a perfect score on every tool. Focus on creating a faster, more stable experience for real visitors, especially on mobile devices and high-value pages.
Once your site is faster, keep the habit going with monthly checks. Small, consistent maintenance prevents slowdowns from returning and helps your WordPress site stay ready for users, search engines, and future growth.
Further Reading
- WordPress Speed Optimization Checklist
- How to Use a CDN in WordPress
- How to Optimize Images for WordPress
- How to Fix Common WordPress Performance Issues
- WordPress Speed Test Checklist
Frequently Asked Questions
What is the first step in WordPress speed optimization?
Why did my WordPress layout break after enabling optimization settings?
Why is my site still slow after installing a caching plugin?
How often should I optimize my WordPress site speed?
Is speed optimization safe for WooCommerce and membership sites?