Caching Plugin Comparisons for WordPress Performance
Expert guidance on matching speed tools to your hosting plan
Caching plugin choices can feel overwhelming when you want better WordPress performance. You see names like LiteSpeed Cache, WP Rocket, WP Fastest Cache, and W3 Total Cache, and it is not obvious which one actually fits your hosting and your site.
You will compare popular plugins, learn which features matter for real speed gains, and follow a safe setup process that works on most hosting plans. The guide also walks through typical gotchas, plugin conflicts, and when you should rely on server-level caching instead of another plugin.
Best Caching Plugins for WordPress
The honest answer is that there is no single “best” caching plugin for every WordPress site. The right choice depends on your server type, how dynamic your content is, and how confident you feel about advanced settings.
For most sites, you can start with a short list of proven options and match them to your scenario.
Here is a compact comparison so you can see how the main options differ.
| Plugin | Best Use Case | Difficulty | Notes |
|---|---|---|---|
| LiteSpeed Cache | Sites on LiteSpeed server | Medium | Excellent performance when server supports LiteSpeed; not useful on plain Apache. |
| WP Rocket | All-round premium solution | Easy | Friendly UI, strong defaults, many speed tools in one plugin. |
| WP Fastest Cache | Simple blogs and small sites | Easy | Fast, lightweight, quick to configure with a small settings page. |
| W3 Total Cache | Power users and custom stacks | Hard | Very flexible with object and database caching; needs careful setup and timely updates. |
| Breeze | Showcase sites on compatible hosting | Medium | Excellent TTFB in some benchmarks, but can conflict with complex ecommerce setups. |
This table gives you a starting point, but you still need to test on your own site. Each theme, plugin stack, and host behaves a little differently.
How Caching Improves WordPress Speed
What Does a Cache Plugin Actually Do?
A cache plugin turns slow, dynamic PHP pages into fast, static HTML copies that your server can serve immediately. Instead of rebuilding the page on every request, WordPress does the heavy work once, then reuses the cached version until you update content or clear the cache.
Which Types of Caching Matter Most?
Several layers of caching can work together. Page caching stores full HTML output, browser caching tells visitors to reuse static assets like CSS and JavaScript, object caching speeds up database queries, and CDN caching moves copies of your pages closer to users around the world.
How Much Faster Can Caching Make WordPress?
On a typical shared host, a good caching setup can reduce page load times by a noticeable margin, often cutting server response time by more than twenty percent. The exact gain depends on your theme, plugins, and hosting, which is why you should always verify with tools like Google PageSpeed Insights.
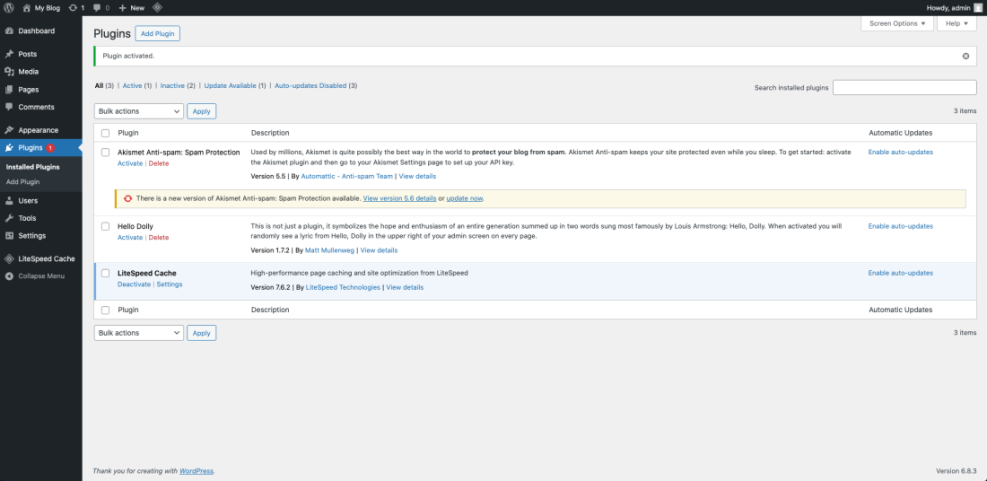
From your WordPress Dashboard, click Plugins then Installed Plugins to confirm that only one caching plugin is active at a time.
Key Features to Compare in Plugins
Is the Plugin Easy to Configure?
Some plugins open with a clean setup wizard and smart defaults. Others show dozens of tabs and acronyms. If you prefer a simple workflow, choose a plugin with clear labels, presets, and a one-click “recommended settings” button so you avoid breaking layouts with experimental options.
Core Optimization Features to Look For
Beyond basic page caching, modern tools also handle file minification, HTML compression, JavaScript deferral, and CSS optimization. Many plugins add image lazy loading, database cleanup, and removal of unused WordPress bloat, which can bring extra performance wins without more plugins.
CDN and Edge Caching Integration
Several caching plugins integrate directly with CDNs such as Cloudflare, QUIC.cloud, or BunnyCDN. This integration lets you purge cache at the edge when you update a post, control HTML TTL, and reduce Time to First Byte for global visitors without extra manual configuration.
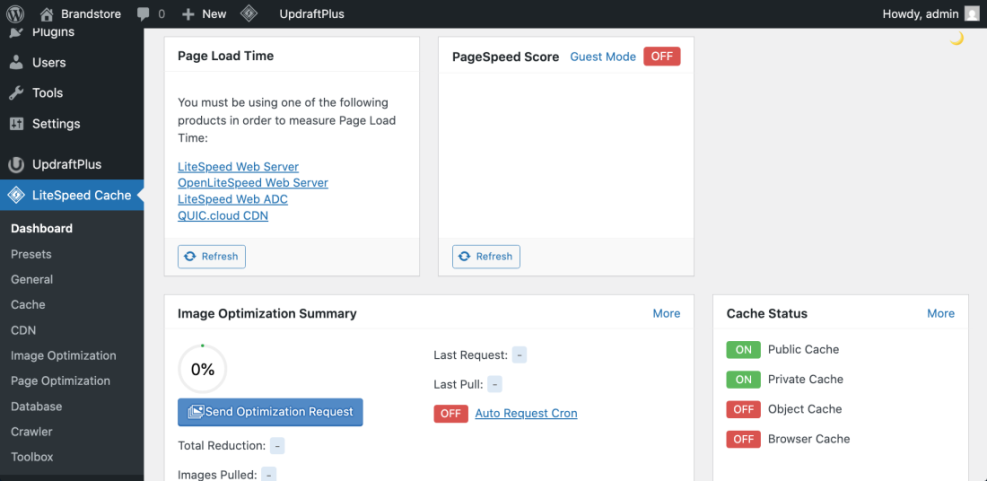
In your Dashboard, go to Settings then the menu of your chosen cache plugin to review its main options page.
Picking Plugins for Different Site Types
Best Caching Choices for Simple Blogs
For a small blog or portfolio with mostly static posts and pages, pick something lightweight with minimal configuration. Plugins like WP Fastest Cache or a carefully configured WP Super Cache profile work well, because they focus on page caching and simple browser rules that are hard to misconfigure.
Best Options for WooCommerce and Membership Sites
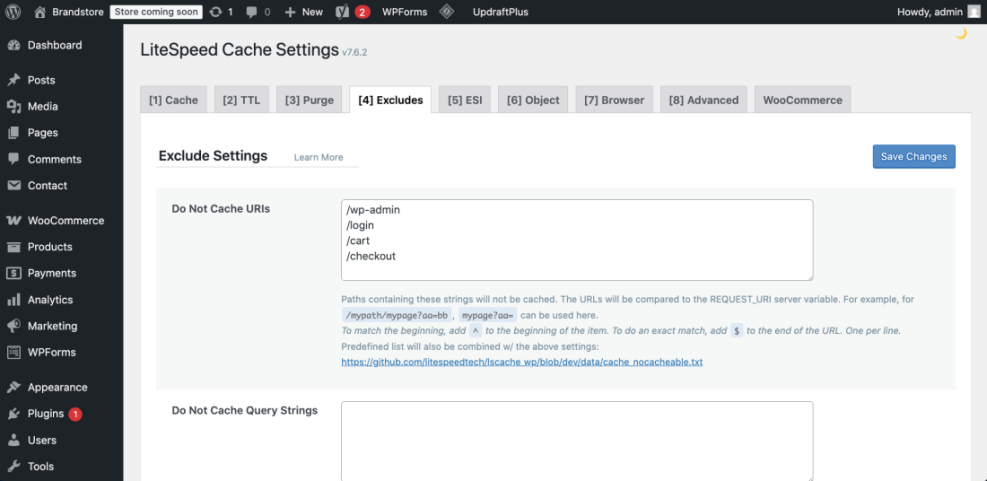
Shops, membership areas, and learning platforms need more careful rules. You must not cache cart, checkout, account, or login pages, and you should respect logged-in users. Choose a plugin that offers page-level exclusions, user-role rules, and good compatibility notes for WooCommerce or your membership plugin.
What If You Already Have Server-Level Caching?
Many managed WordPress hosts provide their own server-level caching. In that case, a full caching plugin can duplicate features and sometimes slow down the site or cause conflicts. You can often rely on the host’s cache and only add a light optimization plugin for minification or image lazy loading.
If you plan a future deep dive on this topic, bookmark Choosing managed hosting WordPress as a next read.
From the Dashboard, open WooCommerce then Status to check your system environment before you apply strict caching rules.
Setup Steps and Avoiding Common Issues
Step by Step Plugin Setup
You get the best results if you set up your caching plugin in a consistent, repeatable way. The basic flow is similar across most tools.
- Take a fresh backup so you can roll back if something breaks.
- Disable and remove any existing caching plugins to avoid conflicts.
- Install and activate the new plugin from Plugins then Add New.
- Run the setup wizard or apply the plugin’s recommended settings preset.
- Exclude sensitive pages such as cart, checkout, and account areas when you run ecommerce.
- Run a PageSpeed Insights test on a key URL and record your scores.
- Toggle advanced options one at a time and retest so you can spot regressions.
- Only one caching plugin active at a time.
- Test on a staging or low-traffic period first.
- Retest Core Web Vitals after major setting changes.
This process keeps your changes controlled and makes it easier to tie a speed gain or problem to a specific setting.
Why Did My Layout Break After Enabling Caching?
A broken layout usually comes from aggressive CSS or JavaScript optimization. When minification or “combine files” features clash with your theme or page builder, sliders, menus, or forms can stop working. Disable those options first, clear all caches, then retest before you change any other settings.
How to Safely Disable Caching for a Page
Sometimes a single landing page, login form, or custom application should never be cached. Many caching plugins respect the DONOTCACHEPAGE constant, so you can create a special page template that tells the plugin to skip caching only where needed.
/*
Template Name: No Cache Page
*/
define( 'DONOTCACHEPAGE', true );

get_header();

// Your custom page content here.

get_footer();
Assign this template to pages that must stay dynamic, then clear your cache to apply the change. Always confirm behavior in a private browser window while not logged in.
Open Tools then Site Health to verify there are no critical issues before you chase the last bit of performance.

If you want a more complete speed checklist around images, CSS, and Core Web Vitals, add WordPress Speed Optimization Checklist to your reading list.
For deeper performance testing ideas, you can also review Google’s guidance in PageSpeed Insights documentation.
Caching Plugin Comparison Conclusion
The most effective caching strategy is simple, predictable, and tuned to your hosting, not just chasing whichever plugin looks most popular this month. Start by matching the plugin to your server stack, keep the configuration as minimal as possible, and test changes with real performance tools before and after.
Your next step is to choose one candidate plugin, activate it on a staging or low-traffic clone of your site, and walk through the controlled setup steps from earlier. Once you confirm stable layouts, better response times, and improved Core Web Vitals, you can roll the configuration into production and schedule regular updates and reviews.
More WordPress Guides You Might Like
For a broader performance strategy around caching, images, and Core Web Vitals, these guides fit well as your next reads.
- Beginner guide WordPress speed core web vitals
- Beginner guide to WordPress speed optimization
- How to Fix Common WordPress Performance Issues
- Broken layouts performance tweaks
- Best WordPress caching plugins
Working through these topics helps you see caching as one layer in a complete performance plan rather than a magic switch that fixes every speed problem on its own.