Starting a blog can feel overwhelming: domain names, hosting plans, themes, plugins, and SEO checklists all compete for your attention before you’ve written a single post. The good news is that you can start a WordPress blog in a structured, stress-free way if you follow a clear sequence.
This guide walks you step by step from idea to launch using self-hosted WordPress.org: you’ll define your blog’s purpose, choose hosting, install WordPress, pick a theme, publish your first post, and make your site search-engine friendly. If you want a bigger picture of where this fits in your learning path, bookmark our WordPress guides and tutorials overview for later.
By the end, you’ll have a live WordPress blog that looks professional, loads quickly enough for beginners, and is ready to grow with your content over time.
Prerequisites
Before you start, make sure you have the basics in place. You don’t need to be a developer, but you should be comfortable clicking through web forms and following on-screen instructions.
- A blog idea or niche (for example: tech tutorials, parenting, travel, finance).
- 30–60 minutes of focused time with a laptop or desktop computer.
- A credit or debit card to purchase your domain and hosting.
- Access to your email account (your host will send login details there).
- A reliable internet connection.
Step 1: Define Your Blog’s Purpose and Audience
Skipping planning is one of the biggest beginner mistakes. A clear purpose and audience make every later decision—domain name, content topics, even design—much easier.
Clarify your topic and reader
- Topic: List 5–10 subjects you’re excited to write about for the next 12 months.
- Audience: Describe your ideal reader in 1–2 sentences (who they are, what they’re struggling with).
- Outcome: Decide what transformation your blog promises (e.g., “help beginners learn WordPress,” “teach busy parents quick recipes”).
Pick a simple publishing goal
To avoid stalling, start with a realistic content goal. For example, commit to publishing one post per week for the first three months instead of aiming for daily posts you’ll struggle to maintain.
Step 2: Choose a Domain Name and Hosting
Your domain is your blog’s address on the web, and your hosting is where the site files live. Getting these right from the start saves you migration headaches later.
Choose a domain name
- Keep it short, easy to spell, and memorable (ideally under 15 characters).
- Aim for a .com if possible, unless a local or niche extension makes more sense.
- Avoid hyphens, numbers, and confusing spellings.
Select WordPress-friendly hosting
Look for a hosting provider that explicitly supports WordPress with one-click installation, SSL certificates, and automated backups. Shared hosting is fine for a brand-new blog, while managed WordPress hosting offers more performance and convenience at a higher price.
If you want a deeper breakdown of hosting options and trade-offs, see this detailed guide on how to choose the right WordPress hosting once you’ve finished this tutorial.
Register and connect everything
- Sign up for a hosting plan and create your account.
- Search for your desired domain name during signup and register it.
- Let the host automatically connect your domain to your hosting (or follow their DNS instructions if you bought the domain elsewhere).
- Enable the free SSL certificate if your plan includes one so your blog loads over HTTPS.
Step 3: Install WordPress and Log In
With your hosting set up, you’re ready to install WordPress. Most modern hosts provide an automated installer, so you don’t need to upload files manually.
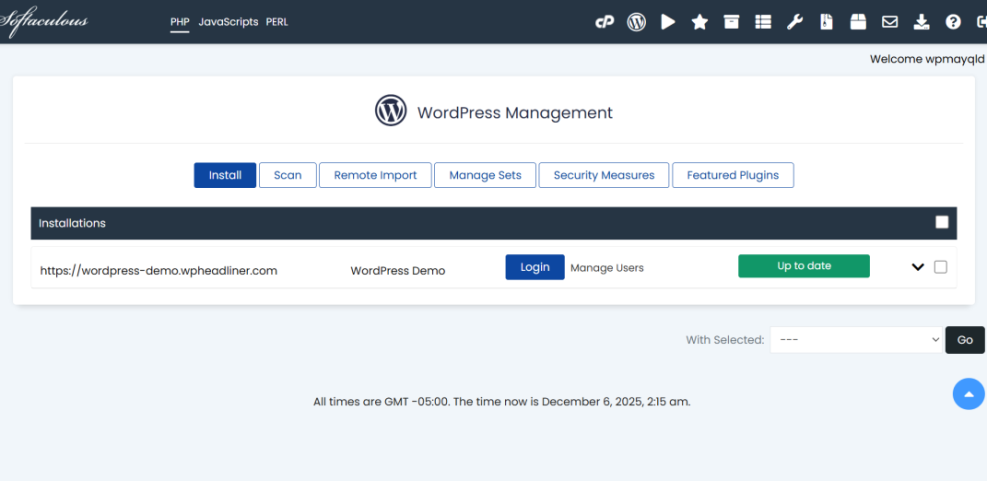
Use your host’s one-click installer
- Log in to your hosting control panel (often cPanel or a custom dashboard).
- Find the “WordPress” or “Website Installer” app (frequently under “Website” or “Softaculous Apps Installer”).
- Select your domain from the dropdown and confirm the installation path (usually the root folder, not a subdirectory).
- Set an admin username, strong password, and email address you actively use.
- Click “Install” and wait for the success message that includes your login URL.
Log in to your WordPress dashboard
- Open your browser and go to
https://yourdomain.com/wp-admin. - Enter the admin username and password you just created.
- Click “Log In” to access the WordPress dashboard.
If the login page doesn’t load, double-check that your domain is pointing to the correct host and that SSL is configured. Clearing your browser cache or trying a different browser can also help.
Step 4: Install a Theme and Configure Your Design
Your theme controls how your blog looks: layout, typography, colors, and some structural elements. For a new blog, choose a clean, responsive theme that focuses on readability.
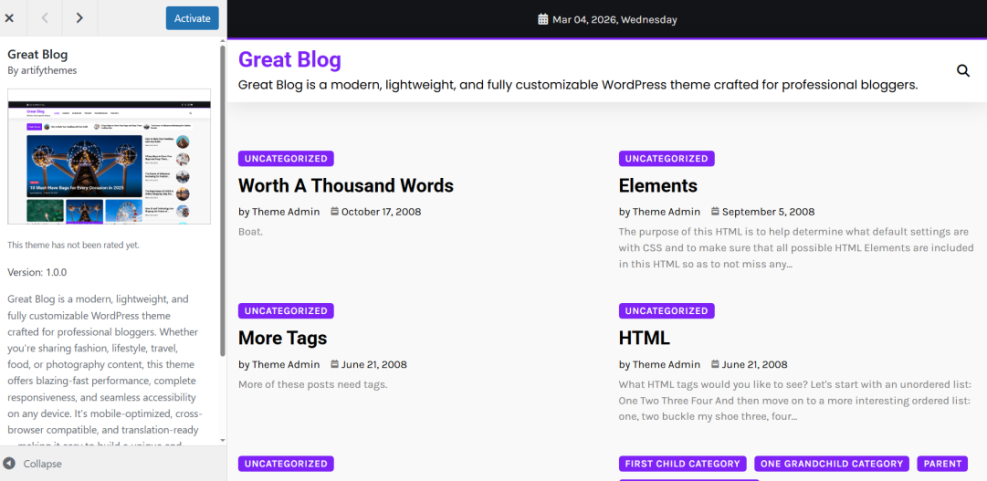
Install a WordPress theme
- From the WordPress dashboard, go to Appearance » Themes.
- Click Add New to browse free themes from the WordPress repository.
- Use the search bar to find a blog-friendly theme and click Install, then Activate.
If you purchase a premium theme, download the ZIP file from the vendor, then click Upload Theme on the same screen to install it.
Customize basic branding
- Go to Appearance » Customize to open the Customizer.
- Set your site title and tagline to reflect your blog’s purpose.
- Upload a logo and site icon (favicon) if you have them ready.
- Adjust fonts and colors for readability (dark text on a light background is usually best).
Step 5: Create Essential Pages and Your First Blog Post
Before you promote your blog, it should look like a real website, not an empty shell. That means having key pages in place and at least one or two solid posts.
Create your core pages
- Go to Pages » Add New.
- Create an About page that explains who you are and what readers can expect.
- Add a Contact page (you can insert a contact form later using a form plugin).
- Create a Privacy Policy page using your theme or plugin’s generator if available.
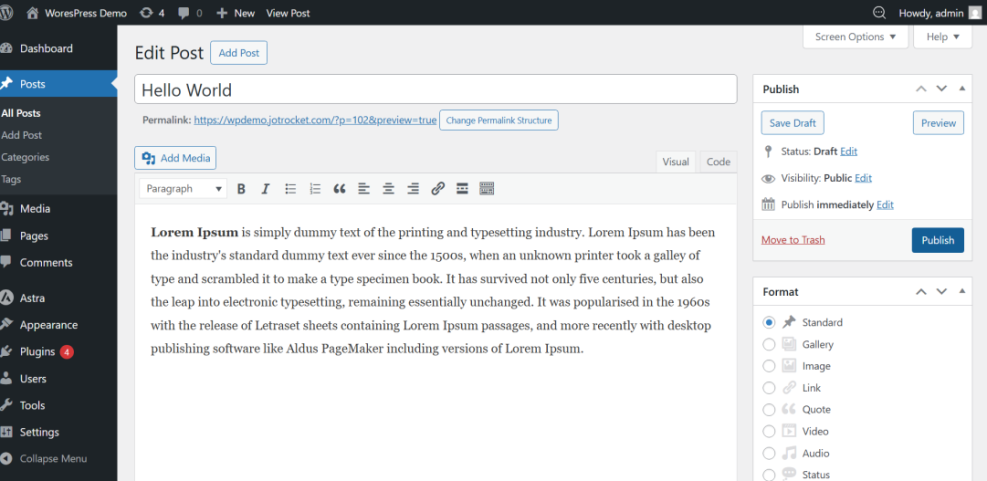
Write and publish your first post
- Navigate to Posts » Add New.
- Enter a clear, benefit-driven title that speaks directly to your reader’s problem.
- Use headings, short paragraphs, and bullet points to break up your content.
- Add at least one relevant image with descriptive alt text for accessibility.
- Assign a category that matches your topic and click Publish.
Step 6: Configure Basic SEO and Analytics
SEO (search engine optimization) helps people discover your blog through Google and other search engines. Setting up the basics now saves you from fixing technical issues later.
Set SEO-friendly permalinks
- Go to Settings » Permalinks.
- Select the Post name option so your URLs use words instead of numbers.
- Save changes.
Install an SEO plugin and configure essentials
- Go to Plugins » Add New and search for a reputable SEO plugin.
- Install and activate it, then follow the setup wizard to configure titles, meta descriptions, and sitemaps.
- Ensure your XML sitemap is enabled and that search engines are allowed to index your site.
For a deeper walk-through of optimizing titles, descriptions, and on-page content, follow the dedicated WordPress SEO beginner guide after finishing your initial setup here.
Connect analytics
To understand who is visiting your blog and which posts perform best, connect a web analytics tool such as Google Analytics. Most SEO or analytics plugins offer an easy way to add your tracking ID without editing code manually.
Step 7: Review, Test, and Launch Your WordPress Blog
Before you announce your blog to the world, run through a quick pre-launch checklist. This helps you catch obvious issues that could frustrate visitors or hurt your reputation.
Run a quick site check
- Visit your homepage and click through each menu item to ensure links work.
- Test your contact form to confirm messages reach your inbox.
- View your site on mobile and tablet devices (or use your browser’s device preview) to check responsiveness.
- Read your published posts on the live site to catch typos you might have missed in the editor.
Do basic performance and backup checks
- Install a caching plugin recommended by your host to improve load times.
- Set up regular backups via your host or a backup plugin so you can restore your blog if something goes wrong.
Once everything looks good, share your blog with friends, family, and your first online communities. Congratulations—you’ve officially launched your WordPress blog.
Wrap Up: Your WordPress Blog Is Ready to Grow
You’ve gone from blank slate to live WordPress blog by defining your purpose, securing a domain and hosting, installing WordPress, choosing a theme, publishing content, and putting basic SEO and analytics in place. That’s a big milestone many people never reach.
From here, your success will come from consistent publishing, listening to your readers, and improving your site piece by piece. Keep refining your topics, upgrading your design as you learn, and optimizing performance and SEO as your traffic grows.
Most importantly, focus on helping your audience with every post. A WordPress blog is just the platform—your content and your consistency are what make it valuable.
Further Reading
- How to Choose the Best Blogging Platform
- Beginner Guide to WordPress Speed Optimization
- Beginner Checklist for Optimizing WordPress Blog Posts
- Content Planning Workflow for WordPress Blogs
- WordPress Business Blog Content Strategy