Starting your first WordPress website can feel overwhelming, but you can do it step by step without learning how to code. This guide walks you through every click you need to go from a blank domain to a working WordPress website.
By the end, you will have WordPress installed on your own hosting, a clean theme activated, essential pages created, and basic security and performance settings in place so you can start publishing on your new WordPress website with confidence.
What You Need to Start Your WordPress Website
- A domain name you can register or already own for your WordPress website.
- A WordPress compatible hosting plan with PHP and MySQL support.
- A payment method for domain and hosting (credit card, PayPal, or similar).
- Basic ability to log in to your email and follow confirmation links.
- 30 to 60 minutes of focused time without distractions.
Step 1: Choose Hosting and Register Your WordPress Website Domain
Pick a Reliable Host for Your WordPress Website
Your web host and domain name are the foundation of your WordPress website. Good hosting keeps your site fast and secure, while a clear domain name makes it easy for visitors to remember you.
Register or Connect Your WordPress Website Domain Name
- Open your preferred browser and visit the website of your chosen WordPress host.
- Select a beginner friendly shared or managed WordPress plan that supports WordPress with one click installs.
- Use the domain search box to register a new domain or connect an existing one for your WordPress website.
- Complete the checkout process and create your hosting account login.
- Log in to your hosting control panel, often called cPanel or Dashboard, from the welcome email.
In your hosting control panel, look for the area that manages applications or WordPress installs.
You can verify this step is complete when you can log in to your hosting control panel and see your new domain listed under your account or domains section.
Step 2: Install WordPress for Your New WordPress Website
Run the One-Click WordPress Website Installer
Most modern hosts let you install WordPress in a few clicks. Using the one click installer is safer for beginners than uploading files manually with FTP, and it’s the fastest way to launch your WordPress website.
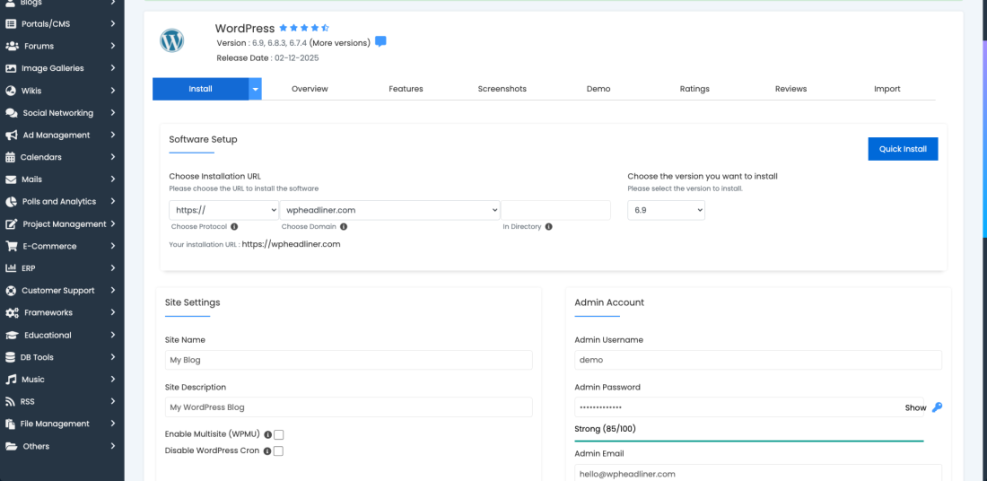
- In your hosting control panel, locate the WordPress or One Click Install tool, sometimes found under Website, Applications, or Softaculous.
- Click the WordPress installer icon.
- Select your domain in the Domain or Installation URL field and leave the directory field blank to install WordPress in the site root.
- Enter a temporary Site Title, choose an Admin Username, a strong Password, and an Admin Email you check often.
- Click Install and wait for the installer to finish.
Log In to Your New WordPress Website Dashboard
The installer usually shows the new admin URL for your WordPress website, which is often https://yourdomain.com/wp-admin.
You can verify success by opening a new browser tab, visiting https://yourdomain.com, and seeing the default WordPress theme. Then visit https://yourdomain.com/wp-admin and log in using the admin credentials you created to manage your WordPress website.
Troubleshoot or Install Your WordPress Website Manually
For additional install methods or troubleshooting, follow the detailed tutorial in How to install a WordPress theme.
If you ever need a manual installation, WordPress provides official instructions at the installation guide on WordPress.org.
// Example of important settings in wp-config.php if editing manually
define( 'DB_NAME', 'your_database_name' );
define( 'DB_USER', 'your_database_user' );
define( 'DB_PASSWORD', 'your_database_password' );
define( 'DB_HOST', 'localhost' );
Step 3: Configure Core Settings for Your WordPress Website
Update Your WordPress Website Identity
Before you start designing, configure your basic site settings so your WordPress website uses the right name, timezone, and URL structure. This prevents redirects, broken links, and confusing titles later.
- Visit https://yourdomain.com/wp-admin and log in with your admin username and password.
- From the left menu, click Settings » General.
- Update Site Title and Tagline with your brand name and a short description of your WordPress website.
- Check that WordPress Address (URL) and Site Address (URL) show https:// and the right domain.
- Set your local Timezone, Date Format, and Time Format, then click Save Changes.
Set a Clean WordPress Website Permalink Structure
- In the left menu, click Settings » Permalinks.
- Select the Post name option and click Save Changes.
These settings control how your WordPress website name and URLs appear to search engines and users.
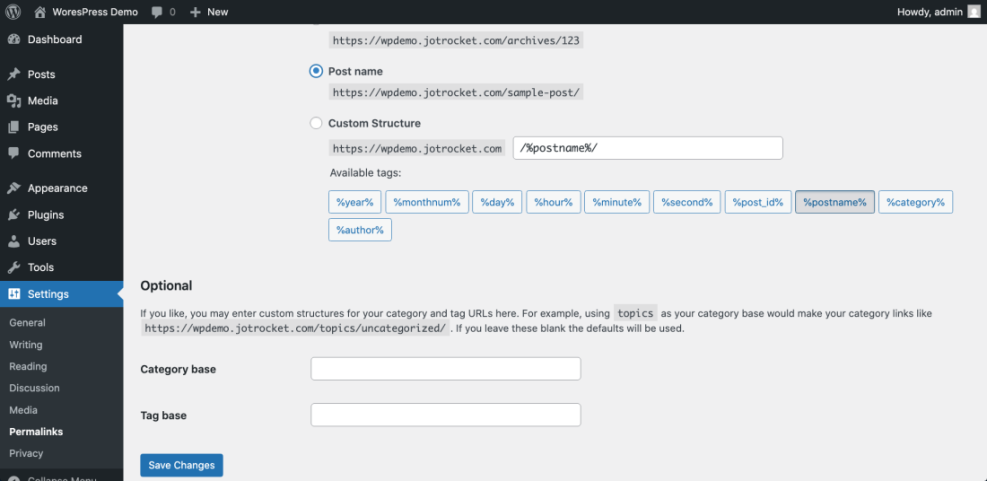
You can verify that permalinks are working by visiting a sample post and checking that the URL uses a clean structure such as /sample-post/ instead of numbers and question marks.
For a deeper explanation of URL structures, read Beginner guide to WordPress speed optimization.
Step 4: Choose and Customize Your WordPress Website Theme
Install a Lightweight Theme for Your WordPress Website
Your theme controls the design of your WordPress website. Choosing a lightweight, well supported theme keeps your site fast and easier to maintain over time.
- From your WordPress dashboard, click Appearance » Themes.
- Click the Add New button at the top of the screen.
- Use the search box to find a theme that matches your niche, then hover over it and click Preview to see how it looks on your WordPress website.
- Click Install, then click Activate to make the theme live on your site.
Customize the Look of Your WordPress Website
- After activation, click Appearance » Customize to open the WordPress Customizer.
- In the Customizer, adjust Site Identity, Colors, Header, and other options, then click Publish.
The Customizer shows a live preview of your changes on the right side of the screen.
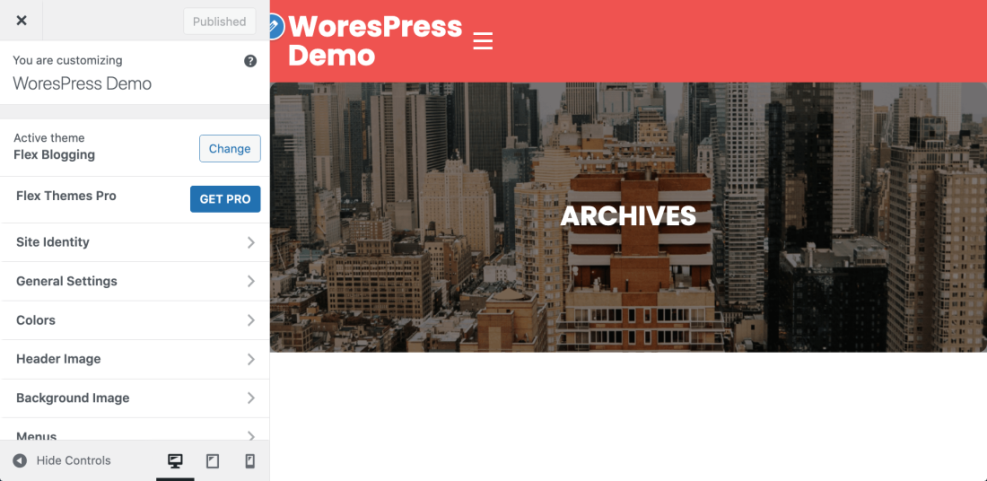
You can verify this step by opening your homepage in a new tab and confirming the design matches your chosen theme and settings.
For help choosing a performance friendly design, read How to choose WordPress theme or Best ftp clients for WordPress users.
Step 5: Create Key WordPress Website Pages and Navigation
Create Essential Pages for Your WordPress Website
Every new WordPress website needs a few core pages and clear navigation so visitors can find your content easily. Build these early to avoid a confusing experience.
- From the dashboard left menu, click Pages » Add New.
- Create pages such as Home, About, Blog, and Contact, then click Publish on each.
Set Your WordPress Website Homepage and Navigation Menu
- Click Settings » Reading.
- Under Your homepage displays, choose A static page, set Homepage to your Home page and Posts page to your Blog page, then click Save Changes.
- Click Appearance » Menus.
- Enter a name in Menu Name, click Create Menu, then add your important pages from the left panel to the menu.
- Set a Display location such as Primary Menu and click Save Menu.
These settings connect your pages to the main navigation area shown at the top of your WordPress website.
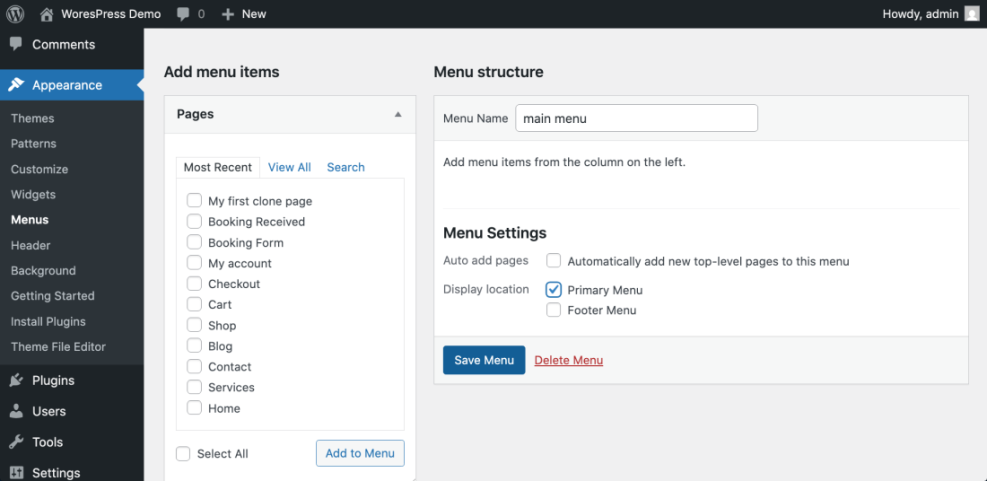
You can verify your menu works by visiting your homepage and clicking each navigation link to confirm it opens the correct page.
For layout ideas and optimization tips, study WordPress migration blog guide and How to design a website with WordPress.
Step 6: Install Essential Plugins and Secure Your WordPress Website
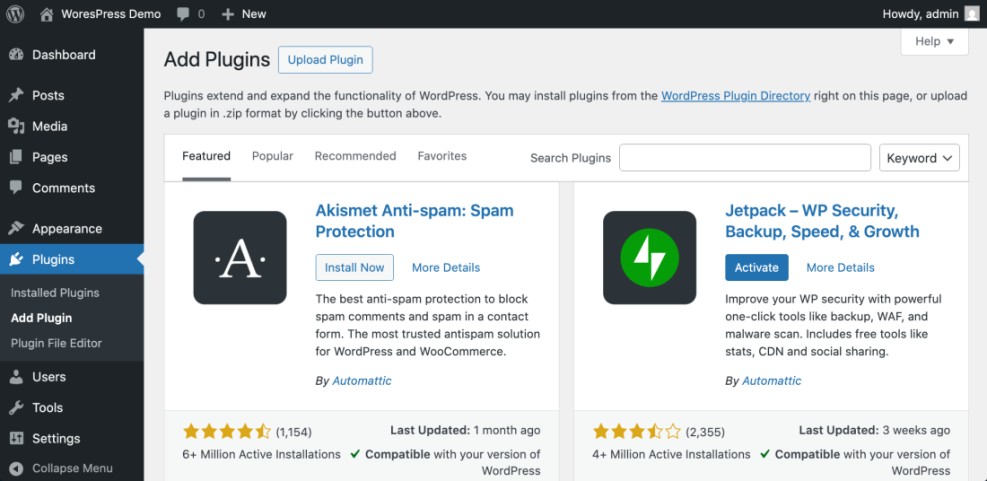
Install Core Plugins for Your WordPress Website
Plugins add new features like contact forms, SEO tools, backups, and caching. Installing a small set of well chosen plugins gives your WordPress website power without slowing it down.
- From the left menu, click Plugins » Add New.
- Use the search field to find a trusted SEO plugin and click Install Now, then Activate.
- Search for a solid backup plugin and repeat the Install Now and Activate steps.
- Add a security plugin to monitor logins and basic threats, then activate it.
- Install a caching plugin to speed up page loading for visitors.
Verify and Configure Your WordPress Website Plugins
Most plugins show a new menu item or settings page under Settings or in the left menu after you activate them.
You can verify that plugins are working by checking that each appears in your Installed Plugins list and that you can access its settings page without errors.
CDN Options for WordPress Website Performance
As your traffic grows, you may want to add a Content Delivery Network (CDN) on top of your caching plugin. Here is a quick comparison of common CDN types and how they fit into a typical WordPress website setup:
| CDN Type | Best For | WordPress Setup Method | Notes |
|---|---|---|---|
| Reverse Proxy CDN (Cloudflare style) | Blogs needing extra security and caching | Change DNS to point through CDN | Can cache HTML, protect against attacks, and sometimes trigger extra Javascript Errors when rules are too aggressive. |
| Image and File CDN (Jetpack style) | Simple image offload and optimization | Install plugin and toggle CDN feature | Very easy, but less control over rules that may affect Javascript Errors. |
| Traditional Pull CDN | Serving static assets from a cdn domain | Use plugin to rewrite asset URLs | Fine control over cache and file paths, useful when isolating Javascript Errors to specific files. |
| Host Built-In CDN | Managed hosting with one-click tools | Enable in hosting panel | Tight integration, low setup effort, and usually safer defaults that cause fewer Javascript Errors. |
Choose a Safe Starter Stack for Your WordPress Website
To pick a safe starter stack for your WordPress website, explore Developer hooks for optimizing WordPress plugins with code, Beginner WordPress security best practices guide, and Beginner Guide to WordPress Speed Optimization.
For official plugin documentation, review the guides on WordPress.org Support.
Step 7: Test and Launch Your WordPress Website
Test Your WordPress Website on Multiple Devices
Before you announce your new WordPress website, test it on different devices and confirm that key actions like forms and navigation work correctly. This prevents visitors from seeing obvious errors.
- Open a private or incognito browser window and visit https://yourdomain.com.
- Click through your main navigation menu to ensure every page loads correctly.
- Test your contact form by sending a test message and verifying you receive the email.
- View the site on a phone or resize your browser window to confirm the layout is mobile friendly.
Schedule Updates and Backups for Your WordPress Website
- Log in to your dashboard and check Dashboard » Updates for any pending updates, then click Update where needed.
- Set up scheduled backups in your backup plugin so your site is automatically backed up at least weekly.
Once you are happy with the result, your WordPress website is ready to share with visitors, customers, or your community.
You can verify launch readiness by following a checklist such as WordPress migration checklist for blogs or Beginner checklist optimizing WordPress blog posts.
Conclusion Your WordPress Website Is Ready to Go
You have chosen hosting and a domain, installed WordPress, configured your core settings, selected a theme, created essential pages, and added key plugins. Your new WordPress website is now ready for content, marketing, and growth.
From here, focus on publishing helpful posts, keeping your plugins and WordPress core updated, and monitoring performance and security regularly. With consistent attention, your WordPress website will stay fast, secure, and useful for years.
Further Reading for Your WordPress Website
- Beginner guide to WordPress speed optimization
- How to install a WordPress theme
- How to choose the best WordPress hosting
- Beginner WordPress security best practices guide
- Beginner Guide to WordPress Speed Optimization