Analytics Setup In WordPress
Plan, connect, and verify your analytics tracking for reliable WordPress data

Without analytics, you are guessing about what works on your WordPress site. With the right setup, you can see which pages bring traffic, which CTAs convert, and where visitors drop off in your funnel.
In this guide, you will plan your analytics strategy, choose the right tracking tool (GA4, Matomo, Jetpack Stats, or others), connect it to WordPress, and verify that your data is accurate. By the end, you will have a clean analytics setup that supports your SEO, content, and conversion decisions.
If you are still getting comfortable with the WordPress admin screens, it may help to review a general overview like the WordPress guides and tutorials overview so the steps below feel more familiar.
Prerequisites
Before you start connecting analytics, make sure you have the right access and a clear baseline of your site.
- A working WordPress site with administrator access.
- The ability to install and activate plugins (or FTP/hosting access if you prefer manual code placement).
- A Google account (for Google Analytics 4 and Site Kit), and optionally a Matomo or other analytics account if you choose a different stack.
- Basic understanding of your site’s purpose: leads, sales, appointments, ad revenue, or something else.
Step 1: Clarify your analytics goals
Analytics configuration always starts with clarity. If you do not know what success looks like, your reports will be noisy and hard to interpret.
- Write down your primary goal. For example, “generate service inquiries,” “sell products,” “grow newsletter subscribers,” or “increase ad revenue.”
- List 3–5 key actions that support that goal. Examples include contact form submissions, product purchases, quote requests, course enrollments, or content downloads.
- Map each action to a measurable event. For example, “form_submit,” “purchase,” “add_to_cart,” “newsletter_signup,” or “file_download.”
Having this list ready will make it easier to configure events, conversions, and segments once your base tracking is in place.
Step 2: Choose the right analytics tool for WordPress
WordPress works with many analytics tools. Most site owners start with Google Analytics 4 (GA4), but alternatives like Matomo or Jetpack Stats can make sense depending on privacy, reporting, and budget.
Option 1: Google Analytics 4 (GA4)
GA4 is free, powerful, and supported by almost every WordPress analytics plugin. It is ideal if you rely on SEO, ads, and cross-channel attribution, or if you need to integrate with Google Ads and Search Console.
- Pros: Free, highly flexible, cross-device tracking, strong ecosystem support.
- Cons: Learning curve, more complex reporting, requires consent setup for privacy compliance.
Option 2: Matomo Analytics
Matomo is a popular GA4 alternative, especially for privacy-focused and self-hosted environments. You can host Matomo on your server or use their cloud offering, then connect it via a WordPress plugin.
- Pros: Strong privacy stance, data ownership, familiar reports for Universal Analytics users.
- Cons: May require paid hosting or license, extra server overhead, fewer third-party integrations.
Option 3: Jetpack Stats and basic dashboards
Jetpack Stats and similar dashboard plugins provide simple pageview and visitor counts inside your WordPress dashboard. They are good for blogs or low-stakes projects where you only need basic trends.
- Pros: Easy to set up, simple reports, visible inside the WordPress dashboard.
- Cons: Limited attribution and funnel data, less suitable for serious e-commerce or lead-generation analysis.
Step 3: Create your analytics account or property
After you choose a tool, create the account or property that will store your website’s data. This is usually done outside of WordPress, in the analytics provider’s own interface.
Create a GA4 property (Google Analytics)
- Sign in to your Google Analytics account and open the Admin area.
- Under the correct account, click Create Property, then enter your site name, time zone, and currency.
- Follow the prompts to add a Web data stream and enter your WordPress site URL and name.
- Copy your Measurement ID (looks like
G-XXXXXXX) for use in WordPress.
Create a Matomo site
- Log in to your Matomo dashboard (cloud or self-hosted).
- Go to the Administration section and click Websites > Manage.
- Add a new website, entering the full URL of your WordPress site.
- Copy the tracking code or site ID that Matomo provides.
Enable Jetpack Stats (optional)
- Install and activate the Jetpack plugin in WordPress if it is not already installed.
- Connect Jetpack to a WordPress.com account when prompted.
- In Jetpack > Settings > Traffic, make sure Site stats is enabled.
Step 4: Connect analytics to WordPress with a plugin
Now you need to send data from your WordPress pages to your analytics property. The easiest and most robust way is via a dedicated tracking plugin like Site Kit by Google, a GA4 integration plugin, or the official Matomo plugin.
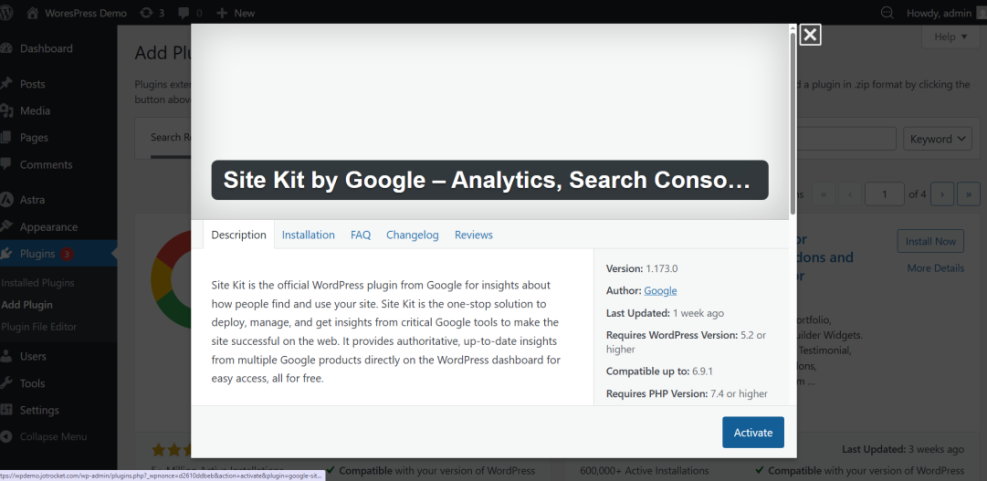
Option 1: Use Site Kit by Google for GA4
- In your WordPress dashboard, go to Plugins > Add New.
- Search for “Site Kit by Google”, then click Install Now and Activate.
- A new Site Kit menu will appear. Click it and follow the on-screen wizard to connect your Google account.
- When prompted, connect to the GA4 property you created earlier or let Site Kit create one for you.
If you prefer command-line deployment, you can install Site Kit via WP-CLI from your hosting SSH terminal:
wp plugin install google-site-kit --activateAfter installing via WP-CLI, complete the Site Kit connection wizard from the WordPress admin as usual.
Option 2: Use a GA4-only or Matomo plugin
If you do not need Search Console or AdSense integration, you may prefer a focused GA4 plugin or the official Matomo plugin.
- Go to Plugins > Add New and search for your preferred GA4 or Matomo plugin.
- Install and activate it, then open its settings page (usually under Settings or its own top-level menu).
- Paste your GA4 Measurement ID or Matomo site ID and tracking URL into the fields provided.
- Enable tracking options such as enhanced measurement, logged-in user exclusion, and cookie consent integration as needed.
Step 5: Test and verify that tracking works
Never assume your analytics is working just because you entered an ID or installed a plugin. Always test tracking and verify that pageviews and key events appear.
- Open your site in a private window. Use an incognito or private browsing window so you see what normal visitors experience.
- Check realtime reports. In GA4, open Reports > Realtime. In Matomo, open the realtime or visitor log reports. You should see at least one active user representing your visit.
- Click several pages. Navigate to a few posts and key landing pages to generate pageviews.
- Test one conversion action. Submit a test form, add a test product to the cart, or trigger another important event if it is safe to do so.
If some data does not appear, double-check that your plugin is active, caches are cleared, and any CDN or performance plugin is not stripping scripts.
Step 6: Configure events, conversions, and key reports
Once basic tracking works, make your analytics more useful by configuring events, marking key conversions, and building simple recurring reports.
Configure events for important actions
- List the actions you defined earlier in Step 1.
- Check which events are already collected automatically. GA4, for example, can auto-track scrolls, outbound clicks, file downloads, and site search.
- Use your plugin or GTM/Matomo tagging to add missing events. For example, form submission events or WooCommerce purchase events.
Many WordPress form and e-commerce plugins include direct integration with GA4 or Matomo, so you can enable conversion tracking without writing code.
Mark conversions and goals
Next, distinguish your high-value events as conversions.
- In your analytics interface, find the Conversions settings.
- Select events like
purchase,generate_lead, or your form submission event. - Mark them as conversions so they appear in reports and can be used for optimization.
Create a basic reporting routine
Analytics only creates value if you look at reports and act on them. Start with a simple weekly or monthly review.
- Traffic overview: Sessions, users, and top traffic channels.
- Top pages: Posts and landing pages that bring the most engaged visitors.
- Conversions: Which pages and campaigns lead to your key actions.
When you are ready to dive deeper into interpreting these numbers, follow this guide to checking website traffic on WordPress for report-level tips and examples.
Turn your WordPress analytics into decisions
You now have a working analytics setup in WordPress: you chose the right tool, connected it safely through a plugin, verified that data is flowing, and defined events and conversions that tie directly to your business goals.
The next step is to build a habit around your data. Review your reports regularly, experiment with new content and landing pages, and use your analytics to decide what to improve next instead of relying on guesswork.
Over time, your analytics setup will become a core part of how you plan campaigns, prioritize SEO work, and justify investments in design, content, and performance improvements.
Further Reading
- Google Analytics for WordPress: Overview and key concepts
- How to Install Google Analytics on WordPress
- Using analytics to improve your online courses and membership content
- Internal linking strategies for WordPress beginners