Step by Step Image Optimization for WordPress
A practical beginner-friendly workflow to compress, resize, convert, rename, and test WordPress images for faster pages and stronger SEO.
Large, unoptimized images are one of the most common reasons WordPress pages feel slow. They can increase page weight, delay loading, hurt mobile visitors, and make it harder for your content to perform well in search.
In this tutorial, you will optimize images before upload, configure WordPress image settings, add useful alt text, enable compression, serve modern formats, and test the result. If your site already feels slow beyond images, pair this workflow with a broader WordPress speed optimization process.
By the end, you will have a repeatable image optimization checklist you can use for blog posts, landing pages, product pages, and existing Media Library files.
Prerequisites
Before you begin, make sure you can access your WordPress dashboard and edit posts, pages, or media files. You do not need coding knowledge, but you should have permission to install plugins if your site does not already include an image optimization tool.
- Administrator access to WordPress.
- A few large images to test with.
- Access to Posts, Pages, and Media Library.
- An image editing tool such as Photoshop, Canva, TinyPNG, Squoosh, Preview, or any built-in editor.
- Optional: access to your hosting control panel or CDN settings.
Step 1: Audit Your Current Image Problems
Start by finding which images are actually slowing down your pages. Optimizing random files can waste time, while auditing first helps you focus on images that affect real visitors.
Open your most important pages in a speed testing tool such as PageSpeed Insights, GTmetrix, WebPageTest, or your hosting performance dashboard. Look for warnings related to image size, next-gen formats, lazy loading, properly sized images, and Largest Contentful Paint.
- Test your homepage, a popular blog post, and one conversion-focused page.
- Write down images flagged as too large or poorly served.
- Check whether the largest above-the-fold image is a banner, featured image, product photo, or background image.
- Open each flagged page in a browser and visually confirm where those images appear.
Checkpoint: You should have a short list of high-impact images to fix first, not a vague goal to optimize everything.
Troubleshooting: If test tools show different results, focus on repeated patterns. For example, if multiple tools mention oversized images or slow LCP, solve that first instead of chasing every minor warning.
Step 2: Resize Images Before Uploading
Resizing is the most important image optimization step because compression cannot fully fix an image that is much larger than its display area. A 4000-pixel photo used in a 900-pixel content column wastes bandwidth even after compression.
Before uploading, decide the largest size the image needs to appear on your site. Blog content images often do not need to exceed the content column width, while hero images may need a wider desktop size.
- Open the image in your editing tool.
- Set the width to match the maximum display size needed on your WordPress layout.
- Keep the aspect ratio locked so the image does not stretch.
- Export a new copy instead of overwriting your original source file.
Use these general starting points:
- Blog content image: 800–1200 pixels wide.
- Featured image: 1200–1600 pixels wide, depending on theme layout.
- Full-width hero image: 1600–2000 pixels wide for most sites.
- Logo or icon: use SVG when appropriate, or a small transparent PNG/WebP.
Checkpoint: The resized image should still look sharp in your theme, but the file dimensions should no longer be unnecessarily huge.
Troubleshooting: If an image looks blurry after resizing, you likely exported it too small for the display area or for high-density screens. Re-export at a slightly larger width and test again.
Step 3: Compress Images Without Noticeable Quality Loss
Compression reduces file size while preserving acceptable visual quality. This step matters because even correctly sized images can still be heavy if exported at maximum quality.
You can compress images before upload using a web-based tool, desktop app, or design software export setting. You can also use a WordPress plugin to compress images automatically after upload.
- Export JPG photos at around 70–85% quality as a starting point.
- Use PNG only when you need transparency or crisp interface graphics.
- Use WebP or AVIF when your optimization plugin or CDN supports it.
- Compare the original and compressed version visually before publishing.
Checkpoint: Most blog images should be much smaller after compression, often without any obvious visual difference.
Troubleshooting: If faces, gradients, or product photos look rough, increase the quality setting slightly. If screenshots look fuzzy, export them as PNG or high-quality WebP instead of over-compressed JPG.
Step 4: Choose the Right Image Format
Image format affects both quality and performance. WordPress supports common formats, but your theme, CDN, and optimization plugin may also help serve modern formats to supported browsers.
- JPG: best for photos, people, landscapes, and realistic images.
- PNG: best for transparency, logos, screenshots, and sharp interface details.
- WebP: useful for smaller photos and graphics with broad browser support.
- AVIF: often very efficient, but test compatibility with your plugin, CDN, and workflow.
- SVG: best for simple logos and icons, but only upload SVGs from trusted sources.
For most WordPress publishers, WebP is the easiest modern format to adopt because many image optimization plugins and CDNs can generate and serve WebP versions automatically.
Checkpoint: Your site should use JPG or WebP for most photos, PNG only when needed, and SVG only for safe, simple vector assets.
Troubleshooting: If WebP images do not appear, clear your cache, check plugin settings, and confirm your server or CDN supports the format conversion method being used.
Step 5: Rename Files Before Uploading
File names help keep your Media Library organized and can provide search engines with extra context. Rename images before uploading because WordPress does not make bulk file renaming easy after the fact.
Use short, descriptive, lowercase file names with hyphens between words. Avoid camera names, random numbers, spaces, and keyword stuffing.
- Identify what the image actually shows.
- Include the page topic only when it naturally fits.
- Use hyphens instead of underscores or spaces.
- Keep the name readable and specific.
Good examples include:
wordpress-image-optimization-settings.webpcompressed-blog-featured-image.jpgmedia-library-alt-text-example.png
Checkpoint: Your image file names should be understandable before you even open the image.
Troubleshooting: If images are already uploaded with poor names, do not rename files directly on the server without understanding the database references. Instead, replace the image through WordPress or use a trusted media replacement workflow.
Step 6: Upload Images to the WordPress Media Library
After resizing, compressing, and renaming, upload the image through WordPress instead of manually placing it in server folders. WordPress creates attachment data and image sizes that themes and plugins rely on.
- Go to Media > Add New Media File.
- Drag your optimized image into the upload area.
- Open the uploaded image in the Media Library.
- Confirm the preview looks correct and the file name is descriptive.
Checkpoint: The image should appear in the Media Library with the correct file name, dimensions, and preview.
Troubleshooting: If WordPress rejects the file, check the format and file size. Some hosts restrict SVG, AVIF, or large uploads, so you may need to use JPG, PNG, or WebP instead.
Step 7: Add Helpful Alt Text and Image Details
Alt text helps describe images for accessibility and can support on-page SEO when used naturally. It should explain the image’s purpose in the context of the page, not repeat the focus keyword unnaturally.
Open the image in the Media Library or select it inside the editor. Add alt text that describes the image clearly, then add a caption only if readers need visible context.
- Go to Media > Library.
- Select the image you uploaded.
- Fill in the Alternative Text field.
- Add a caption only when it helps the reader.
- Update the post or page where the image appears.
For a deeper walkthrough, follow this guide on changing image alt text in WordPress.
Checkpoint: Every meaningful image should have useful alt text, while decorative images can have empty alt text when appropriate.
Troubleshooting: If your alt text sounds repetitive, remove unnecessary keywords and describe the image plainly. A good test is whether someone could understand the image without seeing it.
Step 8: Configure WordPress Image Sizes
WordPress generates multiple image sizes when you upload media. Your theme may also register custom sizes for thumbnails, featured images, and responsive layouts.
Go to Settings > Media and review the thumbnail, medium, and large size settings. For many sites, the defaults are acceptable, but you should make sure they match your layout instead of generating unnecessary sizes.
- Open Settings > Media.
- Review thumbnail, medium, and large dimensions.
- Keep sizes that your theme actually uses.
- Avoid setting extremely large dimensions unless your design requires them.
- Save changes.
Checkpoint: WordPress should generate image sizes that fit your theme layout instead of creating oversized versions by default.
Troubleshooting: If thumbnails look cropped incorrectly, review your theme’s image dimensions and regenerate thumbnails only after you are confident the settings are correct.
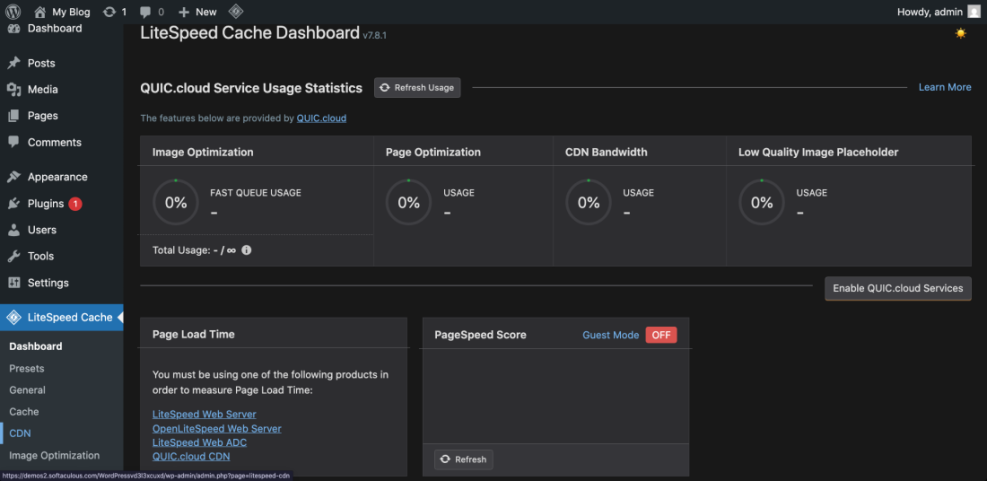
Step 9: Install an Image Optimization Plugin
An image optimization plugin can automate compression, WebP generation, lazy loading, and bulk optimization. This is especially useful if your site already has many uploaded images.
Choose one reputable plugin and avoid stacking multiple image optimization plugins that perform the same task. Plugin overlap can create broken images, duplicate processing, or confusing cache behavior.
- Go to Plugins > Add New Plugin.
- Search for an image optimization plugin from a reputable developer.
- Click Install Now, then Activate.
- Open the plugin settings page.
- Enable compression, WebP delivery, and lazy loading only if they do not conflict with your cache or CDN plugin.
If you need a refresher on adding plugins safely, review this tutorial on installing a plugin in WordPress.
Checkpoint: Your plugin should show active optimization settings and, ideally, a way to test or bulk optimize existing images.
Troubleshooting: If images disappear after enabling WebP or lazy loading, disable one setting at a time, clear all caches, and retest. The issue is often a conflict between the optimization plugin, theme, cache plugin, or CDN.
Step 10: Bulk Optimize Existing Images
New uploads are only part of the problem. Older images in your Media Library may still be oversized, uncompressed, or missing modern formats.
Most image optimization plugins include a bulk optimization screen. Use it carefully, especially on larger sites, because processing thousands of images can use server resources or plugin credits.
- Back up your site before running bulk optimization.
- Open your image optimization plugin’s bulk optimization screen.
- Start with a small batch if the plugin allows it.
- Review a few optimized posts and pages visually.
- Continue with the full Media Library once the test batch looks correct.
Checkpoint: The plugin should report reduced file sizes, completed optimization, and no visible image quality problems on key pages.
Troubleshooting: If bulk optimization times out, reduce batch size, run the process during low-traffic hours, or ask your host whether server limits are interrupting the task.
Step 11: Enable Lazy Loading Carefully
Lazy loading delays off-screen images until visitors scroll near them. This can improve initial load time, but it must be configured carefully for above-the-fold images.
WordPress includes native lazy loading for many images, and performance plugins may add their own controls. Avoid lazy loading your main hero image or Largest Contentful Paint image if it delays the most important visual element.
- Check whether your cache, performance, or image plugin has lazy loading enabled.
- Enable lazy loading for below-the-fold images.
- Exclude the logo, hero image, and other critical above-the-fold images if needed.
- Clear your cache and test the page.
Checkpoint: Below-the-fold images should load as you scroll, while the main visible image should appear quickly.
Troubleshooting: If images flash, load late, or leave blank spaces, disable plugin lazy loading and test native WordPress lazy loading only. Also confirm your theme outputs image width and height attributes to reduce layout shifts.
Step 12: Serve Images Through a CDN
A CDN can deliver images from servers closer to your visitors, reducing latency and improving consistency across locations. This is especially helpful for sites with international traffic or image-heavy pages.
Some CDNs also provide automatic image resizing, WebP conversion, AVIF conversion, and device-based delivery. Enable these features gradually so you can identify conflicts quickly.
- Check whether your host includes a CDN or image CDN.
- Enable CDN delivery for static assets and images.
- Turn on image format conversion only if your CDN supports safe fallbacks.
- Clear your WordPress, CDN, and browser cache.
- Retest important pages from multiple devices.
Checkpoint: Image URLs may be served from your CDN domain or optimized delivery layer, and pages should load images reliably.
Troubleshooting: If old images continue showing, purge the CDN cache. If images break, temporarily disable image transformation features and confirm the original files still load from WordPress.
Step 13: Test Speed, Quality, and Layout
Optimization is not finished until you test the final page. You need to confirm that the site is faster, the images still look good, and the layout remains stable on mobile and desktop.
- Clear all caches, including WordPress, CDN, browser, and host-level cache.
- Open the page in an incognito window.
- Check the page on desktop and mobile widths.
- Run another speed test.
- Compare image-related warnings against your first audit.
Checkpoint: Your optimized page should show fewer image warnings, smaller transfer size, and no visible quality or layout problems.
Troubleshooting: If speed scores do not improve, check whether the largest page element is still an image. Also review caching, render-blocking files, fonts, ads, and third-party scripts because images may not be the only bottleneck.
Step 14: Create a Repeatable Image Workflow
The best image optimization setup is the one you consistently use. Create a simple process for every future post, page, and product image so performance does not slowly decline again.
- Choose the correct image dimensions before upload.
- Rename the file with a descriptive lowercase file name.
- Compress the image before upload or through your plugin.
- Use the right format for the image type.
- Add useful alt text in the Media Library or editor.
- Preview the page on mobile and desktop.
- Test important pages after publishing.
Checkpoint: Everyone who publishes content should know how to prepare, upload, describe, and test images before a page goes live.
Your WordPress Images Are Now Faster and Cleaner
Image optimization for WordPress is not one single setting. It is a workflow: resize before upload, compress intelligently, choose the right format, add helpful alt text, automate with a trusted plugin, and test the final page.
Once you apply this process, your pages should feel lighter, load more smoothly, and provide a better experience for visitors. Continue reviewing your most important pages regularly, especially after redesigns, new plugins, or major content updates.
Further Reading
- How to Optimize Images for WordPress
- Image Optimization Checklist for WordPress Websites
- Beginner Guide to WordPress Speed and Core Web Vitals
- WordPress Speed Test Checklist