Safely Change WordPress Theme Checklist Before Switching
A practical pre-switch checklist to protect your design, SEO, speed, content, and backups before changing your WordPress theme.
Changing your WordPress theme can refresh your site’s design, improve usability, and give your brand a more polished look. But switching themes without preparation can also break layouts, remove widget areas, reset menus, affect SEO elements, and expose performance problems.
This checklist walks you through what to review before, during, and after a theme switch so you can protect your content, rankings, and user experience. If you are still deciding which design direction fits your site, start with this guide on how to choose a WordPress theme before making the switch.
By the end, you will know how to back up your site, test the new theme safely, document important settings, preserve SEO details, and launch with fewer surprises.
Prerequisites
Before you begin, make sure you have access to the tools and accounts needed to recover your site if something goes wrong. A theme switch is usually reversible, but only if you prepare before clicking Activate.
- Administrator access to your WordPress dashboard.
- Hosting control panel or file manager access.
- A complete backup of your files and database.
- A staging site or safe testing environment.
- Access to your SEO plugin, analytics, caching plugin, and theme settings.
- A copy of any custom CSS, tracking scripts, or code snippets added to your current theme.
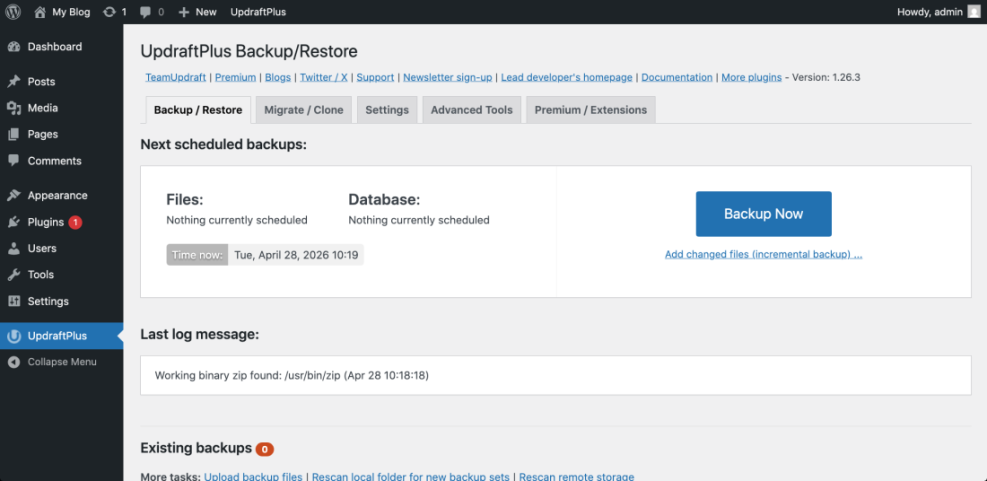
Step 1: Create a Complete WordPress Backup
A backup is your safety net. If the new theme breaks layouts, removes settings, or conflicts with plugins, you need a clean restore point from before the change.
Your backup should include both WordPress files and the database. Files store themes, plugins, uploads, and code. The database stores posts, pages, menus, settings, widget assignments, and plugin configuration.
- Go to your hosting dashboard or backup plugin.
- Create a fresh full-site backup.
- Download a copy to your computer or remote storage.
- Confirm that the backup includes both files and database tables.
- Record the backup date and location.
If you need a more detailed backup workflow, follow this guide on how to backup a WordPress site before continuing.
Checkpoint: You should have a recent backup file or restore point that was created before installing or activating the new theme.
Troubleshooting: If your backup fails, check available disk space, PHP memory limits, and whether your backup plugin has permission to write files. Do not continue until the backup completes successfully.
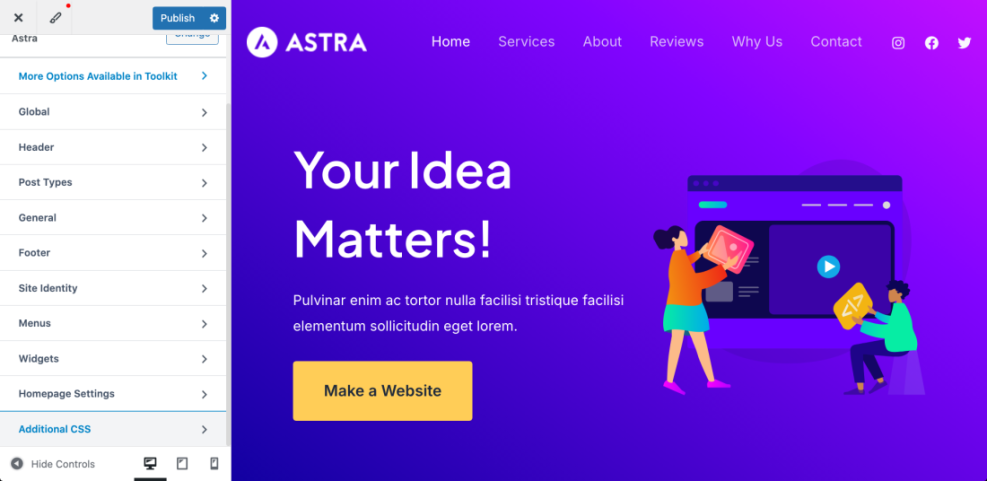
Step 2: Test the New Theme on a Staging Site
A staging site lets you test the theme without affecting visitors. This is especially important for business websites, WooCommerce stores, blogs with custom layouts, and sites using page builders.
Create a staging copy of your live site through your hosting dashboard, staging plugin, or development environment. Then install and activate the new theme on staging first.
- Open your hosting dashboard and look for Staging, Site Tools, or WordPress Management.
- Create a staging copy of your live WordPress site.
- Log in to the staging WordPress dashboard.
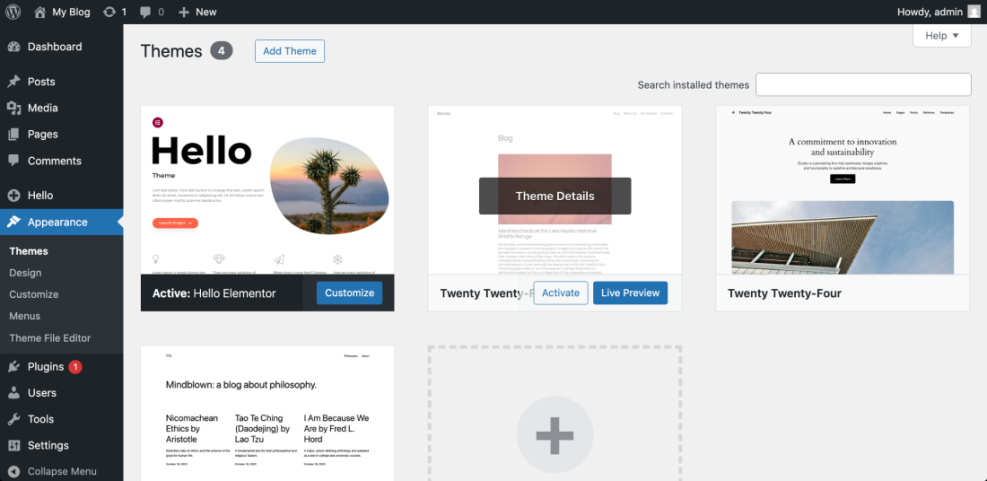
- Go to Appearance > Themes.
- Install the new theme, then click Live Preview before activating it.
- Activate the theme only on staging.
You can use this walkthrough to create a WordPress staging site if your host does not already provide one.
Checkpoint: The staging version should load with the new theme active while your live site remains unchanged.
Troubleshooting: If staging shows a blank screen, disable recently added plugins on staging, switch PHP versions if needed, and check the theme documentation for minimum requirements.
Step 3: Document Your Current Theme Settings
Many theme settings do not transfer perfectly when you switch themes. Header layouts, footer columns, typography, color palettes, widget areas, logo placement, and customizer settings may change or disappear.
Before switching, create a quick inventory of everything your current theme controls. Screenshots are useful because they show how the site looked before the change.
- Logo, favicon, and site identity settings.
- Header layout, menu locations, and mobile menu behavior.
- Footer widgets, copyright text, and footer menu links.
- Sidebar layouts and widget placements.
- Homepage layout and featured content sections.
- Typography, button styles, and color settings.
- Custom CSS in Appearance > Customize > Additional CSS.
- Theme-specific scripts or tracking code.
Checkpoint: You should have screenshots or notes for the major areas of your current design so you can rebuild them if the new theme resets them.
Troubleshooting: If you cannot find a setting, check both Appearance > Customize and the theme’s dedicated settings panel. Some themes store options outside the default WordPress Customizer.
Step 4: Review Pages, Templates, and Widgets
Theme changes often affect how content is displayed, not the content itself. Your posts and pages should remain in WordPress, but templates, sidebars, featured image sizes, and widget areas may look different.
Review the most important pages on your site before switching. Focus on pages that drive traffic, leads, sales, or subscriptions.
- Homepage.
- About page.
- Contact page.
- Blog archive and single post templates.
- Landing pages.
- Product, checkout, and cart pages if you use WooCommerce.
- Category and tag archive pages.
- Pages built with a page builder.
In staging, compare each page against the live version. Look for missing sections, unusual spacing, broken columns, sidebar changes, and shortcode output that no longer renders correctly.
Checkpoint: Your critical pages should still be readable, clickable, and visually consistent after the new theme is active on staging.
Troubleshooting: If a page looks broken, check whether it uses a theme-specific page template. Change the template in the page editor under Page Attributes or rebuild the layout using blocks or your page builder.
Step 5: Protect SEO Settings and Tracking Code
A theme switch should not remove your posts, URLs, or SEO plugin data. However, it can affect heading structure, schema output, breadcrumbs, title display, internal templates, and tracking code if those were added through the old theme.
Before switching, check where your SEO settings are stored. Ideally, titles, meta descriptions, schema, redirects, and XML sitemap settings should live in an SEO plugin instead of the theme.
- Open your SEO plugin settings and confirm it is active.
- Check important pages for SEO titles and meta descriptions.
- Review header scripts, analytics tags, and verification codes.
- Confirm that breadcrumbs are controlled by your SEO plugin or a reusable block, not only the old theme.
- Check that your permalink structure is unchanged under Settings > Permalinks.
Checkpoint: Your SEO plugin should still contain your metadata, sitemap settings, and schema configuration after the new theme is active on staging.
Troubleshooting: If tracking disappears, check whether analytics code was pasted into the old theme’s header settings. Move important tracking scripts to a plugin, tag manager, or child theme so they do not vanish during future theme changes.
Step 6: Check Speed, Mobile Layouts, and Core Web Vitals
A new theme can improve performance, but it can also add heavy scripts, large fonts, sliders, unused CSS, and layout shifts. Test speed before and after the switch so you know whether the new theme actually helps.
Run a baseline test on your current theme first. Then test the staging version after activating the new theme and rebuilding key layouts.
- Homepage load time.
- Largest Contentful Paint behavior.
- Cumulative Layout Shift on mobile.
- Mobile menu usability.
- Font loading and image sizing.
- Number of theme-generated scripts and styles.
- Performance of blog posts and landing pages.
Checkpoint: The new theme should load cleanly on desktop and mobile without major layout shifts, oversized images, or unusable navigation.
Troubleshooting: If the new theme is slower, disable unnecessary theme modules, remove demo content, optimize images, review fonts, and clear all caches before testing again.
Step 7: Switch the Theme During a Low-Traffic Window
After testing on staging, choose a low-traffic time to switch the live site. This gives you time to fix menus, widgets, caches, and layout issues before most visitors arrive.
Use a simple launch sequence so you do not miss anything important.
- Create one final live backup.
- Put the site in maintenance mode if the update may take more than a few minutes.
- Go to Appearance > Themes.
- Install the new theme if it is not already installed.
- Click Live Preview for one final check.
- Click Activate.
- Assign menus under Appearance > Menus or Appearance > Editor, depending on the theme type.
- Rebuild widgets, sidebars, header elements, and footer areas.
- Clear plugin, server, and CDN caches.
Checkpoint: The live site should show the new theme, display the correct menus, and load key pages without obvious design or navigation problems.
Troubleshooting: If the site breaks immediately, switch back to the previous theme from Appearance > Themes. If you cannot access the dashboard, use your hosting file manager or FTP to rename the active theme folder and force WordPress to fall back to another installed theme.
Step 8: Run a Post-Switch Quality Check
The work is not finished when the theme is activated. You still need to verify that visitors, search engines, and analytics tools can use the site correctly.
Open your website in an incognito browser window and test it like a new visitor. Then check the WordPress dashboard for configuration issues.
- Homepage, blog posts, pages, and archive templates load correctly.
- Desktop and mobile menus work.
- Contact forms submit successfully.
- Search, comments, and embedded media work.
- Header, footer, logo, and favicon display correctly.
- Internal links and buttons go to the right pages.
- Analytics and tracking scripts are still firing.
- SEO titles and meta descriptions still appear in your SEO plugin.
- 404 errors and broken layouts are fixed quickly.
Checkpoint: Your live site should look stable, navigate correctly, and preserve the most important SEO and conversion elements.
Troubleshooting: If visitors report an old design, clear all caches. If mobile layouts look wrong, check theme breakpoints, menu settings, and any custom CSS copied from the old theme.
Switch Themes With Confidence, Not Guesswork
A safe WordPress theme change starts before you click Activate. Back up your site, test the new design on staging, document current settings, protect SEO data, and review performance before launching.
After switching, complete a careful quality check across your most important pages, forms, menus, and mobile layouts. When you treat the theme change as a structured process instead of a quick design swap, you reduce downtime, protect rankings, and give visitors a better experience.
Further Reading
- How to Change WordPress Theme
- How to Update WordPress Theme
- How to Customize WordPress Theme
- How to Create a Child Theme in WordPress
- How to Put WordPress in Maintenance Mode