On Page SEO Checklist for WordPress: Optimize Your Content
A practical content optimization checklist you can reuse for every WordPress post before you hit Publish.
You’ve written a solid blog post or landing page, but without consistent on page SEO, even great content can disappear on page two of Google. The good news is that you don’t need to guess what to do every time you publish. A simple, repeatable checklist inside your WordPress editor can make sure every piece is fully optimized before it goes live.
This guide walks you through an on page SEO checklist tailored for WordPress (Classic Editor and the Jannah theme), covering titles, URLs, headings, images, internal links, and final technical checks. Follow it step by step each time you update or publish a post and you’ll turn on-page SEO into a reliable routine, not a one-off chore.
If you’re completely new to search engine optimization, start with a broader overview like the complete WordPress SEO beginner’s guide, then come back here to use this checklist on each individual post.
Prerequisites
Before you start using this on page SEO checklist, make sure you have the basics in place on your WordPress site.
- An active WordPress site with admin or editor access.
- The Jannah theme installed and configured as your active theme.
- Access to the Classic Editor (either using the Classic Editor plugin or Jannah’s classic-style post editor) so your screen matches the paths described here.
- An SEO plugin installed and enabled (for example, Yoast SEO or Rank Math) so you can edit SEO titles and meta descriptions.
- Basic keyword research done, with a primary phrase you want the page to rank for.
Step 1: Clarify search intent and choose a focus keyword
Every optimized page starts with a clear understanding of what the searcher wants. Clarifying search intent and picking a single focus keyword keeps your content aligned with real user needs instead of just stuffing in phrases.
- Identify the main topic of your post in one sentence (for example, “how to speed up a WordPress blog”).
- Decide what type of intent matches that topic: informational, commercial, transactional, or navigational.
- Search your focus keyword in Google and quickly scan the top results. Confirm that your content type (blog post, how-to, checklist, comparison) matches what is currently ranking.
- In the WordPress post editor, scroll to your SEO plugin box and enter your focus keyphrase (for example, “on page SEO checklist”) in the Focus Keyword or Focus Keyphrase field.
Once you’ve done this, the rest of the checklist is about helping Google and readers clearly see that your content is the best answer for that search intent.
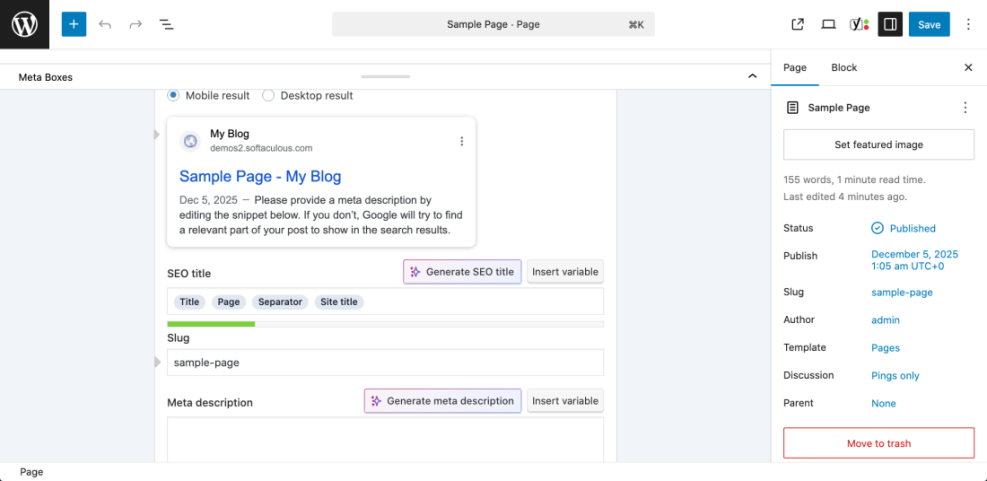
Step 2: Optimize your SEO title and meta description
Your SEO title and meta description are the “ad copy” that shows up in search results. Even if your content is great, a weak title and snippet can destroy your click-through rate.
- In the SEO plugin box below the editor, locate the fields for SEO Title (or Title) and Meta Description.
- Write an SEO title that:
- Includes your focus keyword naturally near the beginning.
- Promises a clear benefit (for example, “On Page SEO Checklist for WordPress: Optimize Every Post”).
- Stays under roughly 60 characters so it doesn’t get cut off.
- Write a meta description that:
- Summarizes what the reader will get from the page.
- Uses your focus keyword once in a natural sentence.
- Stays within about 140–160 characters.
- Check the plugin’s snippet preview to confirm the title and description look complete on both desktop and mobile previews.
<title>On Page SEO Checklist for WordPress: Optimize Your Content</title>
<meta name="description" content="Use this on page SEO checklist for WordPress to optimize every post, improve rankings, and delight your readers." />
Step 3: Fix your URL and permalink slug
Short, descriptive URLs help users and search engines understand what a page is about. WordPress often builds these automatically from your title, but you should always double-check them.
- Below the post title in the Classic Editor, click the Edit button next to the permalink.
- Change the slug to a short, readable phrase that reflects the content, using only lowercase letters and hyphens (for example,
on-page-seo-checklist-wordpress). - Remove extra words like “a”, “the”, or dates unless they are essential to the topic.
- Click OK to save the slug, then update the post.
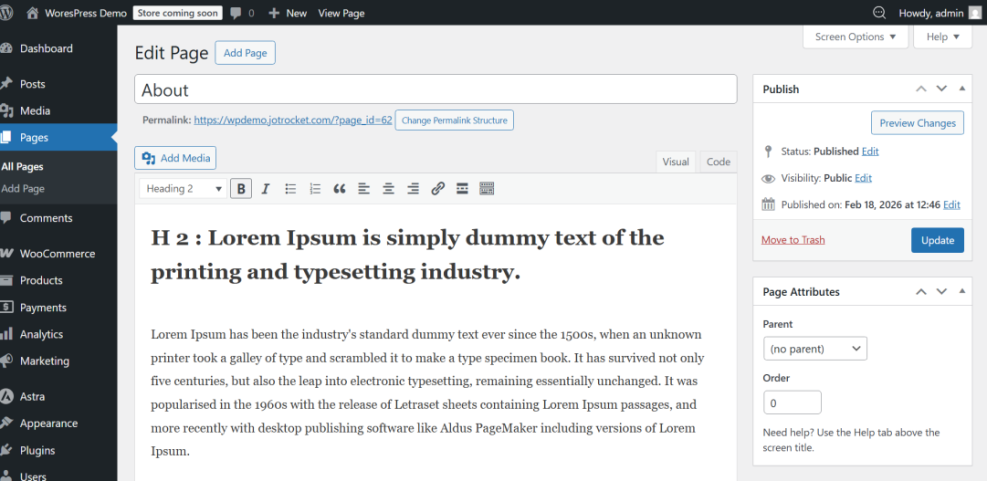
Step 4: Structure headings for clarity and scanability
Headings make your content easier to scan, which helps both users and search engines. In WordPress, the post title is usually your H1, so your job is to organize H2 and H3 headings logically.
- Ensure the post title is the only H1 on the page (don’t manually set other text to H1 inside the editor).
- Break your content into 3–7 main sections and apply H2 to each section heading using the Paragraph / Heading dropdown in the Classic Editor.
- Use H3 headings for subsections under each H2 if needed.
- Include your focus keyword or close variations in 1–2 headings where it fits naturally (avoid putting it in every heading).
Step 5: Improve on-page copy and keyword placement
On page SEO is not about repeating your keyword as many times as possible. It’s about covering a topic thoroughly, in a way that matches search intent and is easy to read.
- Open your post and skim the first 100–150 words. Make sure:
- The focus keyword appears once naturally in the opening paragraph.
- You clearly state what the article will help the reader achieve.
- Scan the rest of the content and:
- Replace vague phrases with specific, helpful details (steps, examples, numbers).
- Add synonyms and related phrases (LSI keywords) instead of repeating the same exact keyword.
- Break long paragraphs into shorter ones and use bullet lists where appropriate.
- Check the conclusion and mention the focus topic again while summarizing the main takeaway and next step.
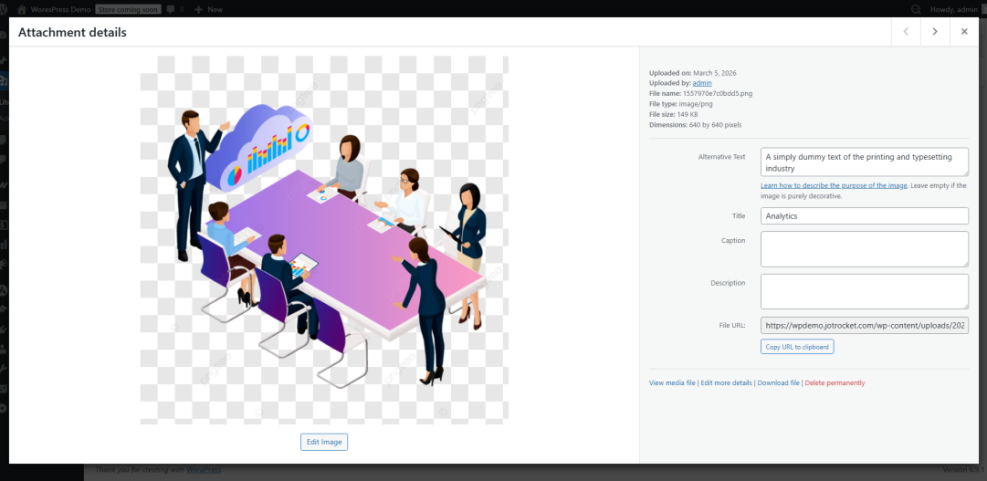
Step 6: Optimize images for SEO and performance
Unoptimized images can slow down your pages and waste a good ranking opportunity in Google Images. A few quick checks in the Media Library go a long way.
- Before uploading, rename image files descriptively in lowercase with hyphens (for example,
wordpress-on-page-seo-checklist.pngrather thanIMG_1234.png). - Use an image optimization plugin or external tool to compress images while keeping them clear.
- In the Classic Editor, click an image and choose Edit, or open it in the Media Library. Fill in the Alt Text field with a short, meaningful description that may include your keyword if it fits naturally.
- Make sure image dimensions are appropriate for your theme (avoid uploading massive images that get scaled down).
- Confirm that lazy loading is enabled (either via your theme, performance plugin, or in WordPress settings) so below-the-fold images don’t slow initial load.
For a deeper walkthrough on this part of the checklist, see the dedicated image optimization checklist for WordPress websites.
Step 7: Strengthen internal and external links
Internal links help search engines understand your site structure and spread authority to important pages. They also keep readers on your site longer. External links to trusted resources add context and credibility.
- Identify 2–5 other posts or pages on your site that are closely related to the one you’re editing (for example, keyword research guides, speed optimization tutorials, or SEO basics articles).
- Within your content, add internal links using descriptive anchor text that tells users what to expect when they click (avoid “click here”).
- Add a small number of outbound links to authoritative sources when they genuinely improve the content (official documentation, research, or original sources).
- In the Classic Editor, use the link button to set links to open in the same tab for internal links and optionally a new tab for external ones, depending on your preference.
If you’re new to internal linking, review this beginner-friendly guide to internal linking in WordPress and build a habit of updating older posts with links to your newer, higher-priority content.
Step 8: Run final technical and publishing checks
Before you hit Publish or Update, run through a quick set of technical checks. This prevents small issues from piling up and affecting your long-term SEO performance.
- Check index settings: In your SEO plugin’s advanced tab for the post, confirm the page is set to index (unless you intentionally want it noindexed).
- Verify canonical URL: Make sure the canonical URL points to the preferred version of the page, especially if you have similar or duplicated content.
- Preview mobile and desktop: Use the WordPress Preview function to check how your post looks on different screen sizes. Fix any layout issues caused by images or embeds.
- Confirm schema or rich snippets (optional): If your SEO plugin adds schema (Article, FAQ, HowTo), ensure the correct type is applied and that your content actually fits that schema.
- Test loading speed: After updating, run the page through your preferred speed testing tool to make sure you didn’t introduce heavy images or scripts that slow things down.
Lock in a repeatable on-page SEO workflow
On page SEO doesn’t have to feel mysterious or overwhelming. By walking through this checklist for each WordPress post—clarifying intent, tightening titles and URLs, structuring headings, polishing copy, optimizing images, and checking links and technical settings—you build a consistent process that search engines can trust.
Over time, this routine becomes second nature. Combine it with periodic content reviews and performance checks, and you’ll steadily improve the visibility and conversions of every new piece you publish in WordPress.
Further Reading
- Step-by-Step Guide to Onpage SEO in WordPress
- Beginner Checklist for Optimizing WordPress Blog Posts
- How to Add Title Tags in WordPress
- Yoast SEO Setup Guide