How to Speed Up WordPress Blog Performance Optimization Tips
A step-by-step speed optimization guide for content-heavy WordPress blogs
Your WordPress blog might have great content, but if it loads slowly, readers will bounce before they ever see it. A sluggish blog also hurts your SEO, Core Web Vitals, and overall brand perception.
In this guide, you’ll walk through a practical, step-by-step process to speed up WordPress blog performance without needing to be a developer. You’ll benchmark your current speed, fix the biggest bottlenecks, and set up a simple workflow so your blog stays fast as you publish more posts.
If you are completely new to optimization, you can first review a beginner’s guide to WordPress speed optimization, then come back here to apply these blog-focused, action-oriented tips.
Prerequisites
Before you begin tuning performance, make sure you have the basics in place so you can test safely and roll back changes if needed.
- Admin access to your WordPress dashboard.
- Access to your hosting control panel (cPanel, Plesk, or custom panel).
- A recent full backup of your WordPress files and database.
- Optional but recommended: a staging site for testing changes.
Step 1: Benchmark Your Current WordPress Blog Speed
You can’t improve what you don’t measure. Start by benchmarking your current blog performance so you can see which changes have the biggest impact.
- Open an incognito/private browser window.
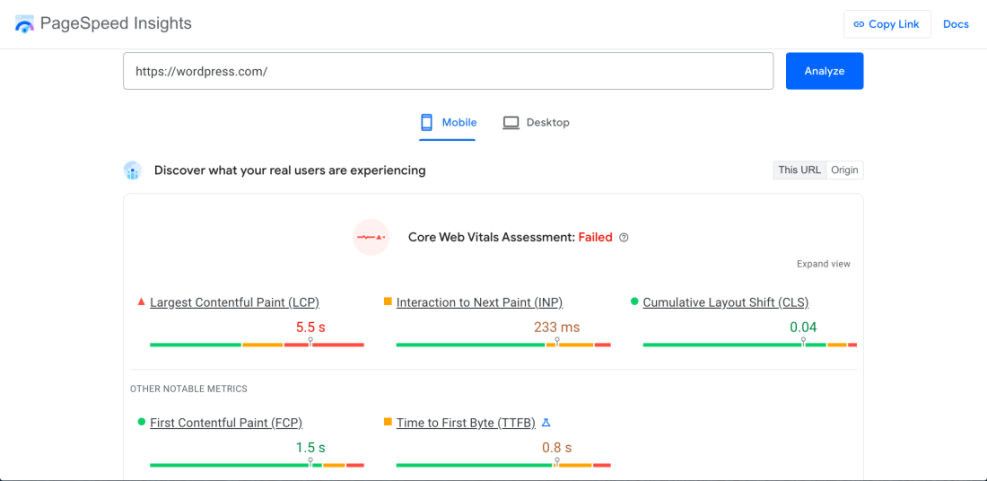
- Test your homepage and a popular blog post using tools such as PageSpeed Insights, GTmetrix, or WebPageTest.
- Record metrics like load time, Core Web Vitals (LCP, CLS, INP), and overall performance score.
Repeat the same test on mobile and desktop. Save screenshots or export reports so you can compare after each optimization round.
Checkpoint: You should now have a baseline report for at least your homepage and one single post, with notes on what the tools say is slowing things down (images, render-blocking scripts, server response time, etc.).
Step 2: Fix Slow Hosting and PHP Limits
If your server is slow, no amount of front-end tweaks will fully fix your performance problems. Many WordPress blogs run on overloaded shared hosting plans with outdated PHP versions.
- In your WordPress dashboard, go to Tools → Site Health → Info and check:
- PHP version (aim for the latest stable version supported by WordPress).
- Server type (Apache, Nginx, LiteSpeed, etc.).
- Memory limit and max execution time.
- In your hosting control panel, switch to a newer PHP version if available (e.g., PHP 8.x) and increase memory limit if your host allows it.
- If your Time to First Byte (TTFB) is high, consider upgrading your plan or moving to a specialized WordPress host.
For detailed guidance on choosing a better plan, see how to choose the right WordPress hosting and evaluate your current provider against those criteria.
Checkpoint: Your blog should now be running on a modern PHP version with reasonable memory and resource limits, and server response time should be better in your test reports.
Step 3: Optimize Your Theme and Blog Layout
Your theme controls the layout and many scripts/styles loaded on every page. Heavy sliders, animations, and complex layouts can slow down a content-focused blog.
- In the WordPress dashboard, go to Appearance → Themes and confirm you are using a performance-conscious theme. If your current theme is bloated, consider switching to a lighter one.
- Go to Appearance → Customize (or the theme options panel if using Jannah or similar) and:
- Disable homepage sliders or carousels if they are not critical.
- Limit the number of posts shown on archive pages (e.g., 6–10 instead of 20+).
- Show post excerpts instead of full content on category and tag archives.
- Check Settings → Reading and ensure your homepage is set up efficiently (static page vs. latest posts) for your blog structure.
Checkpoint: Your homepage and archives should now load fewer posts, have less clutter, and your performance reports should show fewer DOM elements and lighter page weight.
Step 4: Configure Caching and a CDN
Caching and CDN (Content Delivery Network) are must-haves for a WordPress blog with growing traffic. They reduce server load and deliver content faster to visitors around the world.
- Install a reputable caching plugin from Plugins → Add New (choose one caching plugin only).
- Enable page caching and browser caching in the plugin settings.
- Set cache expiration (TTL) to a reasonable time (e.g., several hours to a day) for blog content.
- Connect your site to a CDN (via your caching plugin or CDN provider’s plugin) and ensure images, CSS, and JS are served from CDN URLs.
Checkpoint: Your performance tools should now report better server response times and faster repeat views, especially for visitors in different regions.
Step 5: Compress and Lazy Load Blog Images
Blog posts are often heavy on images—featured images, screenshots, and graphics. Unoptimized images are one of the most common reasons WordPress blogs load slowly.
- Before uploading new images, resize them to the maximum width needed on your site (often 1200–1600px for full-width blog images).
- Use a compression tool (desktop app, web app, or plugin) to reduce file size without visible quality loss.
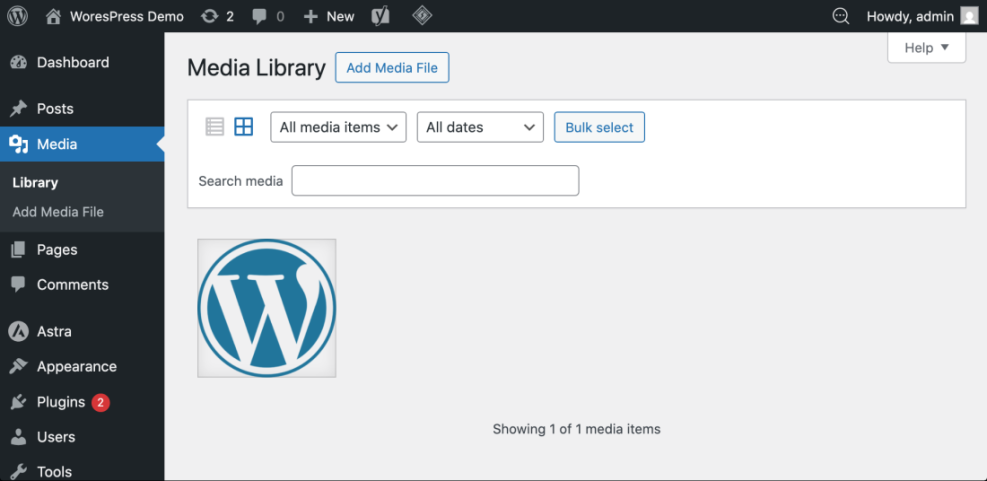
- Install an image optimization plugin to compress existing Media Library images in bulk.
- Enable lazy loading (via your optimization or caching plugin) so offscreen images load only when the user scrolls to them.
For a deeper walkthrough of formats, compression levels, and plugin settings, see how to optimize images for WordPress and apply those best practices specifically to your blog posts.
Checkpoint: Your test reports should now show significantly smaller total page size, and image-related warnings (e.g., “properly size images”, “serve images in next-gen formats”) should be reduced or resolved.
Step 6: Reduce JavaScript, CSS, and Third-Party Scripts
Every plugin and third-party service can add extra JS and CSS files. Over time, this can turn your blog into a tangle of render-blocking assets.
- Go to Plugins → Installed Plugins and identify plugins that are not essential (sliders, social feed widgets, popups, etc.). Deactivate and delete any you don’t truly need.
- Use your caching or optimization plugin’s “minify” and “combine” options carefully to reduce the number of CSS/JS files where safe.
- Avoid loading heavy third-party scripts on every page (e.g., chat widgets, marketing pixels, social embeds) if they are only needed on specific pages.
- Keep only one analytics script if possible.
- Limit the number of ad networks and tracking pixels.
- Replace embedded social feeds with simple links or lightweight share buttons.
Checkpoint: Your waterfall charts in testing tools should now show fewer JS/CSS requests, and the “reduce JavaScript execution time” warnings should be less severe.
Step 7: Clean Up Your Database and Revisions
Busy blogs accumulate post revisions, trashed posts, expired transients, and other database overhead that can slow down queries and admin screens.
- Install a reputable optimization plugin or use your caching plugin’s database cleanup feature.
- Clean up:
- Post revisions and auto-drafts.
- Trashed posts, pages, and comments.
- Expired transients and orphaned options.
- Limit the number of revisions per post by adding a setting in wp-config.php if needed.
If you are comfortable with the command line and have WP-CLI available, you can run basic maintenance from an SSH terminal:
# Run in SSH terminal where WP-CLI is installed
wp db optimize
wp transient delete --all
Checkpoint: Your database size should be smaller, and both the front-end and WordPress admin should feel more responsive, especially when editing posts or loading long archives.
Step 8: Improve Core Web Vitals on Key Blog Templates
For blogs, Core Web Vitals issues often show up on the homepage, category archives, and single post templates. Fixing them improves both user experience and SEO.
- Use your testing tool to identify which templates have the worst LCP, INP, and CLS scores.
- Improve LCP by:
- Using a smaller, optimized featured image above the fold.
- Reducing heavy sliders or hero sections.
- Ensuring critical CSS is loaded early via your optimization plugin.
- Improve CLS by:
- Setting explicit width and height for images and ad slots.
- Avoiding layout-shifting elements (late-loading ads, large fonts, or injected banners).
- Improve INP by:
- Reducing heavy JavaScript on interactive elements (menus, search, popups).
- Deferring non-critical scripts to load after user interaction where appropriate.
Checkpoint: Your field data (from real users) will take some time to reflect improvements, but lab tests should already show better Core Web Vitals scores on your most important blog pages.
Step 9: Build a Simple Ongoing Performance Workflow
Performance optimization is not a one-time project. As you publish new posts, add plugins, or change themes, your WordPress blog can gradually slow down again.
- Monthly: Run speed tests on your homepage and a few key posts, and log results in a simple spreadsheet.
- Quarterly: Review installed plugins and remove any that are unused or duplicated in functionality.
- Before big changes: Test new themes, page builders, or major plugins on a staging site and measure performance impact.
- After big changes: Clear all caches, re-test, and ensure there are no new Core Web Vitals regressions.
Checkpoint: You now have a repeatable process for keeping your blog fast as it grows, not just a one-time cleanup.
Bringing Your WordPress Blog Up to Speed
Speeding up WordPress blog performance is about tackling the biggest bottlenecks in a structured way—starting with hosting and theme choices, then layering on caching, image optimization, and asset cleanup.
By benchmarking your site, improving server response, simplifying your layout, optimizing images, and maintaining a regular performance workflow, you’ll give readers a smoother experience and send stronger signals to search engines.
Follow these steps one at a time, re-test after each group of changes, and your WordPress blog can go from sluggish to fast-loading without needing to rebuild everything from scratch.
Further Reading
- WordPress Performance Checklist for Bloggers
- WordPress Speed Optimization Checklist for Busy Site Owners
- WordPress Performance Tuning Beginner Guide
- WordPress Speed Test Checklist