WooCommerce Caching Setup Guide
How to configure WooCommerce caching for a fast, stable, and secure online store
SEO and UX, and where you will see it in daily work.”>WooCommerce stores live and die by speed. If your product pages, cart, and checkout feel sluggish, visitors abandon their carts and your conversion rate drops. But if you enable caching without understanding how WooCommerce works, you can accidentally cache dynamic data and break orders, carts, and customer accounts.
In this guide you will set up WooCommerce-friendly caching step by step: choosing the right caching plugin, configuring safe page rules, adding object caching, and integrating a CDN without touching sensitive flows like cart and checkout. If you need a broader overview for non-commerce sites, you can also review the complete WordPress caching setup guide before focusing on your store-specific configuration.
By the end, you will have a fast, stable WooCommerce store where pages load quickly, checkouts remain reliable, and your cache strategy is easy to maintain as your catalog and traffic grow.
Prerequisites
Before you touch any caching settings, make sure your WooCommerce store has a few basics in place. This reduces risk and makes it easier to roll back if something goes wrong.
- An existing WordPress site with WooCommerce installed and activated.
- Admin access to the WordPress dashboard and your hosting control panel or server panel.
- A recent full backup of your files and database (ideally via a reliable backup plugin or your host).
- Ability to clear or disable any built-in hosting cache (often via cPanel, Plesk, or a hosting plugin).
- Optional but recommended: a staging site to test caching changes before pushing them live.
Step 1: Understand WooCommerce Caching Basics
WooCommerce is different from a simple blog because many pages are dynamic. Caching the wrong content can cause carts not to update, show the wrong prices, or leak customer data between sessions.
At a high level, you will work with three layers of caching:
- Page cache (full-page caching): Stores the rendered HTML of non-logged-in pages like category listings and product pages.
- Object cache: Stores database query results, improving how quickly WooCommerce can fetch products, cart fragments, and other data.
- Browser/CDN cache: Stores static assets (images, CSS, JS) closer to the visitor, cutting down on load time.
Keep this mental model in mind as you configure plugins and hosting options. Every change should respect the distinction between static catalog content and dynamic user flows.
Step 2: Choose a WooCommerce-Compatible Caching Plugin
Most WooCommerce sites rely on a caching plugin plus any server-level caching from the host. The plugin gives you granular control over page rules, preloading, and exclusions that are critical for eCommerce.
- Log in to your WordPress admin dashboard as an administrator.
- Go to Plugins → Add New.
- Search for a reputable caching plugin known to support WooCommerce (for example, plugins that mention WooCommerce compatibility in their documentation).
- Click Install Now, then Activate.
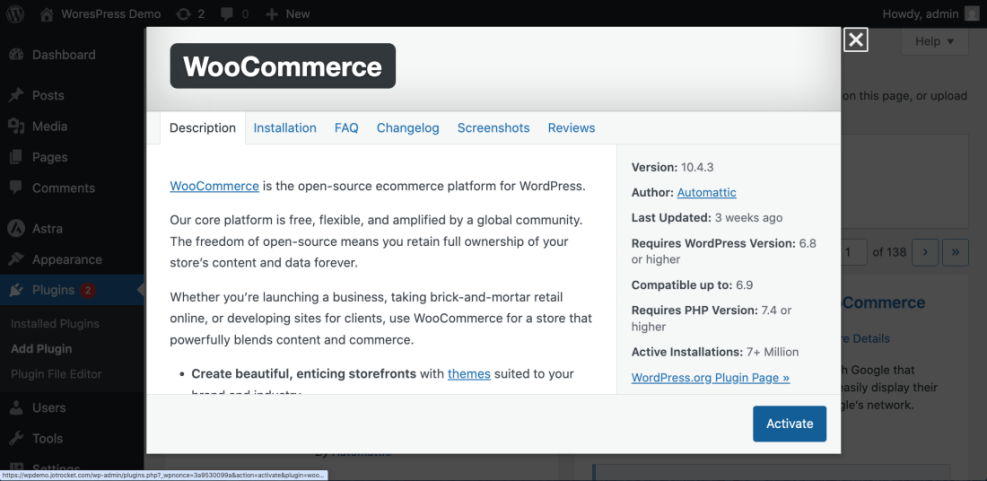
After activation, your caching plugin typically adds a new menu in the admin sidebar (for example, under Settings or as its own top-level item). This is where you’ll configure page cache, exclusions, and preloading in later steps.
Step 3: Configure Page Caching and Exclusions
Page caching is where you get the biggest performance gain, but also where WooCommerce sites most often break. The goal is to cache catalog views and product pages while excluding dynamic pages and cookies that indicate user-specific content.
3.1 Enable basic page caching
- Open your caching plugin settings from the WordPress admin menu.
- Locate the Page Caching or Cache Pages option and turn it On for your site.
- Set cache expiration to a reasonable value (for example, 4–12 hours for most stores) so that inventory and pricing updates are not excessively delayed.
At this stage, the plugin starts storing HTML copies of public pages like the homepage, category archives, and single product pages for non-logged-in visitors.
3.2 Exclude critical WooCommerce pages
Next, you must explicitly exclude any page where user-specific data appears. This usually includes:
- Cart page (often at
/cart/). - Checkout page (often at
/checkout/). - My Account page (often at
/my-account/). - Any custom login or customer dashboard pages.
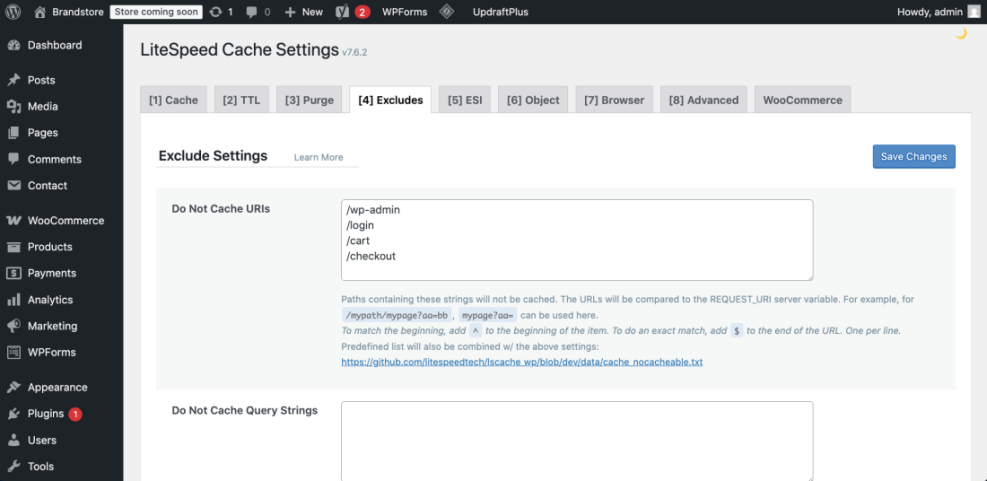
- In your caching plugin, find the section for Never Cache URLs or Exclude Pages.
- Add the paths for your cart, checkout, and My Account pages (you can copy them from Pages → All Pages in WordPress).
- Save changes and clear the cache using the plugin’s Clear Cache button.
3.3 Exclude cookies and user roles when needed
Many caching plugins also let you skip caching when certain cookies or user roles are present. This is important for logged-in customers, store managers, and admins.
- Locate Do Not Cache for Logged-in Users or similar setting and enable it.
- If your plugin supports it, add WooCommerce-specific cookies (such as cart or session cookies) to the “do not cache” list so that dynamic fragments stay fresh.
- Save and clear cache again.
Step 4: Enable Object Caching for WooCommerce Data
Object caching speeds up repeat database queries, which WooCommerce uses heavily for products, orders, and cart fragments. A persistent object cache like Redis or Memcached can significantly reduce server load during traffic spikes.
4.1 Confirm host support and install plugin
- Ask your host or check their documentation to see if Redis or Memcached is available on your plan.
- If Redis is supported, enable it in your hosting control panel or request activation via support.
- In WordPress, go to Plugins → Add New and install a Redis object cache plugin that integrates with WordPress.
- Activate the plugin and click Enable Object Cache in its settings page.
For more background on how Redis works in WordPress, you can follow the Redis object cache beginner guide and then return here to finalize your WooCommerce-specific tweaks.
4.2 Verify that object caching is working
- Open the object cache plugin settings and look for a status indicator like “Connected” or “Object cache: Enabled.”
- Browse a few product pages as a regular visitor in an incognito window.
- Refresh the object cache status page to confirm cache hits are increasing.
If you notice errors, disable the object cache plugin and contact your host. Object cache misconfiguration can cause intermittent errors or 500 responses, especially on busy stores.
Step 5: Add a CDN Without Caching Dynamic Pages
A content delivery network (CDN) helps serve your static assets (images, CSS, JS) from locations closer to your shoppers. For WooCommerce, the key is to cache only static content and avoid caching HTML for cart, checkout, or account pages.
5.1 Enable CDN for static assets
- Sign up with a reputable CDN provider (or enable the CDN feature bundled with your host if available).
- Follow their onboarding steps to point your domain or configure a CDN URL for static assets.
- In your caching plugin, locate the CDN settings and enter the CDN URL (for example,
https://cdn.yourstore.com). - Enable CDN for images, CSS, and JavaScript files but do not enable “full-page caching” of HTML at the CDN level unless you know how to configure advanced bypass rules.
5.2 Add page rules or bypass for dynamic URLs
If your CDN offers page rules or cache level controls, add rules so that cart, checkout, and account URLs bypass the CDN cache or receive minimal caching.
- Set
/cart/*,/checkout/*, and/my-account/*to “Bypass cache” on your CDN. - Ensure query strings and cookies are respected when determining cache keys.
- Clear your CDN cache after changing rules.
Step 6: Test Your WooCommerce Cache Safely
Once caching is configured, you need to test the full customer journey. This means checking performance, but also verifying that everything behaves correctly for both guest and logged-in users.
6.1 Test as a guest shopper
- Open an incognito or private browsing window.
- Browse your homepage, category pages, and a few product pages. They should feel faster and consistent on repeated loads.
- Add items to cart, visit the cart page, and proceed to checkout.
- Ensure quantities, totals, discounts, and shipping options update when you change the cart.
6.2 Test as a logged-in customer and admin
- Create a test customer account and log in from a different browser or device.
- Repeat the browse → add to cart → checkout flow and confirm the experience remains correct and personalized.
- Log in as an admin and test the My Account and any custom dashboard pages.
6.3 Compare performance before and after caching
Use tools like your browser’s DevTools or third-party performance tests to compare load times before and after enabling cache. Focus on your most important revenue-driving pages: homepage, top category, and best-selling product.
Step 7: Maintain and Monitor Your WooCommerce Cache
Caching is not a one-time switch. As you add products, update prices, or install new plugins, you should adjust your cache settings and clear cached content strategically.
7.1 Use smart purging and preloading
- Enable Automatic Cache Purge options so that when you update a product or page, related cache entries are cleared.
- Use Cache Preload or Warmup features to pre-cache high-traffic pages (home, category, best-sellers) after purges.
- Schedule preloading during low-traffic hours to reduce impact on live shoppers.
7.2 Watch for common cache-related issues
- Customers reporting stale carts or wrong prices.
- Checkout errors appearing only for some users or at random times.
- Admin changes that do not appear on the front end until cache is cleared.
When you see these signs, temporarily disable caching, reproduce the problem, then re-enable caching with adjusted exclusions.
7.3 Pair caching with broader performance work
To get the most out of your cache, combine it with performance best practices like image optimization, database cleanup, and efficient hosting. For example, following comprehensive WooCommerce performance tips for faster stores along with proper caching will deliver a smoother experience during peak sales.
Locking In a Stable, Fast WooCommerce Store
By now you have a WooCommerce-specific caching setup that accelerates your catalog, product pages, and static assets while leaving carts, checkout, and sensitive account pages dynamic and safe. You’ve layered page cache, object cache, and CDN rules in a way that respects how customers actually shop.
Going forward, treat caching as part of your ongoing maintenance: test changes on staging, watch for symptoms of over-aggressive caching, and refine your rules as your store grows. With a careful caching strategy, your WooCommerce store can handle more visitors, more orders, and bigger campaigns without sacrificing reliability.
Further Reading
- WooCommerce Optimization: Tuning Your Store for Better Performance
- WooCommerce Performance: Faster Checkouts for Higher Conversions
- Caching Plugin Comparisons for WordPress Performance
- WordPress CDN Setup Guide for Faster Asset Delivery
Frequently Asked Questions
Why did my WooCommerce cart stop updating after enabling caching?
/cart/, /checkout/, and /my-account/ are all excluded. Also enable “Do not cache for logged-in users” and remove any CDN or server-level page rules that cache these URLs.