A WordPress Developer is a web professional who builds, customizes, and maintains websites powered by WordPress. They turn designs and business requirements into working code inside themes, plugins, and the WordPress dashboard.
By the end of this guide, you will know what a WordPress Developer does, which skills you need, and the practical steps to start working on real WordPress development projects.
What You Need Before You Become a WordPress Developer
- A computer where you can install a code editor and local server tools.
- Basic familiarity with using WordPress as a site owner or editor.
- An existing WordPress site or a test installation (local or on cheap hosting).
- Time to practice coding on a staging or local copy instead of a live site.
Understand the WordPress Developer Role
To understand the role of a WordPress Developer, think of them as the technical partner for your website. They use PHP, JavaScript, HTML, CSS, and the WordPress API to add features, fix bugs, and keep sites fast and secure.
- Start from a business goal (for example, “we need a booking system” or “we want a multilingual site”).
- Review the current setup: theme, plugins, hosting, and performance.
- Decide whether to configure existing plugins, write custom code, or build a full custom theme or plugin.
- Implement the changes, test them on staging, and only then deploy to the live site.
Verify success: You can explain in one sentence how a WordPress Developer turns business needs into code changes inside WordPress.
Learn the Core Skills for WordPress Development
Core WordPress Developer Skills to Learn First
Before you go deep into WordPress development, you need a solid foundation in basic web technologies.
- Start with HTML to understand how content is structured on a page.
- Learn CSS so you can control colors, fonts, and layout.
- Add basic JavaScript to handle interactivity and simple dynamic behavior.
- Study PHP, the main language used to power WordPress themes, plugins, and core.
- Get familiar with MySQL, which stores posts, users, and settings in the database.
- Use Git so you can track changes and safely roll back mistakes.
Verify success: You can open a theme file, recognize the HTML structure, CSS classes, and simple PHP logic without feeling completely lost.
Set Up a Local Environment for WordPress Development
Local WordPress Developer Environment Setup Steps
A local development environment lets you experiment freely without breaking a live website.
- Install a code editor such as Visual Studio Code or PhpStorm.
- Install a local server tool such as Local, XAMPP, or MAMP.
- Create a new local WordPress site in the tool (choose site name, PHP version, and database settings).
- Visit the local site URL and complete the standard WordPress installation steps.
- Log in to the dashboard at yourlocalsite.test/wp-admin (or similar, depending on the tool).
Verify success: You can log in to a local WordPress site, edit files in your editor, and see changes immediately in the browser.
Start with Safe Theme Customization for WordPress Development
Create a Child Theme for WordPress Development
Most new WordPress Developers begin by changing how a site looks. The safest way to do this is with a child theme.
- In your local site files, open
/wp-content/themes/. - Create a new folder, for example my-theme-child.
- Add a
style.cssfile with a proper theme header referencing the parent theme. - Add a
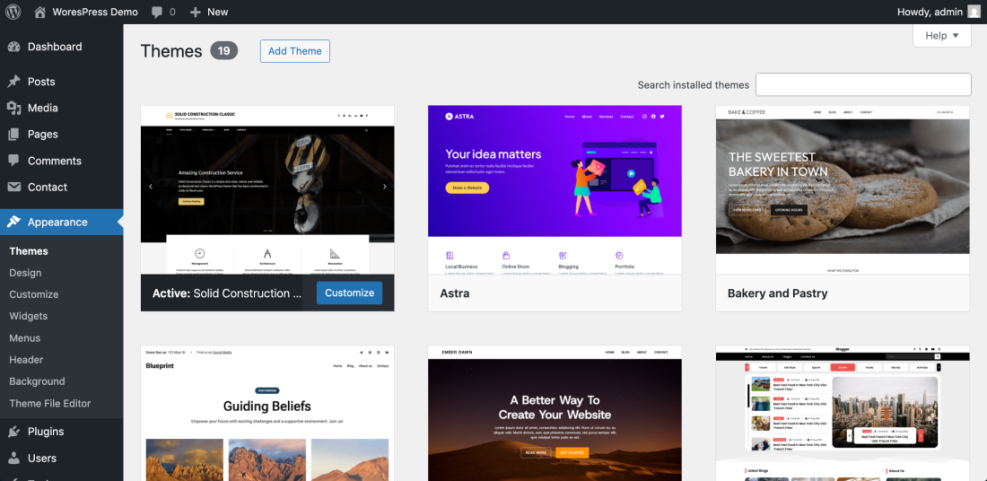
functions.phpfile and enqueue the parent theme styles. - Go to Appearance » Themes and activate your child theme.
Customize WordPress Templates and Styles
- Copy a template file (for example
single.php) from the parent theme into the child theme folder. - Edit headings, markup, or loops inside the copied template file.
- Add custom CSS rules in your child theme
style.cssto tweak spacing, fonts, or colors. - Refresh your local site and confirm the visual changes appear only when the child theme is active.
Verify success: Your design changes stay in place even when the parent theme gets updated.
Build Your First Simple WordPress Plugin as a Developer
Create a Basic WordPress Plugin
Plugins are where WordPress Developers add features that should not depend on a theme.
- Open
/wp-content/plugins/in your local site files. - Create a new folder named my-first-plugin.
- Inside that folder, create my-first-plugin.php.
- Add a simple plugin header and hook into a basic action:
/**
 * Plugin Name: My First Plugin
 * Description: Example plugin for learning WordPress development.
 */

function mfp_add_footer_text() {
    echo '<p style="text-align:center;">Thanks for visiting my site!</p>';
}
add_action( 'wp_footer', 'mfp_add_footer_text' );
- Go to Plugins » Installed Plugins and activate My First Plugin.
- Visit the frontend and scroll to the bottom of the page to see the new footer text.
Verify success: When you deactivate the plugin, the extra footer text disappears from the site.
Add Custom Post Types in WordPress Development
Register a Custom WordPress Post Type
Many client projects require structured content such as “Projects,” “Courses,” or “Testimonials.” A WordPress Developer builds these using custom post types.
- Open your child theme
functions.phpfile or a dedicated functionality plugin. - Add a new function that registers a custom post type:
function wph_register_project_post_type() {
    register_post_type(
        'project',
        array(
            'label'        => 'Projects',
            'public'       => true,
            'show_in_rest' => true,
            'supports'     => array( 'title', 'editor', 'thumbnail' ),
        )
    );
}
add_action( 'init', 'wph_register_project_post_type' );
- Save the file and refresh your WordPress dashboard.
- Look for a new Projects menu item in the admin sidebar.
- Add a few sample “Project” posts, each with a title, description, and featured image.
Verify success: You can create and manage “Projects” separately from regular blog posts and pages.
SEO Options a WordPress Developer Should Know
As a WordPress Developer, you do not have to be an SEO guru, but you must know how titles, meta descriptions, and social tags are controlled. Here are the common methods you will see.
| Method | Where You Use It | Main Purpose |
|---|---|---|
| SEO Plugin (Yoast, Rank Math) | WordPress dashboard » SEO settings + post editor | Quickly manage title, meta description, and social tags for all content with user-friendly controls. |
| Theme SEO Options | Appearance » Customize or theme options panel | Use built-in theme settings to set basic meta tags without extra plugins (feature varies by theme). |
| Manual Code in Theme | Child theme functions.php or header.php | Add custom meta tag logic using PHP for advanced or lightweight setups. |
| Custom Fields + Code | Custom fields in editor + wp_head hook | Store per-page meta values in fields and output them via a custom function. |
| SEO Plugin Social Settings | SEO plugin » Social / Facebook / Twitter tabs | Fine-tune Open Graph and Twitter Card tags for better social sharing previews. |
Verify success: You can tell a client where their site’s meta tags are coming from and how to change them.
Create a Portfolio of WordPress Development Projects
A WordPress Developer is hired based on real work, not just theory. Build a small portfolio that proves you can solve problems.
Plan and Build WordPress Developer Practice Projects
- List 3–5 small project ideas (for example, a portfolio site, a small directory, or a simple membership area).
- For each project, decide what custom post types, taxonomies, or plugin configurations you will need.
- Build each project on a local or staging site using child themes and custom plugins where needed.
Publish Your Best WordPress Developer Work
- Deploy your best practice projects to live domains or subdomains you control.
- Take screenshots of the frontend and admin views that highlight your custom work.
- Create a portfolio page describing what you built, which tools you used, and what problems you solved.
Verify success: You have at least 2–3 live examples ready when someone asks, “Can you show me WordPress sites you’ve built or customized?”
Next Steps in Your WordPress Developer Journey
You now have a clear picture of what a WordPress Developer does and how to start: learn the core web stack, set up a local environment, customize themes, build simple plugins, add custom post types, and understand basic SEO options.
From here, focus on writing cleaner code, following WordPress coding standards, improving performance, and learning more about security. The more small real projects you complete, the faster you will grow into a confident, hireable WordPress Developer.