Learning how to update WordPress plugins safely keeps your site secure, fast, and compatible. When you follow a clear update workflow, you reduce the risk of crashes, errors, or conflicts every time new versions are released.
In this tutorial you will plan a safe update routine, create backups, use a staging site, run plugin updates from the dashboard or WP CLI, and verify that everything still works before and after each change.
What You Need to Start
- Administrator access to your WordPress dashboard.
- Login access to your hosting control panel or backup tool.
- A reliable backup solution for your WordPress site.
- Optional a staging site where you can test updates safely.
- Terminal or SSH access if you want to use WP CLI.
Step 1: Plan a Safe Plugin Update Routine
Before you click any update buttons, define when and how you will update WordPress plugins. A simple routine prevents rushed updates during busy traffic periods and reduces downtime risk.
- Choose low traffic time windows for updates, such as evenings or weekends based on your analytics.
- List business critical plugins such as ecommerce, membership, booking, or custom forms that need extra testing.
- Decide how often you will run updates, for example once a week or every two weeks.
- Document your routine in a simple checklist so you repeat the same steps every time.
To verify success, confirm that you have a written checklist and that your team or clients know when updates will happen.
Step 2: Back Up Your Site and Use a Staging Site
Backups and staging are your safety net. If a plugin update causes errors, you can restore the backup or test changes on a clone before they reach visitors.
- Log in to your hosting panel or backup plugin and locate the Backup or Snapshots section.
- Create a new full backup that includes files and database, then wait until it completes successfully.
- If your host offers staging, open the Staging or Development area and create a staging copy of your live site.
- Note the staging URL and admin login details so you can test plugin updates there first.
For more detailed backup planning, see How to choose the best WordPress hosting.
Verify success by restoring a small test backup or logging in to your staging site and confirming it matches your live site.
Step 3: Review Plugin Compatibility and Changelogs
Checking compatibility and changelogs before you update WordPress plugins helps you avoid known conflicts and surprises. You can decide which updates are safe and which should wait.
- In your WordPress dashboard, navigate to Plugins » Installed Plugins.
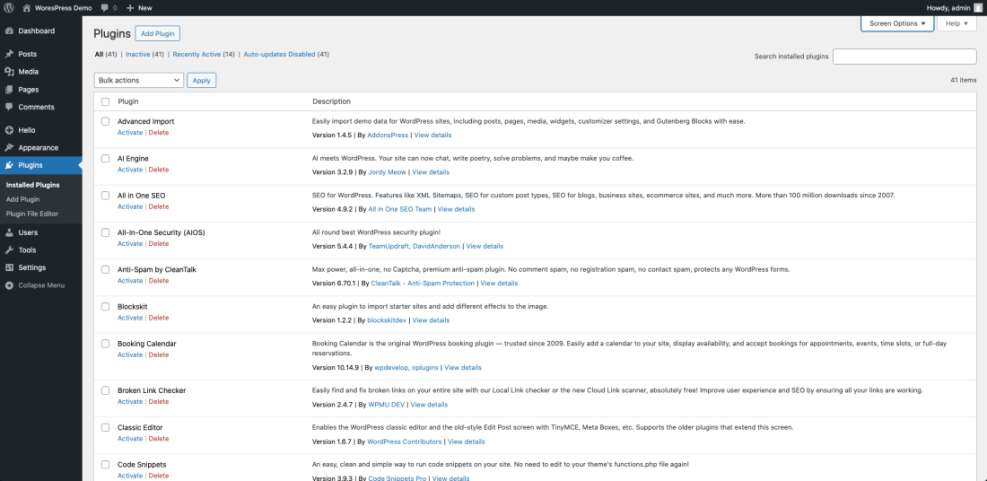
- Look for plugins with an update notice and read the View version details or View details link.
- Check if the new version is marked as compatible with your version of WordPress and PHP.
- Scan the changelog for breaking changes, removed features, or major rewrites that may require extra testing.
- Prioritize security updates first, especially if the notes mention vulnerabilities or exploits.
Verify success by confirming that you understand what each update changes and that no plugin shows warnings about incompatible WordPress or PHP versions.
Step 4: Update WordPress Plugins from the Dashboard
The WordPress dashboard is the safest place for most users to update WordPress plugins. You can update plugins one by one and quickly spot any issues.
Here is a quick comparison of the main ways you can update plugins and where you will use each method:
| Method | Where You Use It | Main Purpose |
|---|---|---|
| Single Plugin Update | Plugins » Installed Plugins — click “Update now” on one plugin | Safely update one plugin at a time so you can quickly identify which update causes issues. |
| Dashboard Updates Screen | Dashboard » Updates | See all available plugin updates in one place and run them in small batches. |
| Bulk Plugin Updates | Plugins » Installed Plugins — select multiple plugins | Speed up maintenance by updating several low-risk plugins at once. |
| Automatic Plugin Updates | Toggle Enable auto-updates on the plugins list | Let WordPress keep trusted plugins up to date without manual clicks. |
| WP CLI Updates | Server terminal / SSH using wp plugin update | Manage updates via command line, ideal for developers or multiple sites. |
- From the admin area, go to Dashboard » Updates to see all available updates in one place.

- Scroll to the Plugins section and select one plugin you want to update.
- Click Update Plugins and wait until the progress message shows that the update completed.
- Open a new browser tab and visit your homepage, a few key internal pages, and any critical forms or checkout flows.
- Repeat the process for the next plugin, updating and testing in small batches to isolate any problems.
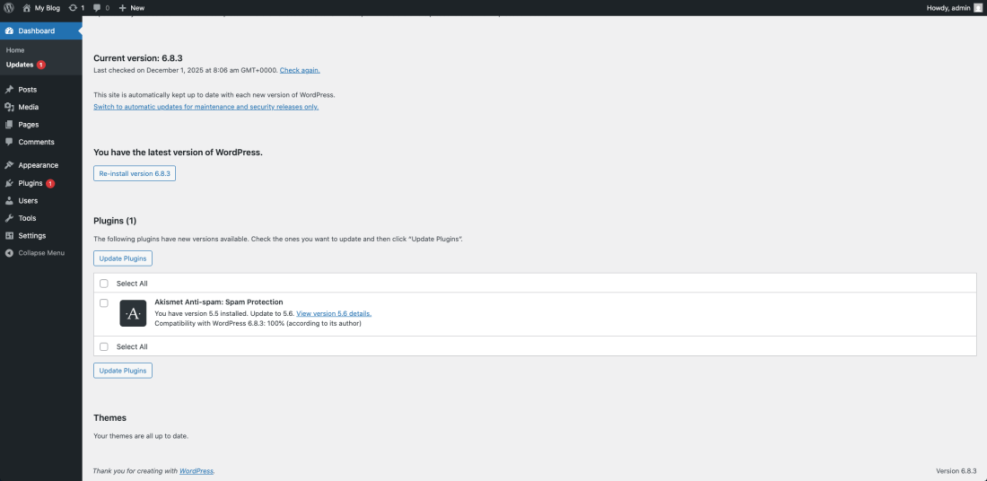
Verify success by confirming that the plugin now shows the latest version number on the Installed Plugins page and your site still loads without errors.
Step 5: Use Bulk Updates and Auto Updates Carefully
Bulk and automatic updates save time but can also hide which plugin caused an issue. Use them only after you trust your backup and staging workflow.
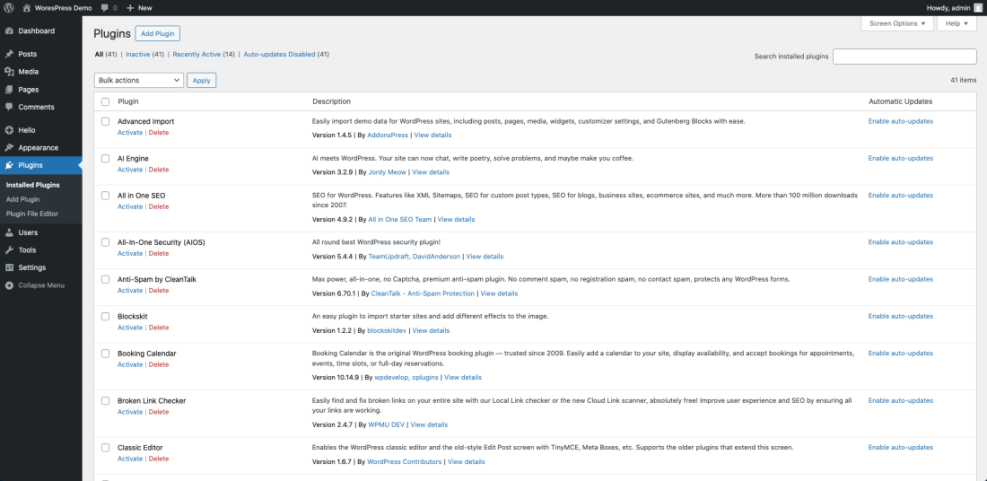
- Navigate to Plugins » Installed Plugins in your WordPress dashboard.
- Select several low risk plugins, such as SEO tools or utilities that do not process payments.
- Choose Update from the Bulk actions dropdown and click Apply.
- After the updates finish, clear your cache if you use a caching plugin and reload key pages.
- To enable auto updates for a specific plugin, click Enable auto-updates next to that plugin row.
Verify success by checking that your selected plugins show Auto-updates enabled and that no new PHP errors or visual issues appear on the site.
Step 6: Update Plugins with WP CLI Optional
WP CLI lets you update WordPress plugins quickly from the command line, which is helpful for developers or administrators managing multiple sites.
- Connect to your server using SSH from your terminal application.
- Navigate to the WordPress root directory that contains the wp-config.php file.
- Run the following command to see all outdated plugins.
wp plugin list --update=available- When you are ready, update a single plugin by running:
wp plugin update plugin-slug-here- To update all plugins at once, use:
wp plugin update --allVerify success by visiting the WordPress Installed Plugins screen and confirming the version numbers match the latest releases.
Step 7: Test Your Site After Plugin Updates
Thorough testing after you update WordPress plugins ensures that visitors do not encounter broken pages, missing styles, or checkout failures.
- Open an incognito or private browsing window to avoid cached content.
- Test your homepage, main navigation, and at least a few important content pages.
- Submit a test form, place a test order, or complete a signup flow if your site uses ecommerce or memberships.
- Check your error logs in your hosting control panel or use a logging plugin to spot new PHP warnings.
- If you find problems, disable the last updated plugin and test again to confirm it is the cause.
If you run into serious issues, follow the steps in Common WordPress backup errors and how to fix or restore your latest backup.
Verify success by confirming that all key user journeys work, no new errors appear in logs, and your performance scores remain stable.
Conclusion You Are Ready to Go
You now have a complete workflow to update WordPress plugins without guesswork. By planning your routine, backing up first, using staging where possible, updating in small batches, and testing carefully, you greatly reduce the risk of downtime or lost revenue.
As your site grows, keep refining your process so plugin updates become a normal, low stress part of your regular WordPress maintenance.
Further Reading
- Beginner checklist optimizing WordPress blog posts
- Install WordPress step by step
- Beginner guide to WordPress speed optimization
- Beginner WordPress security best practices guide
- How to use ai in WordPress
For official reference on managing plugins, review the WordPress.org documentation at Managing Plugins.