WordPress gives you a big SEO head start, but it doesn’t magically optimize your site on its own. If you skip the right settings, ignore on-page optimization, or let performance slide, your content will struggle to rank even if it’s great.
In this guide, you’ll learn exactly how to do SEO on WordPress step by step. We’ll walk through sitewide settings, SEO plugins, on-page optimization, speed and technical fixes, internal linking, and tracking — all assuming you’re using the Classic Editor and a theme like Jannah.
If you’re brand new to the topic, you may also want a quick primer on what WordPress SEO actually means before you dive into the workflow below.
Prerequisites
Before you start, make sure you have everything you need so you don’t get stuck halfway through the setup.
- Admin access to your WordPress website (wp-admin).
- A modern, responsive theme (such as Jannah) already installed and activated.
- Permission to install and configure plugins (or a developer who can do it for you).
- A Google account you can use for Google Analytics and Google Search Console.
- Basic understanding of your target audience and the topics you want to rank for.
Step 1: Configure Core WordPress SEO Settings
Your SEO work will be much easier if the basic WordPress settings are clean and search friendly. This is the foundation for all your later optimization.
- Set a clear site title and tagline
Go to Settings → General.- Use your brand name (and possibly a short descriptor) for Site Title.
- Keep the Tagline short, descriptive, and relevant — or leave it blank instead of using defaults like “Just another WordPress site”.
- Check search engine visibility
Still in Settings → Reading, ensure “Discourage search engines from indexing this site” is unchecked. If it’s checked on a live site, Google may not index your pages. - Choose SEO-friendly permalinks
Go to Settings → Permalinks and select Post name. This creates short, clean URLs that are easier for users and search engines to understand.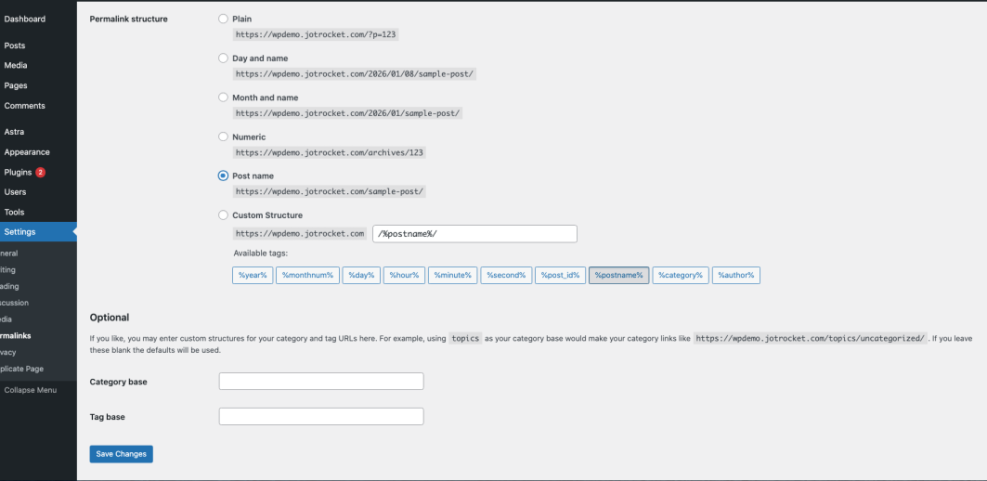
Configure your WordPress permalinks to the ‘Post name’ structure for optimal SEO, as shown in the settings. Warning: If you change permalinks on an existing site, you may need redirects to avoid 404 errors. Talk to your developer or SEO consultant before changing structures on a mature site. - Set your preferred URL and timezone
In Settings → General, make sure your WordPress Address (URL) and Site Address (URL) are consistent (either with or withoutwww). Set the correct timezone so scheduled posts and reports line up with your working hours.
Once this step is complete, your site will have a clean base for SEO: human-readable URLs, proper visibility, and consistent branding in titles.
Step 2: Install and Configure an SEO Plugin
WordPress does not include everything you need for modern SEO out of the box. An SEO plugin adds essential features like XML sitemaps, meta tags, social sharing optimization, and content checks.
- Pick a reputable SEO plugin
Popular choices include Yoast SEO, Rank Math, and All in One SEO. Any of these can work well if you configure them properly — choose one and stick with it rather than using several at once. - Install and activate the plugin
Go to Plugins → Add New, search for your chosen plugin by name, click Install Now, then Activate. - Run the setup wizard
Most SEO plugins include a setup wizard that asks about your site type (blog, business, shop), whether it’s live, and how you want to handle titles, sitemaps, and more. Follow the wizard carefully and choose options that match your site’s purpose.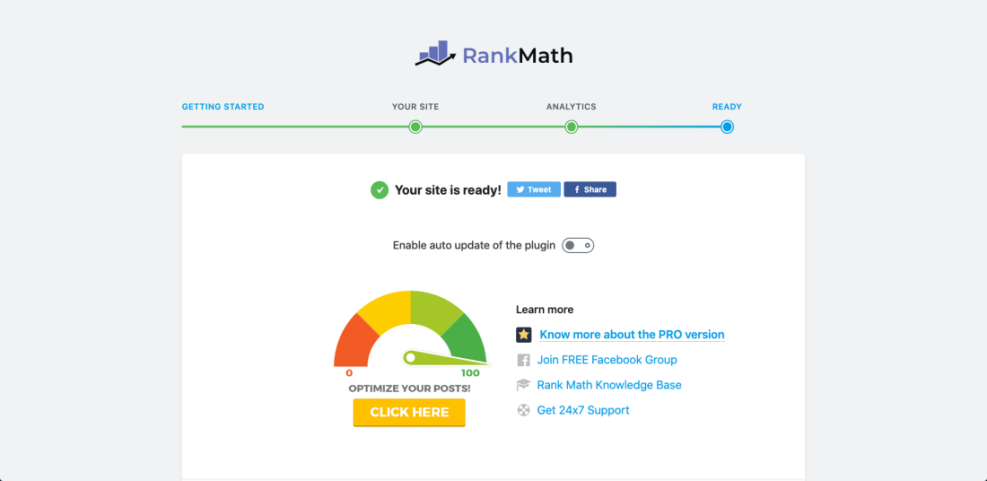
The Rank Math SEO plugin displays the ‘Your site is ready!’ message after successful setup in WordPress. Pro Tip: Use the wizard for the basics, then revisit the plugin’s settings to fine-tune titles, breadcrumbs, and schema once you’ve finished this guide. - Enable XML sitemaps
In your SEO plugin settings, confirm that XML sitemaps are enabled. The plugin will usually provide a sitemap URL (for example,/sitemap_index.xml) which you’ll submit to Google Search Console later. - Configure title and meta templates
Use the plugin’s templates to define how titles and meta descriptions are generated. A simple pattern is:Post Title - Site Name. This keeps your SERP listings consistent and readable.
At this point, your site should automatically generate titles, meta tags, and a sitemap, giving search engines a clearer picture of your content.
Step 3: Optimize Your Posts and Pages for Keywords
On-page SEO is where you tell search engines exactly what each page is about. You’ll use your SEO plugin plus the Classic Editor (or Jannah’s post options) to optimize titles, content, and media for specific keywords.
- Choose a primary keyword for each page
Every important page or post should target one main topic (for example, “WordPress backup strategy”). Make sure it’s something people actually search for and that matches the intent of the content. - Optimize the SEO title and meta description
When editing a post, scroll to your SEO plugin’s meta box under the content.- Use the primary keyword in the SEO title, ideally near the beginning.
- Write a compelling meta description that summarizes the value and encourages clicks.
- Keep both human-friendly and avoid keyword stuffing.
- Use keywords naturally in your content
Include your primary keyword in:- The first 100–150 words (your opening paragraph).
- One or more <h2> or <h3> headings.
- The conclusion or call-to-action.
For a detailed walkthrough of best places to use keywords, check out where to place them in our guide on where to add keywords in WordPress.
- Structure content for readability
Break long text into short paragraphs, use bullet lists for steps or key points, and use headings to divide topics. This helps users read and makes it easier for search engines to understand the content hierarchy. - Optimize images with alt text
Whenever you insert an image into a post, fill out the Alt Text field with a short, descriptive phrase. Include your keyword only when it makes sense. This improves accessibility and gives search engines more context. - Use Jannah and theme options wisely
If you’re using Jannah, take advantage of features like breadcrumbs, featured images, and layout options — but avoid cluttering the page with unnecessary elements that distract from your main content.
Step 4: Improve Technical SEO and Speed
Even perfectly written content can rank poorly if your WordPress site is slow or hard for search engines to crawl. Technical SEO and performance tuning make your site easier to index and more pleasant for visitors.
- Install a caching plugin
Caching plugins create static versions of your pages so they load faster. Configure basic options like page caching, browser caching, and (if available) object caching. Always test changes on a staging site if possible. - Compress and resize images
Large images are one of the most common performance problems. Use an image optimization plugin or your CDN to compress images automatically and serve them in modern formats where possible. - Enable lazy loading and minification
Many performance plugins can delay off-screen images (lazy load) and minify CSS/JS. Turn these features on one by one and test your site for layout issues after each change. - Check mobile responsiveness and Core Web Vitals
Use tools like PageSpeed Insights or your browser’s device tools to confirm your pages look and work well on mobile. If scores are low, prioritize fixing layout shifts, slow images, and bloated scripts. - Clean up unused plugins and themes
Deactivate and delete plugins you don’t use, and remove old themes (except one default theme as a fallback). This reduces potential security issues and sometimes improves performance.
If your site is still slow after these basics, follow a more detailed step-by-step WordPress speed optimization guide to dig deeper into bottlenecks.
Step 5: Build Internal Links and Content Structure
A good WordPress SEO strategy is not just about individual posts — it’s about how those posts connect. Internal links help search engines understand your site’s structure and guide visitors to related content.
- Use categories and tags strategically
Assign each post to one main category that reflects its primary topic. Use tags to group related posts more specifically. Avoid creating dozens of near-empty categories or tags that only apply to one post. - Add internal links to related posts
When you publish or update a post, link to 2–3 relevant articles using descriptive anchor text (for example, “WordPress backup strategy checklist” instead of “click here”). This keeps visitors on your site longer and spreads link equity. - Use menus and widgets to surface key content
In Appearance → Menus, make sure your main navigation highlights your most important pages. Use sidebar or footer widgets to feature popular or cornerstone content rather than random posts. - Audit older posts regularly
Periodically review older content to add new internal links, update outdated information, and ensure they still match your current keyword strategy.
Step 6: Set Up Analytics and Search Console
SEO without measurement is just guesswork. You need analytics to see what’s working and Google Search Console to monitor indexing, queries, and technical issues.
- Connect Google Analytics
Create a property in Google Analytics and add the tracking code to your WordPress site via your SEO plugin, a dedicated analytics plugin, or your theme options (if supported). Verify that page views are being recorded correctly. - Set up Google Search Console
Add and verify your domain in Google Search Console. Use the HTML tag method, DNS record, or one of the supported integrations to prove ownership. - Submit your XML sitemap
In Search Console, go to Index → Sitemaps and submit the XML sitemap URL generated by your SEO plugin (for example,https://yoursite.com/sitemap_index.xml). This helps Google discover and crawl your content more efficiently. - Monitor performance and fix errors
Check Search Console regularly for coverage issues, mobile usability problems, and security alerts. In Analytics, review which pages get the most organic traffic and which keywords are driving clicks.
Over time, use this data to refine your content topics, update underperforming posts, and double down on pages that already rank well.
Turn WordPress Into an SEO-Friendly Growth Engine
Doing SEO on WordPress isn’t about one magic plugin or a secret setting — it’s a repeatable workflow. Once you configure core settings, set up an SEO plugin, optimize your on-page content, improve performance, strengthen internal links, and track results, you have everything you need to grow consistently.
Make this a habit rather than a one-time project. Each time you publish or update content, walk through the same checklist: keyword targeting, on-page optimization, internal links, and performance checks. With steady improvements, your WordPress site can become a reliable source of search traffic and leads.
Further Reading
- WordPress SEO: Complete Beginner’s Guide
- Step-by-Step Guide to On-Page SEO in WordPress
- Internal Linking Strategies for WordPress Beginners
- Image Optimization Checklist for WordPress Websites
- How to Set Up Google Analytics in WordPress