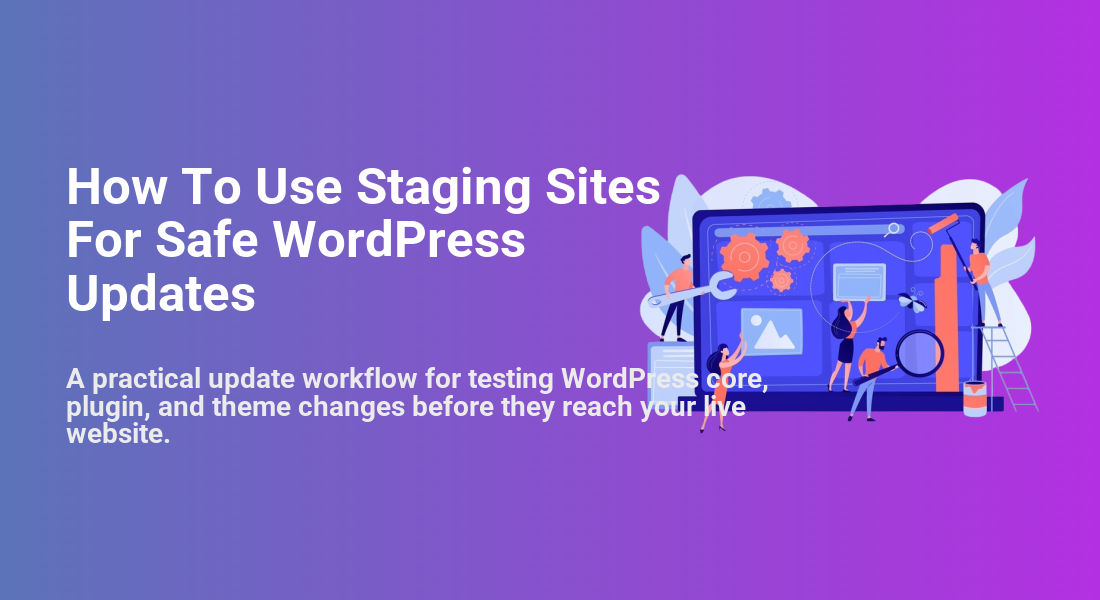
How To Use Staging Sites For Safe WordPress Updates
A practical update workflow for testing WordPress core, plugin, and theme changes before they reach your live website.

WordPress updates keep your website secure, compatible, and performing well, but applying them directly on a live site can be risky. A plugin conflict, broken layout, PHP warning, or failed database change can interrupt visitors, leads, sales, or logged-in users.
A staging site gives you a private copy of your website where you can test WordPress core, plugin, theme, and PHP-related changes before touching production. In this guide, you will build a safe staging workflow for updates, test the right areas, fix problems early, and only deploy when the site is ready.
Before you begin, make sure you understand your recovery options by reviewing this guide on how to backup a WordPress site. Staging is safest when it works together with reliable backups, not as a replacement for them.
Prerequisites
Before you test updates on a staging site, collect the access and tools you need. This prevents you from starting an update and then discovering you cannot restore, compare, or deploy properly.
- Administrator access to your WordPress dashboard.
- Hosting account access with staging, cloning, or file/database tools.
- A recent full-site backup that includes files and database tables.
- A list of important pages, forms, checkout flows, account pages, and custom features to test.
- Access to your theme settings, page builder, custom code snippets, and caching plugin settings if your site uses them.
Step 1: Back Up the Live Site Before Creating Staging
A staging workflow starts with a backup because staging copies the current state of your website. If your live site already has hidden problems, outdated files, or a partial failed update, the staging copy may inherit those issues.
Create a complete backup from your host, backup plugin, or server control panel. The backup should include the WordPress database, uploads folder, themes, plugins, must-use plugins, and configuration files such as wp-config.php.
- Log in to your hosting dashboard or WordPress backup plugin.
- Create a new full backup, not a database-only backup.
- Wait until the backup process finishes successfully.
- Download a copy if your backup tool allows local storage.
- Confirm the backup date, file size, and restore option are visible.
Checkpoint: You should have a fresh backup created before any staging, update, or deployment work begins.
Troubleshooting: If your backup fails, check available storage, file permissions, and PHP memory limits. Do not continue with updates until you have at least one verified restore point.
Step 2: Create a Fresh Staging Copy
Your staging site should reflect the live website as closely as possible. This includes the same active theme, plugins, content, menus, widgets, custom fields, media files, and major settings.
Most managed WordPress hosts provide a one-click staging option. Look for a menu named Staging, Development Site, Clone Site, or Create Staging in your hosting dashboard.
- Open your hosting dashboard.
- Select the live WordPress site you want to update.
- Choose the staging or clone option.
- Create a new staging environment from the current live site.
- Wait until the host finishes copying files and database tables.
- Open the staging URL and log in to the WordPress admin area.
Checkpoint: The staging site should load separately from your live domain, usually on a temporary subdomain, subdirectory, or host-provided staging URL.
Troubleshooting: If the staging site redirects to the live domain, check the site URL settings, caching rules, and any hardcoded redirects in plugins or .htaccess. Some hosts automatically rewrite URLs during cloning, while manual staging setups may require a search-and-replace step.
Step 3: Lock Down the Staging Site
A staging site should not be indexed by search engines, used by real customers, or confused with your live website. Locking it down protects SEO, privacy, and user experience while you test changes.
In WordPress admin, go to Settings > Reading and enable Discourage search engines from indexing this site. This setting is helpful, but it is not enough by itself because search engines may treat it as a request rather than a guaranteed block.
- Password-protect the staging site from your hosting dashboard if available.
- Disable transactional emails or route them to a testing mailbox.
- Turn off payment capture or switch payment gateways to test mode.
- Confirm analytics and tracking tags will not pollute live reports.
- Check that staging has a visible label in the admin bar or dashboard.
Checkpoint: Visitors should not be able to access the staging site without permission, and test activity should not affect customers, payments, analytics, or search results.
Troubleshooting: If staging emails are still sending to customers, disable email-sending plugins, use an SMTP testing tool, or ask your host whether staging email can be blocked at the server level.
Step 4: Make an Update Inventory
Before clicking update buttons, document what needs to change. An update inventory helps you test in a controlled order instead of updating everything at once and guessing which change caused a problem.
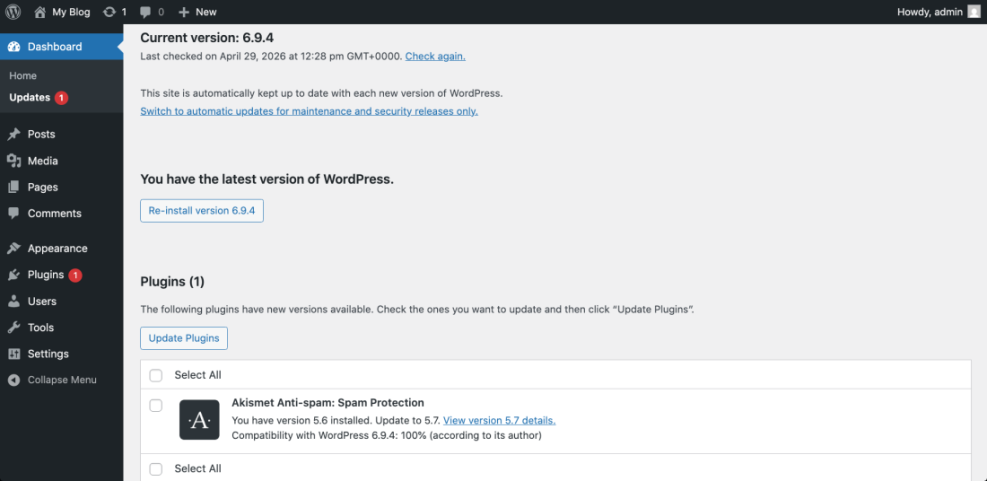
In the WordPress dashboard, go to Dashboard > Updates. Review available WordPress core, plugin, theme, and translation updates. For plugins specifically, use this guide on how to update WordPress plugins if you want a more detailed plugin update process.
- WordPress core version currently installed.
- Available plugin updates and version numbers.
- Available theme updates and whether a child theme is active.
- PHP version currently used by the site.
- Known custom code, snippets, or template overrides.
- Critical site functions such as forms, checkout, memberships, bookings, search, or LMS features.
Checkpoint: You should have a written list of updates and priority areas to test before making changes.
Troubleshooting: If you cannot tell which plugin controls an important feature, check Plugins > Installed Plugins, review page builder modules, inspect shortcodes on the page, and document the plugin before updating it.
Step 5: Update in a Controlled Sequence
The safest staging update process is sequential. Updating everything at once may be faster, but it makes troubleshooting harder because you will not know which update caused a layout shift, PHP error, or feature failure.
Start with lower-risk updates, then move toward larger changes. For many websites, that means translations first, then plugins, then themes, then WordPress core, unless a security update requires a different priority.
- Update translations if available.
- Update one plugin or a small group of related plugins.
- Test the affected feature after each important plugin update.
- Update the active theme or parent theme if needed.
- Update WordPress core after checking plugin and theme compatibility notes.
- Clear staging cache and browser cache before testing the final result.
Theme updates deserve extra care if your site uses custom templates or design changes. Review this walkthrough on how to update a WordPress theme before changing an active production design.
Checkpoint: After each update batch, the staging dashboard should load normally and the front end should not show fatal errors, missing styles, or broken layouts.
Troubleshooting: If the site breaks after one update, deactivate the most recently updated plugin or switch temporarily to a default theme on staging. Check the browser console, PHP error logs, and WordPress debug log before continuing.
Step 6: Test the Staging Site Like a Real Visitor
After updates finish, test the site from the front end, not only from the WordPress dashboard. Many update problems appear in forms, scripts, checkout pages, mobile layouts, or custom templates rather than the admin area.
Create a testing checklist based on your website type. A simple blog, WooCommerce store, membership site, booking site, and lead generation site each have different critical paths.
- Open the homepage and confirm the layout, header, menu, footer, and hero section display correctly.
- Test important landing pages, blog posts, category pages, and search results.
- Submit contact forms using test details.
- Check login, logout, password reset, and account pages if your site has users.
- Run a test checkout or payment flow in test mode for ecommerce sites.
- Open pages on mobile and desktop screen sizes.
- Check the browser console for JavaScript errors.
- Clear cache and retest important pages.
Checkpoint: The staging site should behave like the live site, with no broken layouts, missing functionality, unexpected warnings, or failed user actions.
Troubleshooting: If a page looks broken only after clearing cache, the issue may involve cached CSS, minification, deferred JavaScript, or page builder assets. Regenerate CSS files if your theme or page builder provides that option.
Step 7: Fix Issues Before Deploying
If staging reveals a problem, treat that as a success. You found the issue before it affected real visitors, sales, rankings, or leads.
Start by identifying the most recent change that happened before the issue appeared. Then isolate whether the problem comes from a plugin, theme, WordPress core change, caching layer, PHP version, or custom code.
- Review the update inventory and identify the last changed item.
- Deactivate the suspected plugin on staging and retest.
- Switch to a default WordPress theme on staging only if the issue appears theme-related.
- Disable optimization settings such as minification, delay JavaScript, or combine CSS.
- Check server logs, WordPress debug logs, and browser console errors.
- Search the plugin or theme changelog for known breaking changes.
To enable debugging on staging, add the following to wp-config.php using cPanel File Manager, SFTP, or your host file editor:
define( 'WP_DEBUG', true );
define( 'WP_DEBUG_LOG', true );
define( 'WP_DEBUG_DISPLAY', false );
Checkpoint: You should understand the cause of the problem and have a fix, workaround, rollback plan, or decision to postpone the update.
Troubleshooting: If staging shows a white screen, use SFTP or File Manager to rename the suspected plugin folder inside wp-content/plugins/. This disables that plugin without needing dashboard access.
Step 8: Deploy Updates to the Live Site Safely
Once staging passes testing, decide how you will apply the changes to production. Some hosts let you push staging to live, while others require you to repeat the same updates manually on the live site.
For content-heavy sites, be careful with one-click push tools. If new orders, comments, form entries, memberships, or posts were created on the live site after staging was cloned, pushing the staging database can overwrite newer live data.
- Create another fresh backup of the live site immediately before deployment.
- Put the site into a controlled maintenance window if the update affects checkout, accounts, or critical features.
- Use your host staging push tool only if you understand whether it pushes files, database, or both.
- If needed, repeat the tested update sequence manually on the live site instead of pushing the database.
- Clear all caches after deployment, including plugin cache, server cache, CDN cache, and browser cache.
- Test the same critical paths on the live site.
Checkpoint: The live site should match the tested staging result, with no visible errors and no lost recent data.
Troubleshooting: If the live site behaves differently than staging, compare PHP version, caching settings, CDN rules, file permissions, active plugins, and environment-specific settings.
Step 9: Build a Repeatable Update Schedule
Staging works best when it becomes a routine process instead of an emergency task. A predictable schedule reduces update anxiety and helps you spot conflicts before software becomes severely outdated.
For small sites, a monthly update cycle may be enough. For ecommerce, membership, LMS, booking, or high-traffic lead generation sites, check updates more often and prioritize security releases quickly.
- Weekly: Review available security updates and uptime alerts.
- Monthly: Test plugin, theme, and WordPress updates on staging.
- Quarterly: Review PHP version, abandoned plugins, and theme compatibility.
- After major updates: Test forms, checkout, search, menus, and mobile layouts.
- After deployment: Document what changed and what issues were fixed.
Checkpoint: You should have a recurring update process with backup, staging, testing, deployment, and documentation steps.
Troubleshooting: If updates pile up for months, do not update everything at once. Clone the site, update in smaller batches, and test after each group of related changes.
Make WordPress Updates Boring, Predictable, and Safe
A staging site turns WordPress updates from a risky live experiment into a controlled maintenance process. You can test plugin changes, theme updates, WordPress core releases, design issues, and functionality problems before visitors ever see them.
The safest workflow is simple: back up the live site, create fresh staging, lock it down, update in sequence, test critical paths, fix issues, deploy carefully, and document the result. Once this becomes routine, your site stays more secure without unnecessary downtime or avoidable surprises.
Further Reading
- Create a WordPress Staging Site
- How to Update PHP in WordPress
- How to Put WordPress in Maintenance Mode
- How to Check If WordPress Plugins Are Up to Date
Frequently Asked Questions
Do I need a staging site for every WordPress update?
What should I do if the staging site breaks after an update?
Why does staging work but the live site breaks after deployment?
Is a staging site safe from search engines and visitors?
How long does a staging update workflow take?