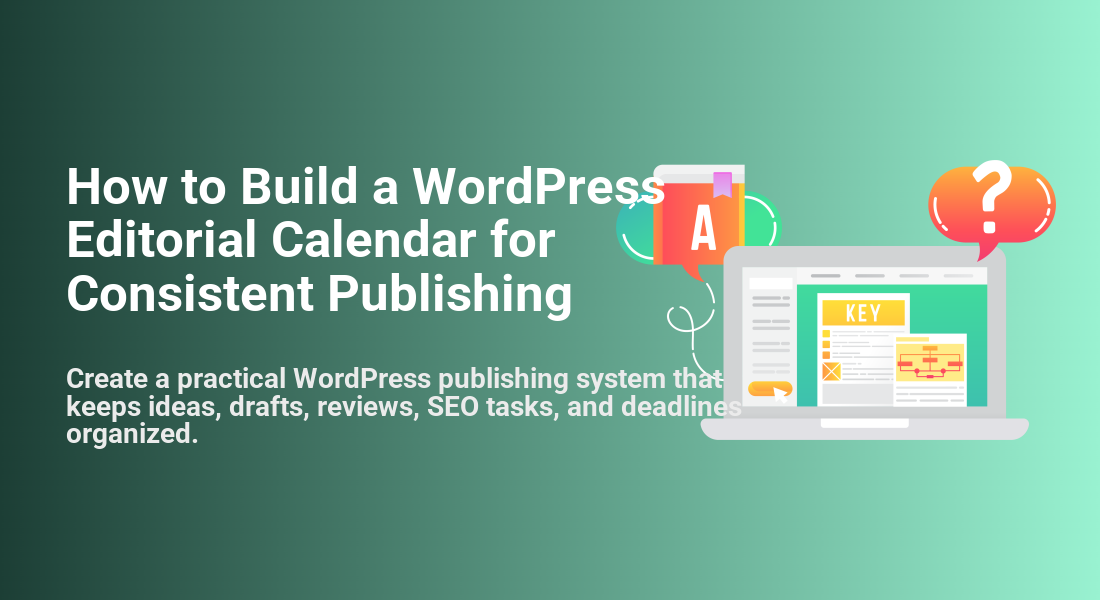
How to Build a WordPress Editorial Calendar for Consistent Publishing
Create a practical WordPress publishing system that keeps ideas, drafts, reviews, SEO tasks, and deadlines organized.
Publishing consistently is difficult when blog ideas, drafts, SEO tasks, images, and approvals live in different places. A WordPress editorial calendar turns that scattered process into a repeatable system, so you always know what is planned, what is being written, and what is ready to publish.
In this guide, you will build a practical editorial calendar for WordPress using statuses, dates, categories, responsibilities, and review checkpoints. The goal is not just to fill a calendar with post titles, but to create a workflow that helps you publish high-quality content on schedule.
If you are still shaping your overall blog direction, start with a broader WordPress business blog content strategy so your calendar supports real traffic, leads, and audience goals.
Prerequisites
Before you build the calendar, prepare the basic pieces that make scheduling easier. You do not need a complex project management system, but you do need a clear publishing goal and access to your WordPress dashboard.
- Administrator or Editor access to your WordPress site.
- A list of blog topics, target keywords, or recurring content themes.
- A realistic publishing frequency, such as one post per week or two posts per month.
- A place to track assignments, such as a WordPress editorial calendar plugin, spreadsheet, Notion board, Trello board, or Google Calendar.
- A simple review process for SEO, formatting, images, and final approval.
Step 1: Define Your Publishing Goals
An editorial calendar works best when it is tied to a clear publishing goal. Without a goal, the calendar becomes a list of random article ideas instead of a system for building topical authority, serving readers, and improving search visibility.
Start by deciding what your content needs to accomplish over the next 90 days. For example, you may want to support a product launch, grow organic search traffic, answer beginner questions, or build a library of tutorials around one service category.
- Choose one primary audience, such as beginners, site owners, agencies, or WooCommerce store owners.
- Choose one main content objective, such as education, lead generation, product support, or SEO growth.
- Set a realistic publishing pace that your team can maintain without lowering quality.
- Group ideas into themes, such as WordPress SEO, backups, performance, plugins, or beginner tutorials.
Checkpoint: You should have a simple statement such as, “We will publish one WordPress SEO tutorial every Tuesday for beginner site owners for the next three months.”
Step 2: Map Your Editorial Workflow
Your calendar should show more than publish dates. It should show the full path from idea to published post, because delays often happen during research, review, formatting, image creation, or final approval.
Create a workflow that matches how content actually moves through your site. For most WordPress blogs, a simple workflow is enough: Idea, Approved, Writing, Editing, SEO Review, Scheduled, Published, and Updating.
- Open your planning tool and create columns or status labels for each stage.
- Add every current content idea to the first stage, usually Idea or Backlog.
- Move only approved topics into the active calendar.
- Assign each active post to a writer, editor, or site owner.
- Add a due date for the draft, review, final edits, and publish date.
Checkpoint: Every article should have a visible status, owner, deadline, and next action. Nobody should need to ask, “What happens next?”
For larger teams, use a dedicated multi-author WordPress content workflow so writers, editors, and reviewers understand their roles before a post reaches the publishing queue.
Step 3: Choose Your Calendar Format
The best editorial calendar format depends on your publishing volume and team size. A solo blogger may only need a spreadsheet, while a team with multiple writers may need plugin-based calendar views, Kanban boards, or project management software.
Choose a format that makes deadlines visible and easy to update. The tool matters less than whether your team actually uses it every week.
- Spreadsheet: Best for simple blogs, low budgets, and quick customization.
- Google Calendar: Best when publish dates and reminders are the main priority.
- Trello, Notion, or Asana: Best for teams that need assignments, comments, and workflow stages.
- WordPress editorial calendar plugin: Best when you want to manage drafts and scheduled posts close to the WordPress dashboard.
Checkpoint: You should be able to open your calendar and immediately see what is planned this week, what is overdue, and what is ready to schedule.
Step 4: Create Calendar Fields and Post Templates
A calendar becomes much more useful when every post includes the same planning fields. These fields prevent missing details such as focus keywords, categories, internal links, image requirements, and calls to action.
Create a reusable calendar template for every article. This keeps your publishing process consistent even when different writers or editors contribute to the site.
- Working title: The draft title before final SEO editing.
- Focus keyword: The main search phrase the article targets.
- Search intent: The reason someone would search for the topic.
- Category and tags: The WordPress taxonomy plan for the post.
- Internal links: Existing posts that should be linked from the article.
- Draft due date: When the first version should be ready.
- Review date: When editing, SEO, and formatting checks happen.
- Publish date: The final scheduled publication date.
- Owner: The person responsible for moving the post forward.
- Status: The current workflow stage.
Checkpoint: Each planned article should include enough information for a writer to begin without needing a separate briefing conversation.
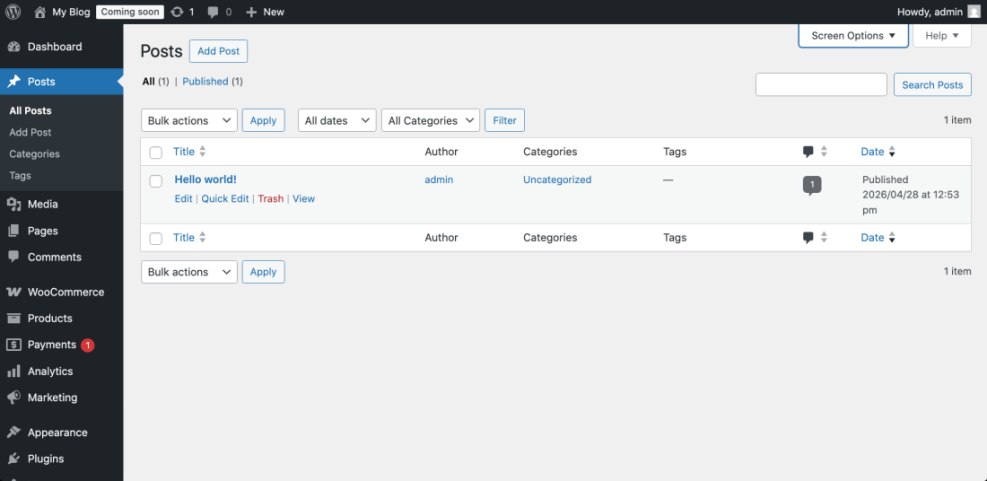
Step 5: Schedule Posts Inside WordPress
Once a post is drafted, edited, and approved, schedule it directly in WordPress. This keeps your calendar aligned with the actual publishing queue instead of relying only on an external planning document.
- Go to Posts > All Posts in your WordPress dashboard.
- Open the post you want to schedule.
- Confirm the title, permalink, category, tags, featured image, excerpt, and SEO fields.
- In the editor sidebar, find the Publish setting.
- Click the date and time field, then choose your planned publish date.
- Click Schedule to place the post in the publishing queue.
Checkpoint: The post status should change from Draft or Pending Review to Scheduled. In Posts > All Posts, the date column should show the future publish date.
If your calendar includes SEO tasks, connect each post to a repeatable optimization process like this checklist for optimizing WordPress blog posts before scheduling.
Step 6: Add Review and Quality Control Checkpoints
Consistent publishing should not mean rushed publishing. Add review checkpoints to catch weak introductions, missing screenshots, broken formatting, thin sections, poor internal linking, and SEO issues before a post goes live.
Use a short quality checklist for every article. The checklist should be simple enough to complete quickly, but detailed enough to protect your publishing standards.
- The article matches the search intent and title promise.
- The introduction explains the problem and outcome clearly.
- Headings follow a logical step-by-step structure.
- Images, screenshots, or diagrams support difficult steps.
- Internal links are relevant and useful.
- Meta title and meta description are complete.
- Categories and tags are accurate.
- The post has been previewed on desktop and mobile.
- The final publish date matches the editorial calendar.
Checkpoint: A post should only move to Scheduled after the checklist is complete and the assigned reviewer has approved it.
Step 7: Review Performance and Update the Calendar
Your editorial calendar should improve over time. Review performance data monthly so you can publish more of what works, refresh content that is slipping, and remove topics that do not support your goals.
Track simple metrics first. You can always add more later, but the calendar should not become so complicated that nobody maintains it.
- Published posts: How many posts went live compared with the plan.
- Missed deadlines: Which workflow stages caused delays.
- Organic clicks: Which topics attracted search traffic.
- Conversions: Which posts generated leads, signups, sales, or inquiries.
- Update opportunities: Which older posts need refreshing.
Checkpoint: At the end of each month, your next calendar cycle should include new posts, updates to existing posts, and improvements based on missed deadlines or performance patterns.
Turn Your Calendar Into a Reliable Publishing Habit
A WordPress editorial calendar gives your publishing process structure. Instead of reacting to last-minute ideas, you can plan topics, assign responsibilities, review drafts, schedule posts, and measure results with confidence.
Start simple: choose your publishing goal, map your workflow, create reusable fields, and schedule approved posts inside WordPress. Once the system is working, improve it with better templates, stronger SEO checks, and monthly performance reviews.
Further Reading
- Content Planning Workflow for WordPress Blogs
- Content Briefs for WordPress Writing
- AI Content Briefs for WordPress
- Internal Linking for WordPress Beginners