How to Change Font in WordPress
Beginner’s guide to changing fonts with the WordPress Site Editor, Customizer, and typography plugins.
Does your WordPress site still use the default font that came with your theme, even though it doesn’t match your brand or feels hard to read on some screens? The good news: you can change fonts in WordPress without touching PHP or editing theme files directly.
In this guide, you’ll learn step by step how to change your fonts using the WordPress Site Editor (for block themes), the classic Customizer (for older themes and Jannah), and beginner-friendly typography plugins. By the end, your headings and body text will look consistent, readable, and on-brand.
If you have already started to customize your WordPress theme, adjusting your typography is the next logical step so that fonts, colors, and layout all work together.
Prerequisites
Before you start changing fonts, make sure you have the basics in place:
- Administrator access to your WordPress dashboard (the ability to change themes and install plugins).
- Your current theme name (for example, a block theme like Twenty Twenty-Four, or a classic theme such as Jannah).
- A recent backup of your site, especially if you plan to install new plugins or add custom CSS.
Step 1: Check Your Theme and Editor Type
WordPress offers more than one way to control fonts. To choose the right workflow, you first need to know whether your theme uses the modern Site Editor (block theme) or the older Customizer (classic theme, including Jannah).
- Log in to your WordPress dashboard.
- In the left menu, go to Appearance.
- If you see a menu item called Editor (sometimes labelled “Site Editor”), you are using a block theme.
- If you see Customize instead of Editor, you are on a classic theme that uses the Customizer (this is the case for many premium themes, including Jannah).
- Optionally, check if you are using a page builder plugin (like Elementor, Divi, or WPBakery). These tools often have their own font controls inside each page or global settings panel.
Once you know which editor controls your site, follow the matching steps below.
Step 2: Change Fonts with the Site Editor (Block Themes)
If your theme uses the WordPress Site Editor, you can change fonts globally using the Styles panel. This updates typography across templates and patterns, which keeps your design consistent.
- In the WordPress dashboard, go to Appearance > Editor.
- Click the Styles icon (the half-filled circle) in the top-right corner.
- Select Typography. Depending on your theme, you may see options for Text, Headings, Buttons, and more.
- Choose a font family for your body text and headings. Many block themes include a curated list of web-safe and Google Fonts.
- Adjust related settings such as font size, line height, and letter spacing if they are available.
- Click Save, then confirm by clicking Save again to apply typography changes across the site.
After saving, open a few different templates (such as your homepage, a single post, and an archive) in the Site Editor preview to confirm that fonts look correct everywhere.
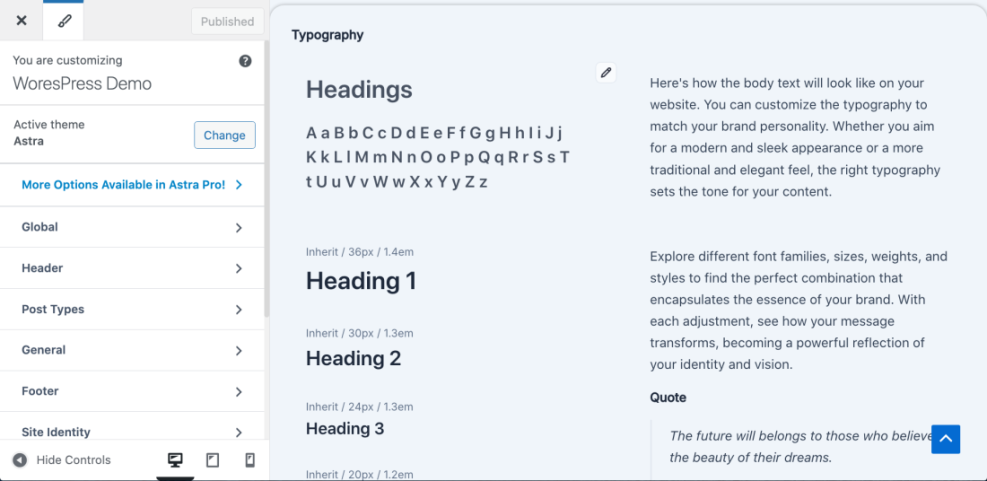
Step 3: Change Fonts with the Customizer (Classic Themes & Jannah)
Classic themes and many premium themes (including Jannah) use the Customizer for design controls. In these themes, fonts are typically found under Typography, Theme Options, or a similar section.
- From the WordPress dashboard, go to Appearance > Customize.
- Look for a panel named Typography, Fonts, or Theme Options. In Jannah, for example, you can manage fonts via its dedicated theme options and typography panels.
- Open the typography settings and locate options for Body and Headings. Choose your desired font families from the available list.
- Where available, adjust font weights (regular, bold), styles (italic), and subsets (for language support).
- Use the live preview on the right to confirm the fonts look correct on key areas like the header, post titles, and main content.
- Click Publish to save your changes and push them live.
If you do not see any typography options in the Customizer, your theme may rely on custom CSS or a separate options page in the dashboard. Check under Appearance or in a top-level menu using your theme’s name.
Step 4: Change Fonts in Individual Posts and Pages
Global font settings control most of your site, but sometimes you want a different font style for a specific block, heading, or callout. You can do this directly inside the editor.
Change fonts in the Block Editor (Gutenberg)
- Open a post or page and ensure you are using the Block Editor.
- Select the block you want to style (for example, a heading or paragraph).
- In the right-hand Block settings panel, look for a Typography section. Depending on the block and theme, you may be able to change font family, size, appearance, and other properties.
- Adjust the font settings and preview the change in the editor.
- Click Update or Publish to save.
In many themes, typography controls work alongside font size settings. If you are mainly interested in changing how large your text appears, follow a dedicated guide on how to change font size in WordPress so that size and font family stay in balance.
Change fonts in the Classic Editor
- Open a post or page using the Classic Editor.
- Use the Paragraph and Heading dropdowns to standardize structure (H2 for section headings, H3 for subsections, and so on).
- For font styling beyond bold and italic, click the Toolbar Toggle button to reveal more options, or apply CSS classes via the Text tab if your theme provides them.
Step 5: Use a Plugin or Custom CSS for More Control
If your theme offers limited font options, a typography plugin or a small amount of custom CSS can give you extra control without editing theme files directly.
Using a typography plugin
- In the dashboard, go to Plugins > Add New.
- Search for a reputable typography plugin that integrates with the Customizer or Site Editor (for example, a plugin that adds Google Fonts support).
- Install and activate the plugin.
- Follow the plugin’s instructions—often you will find new font controls under Appearance > Customize or inside a dedicated settings page.
- Assign fonts to headings, body text, menus, and other elements as needed, then save your settings.
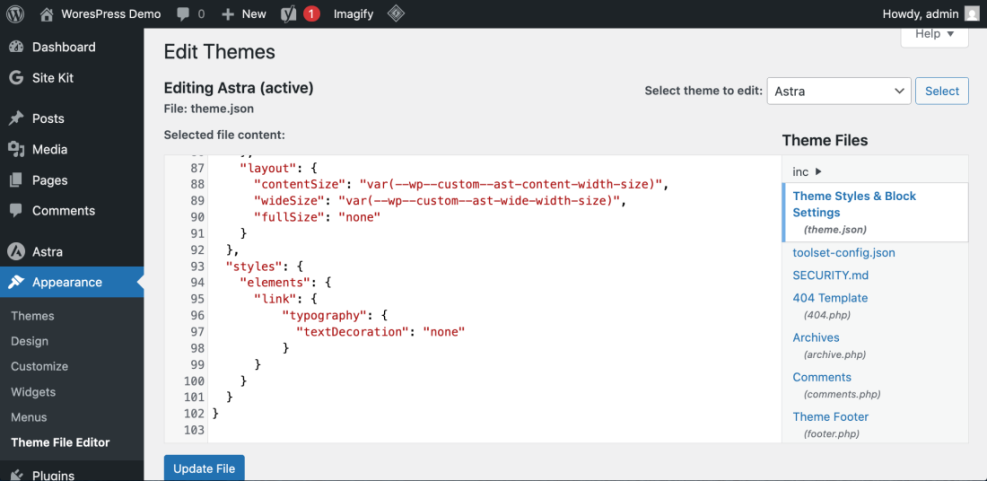
Using Additional CSS for fine-tuning
For small tweaks, you can add custom CSS through the Customizer instead of editing theme files. Always test on a staging site or at least keep a backup.
- Go to Appearance > Customize > Additional CSS.
- Add CSS rules that target the elements you want to change. For example:
body {
  font-family: "Open Sans", Arial, sans-serif;
}

h1, h2, h3 {
  font-family: "Merriweather", Georgia, serif;
}- Click Publish to apply the changes.
For a full visual refresh, you might also want to match your headings and links by learning how to change font color in WordPress, so your typography and color palette work together.
Step 6: Test Readability and Performance
Once fonts are updated, take a few minutes to make sure they look great on different devices and don’t slow your site down.
- View your site on desktop, tablet, and mobile. Check heading sizes, paragraph spacing, and line length (45–75 characters per line is usually comfortable).
- Make sure important areas—such as navigation, buttons, and forms—remain readable and accessible.
- If you added many custom fonts, check your site’s loading time. Consider reducing the number of font weights or styles if pages feel sluggish.
- Ask a colleague or friend to read a few pages and share whether the text feels easy on the eyes.
Lock In Your New WordPress Change Fonts with Confidence
Changing fonts in WordPress does not have to be complicated. By identifying which editor your theme uses, applying global typography settings, and fine-tuning individual blocks or pages, you can quickly bring your site’s design in line with your brand.
Whether you are running a simple blog or a busy WooCommerce store, thoughtful typography makes your content easier to read and remember. Now that you know how to control fonts through the Site Editor, Customizer, plugins, and CSS, you are ready to standardize your design and focus on publishing great content.
Further Reading
- How to Design a WordPress Website
- What Is WordPress Website Design?
- How to Create a Child Theme in WordPress
- Beginner Guide to WordPress Menus and Navigation