How to Back up a WordPress Website
Set up safe automated backups for non technical site owners
If you run a WordPress site, learning how to Back up WordPress correctly is one of the most important tasks you can complete. A reliable backup protects your content, design, and customer data when your host fails, an update breaks the site, or malware hits.
In this guide you will create a practical backup setup that uses your hosting tools, a dedicated backup plugin, and safe off site storage. By the end, you will have automated backups running, a clean copy downloaded, and a tested restore process you can trust.
What You Need to Start
- Access to your WordPress Admin Dashboard with an Administrator account.
- Login for your web hosting control panel such as cPanel or a managed WordPress dashboard.
- At least one external storage option such as Google Drive, Dropbox, or another cloud drive.
- Basic ability to install and configure WordPress plugins.
- Enough free disk space in your hosting account to create at least one full backup.
Step 1: Plan Your Backup Strategy
Before you install anything, decide what you will back up, how often, and where the backups will live. This prevents half finished setups that fail when you need them most.
- List the parts of your site you must protect such as database, themes, plugins, and uploads.
- Decide how often your content changes such as daily blog posts, weekly updates, or static pages.
- Choose a backup frequency that matches site changes, such as daily for busy blogs or weekly for small sites.
- Select at least one off site location such as Google Drive or Dropbox for long term storage.
- Review the checklist in WordPress backup strategy if you want a deeper planning framework.
Write these decisions down. You will use them when configuring your backup plugin and hosting tools.
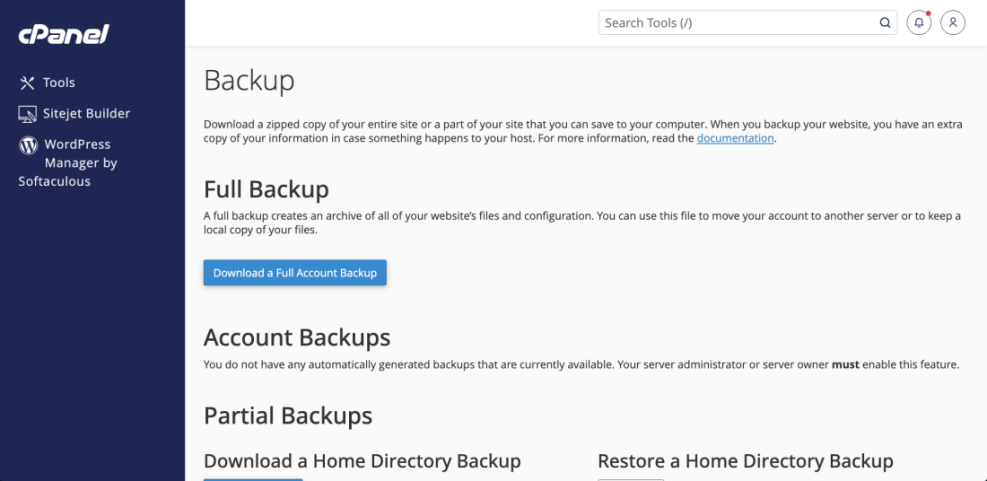
Step 2: Enable Host Level Backups
Most reputable hosts provide a backup feature. Even if you use a plugin, host level backups give you a second safety net when something major goes wrong.
- Log in to your hosting account dashboard using your hosting username and password.
- Open cPanel or your managed WordPress panel from the main account screen.
- Look for a section named Backup, Backups, or Backup Wizard.
- Click the backup tool and choose a full site or account backup option.
- Start a backup and wait until the process shows as complete.
- Download at least one backup file to your computer and store it in a safe folder.
To verify success, confirm you have at least one backup file saved locally and that your hosting panel shows a recent backup date.
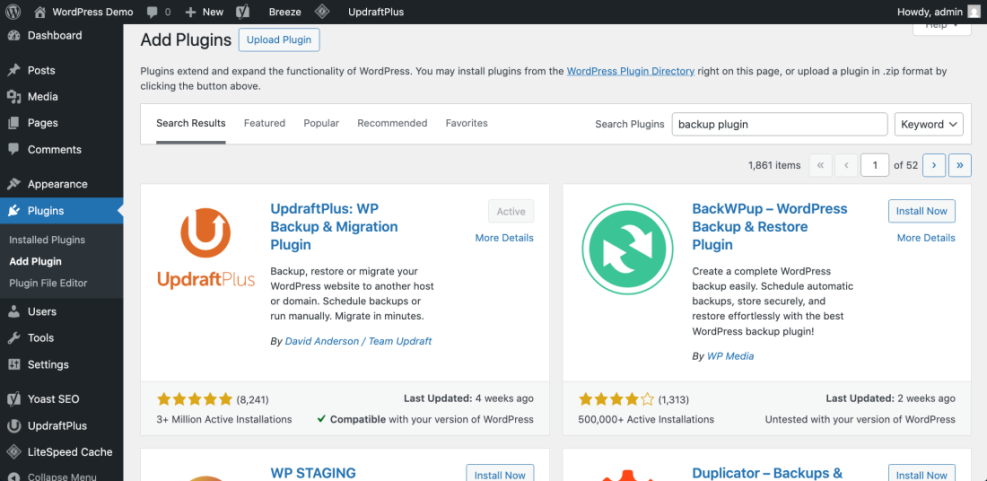
Step 3: Install a Reliable Backup Plugin
A dedicated backup plugin gives you more control over what to back up, how often to run, and which cloud services to use. In this step you will install a plugin and prepare it for configuration.
- Log in to your WordPress Admin Dashboard.
- In the left menu, click Plugins » Add New.
- In the search box, type the name of your chosen backup plugin.
- Review ratings, active installs, and update history. For help choosing, read How to choose the best WordPress hosting.
- Click Install Now next to your selected plugin, then click Activate.
After activation, look for a new menu item such as Settings » Backups or a top level Backups entry. This confirms the plugin is installed and ready.
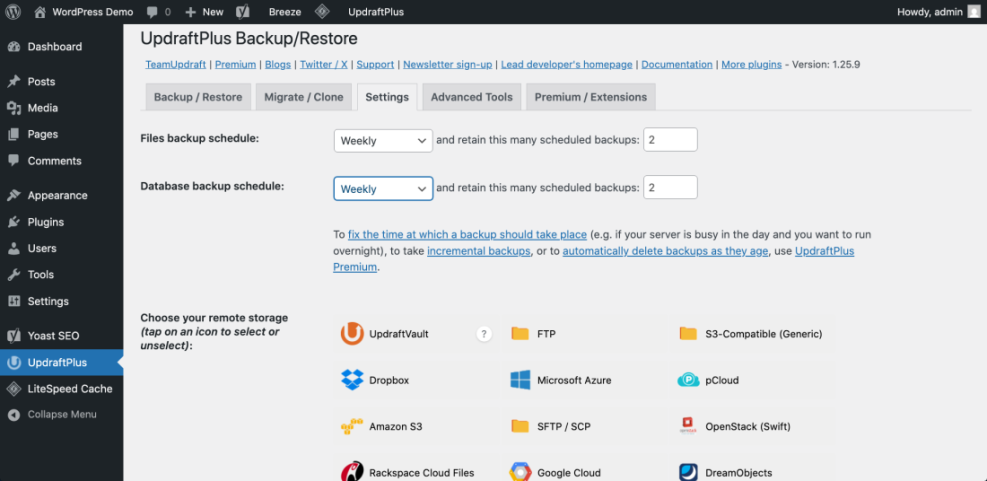
Step 4: Configure Automatic Backup Schedules
Now you will tell the plugin what to back up and how often. Use the decisions from Step 1:: so your schedule matches how your site actually changes.
- Navigate to your backup plugin settings, usually under Settings » Backup or the plugin’s own menu.
- Find the options for File backups and Database backups.
- Set the File backup schedule, such as daily or weekly, based on how often you update themes, plugins, and uploads.
- Set the Database backup schedule, typically daily for active blogs or shops.
- Choose how many backups to retain, such as 7 daily copies, so older backups are automatically deleted.
- Enable email notifications so you receive an alert if backups fail.
Save your settings, then check that the next scheduled backup time appears somewhere in the plugin dashboard. This confirms your schedule is active.
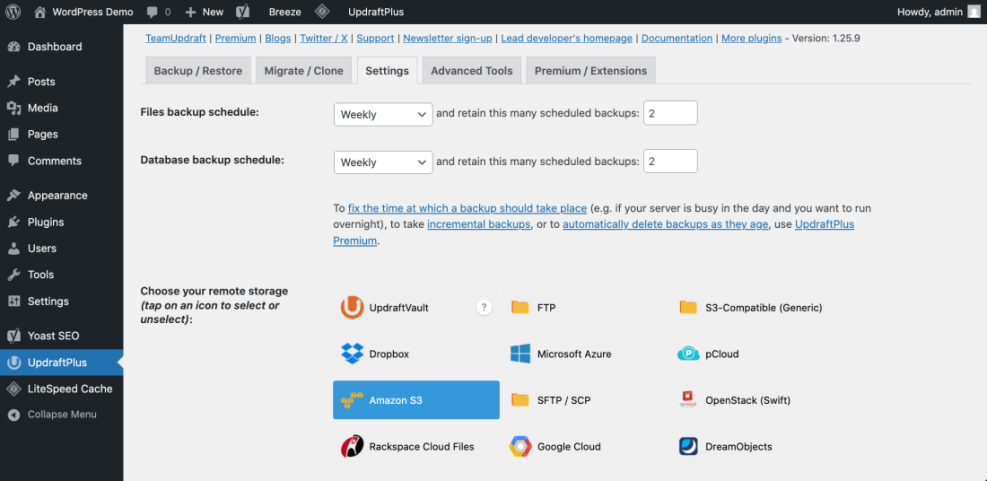
Step 5: Connect Off Site Cloud Storage
Storing backups on the same server is risky. Connecting cloud storage keeps a copy safe even if your host fails completely.
- In your backup plugin settings, scroll to the section labeled Remote Storage or Cloud Storage.
- Select a service such as Google Drive, Dropbox, or Amazon S3.
- Click the Authenticate or Connect button next to your chosen service.
- Log in to the cloud account in the popup window and approve the plugin’s access.
- Return to WordPress and click Save Changes or Complete Setup.
- Ensure the chosen cloud service now shows as Connected or Active in the storage list.
Verify success by checking your cloud drive. After your first backup runs, you should see a folder with your site’s name containing backup archives.
Step 6: Run Your First Backup and Download a Copy
With schedules and storage configured, run a manual backup to test everything immediately. This also creates your first full copy in case something breaks during future changes.
- Open your backup plugin page in the WordPress dashboard.
- Click the Backup Now or Run Backup button.
- Choose to include both Files and Database if prompted.
- Wait until the progress indicator shows the backup is complete.
- Locate the new backup in the plugin’s Existing Backups or History tab.
- Click the download icons to save at least one full backup archive to your computer.
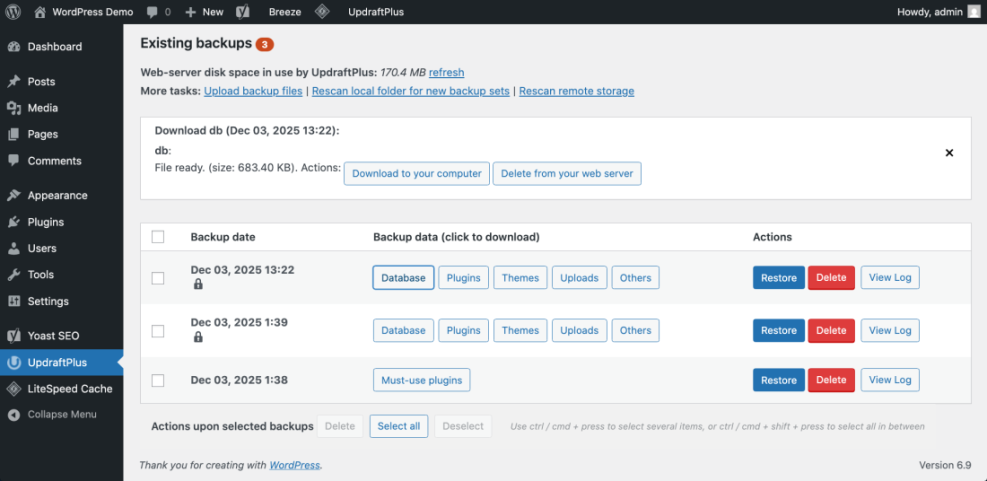
To double check, open the downloaded archive on your computer. You should see folders like wp-content and a .sql file for the database.
Step 7: Create an Optional Manual Backup with WP CLI
If your host provides SSH access and WP CLI, you can create fast manual backups directly on the server. This is especially helpful before risky updates or migrations.
- Connect to your server using an SSH client with your hosting credentials.
- Change to your WordPress site directory, usually public_html or a subfolder.
- Run a database export command using WP CLI.
- Create a compressed archive of your WordPress files.
- Download both files to your computer using SEO and UX, and where you will see it in daily work.”>SFTP or your host’s file manager.
# Export the WordPress database wp db export backup-$(date +%F).sql # Archive WordPress files (run one level above wp-content) tar -czf wp-files-backup-$(date +%F).tar.gz wp-contentVerify success by checking for the .sql and .tar.gz files in your download folder and confirming their sizes are reasonable for your site.
Step 8: Test Restores on a Staging Site
A backup is only trustworthy if you have tested restoring it. The safest way is to use a staging site where you can experiment without touching your live visitors.
- Create or access a staging copy of your site. If you need help, follow How to use ai in WordPress.
- Install and activate the same backup plugin on the staging site.
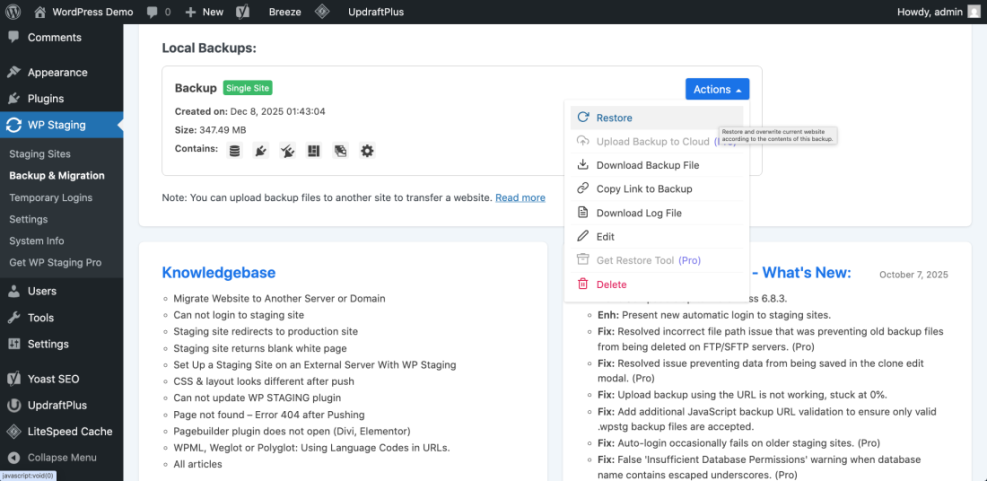
- Upload one of your backup archives or connect the same cloud storage account.
- Use the plugin’s Restore or Import feature to apply the backup to staging.
- Visit several pages, forms, and admin screens to confirm the site works normally.
- Read Common WordPress backup errors and how to fix for a detailed restore checklist.
If the staging restore works and looks like your live site, you know your backup archives are valid and your restore process is clear.
Step 9: Maintain and Monitor Your Backups
Backups are not a one time task. Regular maintenance ensures your backup plan keeps working as your site grows and plugins change.
- Add a monthly reminder in your calendar to log in and confirm recent backups exist both in your plugin and your cloud storage.
- After major updates or redesigns, run an extra manual backup and download a copy.
- Delete very old backups from your cloud storage if you are running low on space.
- Run a staging restore test every few months to confirm restores still work.
- Consider extending your plan with WordPress backup plugins online stores if you process orders or payments.
With these habits in place, your WordPress backup setup will stay dependable instead of slowly failing in the background.
Conclusion You Are Ready to Go
You have planned your backup strategy, enabled host level backups, configured a dedicated plugin, connected off site storage, created manual copies, and successfully tested a restore on staging. That means you now have multiple safety nets instead of hoping your host will rescue you.
As a next step, expand your plan into a full disaster recovery process using WordPress disaster recovery walkthrough. With a reliable backup and a clear checklist, you can work on your site with confidence, knowing you can always roll back if something goes wrong.
Further Reading
- WordPress backup strategy
- Install WordPress step by step
- WordPress backup strategy
- How to create a website with WordPress
- Official WordPress Backups Documentation