Step By Step Guide To WordPress Backups
A beginner-friendly WordPress backup workflow for creating, storing, testing, and restoring safe website backups.

WordPress backups are your safety net when updates fail, plugins conflict, malware appears, or a hosting issue takes your site offline. Without a reliable backup, a small mistake can become hours of emergency recovery work.
In this step-by-step guide, you will learn how to back up your WordPress files and database, store copies safely, test your backups, and restore your site when needed. If you want a broader overview first, read this guide on how to backup a WordPress site.
By the end, you will have a practical backup routine you can repeat monthly, weekly, or daily depending on how often your site changes.
Prerequisites
Before you create your first backup, make sure you have access to the basic tools needed to copy your site safely. You do not need to be a developer, but you should know where your hosting panel and WordPress admin area are located.
- Administrator access to your WordPress dashboard.
- Access to your hosting account, cPanel, file manager, or FTP/SFTP account.
- Enough storage space for at least one full backup copy.
- A secure off-site storage location such as cloud storage or a backup service.
- Optional: a staging site for safe restore testing.
Step 1: Choose What Your WordPress Backup Must Include
A complete WordPress backup has two major parts: website files and the database. Files contain your themes, plugins, uploads, and WordPress core files. The database contains posts, pages, users, settings, comments, product data, and many plugin settings.
Skipping either part can make a restore incomplete. For example, a files-only backup may preserve images but lose posts, while a database-only backup may preserve content but lose uploaded media and plugin files.
- List what changes often on your site, such as blog posts, WooCommerce orders, form entries, or membership data.
- Decide whether you need full-site backups, database-only backups, or both.
- Choose how often backups should run based on site activity.
- Decide where backup copies will be stored.
Checkpoint: You should know whether your site needs daily, weekly, or monthly backups and whether you need full-site or database-focused copies.
Troubleshooting: If you are unsure how often to back up your site, use this simple rule: back up as often as you would be willing to lose work. A busy store may need real-time or daily backups, while a static brochure site may only need weekly or monthly backups.
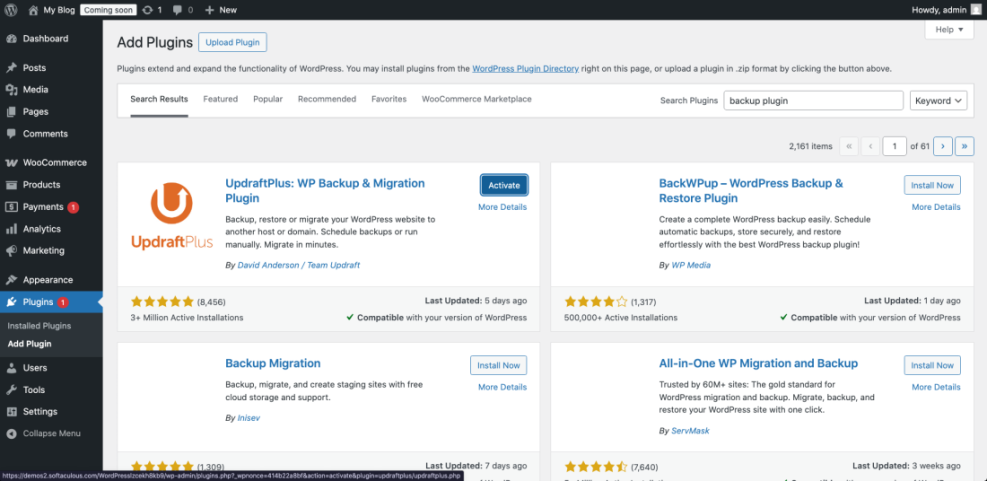
Step 2: Install a Trusted WordPress Backup Plugin
A backup plugin is the easiest method for most WordPress users because it can package your files and database from inside the dashboard. It can also automate backups, send copies to remote storage, and simplify restores.
To compare options before choosing one, review this list of WordPress backup plugins. Pick a plugin that supports full-site backups, scheduled backups, remote storage, and easy restoration.
- Log in to your WordPress admin dashboard.
- Go to Plugins > Add New.
- Search for your chosen backup plugin.
- Click Install Now.
- Click Activate.
- Open the plugin settings page and review the setup wizard or backup settings.
Checkpoint: The backup plugin should appear as active under Plugins > Installed Plugins, and you should be able to open its settings page.
Troubleshooting: If installation fails, check your PHP version, file permissions, and available disk space. If the plugin activates but the backup page does not load, temporarily disable caching or security plugins and try again.
Step 3: Back Up Your WordPress Files Manually
Manual file backups are useful when you need direct control or when your WordPress dashboard is unavailable. Your most important folder is usually wp-content, which contains themes, plugins, and uploads.
You can back up files through cPanel File Manager, your hosting file manager, or an FTP/SFTP client. The exact interface differs by host, but the goal is the same: download a copy of your WordPress installation files.
- Log in to your hosting control panel.
- Open File Manager or connect with SFTP.
- Find your WordPress root folder, often named
public_html,www, or your domain name. - Select the WordPress files and folders, especially
wp-content. - Compress them into a ZIP file if your file manager allows it.
- Download the ZIP file to your computer.
- Rename the file with the site name and date, such as
example-site-files-2026-04-28.zip.
Checkpoint: You should have a downloaded ZIP file containing WordPress folders such as wp-admin, wp-content, and wp-includes, or at minimum a complete copy of wp-content.
Troubleshooting: If the download times out, compress smaller folders separately. Large media libraries may need to be downloaded in batches through SFTP instead of the browser-based file manager.
Step 4: Back Up Your WordPress Database
The database is where WordPress stores your content and many settings. Even if your files are safe, losing the database can remove posts, pages, users, comments, orders, and plugin configuration.
The most common manual database backup method is phpMyAdmin. You can usually find it inside your hosting control panel.
- Log in to your hosting control panel.
- Open phpMyAdmin.
- Select your WordPress database from the left sidebar.
- Click the Export tab.
- Choose Quick for a standard backup or Custom if you need more control.
- Select SQL as the format.
- Click Export and download the file.
- Rename it with the site name and date, such as
example-site-database-2026-04-28.sql.
Checkpoint: You should have an .sql file saved on your computer. This file is your WordPress database backup.
Troubleshooting: If you do not know which database belongs to your site, open your wp-config.php file and look for DB_NAME. That value shows the database name WordPress uses.
Step 5: Schedule Automatic Backups
Manual backups are helpful, but automation is what protects you when you forget. A good backup schedule should match how often your site changes.
For a practical long-term routine, combine scheduled plugin backups with a written WordPress maintenance backup plan. This keeps backups from becoming a one-time task that gets ignored after setup.
- Static business site: Weekly full-site backup and monthly manual check.
- Active blog: Daily database backup and weekly full-site backup.
- WooCommerce store: Daily or real-time database backup and frequent full-site backups.
- Membership site: Daily database backup or real-time backup if user activity is constant.
- Open your backup plugin settings.
- Find the schedule or automation settings.
- Select the backup frequency for files and database.
- Choose how many backup copies to retain.
- Save the schedule.
- Run one manual backup immediately to confirm the settings work.
Checkpoint: Your backup plugin should show the next scheduled backup date and at least one completed backup.
Troubleshooting: If scheduled backups do not run, check whether WordPress cron is disabled, whether your site has very low traffic, or whether your hosting account blocks long-running processes.
Step 6: Store Backup Copies Off-Site
A backup is only useful if you can access it after something goes wrong. Storing every backup on the same server as your website creates a single point of failure.
Use the 3-2-1 backup principle as a practical standard: keep three copies, on two different storage types, with one copy off-site. For WordPress, that often means your live site, a local copy, and a cloud storage copy.
- Cloud storage such as Google Drive, Dropbox, Amazon S3, or similar services.
- A secure local external drive for periodic manual copies.
- Your host’s backup system as an extra layer, not your only layer.
- A dedicated backup service if the site is business-critical.
Checkpoint: You should have at least one backup stored somewhere outside your hosting account.
Troubleshooting: If remote storage fails to connect, recheck API permissions, cloud account storage limits, and whether your security plugin is blocking outbound connections.
Step 7: Test Your Backup Before You Need It
An untested backup is only a hope. Testing confirms that your backup files are complete, readable, and restorable before an emergency happens.
The safest way to test is on a staging site, temporary subdomain, or local development environment. Never overwrite your live site just to test a backup unless you are intentionally restoring it.
- Create a staging site through your host or backup plugin.
- Upload or select the backup you want to test.
- Run the restore process on the staging environment.
- Log in to the restored WordPress dashboard.
- Check posts, pages, menus, media, forms, and important plugin settings.
- Test key actions such as submitting a form or placing a test order if applicable.
Checkpoint: The staging copy should load correctly, show your content, display media files, and allow admin login.
Troubleshooting: If the restored site redirects to the live domain, update the site URL in the staging database or use your backup plugin’s migration URL replacement feature.
Step 8: Restore Your WordPress Site Safely
Restoring a backup replaces broken, missing, infected, or failed site data with a previous working copy. The process should be careful because restoring the wrong backup can overwrite recent work.
Before restoring, identify the exact point in time you want to return to. For example, if a plugin update broke the site at 3:00 PM, choose a backup from before that update.
- Put the site in maintenance mode if visitors may be affected.
- Download a fresh emergency copy of the current broken site if possible.
- Select the correct backup date.
- Restore files and database through your backup plugin or hosting panel.
- Clear site, plugin, server, and browser cache.
- Log in and test the site carefully.
- Document what caused the issue so it does not repeat.
Checkpoint: Your site should load normally, the dashboard should be accessible, and key pages should work as expected.
Troubleshooting: If the restore completes but the site shows a white screen, enable debugging, check plugin conflicts, and confirm that the restored files match the restored database version.
/* Run this in wp-config.php only while troubleshooting. Remove or disable it after debugging. */
define( 'WP_DEBUG', true );
define( 'WP_DEBUG_LOG', true );
define( 'WP_DEBUG_DISPLAY', false );Step 9: Create a Repeatable Backup Checklist
A checklist makes backups consistent. Instead of guessing what you did last time, you can follow the same process every month or after every major site change.
- Confirm automatic backups are still running.
- Check that remote storage is connected.
- Download one recent backup copy locally.
- Verify that backup files and database exports are not empty.
- Test a restore on staging at least quarterly.
- Keep notes for backup dates, plugin changes, restore tests, and errors.
- Delete old backup copies according to your retention policy.
Checkpoint: You should have a written backup routine that anyone responsible for the site can follow.
Troubleshooting: If backups are consuming too much storage, reduce retention, exclude unnecessary cache folders, and store older archive copies outside the hosting account.
Your WordPress Backup System Is Now Ready
You now have a complete WordPress backup workflow: identify what to back up, create file and database copies, automate the schedule, store backups off-site, test restores, and document the process.
The most important habit is consistency. A backup created once is helpful, but a backup system that runs, stores, and tests itself regularly is what protects your site long term.
Before your next plugin update, theme change, migration, or redesign, run a fresh backup and confirm you know how to restore it.
Further Reading
- WordPress Disaster Recovery Walkthrough
- Common WordPress Backup Errors and How to Fix Them
- WordPress Hosting Backups
- Beginner Guide WordPress Backups Restore Strategies