SEO plugin setup feels confusing at first, especially when you open Yoast SEO for the first time and see many options. However, once you understand what each screen does, you can configure everything in a logical order that fits your site.
In this guide, you learn how to install Yoast SEO, run the first-time configuration, adjust the most important global settings, and use the content analysis tools on posts and pages. You also see how to handle sitemaps, schema, and simple checks so your setup stays solid over time.
SEO Plugin Setup Quick Start
The quickest way to handle SEO plugin setup with Yoast is to move in three stages. First, you install and activate the plugin. Next, you run the configuration wizard to give Yoast basic information about your site. Finally, you review a few key settings and test the plugin on a single post.
What You Need Before You Start
Before you touch any setting, make sure your WordPress site uses a stable theme and only the plugins you actually need. In addition, confirm that you can log in as an administrator, because you must reach the Yoast SEO screens under the main menu.
How Do You Install Yoast SEO?
To begin, you install Yoast like any other plugin. Therefore, verify that your hosting plan meets current WordPress and PHP requirements, since outdated software often causes odd issues. You can also create a quick backup so you can roll back if another plugin conflicts with Yoast.
Navigate to Plugins » Add New in your dashboard and search for “Yoast SEO”
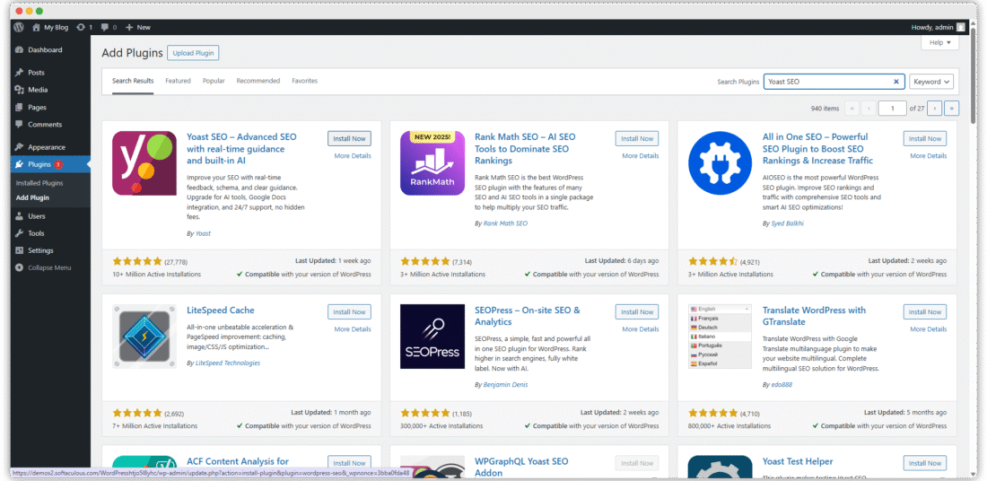
- Open Plugins » Add New.
- Search for Yoast SEO.
- Click Install Now, then click Activate.
- Look for the new SEO menu item in the left sidebar.
After activation, Yoast adds a main SEO menu and small indicators inside your post and page editor. This confirms that the plugin is active and ready for basic configuration.
Run The First Time Configuration
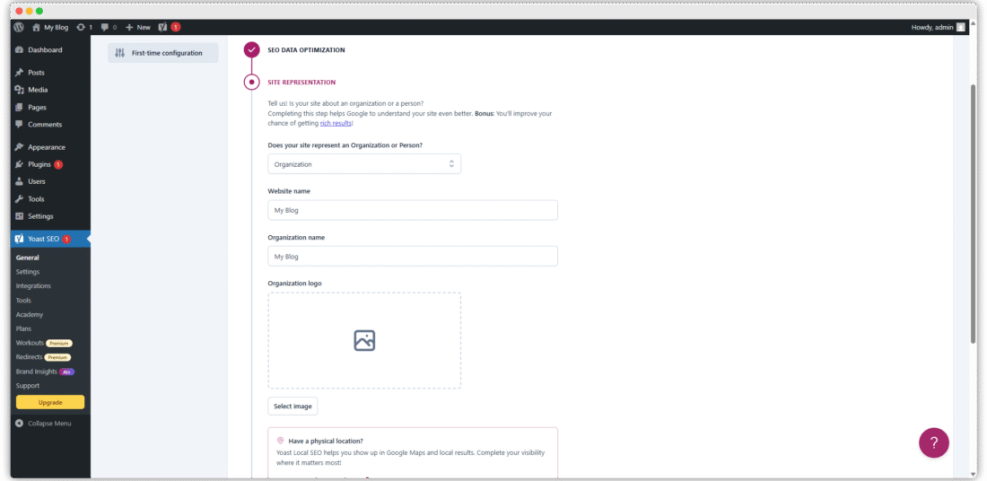
Most of the heavy lifting happens in the first-time configuration wizard. This wizard asks about your site type, organization details, and visibility choices so Yoast can generate structured data and sensible defaults. As a result, you avoid manual tweaks on dozens of smaller options later.
Navigate to SEO » General and click the configuration or first-time setup link.
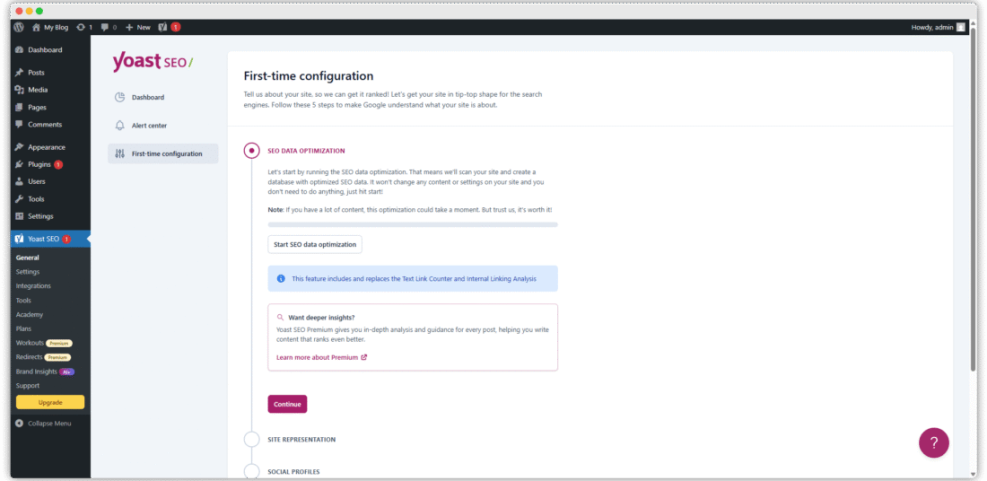
- Confirm your site is ready to be indexed.
- Select the correct site type, such as Blog or Online Store.
- Add your organization name and logo or your personal details.
- Connect main social profiles if available.
These answers help Yoast create consistent metadata and schema for search engines. Later, you can always revisit these choices if your brand name or logo changes.
Configure Core Yoast Settings
Once the wizard is complete, you should check the core settings that control how search engines see your content. This section focuses on representation, indexation, and key features like sitemaps and breadcrumbs, because these have the largest impact on how search engines crawl your site.
Choose The Right Site Representation
In the global settings, Yoast lets you define whether you are a person or an organization, and which logo or avatar to use. This information feeds into your schema graph and may show in rich results. Therefore, match your choice with the way you present yourself everywhere else online.
Navigate to SEO » Settings and open the section for Site basics or Site representation.
Control What Search Engines Index
Next, you need to decide which content types appear in search results. For most blogs and business sites, you want posts and pages indexed, but you may want to hide thin archives, test pages, or landing pages with duplicate content. Yoast adds simple switches for these decisions.
- Go to SEO » Settings and open Search Appearance or Content types.
- For each post type, decide whether it should be shown in search results.
- Review taxonomies such as categories and tags, and disable ones that add no value.
When you keep only meaningful archives indexed, crawlers waste less time on low-value pages. This makes it easier for your most important content to be crawled and ranked more often.
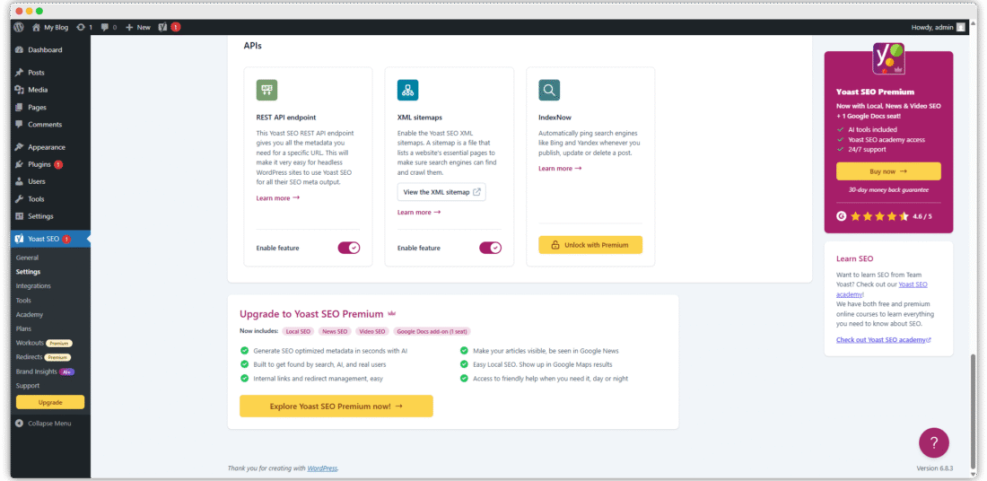
Enable Helpful Features And Sitemaps
Yoast can handle XML sitemaps, breadcrumbs, and many small technical details for you. In many cases, the default options are fine, yet you should verify that they match your site structure. In addition, make sure you do not use two plugins that generate sitemaps at the same time.
Navigate to SEO » Settings and open the Features or Site features section.
Optimize Posts And Pages For Search
After the global SEO plugin setup is done, your daily work happens inside the editor. Here, Yoast adds its familiar traffic light indicators and content analysis. When you use them correctly, these tools guide you toward clearer copy, stronger titles, and more consistent internal links.
How Do You Use The Yoast SEO Box?
The Yoast SEO box appears below your post or page content. It lets you set an SEO title, meta description, focus keyphrase, and social previews. As you type, Yoast updates a live Google-style preview and gives feedback on keyword usage, length, and basic on-page SEO.
Scroll below the editor to find the Yoast SEO box when editing any post or page.
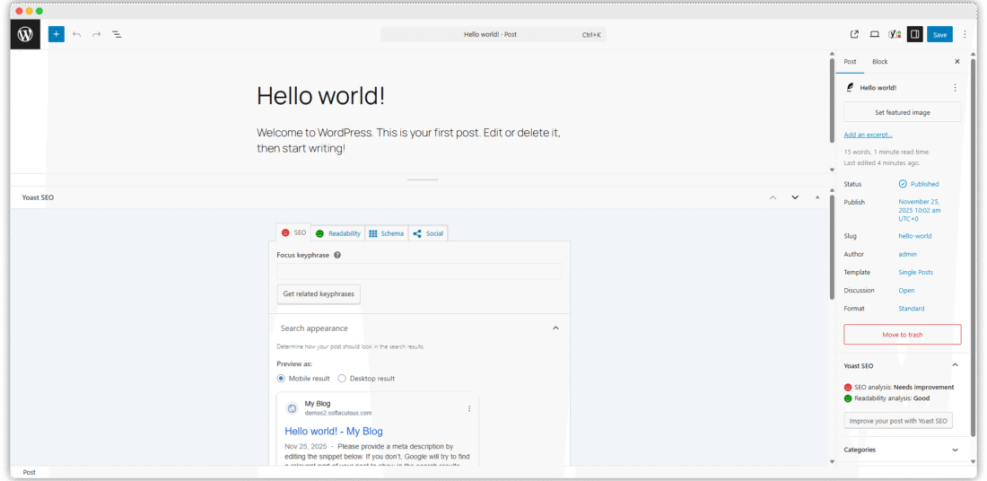
Improve Readability And Snippet Previews
Yoast includes a separate readability tab that checks sentence length, paragraph length, subheading distribution, and use of passive voice. These checks mirror how real visitors experience your text. Therefore, try to fix red and orange warnings when they match feedback you would give to a colleague.
- Open a post in the editor.
- Set a clear SEO title and meta description in the Yoast box.
- Switch to the Readability tab to see suggestions on structure and style.
- Break long sentences and add subheadings where the plugin suggests.
When your snippets look good and your text is easy to read, your click-through rate usually improves, even when rankings stay the same.
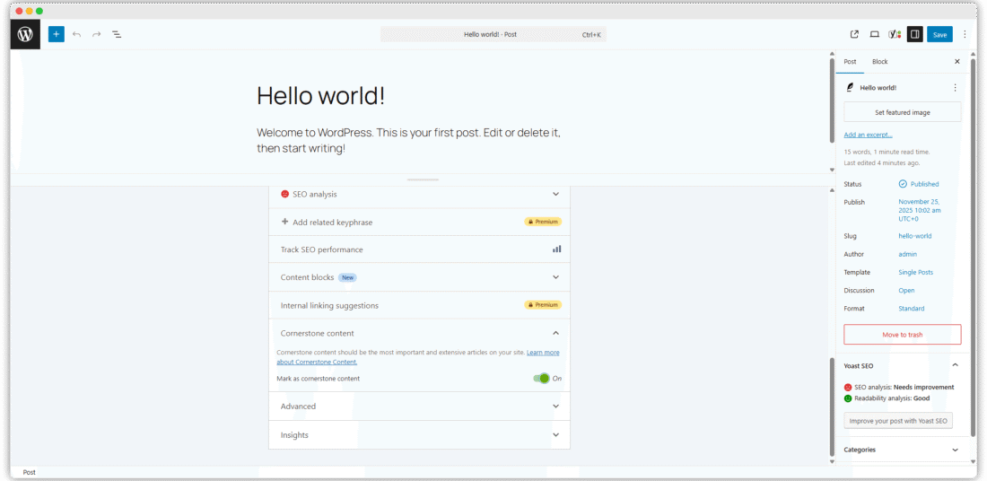
Mark Cornerstone And Pillar Content
Some posts act as pillars for broad topics on your site. Yoast lets you mark these as cornerstone content, which slightly tightens the analysis and makes it easier to spot when these pages have thin internal links. In addition, many site owners use this as a checklist for periodic updates.
In the Yoast SEO box, toggle the Cornerstone content switch for your most important guides.
Over time, a clear set of cornerstone pages makes your internal linking strategy easier to manage. You can also plan a simple Internal linking strategies WordPress that lists which articles should point to each cornerstone.
Connect Sitemaps And Integrations
Once your basic SEO plugin setup works, you should help search engines discover your content more efficiently. Yoast generates a structured sitemap index and can cooperate with tools such as Google Search Console and analytics solutions, which makes monitoring your traffic much easier.
Generate And Submit XML Sitemaps
Yoast usually enables XML sitemaps automatically, yet you should confirm that the sitemap exists and is reachable. After that, you can submit the sitemap URL to Google and Bing so they understand your site structure and crawling priorities faster.
- Visit
https://yourdomain.com/sitemap_index.xmlin your browser. - If the sitemap loads, copy the URL.
- Open Google Search Console, select your property, and submit the sitemap URL under Sitemaps.
When the sitemap processes without errors, you gain a quick view of how many URLs are discovered and indexed. Over time, this helps you spot issues with unexpected drops or excluded pages.
Connect To Search Console And Analytics
Search Console and analytics data reveal how well your setup performs beyond simple rankings. Some Yoast integrations let you see this data more conveniently from your dashboard. However, even without direct integration, linking your site to these tools is still essential.
Navigate to SEO » Settings and look for integrations or webmaster tools fields.
You can follow Google’s documentation on verifying your site ownership and adding properties in Search Console. For deeper analytics, pair Yoast with a separate guide to Analytics setup WordPress google analytics so you understand what the numbers mean.
Configure Social Profiles And Previews
Social previews affect how your content looks when shared on platforms like Facebook and X. Yoast lets you define basic social information and fallback images at the site level, then override these fields on individual posts. As a result, your shared links look cleaner and more consistent.

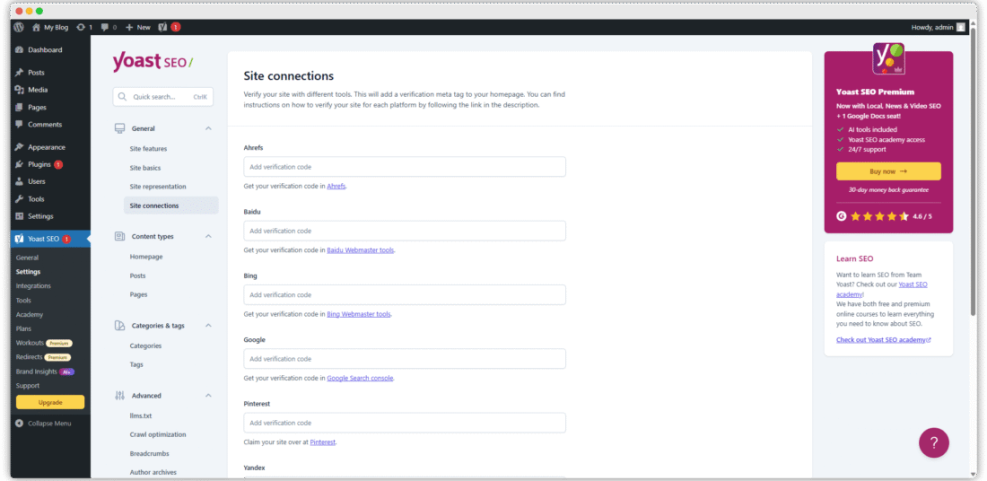
- Open SEO » Settings and locate the Social or Site connections section.
- Add main social profile URLs such as Facebook Page or LinkedIn.
- Set a default share image for posts without a featured image.
On important landing pages, use the Social tab in the Yoast box to customize titles and descriptions specifically for social networks. This small step can meaningfully improve engagement from shared links.
Fine Tune Yoast For Better Results
After the main SEO plugin setup is stable, you can explore Yoast’s tools and more advanced options. These features help you clean up outdated titles, manage redirects, and reduce crawl waste. You do not need to adjust everything immediately, yet gradual tuning keeps your site healthy.
Use Tools For Bulk Titles And Redirects
Yoast includes a tools area where you can bulk edit titles and descriptions, or import and export settings. In Yoast SEO Premium, you also gain a redirect manager that helps you handle URL changes without touching code. This is especially useful when you restructure old content.
- Go to SEO » Tools.
- Use the Bulk editor to fix inconsistent titles or missing descriptions.
- If available, use the redirect manager to map old URLs to new ones.
Common Mistakes To Avoid
Many site owners either install Yoast and never open the settings again, or they change too many advanced options without understanding them. Both habits cause trouble. Instead, document your decisions and change one thing at a time, especially when adjusting indexation or schema options.
- Do not run multiple SEO plugins that overlap in features.
- Avoid blocking your whole site in search after going live.
- Review noindex settings before launching a new content section.
- Recheck sitemaps after major design or permalink changes.
When you treat Yoast settings like a living checklist instead of a one-time task, you reduce the risk of invisible errors that silently hurt organic traffic.
When To Consider Premium Or Addons
The free version of Yoast covers most core needs, especially for small blogs and business sites. However, larger sites may benefit from Premium features such as redirects, internal linking suggestions, and additional schema options. Specialized addons also help with WooCommerce, news, and video content.
Before upgrading, list the specific problems you want to solve. Then compare those with the feature list on the official Yoast site, and avoid paying for features you will not use. If your budget is tight, focus first on strong content and a clean technical setup.
SEO Plugin Setup Conclusion
Effective SEO plugin setup with Yoast starts with a clear order of operations. First, you install and run the configuration wizard. Next, you tune global settings for indexation, sitemaps, and features. Finally, you apply those foundations to every new post, using the analysis tools as a guide.
Your next step is simple. Choose one key page on your site and give it a full Yoast review: refine the title and description, improve headings, and add smart internal links to your cornerstone content. When that process feels smooth, repeat it across your most important pages first, not every minor post.
More WordPress Guides You Might Like
If you want to strengthen your overall WordPress SEO and analytics skills around Yoast, these related topics make excellent next steps and help you build a more complete strategy.
- Is WordPress good for seo
- Content briefs WordPress writing
- Internal linking WordPress beginners
- Developer hooks for better WordPress theme optimization with
- How to add google search console to WordPress
As you cover these areas, your Yoast configuration becomes part of a larger system rather than a collection of isolated settings. That system is what supports long-term organic growth.