WordPress migration sounds scary when your blog holds years of posts and images. You worry about breaking the design, losing SEO, or seeing visitors hit error pages while you move everything to a new host or domain.
This guide shows you how to plan, run, and verify a complete blog move. You will learn how to choose between plugin and manual methods, handle domains and DNS, protect SEO, and test your site so readers never notice the change.
WordPress Migration Quick Answer
What Does Migrating a Blog Mean?
Migration means copying your entire WordPress site to a new place, then switching traffic to that copy. You move files, the database, and domain settings so visitors see the new server, but the blog looks and behaves like the old one.
Key Steps for a Safe Migration
The safest path follows a clear checklist. You prepare backups, choose a method, test on a staging area, then switch DNS once everything works and looks right.
- Back up files and database in at least two places.
- Set up the new hosting or new WordPress install.
- Choose plugin or manual migration and copy the site.
- Fix URLs, permalinks, and logins on the new site.
- Test pages, forms, and logins on a temporary URL.
- Update DNS or domain settings and monitor for issues.
When you follow these steps and test carefully, you can move a WordPress blog with little or no downtime, even if you are not a developer.
Plan Your Blog Move
Clarify Why You Want to Move
Start by writing down why you want to migrate. You might want faster hosting, better support, cheaper pricing, or a more professional domain name. When you know your goal, you can choose the right host, method, and timing.
List What Your Site Depends On
Next, list the key parts of your blog. Include your theme, child theme, plugins, custom code snippets, email forms, payment buttons, and any third party services. This list helps you check that everything still works after the migration.
Make Reliable Backups Before You Start
Always create a full backup of your current site. Use your hosting backups, a backup plugin, or both. Store at least one copy off the server, for example in cloud storage or on your computer. That way you can roll back if something goes wrong.
For a deeper setup, you can follow a dedicated Beginner guide to WordPress speed optimization to strengthen your backup routine before moving.
Compare Plugin and Manual Methods
When a Plugin Is the Best Choice
For most blog owners, a migration plugin is the easiest option. It wraps your files and database into one package and restores them on the new site. Many plugins also handle search and replace for URLs, which avoids tricky database tools.
When Manual Migration Works Better
Manual migration gives you more control. You copy files over FTP or a file manager and move the database with tools like phpMyAdmin. This approach helps when plugin limits, very large sites, or strict hosting rules block plugin-based moves.
Plugin vs. Manual at a Glance
The table below shows how plugin and manual methods compare for a typical WordPress blog migration.
| Aspect | Plugin Migration | Manual Migration |
|---|---|---|
| Setup Difficulty | Easy, guided screens | Higher, several tools |
| Required Skills | Basic WordPress skills | Comfort with FTP and databases |
| Risk of Errors | Low if plugin succeeds | Higher if you miss steps |
| Downtime Control | Easy to test before DNS change | Also testable, but more setup |
| Fine Control | Less granular control | Full control over every file |
| Best For | Small to medium blogs | Large sites or special setups |
If you are not sure which method to use, start with a plugin on a staging copy. You can always fall back to a manual approach if the plugin fails.
Migrate Your Blog with a Plugin
Prepare Both Old and New Sites
First, create a clean WordPress install on your new host or staging environment. Use the same PHP version and similar server settings if possible. Then make sure both the old and new sites use the same core version to avoid conflicts during import.
Export and Import with a Plugin
Navigate to Plugins » Add New and search for your chosen migration plugin, then install and activate it.
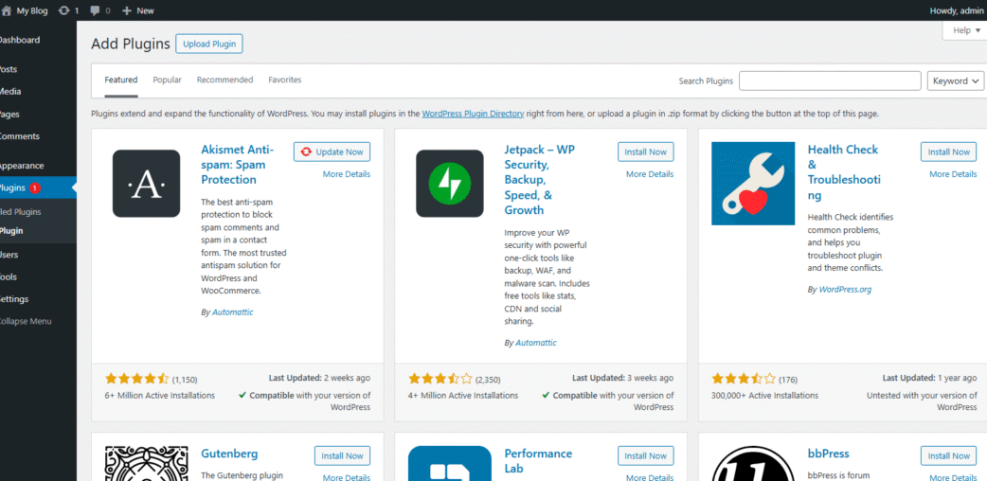
Most tools follow the same pattern. On the old site, you create an export file that bundles your database, themes, plugins, and uploads. On the new site, you install the same plugin and import that file so it overwrites the fresh install with your blog content.
Fix Links and Permalinks After Import
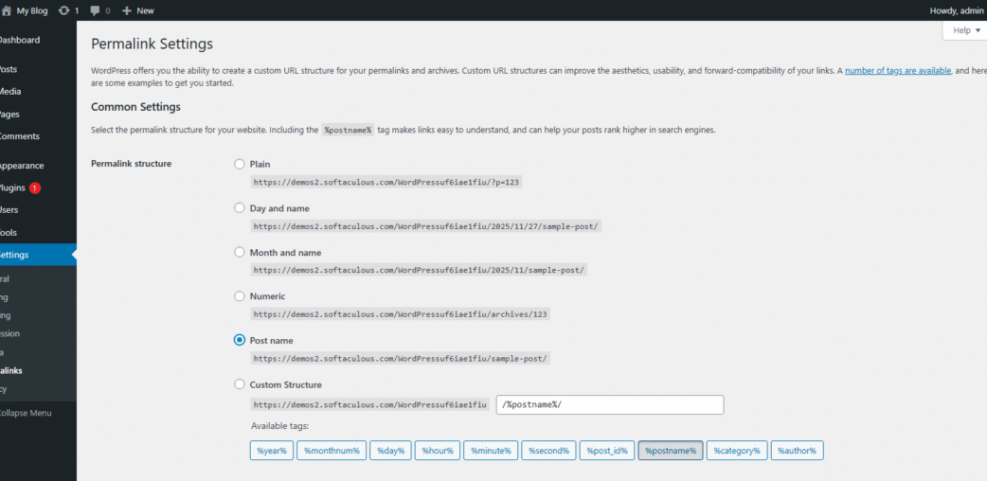
After import, you often need to refresh permalinks. Navigate to Settings » Permalinks, confirm your preferred structure such as Post name, and save.
Many plugins include a search and replace tool for URLs. Use it to replace the old domain with the new one if the addresses changed. Always run a dry run first when possible, then process the real replace only after you confirm the preview looks right.
Manually Move Your WordPress Blog
Copy Files and Export the Database
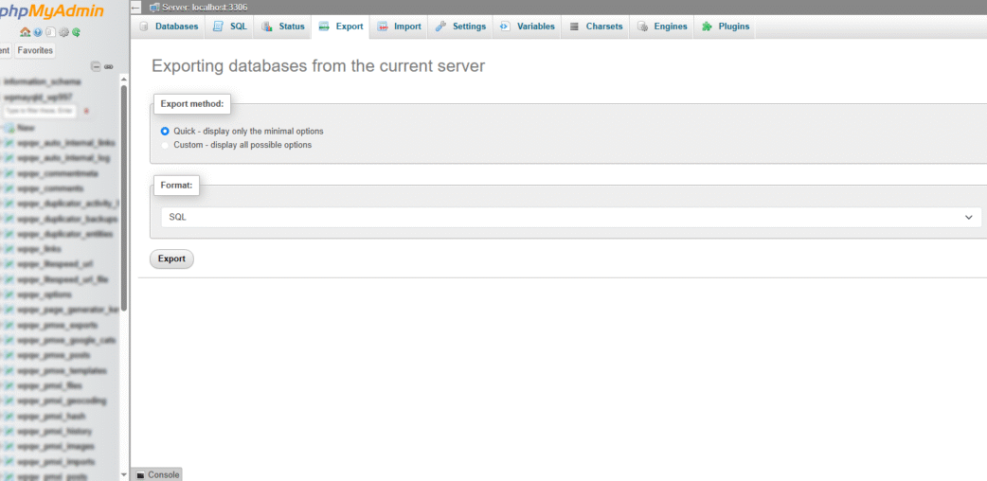
To move a site by hand, you first copy files and export the database. Using FTP or your hosting file manager, download the entire WordPress directory, including wp-content, wp-admin, and wp-includes. Then export the database to an SQL file.
In your hosting control panel, open phpMyAdmin for the old site database.
Upload Files and Import the Database
On the new host, create an empty database and user, then note the database name, username, and password. Upload your WordPress files to the correct directory, usually public_html or a similar web root. Then import the SQL file into the new database with phpMyAdmin.
Update wp-config and URLs
Next, edit wp-config.php on the new server so DB_NAME, DB_USER, DB_PASSWORD, and DB_HOST match the new database. If your URL changes, use a search and replace tool or a command line script to update old domain values inside the database tables.
What If Something Breaks After Migration?
If you see a white screen or database connection error, check file permissions, database credentials, and your .htaccess file. You can often fix issues by re-saving permalinks, deactivating all plugins, and then reactivating them one by one to find the culprit.
Domains DNS Email and Downtime
Point Your Domain to the New Host
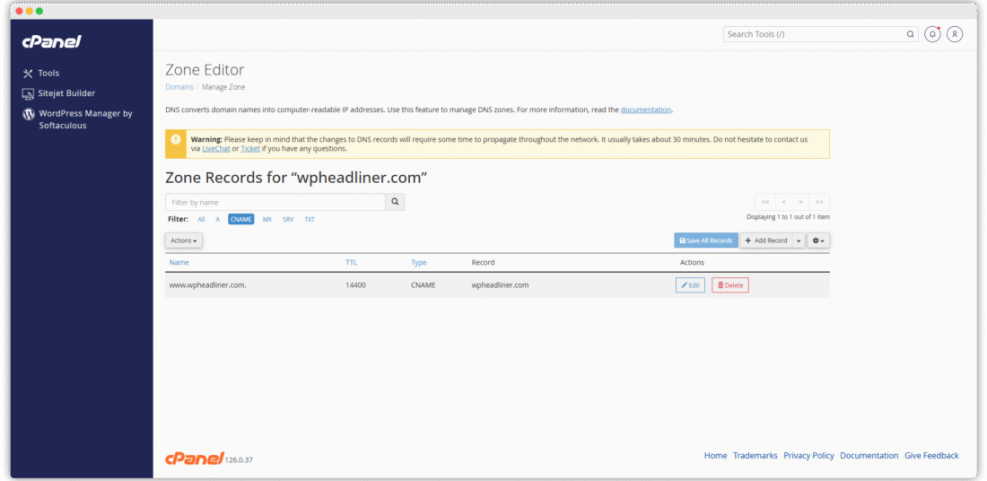
Once the new copy of your blog looks correct, you can switch traffic. Update your domain’s nameservers or DNS A record to point to the new host. This tells the internet to use the new server’s IP address when people type your domain.
Use DNS and Hosts File for Testing
Before global DNS changes, you can preview the new site using a temporary URL or a hosts file entry on your computer. This lets you test menus, forms, and login flows without exposing broken pages to real visitors.
In your hosting panel, open the DNS or domain management section for your domain.
Handle Email Accounts During Migration
If your host also manages email, plan that move as well. Recreate your email addresses on the new host before you change DNS. Then update mail client settings so users connect to the new mail server as soon as DNS finishes updating.
Test Fix and Optimize After Moving
Check Pages Posts and Media
After DNS change, browse your site like a new visitor. Test the home page, key category pages, recent posts, and popular content. Confirm that images load quickly and that galleries, featured images, and sliders still work as expected.
Verify SEO Redirects and Sitemaps
If your URLs changed, set up 301 redirects from old addresses to new ones. You can use a redirect plugin or your server configuration. Then submit the new XML sitemap in Google Search Console so search engines find the updated structure faster.
- Confirm login and admin access work.
- Test all forms and contact pages.
- Review menus and widgets.
- Check error logs for new warnings.
This short checklist helps you spot issues early, while the migration is still fresh in your mind and easier to debug.
Monitor Performance and Error Logs
In the first few days, watch performance and stability. Enable caching on the new host and compare load times. Review server error logs for repeated warnings, and fix any plugin or theme code that behaves differently on the new environment.
For deeper tuning, you can later follow a dedicated Managed WordPress hosting guide or a Beginner guide to WordPress speed optimization to fine tune your new setup.
WordPress Migration Conclusion
Your Next Step After This Guide
With a clear plan, WordPress migration becomes a controlled project instead of a risky jump. Your next step is to test the process on a small site or staging copy. Once you feel comfortable, schedule the real migration for your main blog and follow the same checklist.
If your site earns income or handles many leads, consider creating a long term maintenance routine after the move. Regular backups, updates, and security checks will keep your new hosting stable so you do not need another emergency migration soon.
More WordPress Guides You Might Like
Suggested Tutorials and Checklists
To build on your new setup, these guides help you improve backups, speed, and overall blog quality.
- Beginner guide to WordPress speed optimization
- Create WordPress blog
- Beginner checklist optimizing WordPress blog posts
- Complete WordPress Migration Checklist for Safer Blog Moves
- How to Troubleshoot Common WordPress Migration Errors
Working through these resources will turn your one time migration project into a stronger, more future proof WordPress setup.