WordPress Disaster Recovery Walkthrough
Step by Step Plan to Restore Your Site Safely
WordPress disaster recovery sounds scary when your site suddenly goes offline, throws errors, or shows a hacked homepage. A bad update, a broken plugin, or a server crash can cost you visitors, customers, and sleep if you do not have a clear plan.
This walkthrough gives you a simple structure to prepare before anything breaks, react calmly when disaster hits, and restore your site with minimal downtime. You will see how to recognize different failure types, use backups correctly, and turn your recovery steps into a repeatable plan.
WordPress Disaster Recovery Quick Start
When your site breaks, you need a calm, repeatable routine. The fastest way to recover is to stop the damage, confirm a clean backup, restore in a safe place, then go live only after you verify everything.
- Stay calm and write down what you see, including error messages and recent changes.
- Check whether the problem is global by visiting your site in another browser and on mobile.
- Log in to your hosting panel and confirm there is no known outage or maintenance window.
- Switch on maintenance mode or restrict public access so visitors do not see a broken or hacked site.
- Identify the most recent known good backup, including both files and the database.
- Restore that backup to a staging site or temporary subdomain whenever your host or plugin allows it.
- Test the restored copy, then replace your live site or switch DNS only after it works correctly.
This simple flow keeps visitors away from broken pages, protects your data, and avoids restoring a half-working backup straight onto the live site.
What Should You Do First?
First, confirm whether the issue is limited to you or affects everyone. Try a different device or network, and check your host’s status page or dashboard notices. If the whole site is down for everyone, treat this as a full incident and start documenting your actions right away.
When Should You Involve Your Host?
You should contact hosting support as soon as you suspect a server issue, hardware failure, or malware infection beyond your skills. Provide the exact time the incident started, the URL where you see errors, and what changed just before the problem. Clear details usually lead to faster help and a cleaner recovery.
Typical WordPress Failure Scenarios
Not every disaster looks the same. Some problems come from your code or plugins, while others start at the server or from attackers. Understanding the most common scenarios helps you choose the right recovery path without guessing.
- Bad theme or plugin update that triggers a fatal error or white screen.
- Hacked site that redirects traffic, injects spam, or adds unknown admin users.
- Server outage, disk failure, or corrupted database tables at the hosting level.
- Human error, such as deleting content, dropping a database, or overwriting files.
Each of these requires slightly different first steps, but every case benefits from clean backups, a staging site, and a written checklist.
What Problems Count as Disasters?
Think of a disaster as anything that makes your site unavailable, unsafe, or unusable for visitors. That includes full downtime, severe performance drops, strange redirects, or warnings from browsers and search engines. If you would be afraid to send a paying customer to the site, treat it as a disaster.
How Can You Quickly Classify the Issue?
Look for simple clues first. If only one page shows errors after editing it, you may have a content or shortcode problem. If the entire site fails with a critical error, suspect a plugin, theme, or PHP change. If you cannot even reach the dashboard or see server errors, the host or database may be in trouble.
When Is It Probably a Security Incident?
Assume a security incident when you see new unknown admin users, strange logins, spam pages, or redirections to other domains. Browser or search warnings about malware also signal compromise. In those cases, freeze logins, change passwords, and avoid restoring an infected backup without cleaning it first.
// Add this to wp-config.php temporarily during troubleshooting
define( 'WP_DEBUG', true );
define( 'WP_DEBUG_LOG', true );
define( 'WP_DEBUG_DISPLAY', false );
// Check wp-content/debug.log, then disable WP_DEBUG after you finish.
This simple configuration records errors in a log file without showing details to visitors, which makes it easier to see what went wrong during a failure.
Designing a Reliable Backup System
Your disaster recovery plan depends completely on reliable backups. You need more than a single daily copy that lives on the same server as your site. A strong backup strategy combines multiple locations and regular testing so you never discover a broken backup during an emergency.
What Is the 3-2-1 Backup Rule?
A practical way to think about backups is the 3-2-1 rule. Keep several recent copies of your site, store them in at least two different types of storage, and always have at least one copy offsite. That way, you can still recover if a server, account, or device fails completely.
How Do You Set Up Backup Plugins?
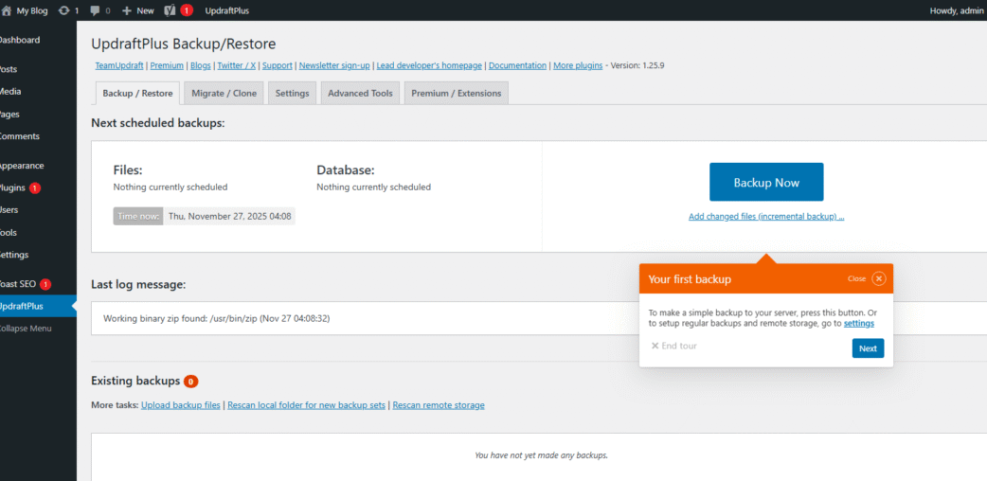
A good backup plugin lets you schedule automatic jobs and store copies offsite.
- From the WordPress Dashboard, go to Plugins » Add New and search for a well-rated backup plugin.
- Install and activate it, then open its settings page from the left-hand menu.
- Choose a full backup that includes both database and files, and set a schedule that matches how often your site changes.
- Connect an offsite storage service such as remote FTP or cloud storage, and enable encryption when available.
- Run a manual backup now, then download one copy to your own computer.
After you finish the first backup, try restoring it to a test site so you know the plugin works end to end.
In the WordPress Dashboard, go to Settings » Your Backup Plugin and open the Existing Backups tab.
How Often Should You Run Backups?
The more often your content or orders change, the more often you should back up. Busy shops and active blogs often need at least daily backups, while small brochure sites may live with less frequent schedules. Always create an extra backup before major updates, migrations, or plugin experiments.
For deeper best practices, you can also study the official WordPress backup guidance at WordPress Developer Resources. That reference explains why both files and databases matter in every recovery plan.
If you want to expand this into a complete write-up later, you can turn your notes into a dedicated WordPress backup strategy.
Step by Step Site Recovery
Once you have a clean backup and a rough idea of what went wrong, you can start the actual restore. The exact steps depend on whether you use a backup plugin, host-level backups, or manual copies. The goal is always the same: restore to a safe environment, verify, then go live.
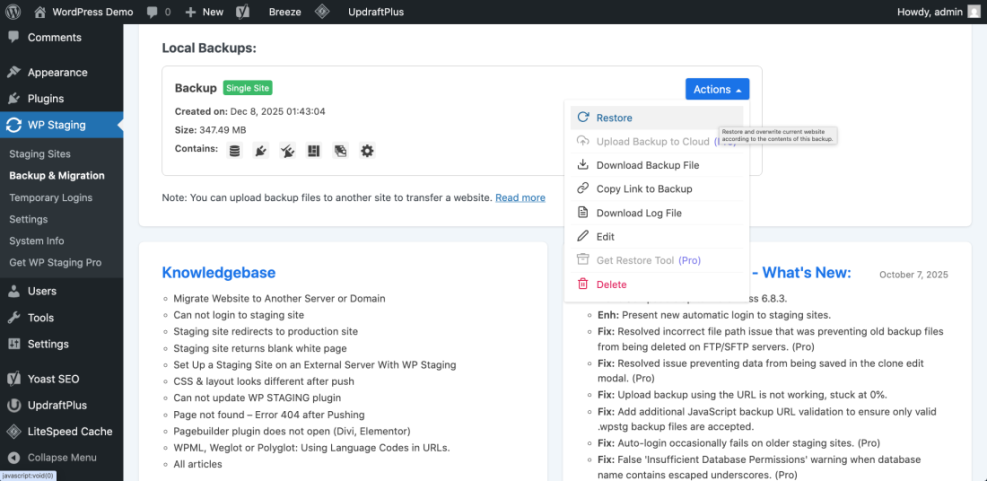
How Do You Restore With a Backup Plugin?
Most backup plugins follow a similar flow.
- Log in to the WordPress Dashboard for your staging site or temporary recovery site.
- Install and activate the same backup plugin you use on the live site if it is not already there.
- Upload your backup file if needed, or pick one from the plugin’s “Existing Backups” list.
- Choose whether to restore the database, files, or both, depending on the incident.
- Start the restore and wait until the plugin finishes without errors.
- Log out and back in, browse the front end, and test forms, checkout, and logins.
Only after you confirm that the restored copy works should you move it to the live domain or switch DNS.
In the WordPress Dashboard, go to Tools » Your Backup Plugin and click Restore next to the backup you want to test.
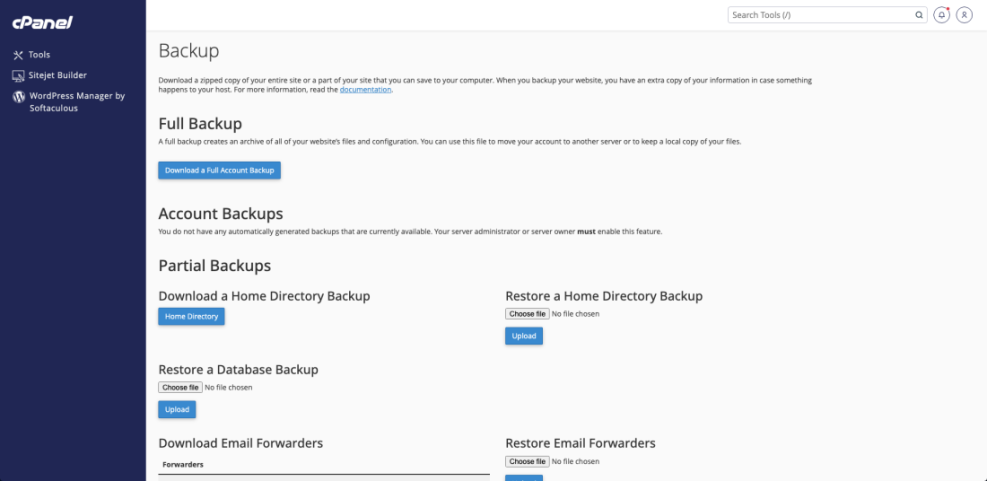
How Do You Restore From Host Backups?
Many managed WordPress hosts provide one-click backups in their control panels.
- Log in to your hosting dashboard and open the site management page for the affected domain.
- Find the backups or restore section in the panel.
- Review the list of restore points and pick the most recent one from before the incident.
- If the host allows it, restore to staging instead of live so you can test safely.
- Wait for the process to complete, then log in to the restored site and test it.
If your host only offers direct live restores, schedule the restore during a low-traffic window and warn your team before you start.
From your hosting panel, open cPanel or a similar interface, then click Backup or Restore in the tools section.
What If You Must Recover Manually?
Sometimes you only have raw files and a database export. In that case you will restore manually.
- Use your host’s file manager or an FTP client to upload the backup files to a new empty directory.
- Create a fresh database in your hosting panel and import the SQL backup using phpMyAdmin or a similar tool.
- Edit wp-config.php to point to the new database name, user, and password.
- Load the site in your browser and log in to the dashboard.
- Update the site URL in Settings » General if the recovered copy lives on a temporary domain.
Although it takes more steps, manual recovery gives you full control when plugins or host tools are not available.
Building Your WordPress Disaster Recovery Plan
Once you survive one disaster, you should capture what worked and what did not. A written recovery plan turns a stressful scramble into a checklist that anyone on your team can follow, even at night or on a weekend.
What Should You Document in Advance?
Start with a simple document that lists your hosting login, domain registrar, key plugin licenses, and usual backup locations. Include contact details for support teams and any developers you trust. Store this file in secure cloud storage and keep access in a password manager so you can reach it even if email is down.
- Where backups live and how to restore them.
- Which plugins are critical and must be tested after every restore.
- How to switch to a maintenance or holding page quickly.
- Who is allowed to make recovery decisions.
These checklist items make it easier to recover under pressure, because you do not need to remember every technical step from memory.
How Do You Assign Roles and Response Times?
Even a small site benefits from clear roles. Decide who owns communication with customers, who talks to the host, and who handles technical steps. Set reasonable response times for business hours and off-hours so everyone knows when they must be reachable during serious incidents.
How Often Should You Test Backups?
Testing backups only takes a little time and prevents nasty surprises. Aim to restore to a staging site at regular intervals, such as once a month for active sites. During each test, log in, place a test order if you run a shop, and confirm that all important pages still work.
This kind of routine can later grow into a full Maintenance Process Checklist that you follow every month.
Hardening WordPress Against Disasters
A strong disaster recovery plan reduces damage, but prevention still saves the most time and money. By hardening your site, you lower the chances that you ever need to use your recovery checklist.
How Do You Reduce Risk From Updates?
Updates are important, yet they often trigger failures when you skip backups or change too much at once. Always back up your site before major core, theme, or plugin updates. When possible, run updates on a staging site first, test for errors, then apply the same updates to your live site.
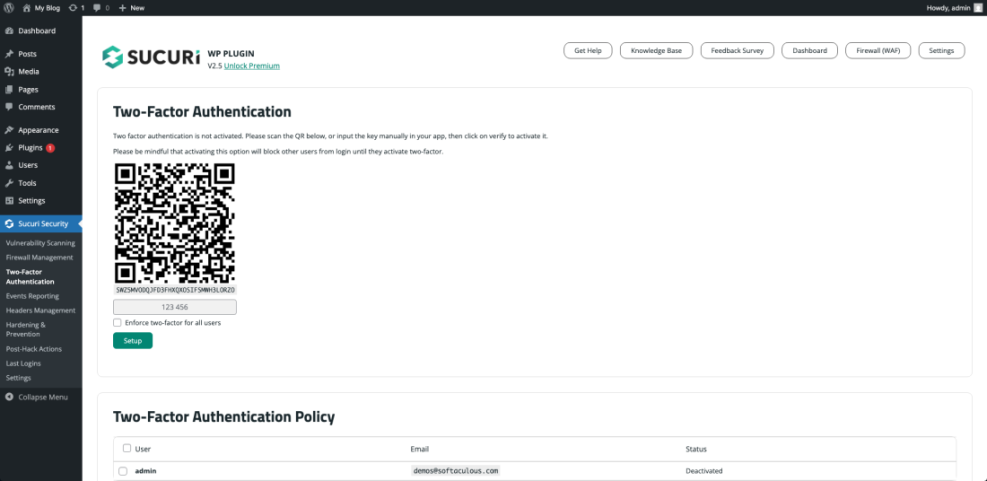
How Can You Improve Login and Malware Protection?
Security plugins make it harder for attackers to gain access or hide malware. Many tools add firewalls, brute-force protection, and file change monitoring. Combine them with strong, unique passwords, two-factor authentication for admin users, and limited access to the dashboard from shared computers.
In the WordPress Dashboard, open Users » Profile or your security plugin’s settings page to turn on two-factor authentication and login alerts.
How Do Monitoring and Alerts Help?
Uptime and performance monitoring tools alert you when your site stops responding or slows down. Connect them to email or messaging apps so someone sees alerts quickly. Fast notifications mean you can take the site into maintenance mode, start recovery, and shorten the downtime window.
For advanced database protection techniques, you can also review the official guide at Backing Up Your Database. Those practices support cleaner restores in every incident.
WordPress Disaster Recovery Conclusion
A solid WordPress disaster recovery plan turns chaos into a checklist. When you know how to capture clean backups, restore them safely, and test your site before going live, you protect your brand and revenue even when things break.
Your next step is simple. Set up layered backups, write down a short recovery playbook, and schedule your first restore test on a staging site. Once you prove that process works, you will feel far more confident the next time your site faces a serious problem.
More WordPress Disaster Recovery Guides You Might Like
If you want to keep improving your site’s resilience and day-to-day care, these topics make natural next steps for your learning plan.
- WordPress backup strategy
- Beginner guide to WordPress speed optimization
- Common WordPress backup errors and how to fix
- WordPress speed optimization new bloggers
Each of these future guides builds on the same idea as your recovery walkthrough: small, repeatable steps that reduce risk and make your WordPress site easier to manage over time.