WordPress Website Design is the process of planning and creating how your WordPress site looks, feels, and works for visitors, using themes, layouts, and design tools inside WordPress. Instead of hard coding every page, you combine ready made design options with your brand colors, fonts, and content so the site looks professional and is easy to use.
In this guide you will understand what WordPress Website Design actually includes, how themes and page builders fit together, and which parts you can safely do yourself before hiring a designer or developer.
What You Need to Start
- A working WordPress installation on your host. If you are not there yet, follow the steps in How to install a WordPress theme.
- Login access to your WordPress admin dashboard at yourdomain.com/wp-admin.
- A simple plan for your site purpose, such as “blog”, “service business”, “online store”, or “church site”.
- A short list of pages you know you need, such as Home, About, Services, Blog, Contact.
- At least a few pieces of sample content, like one draft blog post and one service page, so you can see your design with real text.
- Optional but recommended a staging site so you can test design changes safely by using a guide like Create WordPress blog.
Understand WordPress Website Design Basics
Before you start changing colors and fonts, understand how WordPress separates design from content. This helps you pick the right tools and avoid breaking your layout later.
- Log in to your WordPress dashboard at /wp-admin.
- Go to Pages and open a sample page to see how your content is structured with headings and paragraphs.
- Navigate to Appearance » Themes to see which theme controls your design.
Verify your current design by opening your site in a new browser tab. Refresh the page after changes to confirm that the theme controls fonts, colors, and layout, while the page itself holds only the text and images.
For a deeper platform overview, read What is managed WordPress and What is managed WordPress so you clearly see how design sits on top of the WordPress core.
Plan Your WordPress Site Layout
Strong WordPress Website Design starts with planning. You decide how visitors move through your site before you touch any colors or fonts.
- Write down your main navigation items such as Home, About, Services, Blog, Contact.
- In the dashboard, go to Pages » Add New and create one page for each main item if it does not exist yet.
- Navigate to Appearance » Menus (or Appearance » Editor for block themes) and add these pages to your main menu.
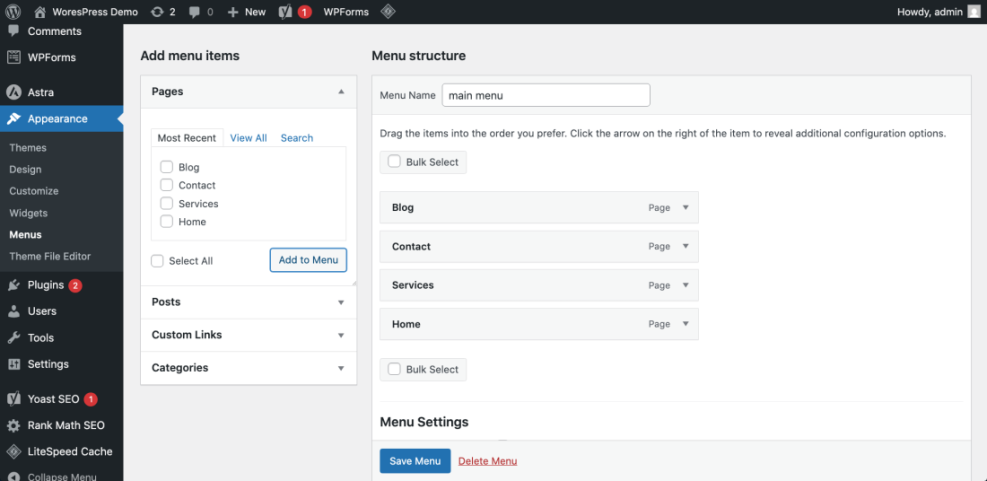
Visit your site front end and click each menu item to confirm the navigation works and there are no broken or empty pages. Good structure makes future design decisions easier and supports SEO.
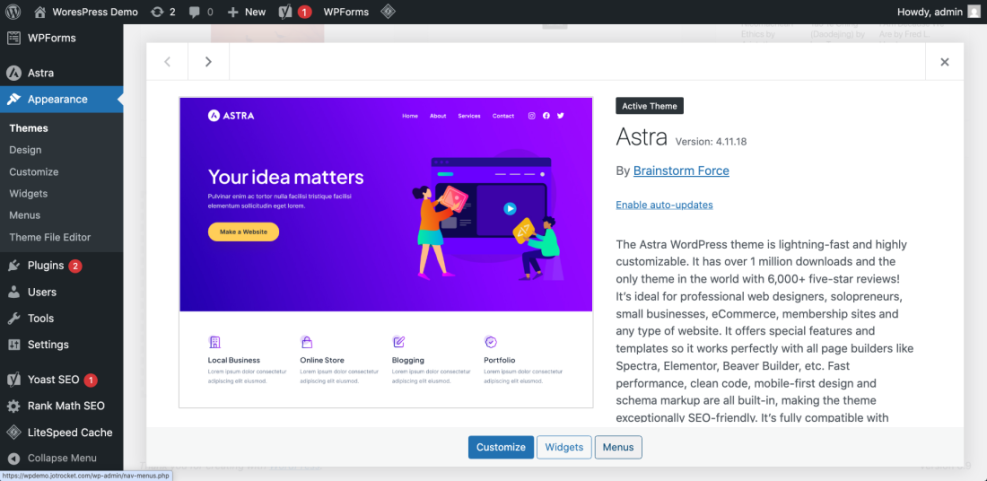
Choose the Right WordPress Theme
Your theme provides the base design for your WordPress Website Design. It sets your default layout, typography, and many style options before you customize anything.
- From the dashboard, go to Appearance » Themes and click Add New.
- Use the search box to browse themes that match your niche and filter by Featured, Popular, or Block Themes.
- Click Preview or Live Preview on a theme to see how sample content looks with its design.
- When you find a clean, fast, and responsive design, click Install, then Activate.

After activation, reload your site front end and scroll several pages. Check that the typography is readable and that buttons and forms match your brand direction. If not, switch back or test another theme until the base design feels right.
Customize Your WordPress Design Without Code
Once your theme is active, you use WordPress customization tools to match the design to your logo, brand colors, and layout preferences.
- In the dashboard, go to Appearance » Customize (for classic themes) or Appearance » Editor (for block themes).
- Set your Site Title, Tagline, and upload your Logo in the relevant panel.
- Open the Colors and Typography sections to adjust brand colors and font sizes for headings and body text.
- Customize the Header and Footer areas to control your logo position, menu, and footer widgets.
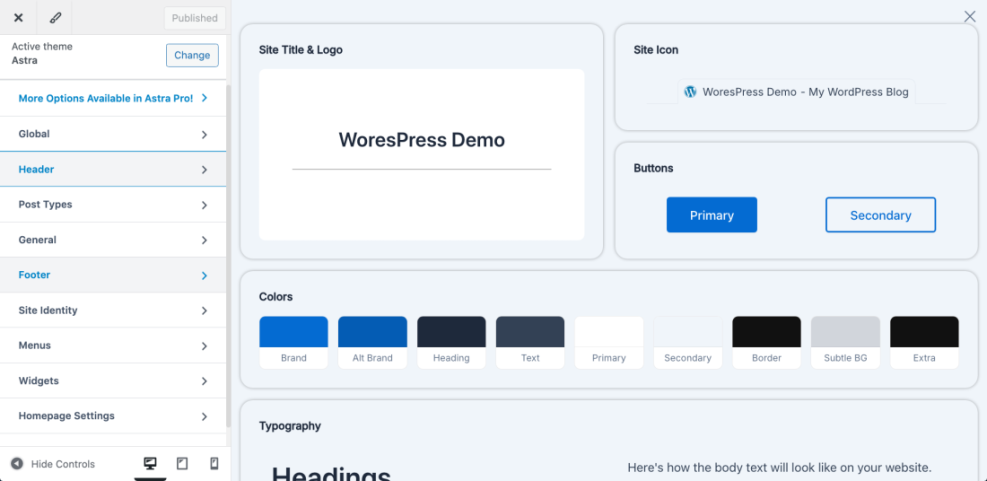
Use the live preview on the right side to confirm changes before saving. When you are happy with your updates, click Publish or Save and reload your site in a new tab to verify that all visitors see the new design.
For layout specific ideas, review WordPress migration blog guide and Best WordPress seo plugins and tools to see proven structures you can copy.
Design Individual Pages and Blog Layouts
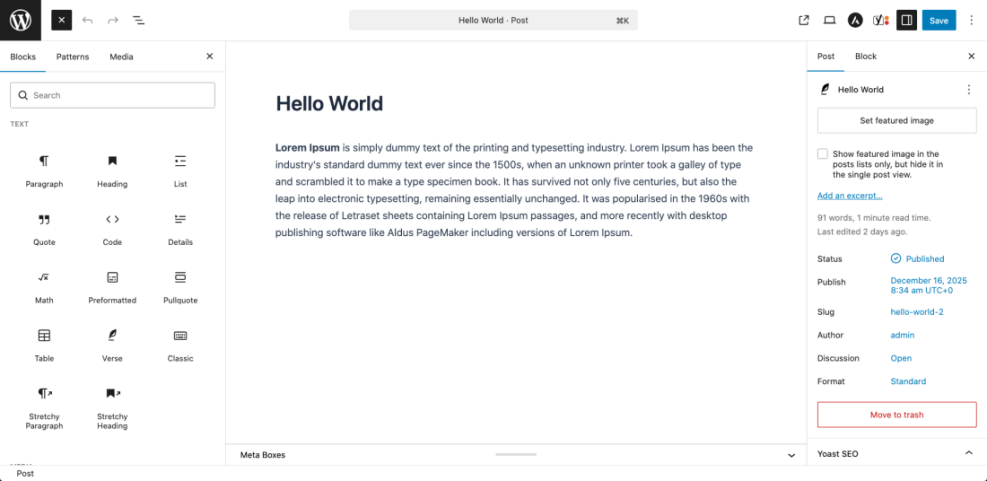
WordPress Website Design is not only about the frame around your content. You also design how each page and blog post looks using the block editor or a page builder plugin.
- Go to Pages » Add New to design a key page such as your Home or Services page.
- Use the block editor to insert Heading, Paragraph, Image, and Button blocks to build logical sections.
- Click the Settings panel and review the Template and Featured image options so the page matches your theme layout.
- For blogs, go to Settings » Reading and choose whether your homepage shows latest posts or a static page.
Click Preview to open the page on desktop and mobile views. Confirm that headings create a clear hierarchy, text is easy to scan, and key calls to action stand out above the fold.
Check Mobile Design Speed and Accessibility
More visitors now arrive on phones than desktops, so mobile friendly WordPress Website Design is essential for both user experience and SEO.
- Open the Customizer or Editor and use the device icons to switch to Tablet and Mobile previews.
- Review headings, paragraph width, and button size to ensure they are readable and easy to tap.
- Test your site on a real phone by loading your homepage and a key content page.
- Run your URL through Google PageSpeed Insights in a separate tab to check Core Web Vitals and identify design related speed issues.
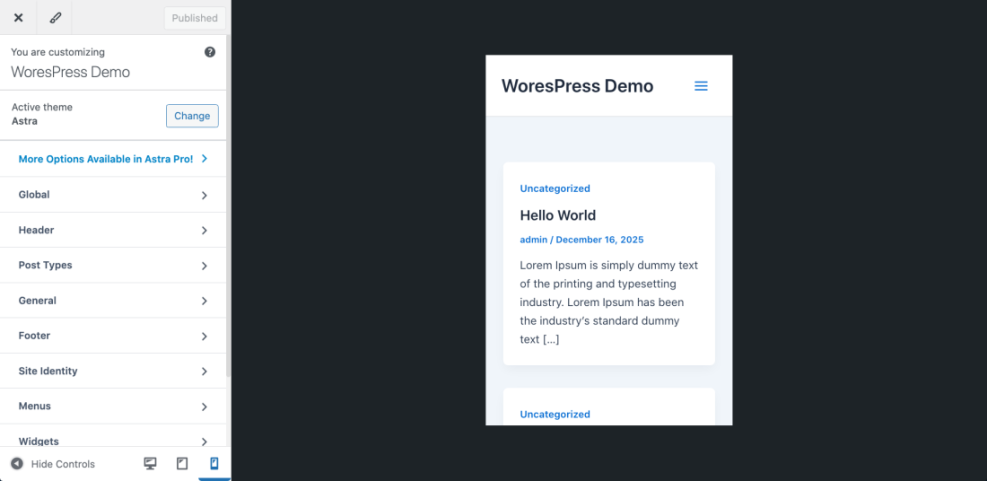
Fix any issues where text is too small, buttons overlap, or images push content too far down the page. Good mobile design should feel fast, clean, and simple instead of crammed and slow.
How to Edit Image Alt Text in WordPress
Accessible WordPress Website Design also means adding useful alt text to your images. Alt text helps screen readers describe images to visually impaired visitors and also gives search engines more context about your content. There are several ways to edit alt text in WordPress, depending on how you manage your images.
| Alt Text Editing Method | Best For | Where You Edit Alt Text | Notes |
|---|---|---|---|
| Media Library (single image edit) | Setting a default alt text for images you reuse often | Media » Library » Attachment details » Alternative Text | Updates the attachment record; existing posts may still use the old alt text saved in their HTML. |
| Block Editor image block (Gutenberg) | Modern sites using the block editor fixing alt text inside posts and pages | Open post, select image block, edit Alt text in the Block settings panel | Directly changes the rendered <img> tag in that specific post or page. |
| Classic Editor image details popup | Legacy sites or themes that still use the Classic Editor | Click image in Classic Editor, click pencil icon, edit Alternative Text in Image Details | Works well on older sites; remember to save both the image details and the post. |
| Code snippet / theme filter | Developers who want automatic fallback alt text | Add a wp_get_attachment_image_attributes filter in a child theme or code snippets plugin | Good for filling blanks with a default, but still needs human-written alt text on important images. |
As a rule of thumb, write alt text that clearly describes the image’s purpose in the page. For design elements that are purely decorative, you can leave the alt text empty so assistive technologies skip them.
Add Simple CSS Tweaks Safely
Sometimes your theme and page builder will not let you change a small design detail. In these cases, you can add a few lines of CSS without editing theme files directly.
- In the dashboard, go to Appearance » Customize and look for the Additional CSS panel.
- Paste a simple snippet such as adjusting body font size or button radius.
- Use Preview to confirm it looks correct on desktop and mobile views.
- Click Publish when you are confident the change works.

/* Example tweak for body text and buttons */
body {
  font-size: 18px;
  line-height: 1.6;
}

.wp-block-button__link {
  border-radius: 6px;
  padding: 0.75em 1.5em;
}
After publishing, refresh your site in a private browser window to verify that visitors see your CSS changes and that nothing else in the layout broke.
Conclusion You Are Ready to Go
Now you know what WordPress Website Design really means in practice. You understand how themes, layouts, and content work together, you can plan navigation, customize your design with built in tools, and apply small CSS tweaks without risking your whole site.
From here you can keep improving by testing new layouts, optimizing speed, and refining your content so your WordPress website looks polished and supports your business goals.
Further Reading
- How to build a website on WordPress
- How to choose WordPress theme
- WordPress migration blog guide
- Best WordPress seo plugins and tools
- Beginner guide to WordPress speed optimization