A WordPress Widget is a small content block that you drop into widget areas like your sidebar or footer to add features without writing code. Widgets let you place menus, search boxes, recent posts, ads, and more exactly where you want them.
In this guide you will learn what widgets are, where they appear in your theme, and how to add, configure, move, and remove them so you can control your layout confidently in the Classic Editor and Jannah or similar themes.
What You Need to Start
- Administrator or Editor access to your WordPress dashboard.
- A classic theme with widget areas such as sidebars or footers (for example the Jannah theme).
- Basic familiarity with logging into wp-admin.
- A modern web browser on desktop or laptop for easier drag and drop.
Step 1: Understand WordPress Widgets
Before you start clicking around the dashboard, understand what a widget actually does. A widget is a reusable block of functionality that you place in a widget area. The theme decides which areas exist; widgets decide what appears inside them.
Common widget examples include a search bar, recent posts list, categories list, custom HTML, image banners, and navigation menus. Unlike plugins that add features site-wide, widgets only affect specific spots where you place them.
- Log in to your WordPress dashboard by visiting yourdomain.com/wp-admin.
- Look at the left admin menu to confirm you see Appearance and widget related options.
To verify the concept, open a public page on your site in another tab and look at your sidebar or footer. Every small block of content there is most likely powered by a widget.
Step 2: Learn Where Widgets Appear
Widgets live inside widget areas. These areas are pre-defined by your active theme and can include sidebars, multiple footer columns, header bars, and sometimes above or below content sections.
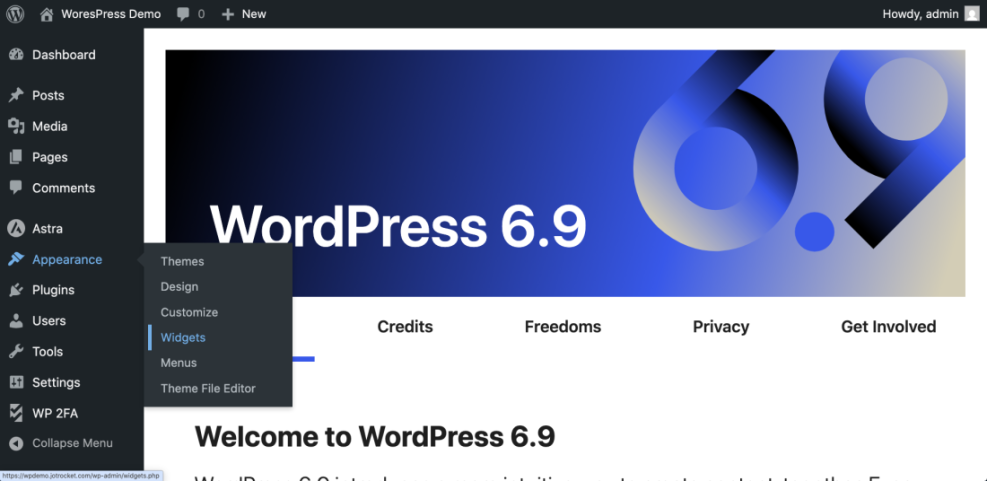
- In the dashboard, hover over Appearance.
- Click Widgets if your theme shows that menu.
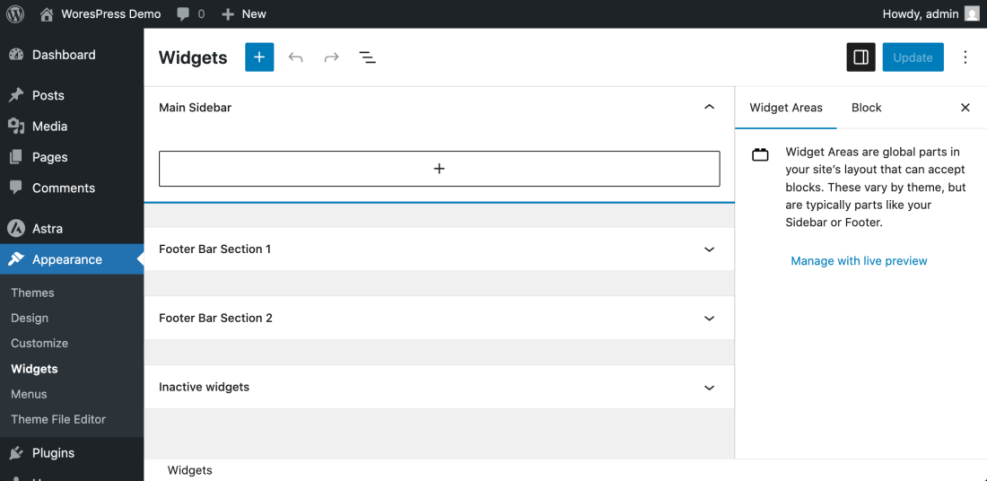
On the Widgets screen you will see each widget area listed, for example Main Sidebar, Footer 1, Footer 2, or Header Ads. Inside each area the currently active widgets are stacked in order from top to bottom.
To verify you understood correctly, match one visible widget in the admin (like a text or search widget in Main Sidebar) with what you see on the front end sidebar. The order and content should match exactly.
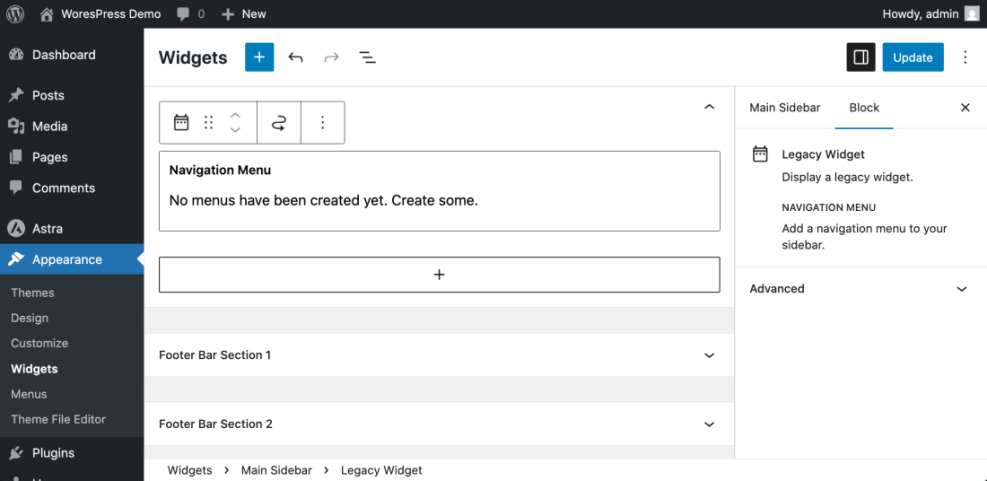
Step 3: Add and Configure Widgets
Now you will add a new widget so you can see how easy it is to customize your layout. In current WordPress versions, classic themes use a block based widget editor, but the idea is the same: you insert a block into a widget area.
- In the dashboard, go to Appearance » Widgets.
- Click the widget area where you want to add content, such as Main Sidebar or Footer 1.
- Inside that area, click the + button to add a block.
- Use the search box that appears and type the widget you want, for example Search, Categories, or Navigation Menu.
- Click the block name to insert it into the widget area.
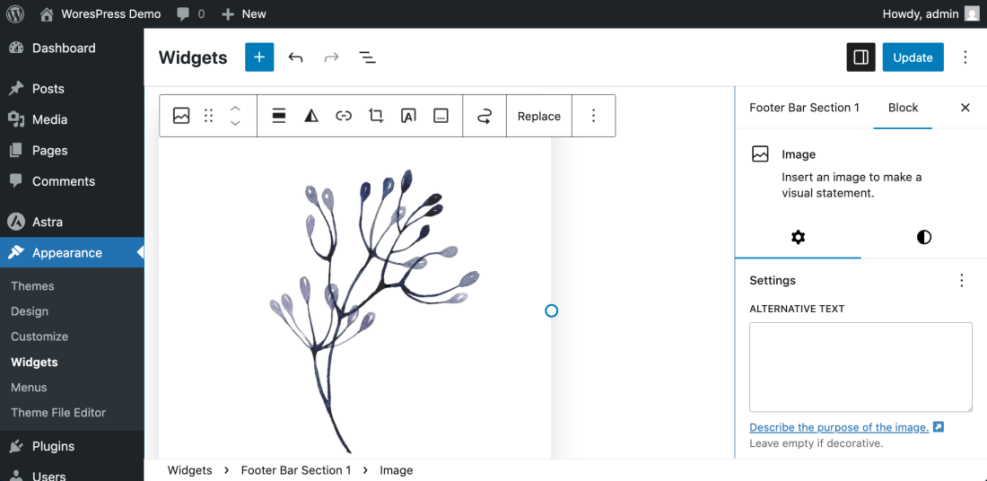
After adding the widget, configure its settings directly in the editor. For example, type a title like “Search the blog” for a search widget, or choose which menu to display for a navigation menu widget.
- Select the widget block you just added.
- Use the settings panel on the right to edit its Title, choose options, or toggle labels as needed.
- Click Update or Save (depending on your WordPress version) to store changes.
To verify everything works, refresh the corresponding page on the front end. You should see your new widget appear in the correct area with the title and settings you configured.
Step 4: Reorder and Remove Widgets
The order of widgets directly controls what visitors see first. Moving a key widget like search or an email signup higher in the sidebar can improve usability and conversions.
- Return to Appearance » Widgets.
- In the widget area you want to adjust, click and drag a widget block up or down to change its position.
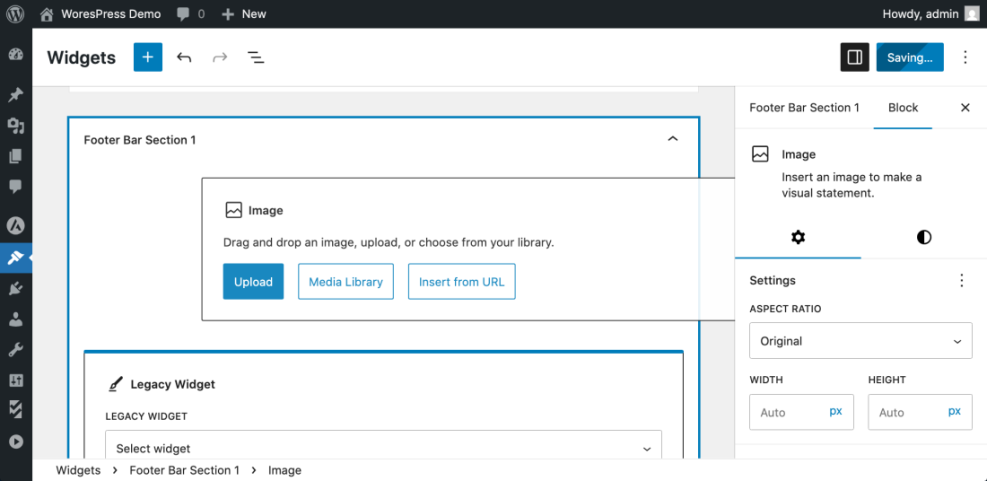
If you want to remove a widget completely, you can delete it from the area.
- Click the widget block you no longer need.
- Open the block options menu (often a three dot Options icon).
- Choose Remove or Remove block.

To verify your changes, refresh the front end page and confirm that widgets appear in the new order and that any removed widget is no longer visible.
Step 5: Choose How You Maintain Your WordPress Site
Widgets are just one part of your overall WordPress setup. The way you handle updates, backups, and general maintenance affects how safely you can experiment with new widgets, themes, and plugins. Here is a quick comparison of common maintenance methods:
| Method | Where You Use It | Main Purpose |
|---|---|---|
| DIY Manual Maintenance | WordPress dashboard and hosting control panel | Maximum control over updates, theme and plugin changes, and manual checks for title issues on small or low-risk sites. |
| Managed Hosting Tools | Your host’s control panel or custom dashboard | Simplify routine maintenance with one-click updates, built-in backups, and basic monitoring so template problems are less likely to appear. |
| SEO, Maintenance & Security Plugins | Plugins section inside the WordPress dashboard | Automate repetitive tasks like backups, database cleanup, image optimization, and security scans, while also running periodic audits of titles and meta tags. |
| WP-CLI and Developer Tools | SSH terminal with WP-CLI and deployment tools | Scriptable, fast maintenance for developers managing multiple or complex sites, including scanning themes for legacy header.php markup. |
| Professional WordPress Care Plan | External provider, freelancer, or agency | Hands-off maintenance with proactive monitoring, regular audits, and expert fixes so problems like duplicate titles are caught early. |
Whichever method you choose, always test widget changes after major theme or plugin updates to be sure your sidebars and footers still look the way you expect.
Step 6: How Themes Register Widget Areas
If you are curious why different themes expose different widget areas, the answer is theme code. Developers declare widget areas using PHP functions so WordPress knows where widgets can be placed.
Here is a simple example of how a theme might register a sidebar in its functions.php file:
function mytheme_register_widget_areas() {
    register_sidebar(
        array(
            'name'          => __( 'Main Sidebar', 'mytheme' ),
            'id'            => 'main-sidebar',
            'description'   => __( 'Primary sidebar for blog posts.', 'mytheme' ),
            'before_widget' => '<section id="%1$s" class="widget %2$s">',
            'after_widget'  => '</section>',
            'before_title'  => '<h3 class="widget-title">',
            'after_title'   => '</h3>',
        )
    );
}
add_action( 'widgets_init', 'mytheme_register_widget_areas' );
This code tells WordPress to create a Main Sidebar widget area that will appear on the Widgets screen. The theme’s template files then output that sidebar in the front end.
For deeper developer documentation, see the official WordPress.org guides on widgets and widget functionality in themes and the register_sidebar function reference.
Conclusion You Are Ready to Go
You now know what a WordPress Widget is, where widgets live inside widget areas, and how to add, configure, reorder, and remove them in the dashboard. You have also seen different ways to maintain your WordPress site so layout changes remain safe. With this understanding, you can turn a plain sidebar or footer into a useful space for navigation, search, promotions, or email signup forms without writing code.
As you grow more comfortable, experiment with different widget combinations and placements to see what helps visitors find content faster and engage more with your site.
Further Reading
- What is managed WordPress
- What is managed WordPress
- WordPress migration blog guide
- Best WordPress seo plugins and tools
- Beginner guide to WordPress speed optimization