How to Make a WordPress Website for Beginners
Launch a simple WordPress website without hiring a developer
If you want to build a WordPress website but feel overwhelmed by the technical parts, you are in the right place. This step by step guide shows you one clear path to create a self hosted WordPress website on your own domain, even if this is your first site.
By the end, you will register a domain, set up hosting, install WordPress, choose a theme, add essential pages, install key plugins, and safely launch your new website. If you are still unsure what WordPress is, start with What is managed WordPress and then come back to this tutorial.
What You Need to Start
- A domain name idea (for example, yourbrand.com).
- A shared or managed WordPress hosting plan that supports PHP and MySQL.
- Access to your hosting control panel or account dashboard.
- 15–30 minutes of focused time to complete the first setup.
- A modern web browser and a stable internet connection.
- Payment method for your domain and hosting subscription.
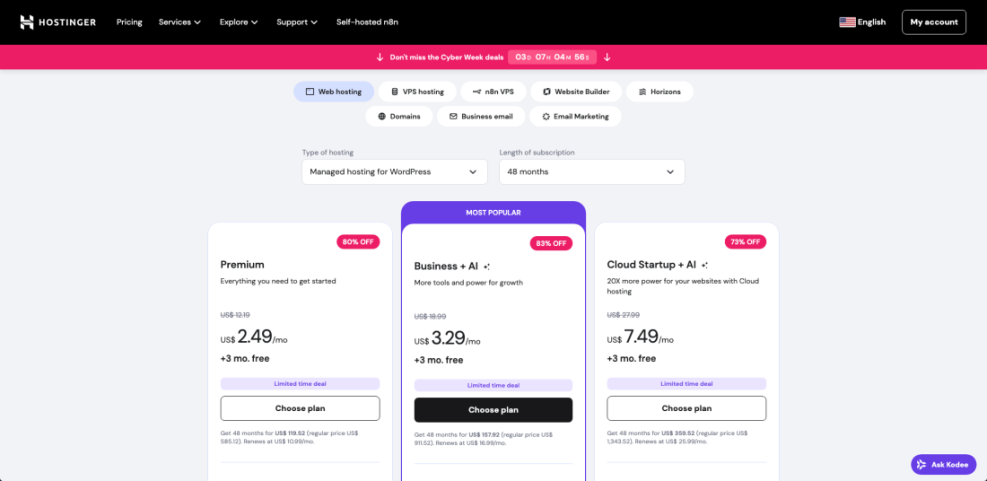
Step 1: Choose your domain and hosting
Before you can install WordPress, you need a place to store your files and a web address people can type to visit your site. In this guide you will use self hosted WordPress, which gives you full control and flexibility.
If you are not sure whether to use WordPress.com or self hosted WordPress, review Beginner guide to WordPress speed optimization before you commit.
- Choose a reputable host that offers one click WordPress installation. Many beginner friendly providers clearly label their WordPress Hosting plans.
- From the host’s pricing page, select a starter plan that allows at least one website and includes a free SSL certificate.
- During checkout, enter your desired domain name and confirm that it is available.
- Complete payment and create your hosting account login with a strong password.
- Open your hosting Dashboard or Control Panel and locate the section for Websites, WordPress, or cPanel.
From your hosting dashboard, open the website or domain management area to confirm that your new domain is attached to your hosting plan.
You know this step is complete when your hosting account shows your domain in the websites list with DNS or status marked as active.
Step 2: Install WordPress on your domain
Most modern hosts let you install WordPress automatically without downloading any files manually. Using the one click installer is the safest and fastest way for beginners.
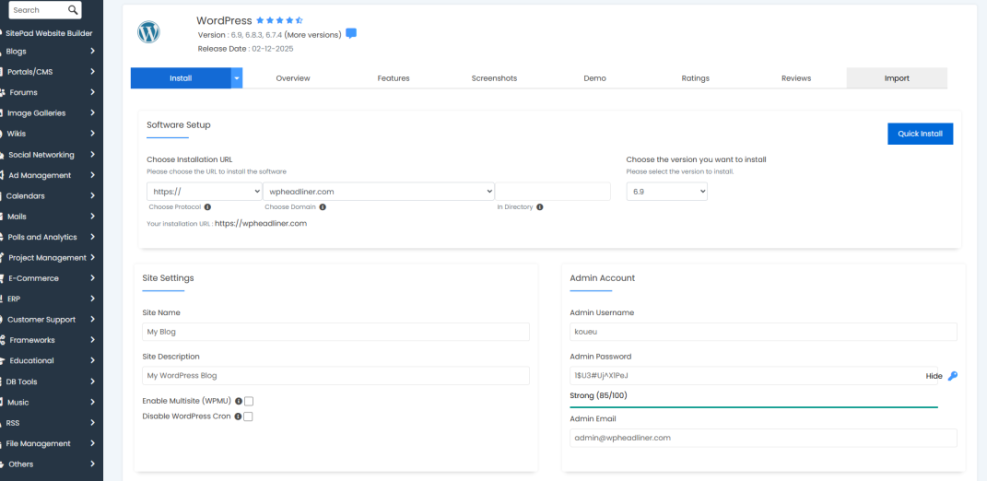
- Log in to your hosting Dashboard and open cPanel or the site management area.
- Look for a section named WordPress, One Click Install, Website, or Softaculous.
- Click the WordPress installer option.
- Select your domain from the Domain dropdown field so WordPress installs on the correct address.
- Fill in the Site Title, Admin Username, Password, and Admin Email.
- Leave the directory field blank if you want WordPress installed at the root of your domain (recommended for most sites).
- Click Install or Submit and wait for the installer to finish.
From the installer confirmation screen, note the login URL, usually https://yourdomain.com/wp-admin, and your admin username.
You can verify success by visiting your domain in a new browser tab. If the installation worked, you should see a default WordPress theme instead of a hosting placeholder page. For a more advanced walkthrough, see How to install a WordPress theme.
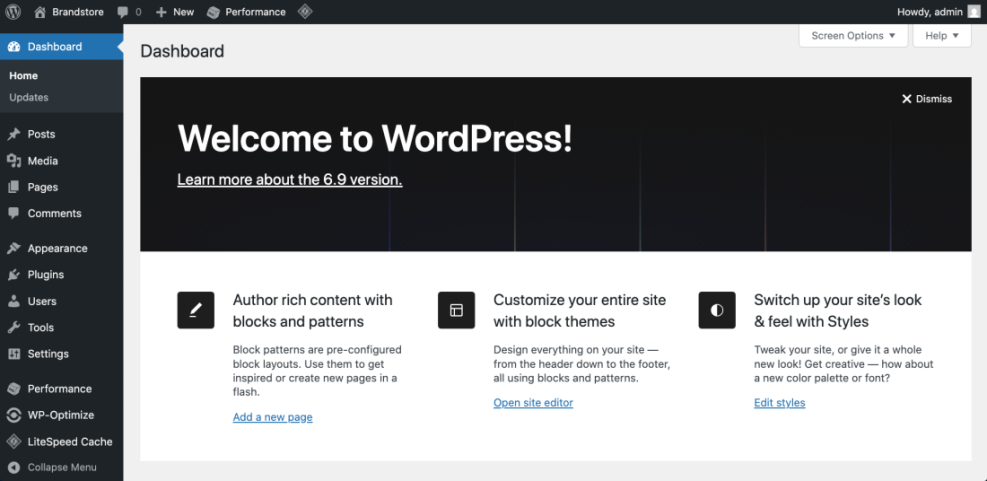
Step 3: Log in to your WordPress dashboard
Now that WordPress is installed, you need to access the dashboard where you will manage content, themes, and plugins. This dashboard is sometimes called the WordPress admin area.
- Open a new browser tab and go to https://yourdomain.com/wp-admin.
- Enter the Username and Password you created in the installer.
- Click Log In.
- Optionally, check the box for Remember Me only on your personal computer, never on shared devices.
After logging in, you should see the main dashboard with menu items like Posts, Pages, Appearance, and Plugins on the left side.
To avoid login issues later, bookmark your admin URL. For more login tips and security best practices, review How to find your WordPress login url.
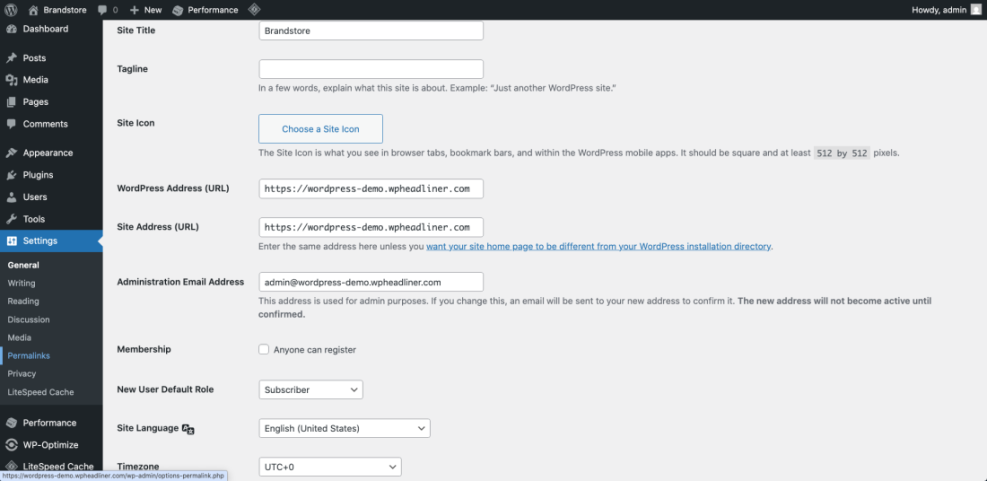
Step 4: Configure basic WordPress settings
Configuring key settings early helps your WordPress website look professional and prevents future SEO problems. You will set your site title, timezone, and URL structure.
- In the dashboard, go to Settings » General.
- Enter your Site Title and a short Tagline that explains what your site is about.
- Confirm your WordPress Address (URL) and Site Address (URL) both use https://.
- Set your Timezone, Date Format, and Time Format to match your local region.
- Click Save Changes.
- Next, go to Settings » Permalinks.
- Select the Post name option to create clean, readable URLs.
- Click Save Changes again.
Navigate back to Settings » General if you need to adjust your site title or tagline later.
Open a sample post on the front end. If the URL now uses your post title instead of numbers, your permalink settings are active. For a deeper explanation, see Beginner guide to WordPress speed optimization.
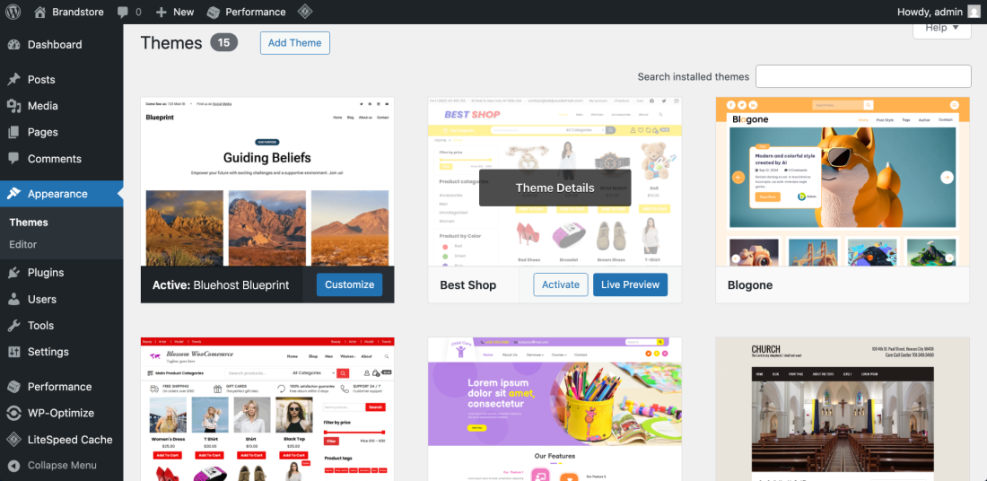
Step 5: Choose and install a WordPress theme
Your theme controls how your WordPress website looks. Choosing a lightweight, well supported theme gives you a fast site that is easier to customize and maintain.
- In the dashboard, go to Appearance » Themes.
- Click Add New at the top of the page.
- Use the Search themes box or the Feature Filter to find a theme that matches your layout and style needs.
- Hover over a theme and click Preview to see how it might look on your site.
- When you find one you like, click Install, then click Activate.
Go back to Appearance » Themes to confirm your new theme is marked as active and your old theme is still available as a backup.
Open your homepage and a sample blog post in a new tab to see how the new theme displays your content. If you need help picking performance friendly designs, read How to choose WordPress theme.
Step 6: Create essential pages and menus
Before you launch, your WordPress website needs a clear structure with core pages and easy navigation. Most sites need at least a homepage, an about page, a contact page, and a blog listing.
- Go to Pages » Add New.
- Create an About page that explains who you are and what visitors can expect.
- Create a Contact page with a simple contact form or email address and basic details.
- Create a Blog or News page to hold your latest posts.
- Go to Settings » Reading and choose whether your homepage shows Your latest posts or a static page.
- If using a static page, set Homepage to your custom home page and Posts page to your blog page.
- Go to Appearance » Menus (or Appearance » Editor in block themes) and add your important pages to the primary navigation menu.
Open the menu editor screen where you can drag and reorder your navigation links for desktops and mobile devices.
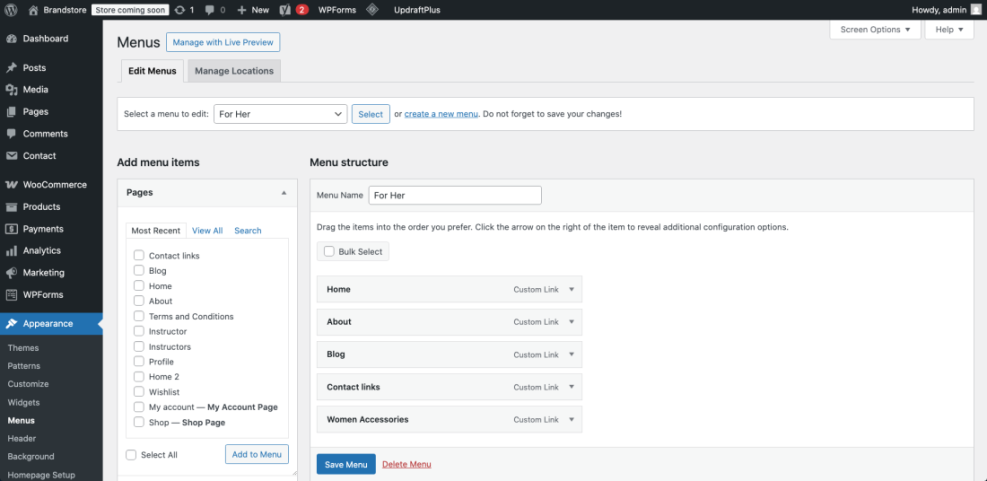
Refresh your site in a new browser tab. When you see a clean menu with your chosen pages, you know your basic structure works. For more detail on menu options, see Beginner guide to WordPress speed optimization.
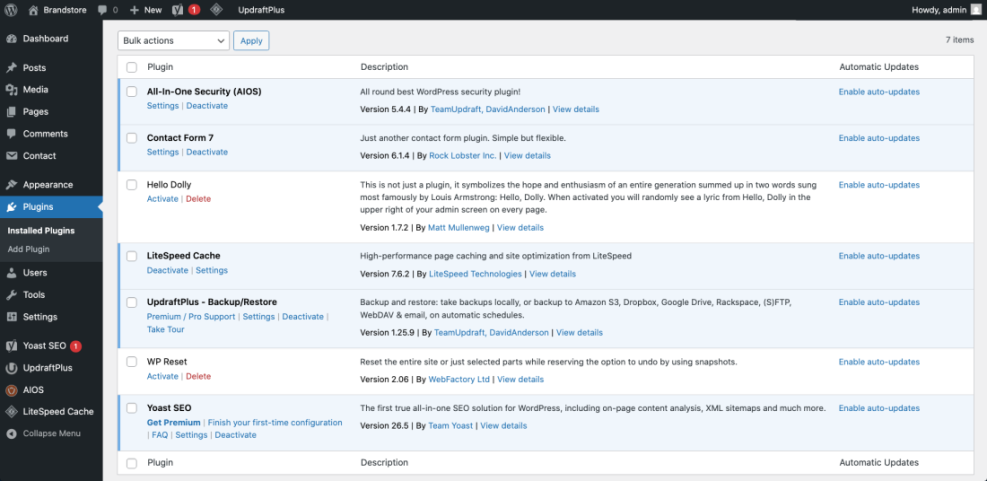
Step 7: Install essential WordPress plugins
Plugins extend your site with features like contact forms, backups, SEO tools, and caching. A small, carefully chosen plugin stack keeps your WordPress website fast and secure.
- In the dashboard, go to Plugins » Add New.
- Use the Search plugins box to find a reputable SEO plugin with many active installs and recent updates.
- Click Install Now, then click Activate.
- Install a trusted security plugin to help block brute force attacks.
- Add a backup plugin and connect it to a remote storage location if available.
- Install a basic caching plugin if your host does not already provide server level caching.
- Finally, add a contact form plugin and create a simple form on your Contact page.
Open Plugins » Installed Plugins to review your list and deactivate anything you do not really need.
Visit your contact page and submit a test message to confirm email delivery. For a curated list of recommended tools, check Developer hooks for optimizing WordPress plugins with code.
Step 8: Customize your homepage and blog layout
Now your WordPress website is functional, you can customize the design so it matches your brand. You will adjust colors, fonts, and layout using your theme options and, if you like, a small amount of CSS.
- Go to Appearance » Customize (or Appearance » Editor for block themes).
- Edit your Site Identity settings, including logo and favicon, if your theme supports them.
- Adjust Colors and Typography options so headings and body text are easy to read.
- Open the Homepage or Front Page section to configure which blocks or widgets appear above the fold.
- Click Publish to save your design changes.
To apply a simple custom style, use the Additional CSS option in the Customizer.

/* Example custom style to soften the site background */
body {
  background-color: #f8f9fa;
}
After saving, refresh your site in a new tab or on your phone to confirm your changes appear correctly on both desktop and mobile devices. If anything breaks, remove or adjust the CSS and republish.
Step 9: Prepare and launch your WordPress website
With your structure, theme, and essentials in place, you are ready to launch. A short pre launch check ensures visitors and search engines see a polished, working website.
- Go to Settings » Reading and make sure Search engine visibility is not checked, so search engines can index your site.
- Visit each key page (Home, About, Blog, Contact) and proofread the content.
- Test your contact form again with a different email address.
- Open your site on a phone or tablet and check that menus and buttons are easy to tap.
- Remove any sample posts or pages like “Hello world” that you no longer need.
- Ask a friend to browse your site and report any confusing areas or broken links.
From the front end, navigate through every menu item and click all important buttons. When everything loads quickly and works as expected, your WordPress website is ready for visitors.
If you want a structured checklist for future launches, read WordPress migration checklist for blogs after you publish.
Conclusion You Are Ready to Go
You have just created a working WordPress website from scratch using a single, beginner friendly workflow. You picked a domain and hosting plan, installed WordPress, adjusted key settings, installed a lightweight theme, created core pages and menus, added essential plugins, customized your layout, and completed a launch checklist.
From here you can focus on publishing helpful content, improving your design, and growing traffic over time. As you become more comfortable with WordPress, you can safely extend your site with ecommerce, memberships, or advanced SEO tools.
Further Reading
- Beginner checklist optimizing WordPress blog posts
- WordPress migration checklist for blogs
- Beginner guide to WordPress speed optimization
- Beginner guide to WordPress speed optimization
- WordPress migration blog guide