Using the WordPress website builder is the easiest way to design a professional site without writing code. With blocks, templates, and patterns, you can build pages visually and control how every section looks.
In this guide you will choose your website builder approach, pick a compatible theme, design your homepage and key pages, customize your header and footer, and preview everything on mobile before you publish.
What You Need to Start With the WordPress Website Builder
- Access to a WordPress site with administrator role.
- A modern theme that supports the block editor or full site editing.
- Basic content ready such as logo, colors, images, and copy.
- Optional a page builder plugin if you prefer a third party builder.
- A desktop browser so you can see the full WordPress dashboard.
Step 1: Choose Your WordPress Website Builder
WordPress gives you several ways to build pages visually. Decide which approach fits your site so you pick the right theme and tools from the beginning.
- Log in to your WordPress dashboard using your administrator account.
- Navigate to Appearance » Themes to see which theme is active.
- Check the theme description for terms like Block theme, Full Site Editing, or Compatible with block editor.
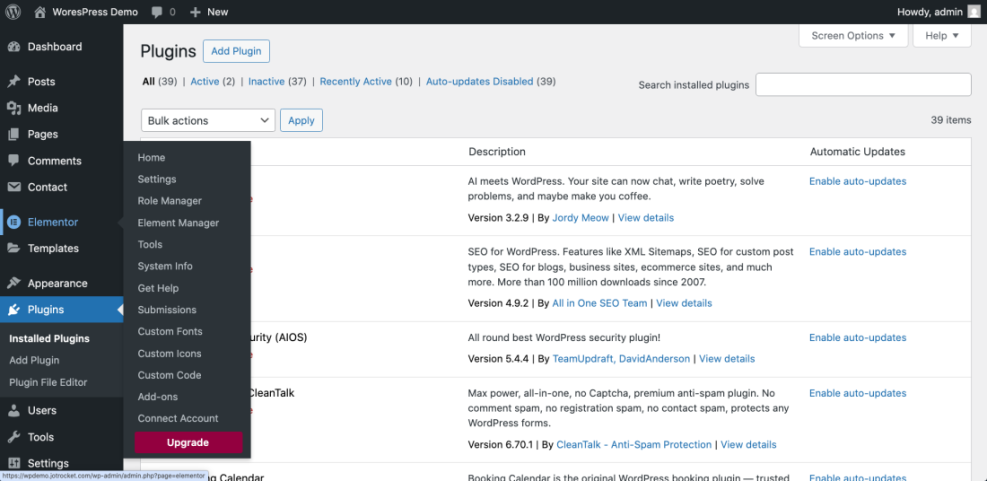
- If you prefer a third party builder, go to Plugins » Add New and search for a reputable page builder plugin.
Here is a quick comparison of common WordPress website builder methods and where you use each one:
| Builder Method | Where You Use It | Main Purpose |
|---|---|---|
| Block Editor | Pages » Add New or edit any page | Build and edit individual page layouts using blocks and patterns. |
| Site Editor | Appearance » Editor with a block theme | Design global templates such as header, footer, and blog layouts. |
| Theme Customizer | Appearance » Customize | Adjust colors, fonts, and basic layout on classic themes. |
| Page Builder Plugin | Page builder tab inside the page editor | Use a drag and drop interface with extra widgets and design controls. |
| Pattern Library | + block inserter » Patterns tab | Insert prebuilt sections like hero blocks, pricing tables, and FAQs. |
Verify success by confirming which builder you will use for most layouts and that your active theme fully supports that method.
Step 2: Choose a Theme for Your WordPress Site Builder
Your theme controls the overall design framework. Choosing a builder friendly theme makes it easier to create clean, consistent layouts.
- In the dashboard, go to Appearance » Themes.
- Click Add New to browse available themes, then use filters such as Block Themes or Featured.
- Hover over a theme and click Preview to see how its default layouts look.
- Click Install and then Activate on a theme that clearly supports the block editor or your chosen page builder.
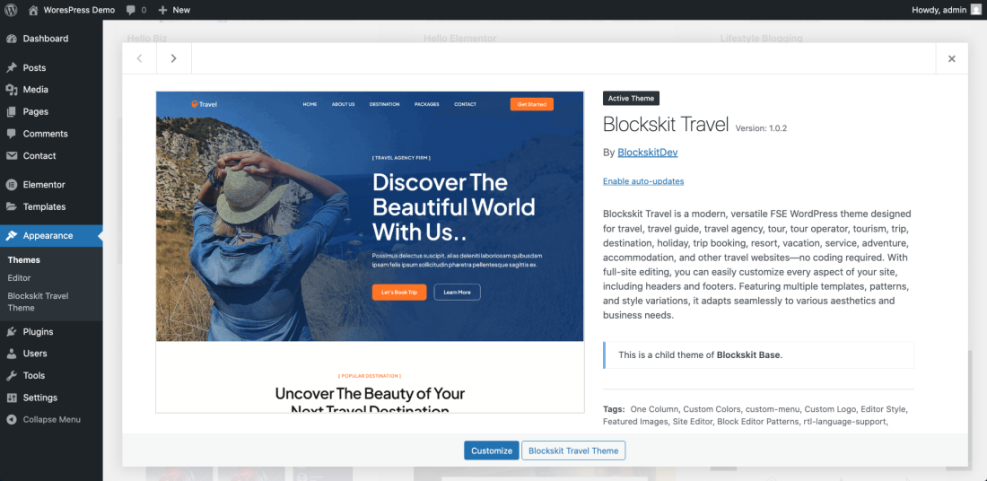
Verify success by visiting your site in a new tab and confirming that the basic design changed to match the new theme, without major layout errors.
Step 3: Create a Homepage With the WordPress Website Builder
The homepage is usually the first place visitors see your website builder work. Build it with sections that show who you are, what you do, and what action visitors should take.
- Go to Pages » Add New to create a new page.
- Enter a title such as Home in the title field at the top.
- Click the + button in the top left to open the block inserter.
- Insert key blocks such as Group, Columns, Heading, Paragraph, Image, and Buttons to build your layout.
- Use the Patterns tab to add ready made sections like hero areas, testimonials, and feature grids.
- Click Save draft or Publish in the top right corner when your basic layout is ready.
- Navigate to Settings » Reading and set Your homepage displays to A static page, then choose your new Home page.
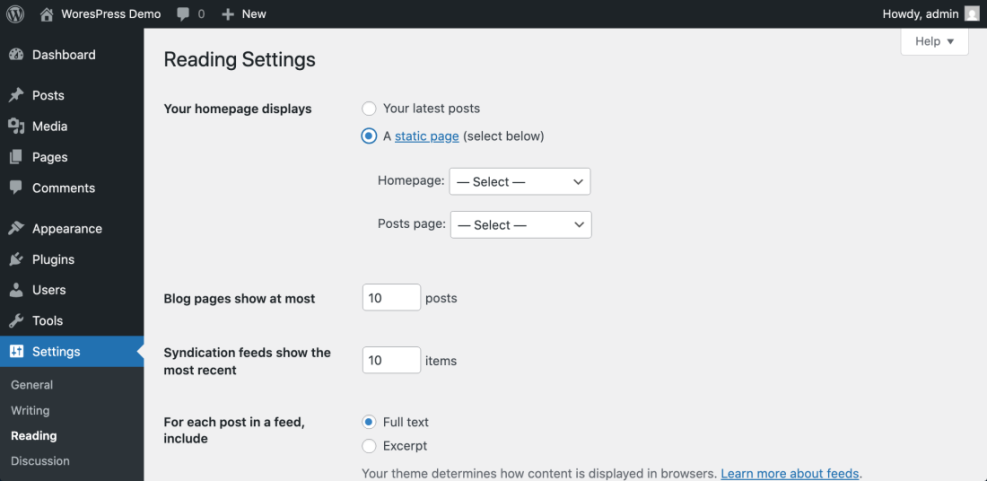
Verify success by opening your domain in a separate browser tab and confirming that your new block based homepage appears as the front page.
Step 4: Build Your Key Site Pages in the WordPress Page Builder
Beyond the homepage, your visual builder should help you quickly create consistent layouts for About, Services, and Contact pages.
- Go to Pages » Add New and create an About page.
- In the page settings sidebar, open the Template dropdown to see available page templates.
- Select a template such as Default, Full width, or a custom template your theme provides.
- Use blocks or your page builder interface to add sections explaining who you are, your story, and your team.
- Repeat the process to create additional pages like Services, Contact, or Blog.
Verify success by visiting each new page on the front end and confirming that headings, spacing, and fonts look consistent with your homepage.
Step 5: Customize Header Footer and Blog Layout
The header, footer, and blog layouts are usually controlled by the Site Editor on block themes or by the Customizer on classic themes. Adjust these to match your brand.
- If you use a block theme, go to Appearance » Editor. If you use a classic theme, go to Appearance » Customize.
- In the Site Editor, click Header to edit your global header template.
- Add or adjust blocks such as Site Logo, Site Title, and Navigation.
- Open the Footer template and add blocks for Copyright, Menu, and any Social Icons.
- Locate the Single and Archive templates to adjust blog post and blog listing layouts.
Verify success by visiting several pages and blog posts, making sure the same header and footer appear everywhere with correct navigation links.
Step 6: Optimize Your Layout for Mobile Devices
Most visitors will see your WordPress website builder work on a phone. Always check mobile views so typography and spacing stay readable.
- Open a key page in the block editor or your page builder interface.
- Click the Preview button in the top right and choose Tablet or Mobile view if available.
- Check that headings wrap nicely and buttons are large enough to tap with a thumb.
- Adjust block settings such as Padding, Margin, and Stack on mobile for columns.
- Repeat the preview for your homepage, About, Services, and Contact pages.
Verify success by loading your site on an actual smartphone and confirming that the layout is easy to scroll, links are tappable, and no text runs off the screen.
Step 7: Save and Reuse Layouts in Your Page Builder
Saving reusable patterns and templates makes your website builder workflow faster. You can keep your design consistent without rebuilding sections each time.
- In the block editor, select a group of blocks that form a section you want to reuse, such as a pricing table or testimonial row.
- Click the three dot Options menu in the toolbar above the selection.
- Choose Create pattern or Add to reusable blocks depending on your version.
- Give the pattern a descriptive name such as Pricing three columns and click Save.
- On a different page, click the + inserter, open the Patterns or Reusable tab, and insert your saved pattern.
Verify success by confirming that your saved pattern appears in the pattern list and that edits to a reusable block update everywhere you used it, when applicable.
Step 8: Connect Your Pages and Launch Your Site
Once your layouts are ready, connect your pages through menus and double check basic settings before you share your new website.
- Go to Appearance » Menus or, on block themes, edit navigation from Appearance » Editor.
- Add menu items for your Home, About, Services, Blog, and Contact pages.
- Set the menu location to Primary or Main so it appears in your header.
- Navigate to Settings » General and confirm your Site Title and Tagline are correct.
- Visit your site in a private or incognito window to test the full visitor experience.
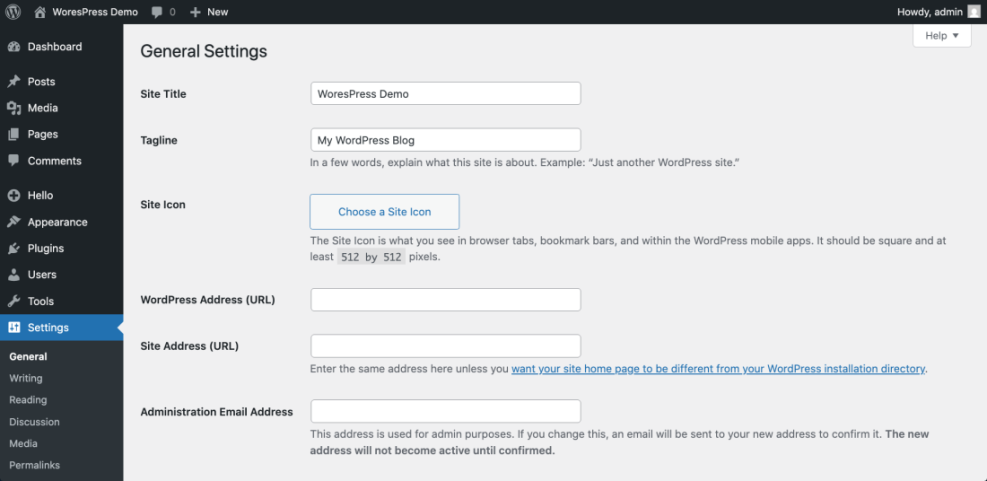
Verify success by clicking through every menu item, confirming that all important pages load correctly and that your new design feels consistent from top to bottom.
Conclusion You Are Ready To Use the WordPress Website Builder
You have now used the WordPress website builder to choose a modern theme, design your homepage and core pages, customize global templates, and test layouts on mobile devices.
As you grow more comfortable, keep refining your patterns, templates, and content so updating your design becomes a normal, low stress part of your WordPress routine.