If you want to speed up WordPress on your existing site, you need a structured workflow instead of random tweaks that may break things. In this guide, you’ll follow a simple, repeatable process that combines caching, image optimization, and hosting tweaks to make your site feel instantly faster for visitors.
By the end, you’ll know exactly how to Speed up Website WordPress using safe, practical steps inside your dashboard, and how to verify improvements using real speed reports and Core Web Vitals checks.
What You Need to Speed Up WordPress
Before you start, it helps to prepare a few basics so you can speed up your WordPress website without breaking anything.
- Access to your WordPress admin dashboard with an Administrator account.
- Access to your hosting control panel or support chat for cache and PHP settings.
- A recent full backup of your site files and database.
- Basic familiarity with installing and configuring WordPress plugins.
- 15–30 minutes of low traffic time to run tests and apply changes.
Step 1: Establish a Baseline Speed Test for Your WordPress Site
Before you speed up WordPress, you must know how fast or slow your site is right now. A clear baseline helps you see which changes actually work and prevents you from guessing. This also shows you how much improvement your How to Speed up Website WordPress efforts really deliver.
- Open a new browser tab and go to PageSpeed Insights.
- Enter your homepage URL in the field and click Analyze.
- Wait for the report to finish, then note your Performance score and Core Web Vitals such as LCP and CLS.
- Repeat the test for one key blog post and one key landing or shop page.

To verify success, make sure you’ve written down or screenshotted scores for mobile and desktop. These numbers will be your before and after comparison once you finish the optimization steps.
Step 2: Remove Unused Plugins to Boost WordPress Performance
Every extra plugin or feature can slow down WordPress. Cleaning up unused or overlapping plugins reduces PHP processing time and lowers the chance of conflicts, which is a simple way to speed up your WordPress website before you touch any advanced settings.
- Log in to your WordPress admin and navigate to Plugins » Installed Plugins.
- Identify plugins you no longer use, duplicate functionality, or that were installed for one-time tasks.
- Click Deactivate under each plugin you plan to remove, then click Delete to uninstall it completely.
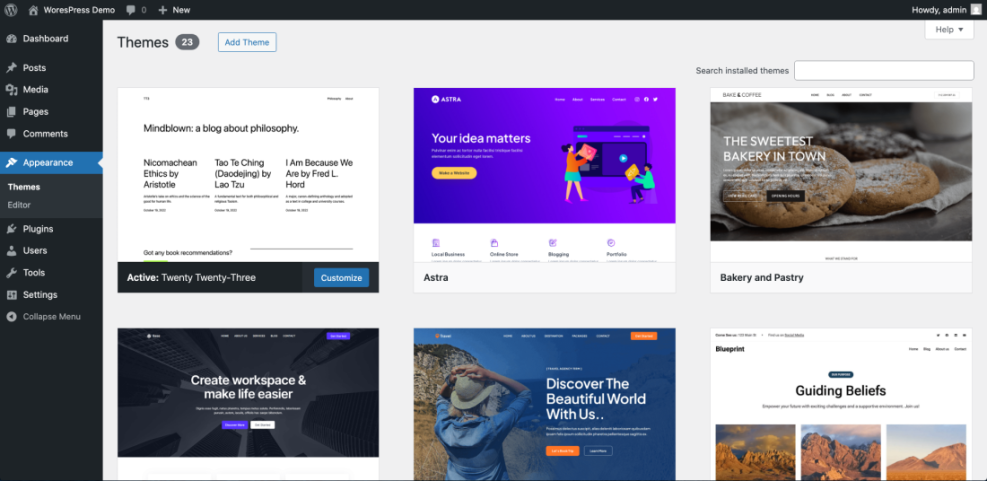
- Go to Appearance » Themes and delete any unused themes, keeping only your active theme and one default theme as backup.
To verify success, reload a few key pages in an incognito window and confirm everything still works as expected. Your admin dashboard should also feel slightly snappier with fewer plugins active.
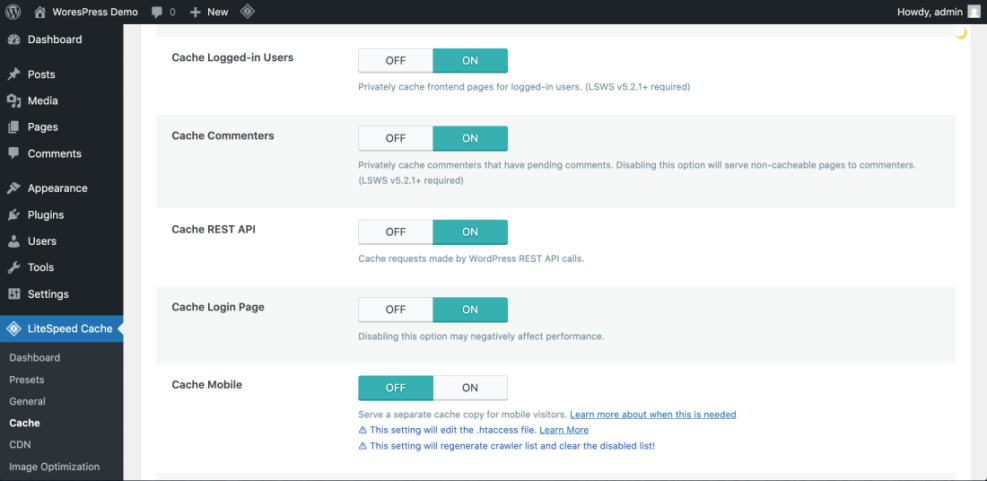
Step 3: Set Up Page Caching to Speed Up Your WordPress Website
Page caching stores pre-generated HTML versions of your pages so your server does not rebuild them from scratch on every visit. This is usually the biggest single improvement when you want to speed up WordPress and make pages load quickly for repeat visitors.
- From your WordPress admin, go to Plugins » Add New.
- Search for the caching plugin recommended by your host or a popular option with recent positive reviews.
- Click Install Now, then click Activate.
- Locate the new menu item (often under Settings or its own menu) and open the caching plugin settings page.
- Enable Page Cache and, if available, Browser Cache. Save your settings.
To verify success, open your site in an incognito browser, load a page twice, and confirm the second load is noticeably faster. You can also re-run your PageSpeed Insights test and look for improved First Byte Time and overall performance score.
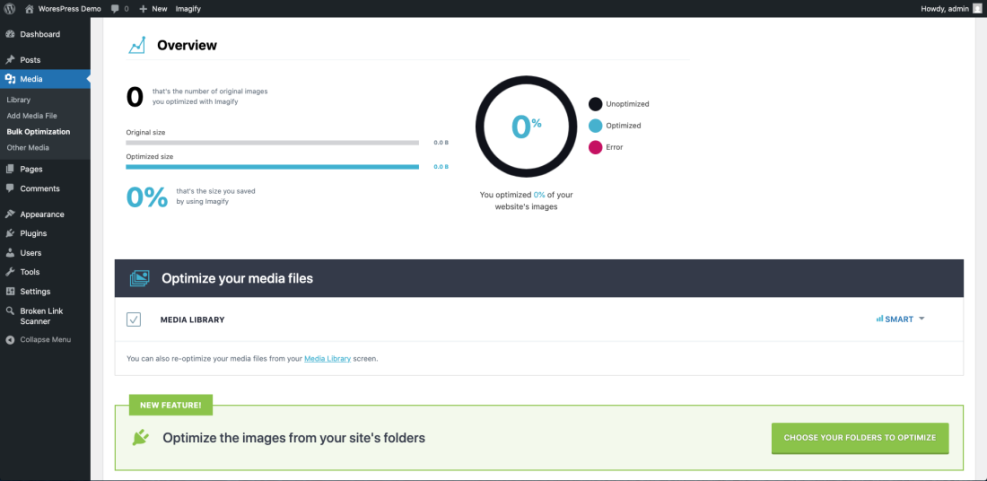
Step 4: Optimize Images to Speed Up WordPress Load Times
Large, uncompressed images are one of the most common causes of slow WordPress sites. Compressing images and serving modern formats like WebP can dramatically reduce page weight without sacrificing visible quality, which directly helps speed up your WordPress website.
- In your dashboard, go to Plugins » Add New and search for an image optimization plugin with automatic compression.
- Click Install Now and Activate, then open the plugin’s settings page.
- Enable automatic compression for new uploads and choose a reasonable compression level such as “Lossy” or “Balanced.”
- If available, enable WebP or “next-gen formats” and run a bulk optimization on your existing media library.
To verify success, open a page with several images and check that it loads faster, especially on mobile. Re-run your performance test and confirm that total page size and “Total Blocking Time” have improved compared to your baseline.
Step 5: Add a CDN to Make Your WordPress Site Faster
A Content Delivery Network (CDN) places copies of your static files like images, CSS, and JavaScript on servers closer to your visitors. This reduces latency and improves load times for global audiences and helps speed up WordPress for international users.
- Sign up for a reputable CDN service from your hosting provider or a third party such as Cloudflare.
- Follow their onboarding wizard to add your domain and verify ownership.
- Point your DNS or nameservers to the CDN as instructed, or connect via the official CDN WordPress plugin if offered.
- In your CDN dashboard or plugin, enable caching for static assets and confirm your site is being served through the CDN.
To verify success, visit your site from a different device or network and check the browser’s developer tools Network tab. Your static files should now be served from CDN domains, and repeat visits should feel faster.
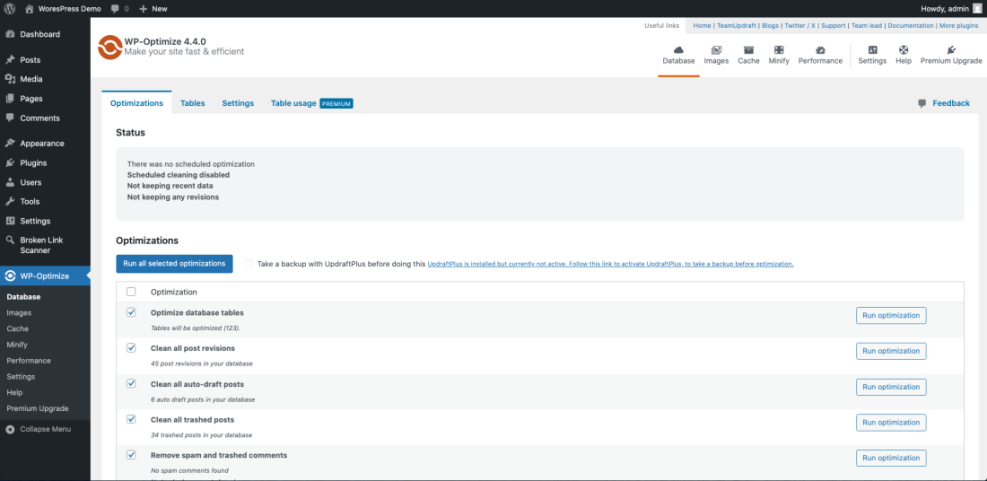
Step 6: Clean Up the Database to Improve WordPress Performance
Over time, your WordPress database collects post revisions, transients, and temporary data that can slow down queries. A careful cleanup reclaims space and speeds up database operations so you can speed up your WordPress backend as well as the front end.
- Before changing anything, confirm you have a recent backup. If not, follow a guide like Beginner guide to WordPress speed optimization to create one.
- Install and activate a reputable database optimization plugin from Plugins » Add New.
- Open the plugin settings and select safe options such as cleaning post revisions, trashed posts, and expired transients.
- Run the optimization, then refresh your site to ensure everything still works correctly.
To verify success, log in to your hosting control panel and check the database size, or look for a summary in the plugin’s report. You should see reduced size and fewer junk entries.
Step 7: Apply Optional Code Tweaks to Speed Up WordPress Even More
If you’re comfortable with simple code changes, you can disable emojis and embeds to reduce extra HTTP requests and scripts. These small tweaks help you speed up WordPress without installing yet another plugin.
- Install and activate a code snippets plugin from Plugins » Add New, or open your child theme’s functions.php file.
- Add the following snippet to disable emojis and embeds sitewide.
- Save the changes or enable the new snippet, then visit your site front end.
/**
 * Basic performance tweaks to disable emojis and embeds.
 */
add_action( 'init', function() {
    // Disable emojis.
    remove_action( 'wp_head', 'print_emoji_detection_script', 7 );
    remove_action( 'wp_print_styles', 'print_emoji_styles' );
    remove_action( 'admin_print_scripts', 'print_emoji_detection_script' );
    remove_action( 'admin_print_styles', 'print_emoji_styles' );

    // Disable embeds.
    remove_action( 'wp_head', 'wp_oembed_add_discovery_links' );
    remove_action( 'wp_head', 'wp_oembed_add_host_js' );
});
To verify success, open your page source and confirm emoji and embed scripts are no longer present. Run a new performance test and check if JavaScript execution time has decreased.
Step 8: Retest WordPress Performance and Monitor Regularly
With your main optimizations in place, you should confirm the real impact. Regular testing helps you keep your WordPress speed optimization efforts on track as you add themes, plugins, or content.
- Return to PageSpeed Insights and rerun tests for your homepage, blog post, and key landing or shop page.
- Compare the new performance scores and Core Web Vitals to your baseline numbers from Step 1.
- Review official WordPress optimization documentation if you want deeper technical explanations of specific metrics.
- Schedule a recurring reminder to retest your site monthly or after major design, plugin, or hosting changes.
To verify success, your scores should be higher than your baseline, and pages should feel faster on both desktop and mobile devices. Even small improvements in LCP and TTFB can make a big difference for visitors.
Conclusion: You Are Ready to Speed Up WordPress
You have now followed a practical workflow to speed up your WordPress site without needing to be a developer. You cleaned up heavy plugins, enabled caching, optimized images, added a CDN, tuned your database, and optionally applied lightweight code tweaks.
Keep repeating this process every few months and any time you change themes, install new plugins, or switch hosts. If you follow these steps whenever you build or maintain a site, you’ll always know how to Speed up Website WordPress safely and keep it fast for new visitors and search engines.