If you want to Optimize Images on your WordPress site without sacrificing visual quality, you need a clear, repeatable workflow you can follow for every post. Optimized images load faster, use less bandwidth, and help your Core Web Vitals so your pages feel snappy on both desktop and mobile. Throughout this tutorial, you will learn how to Optimize Images in WordPress using a simple, repeatable process.
In this guide, you will benchmark your current performance, prepare and optimize images before upload, configure WordPress media sizes, set up an image optimization plugin, and verify the impact on speed so your pages stay fast even as your media library grows.
What You Need to Start
- Administrator access to your WordPress Dashboard.
- Permission to install and activate plugins on your site.
- A recent backup of your site from your host or a backup plugin.
- Access to your original image files on your computer or cloud storage so you can optimize images before uploading them.
Step 1: Benchmark Your Image Performance
Before you change anything, benchmark how images affect your current performance so you can measure real improvements later and see where you need to optimize images in WordPress.
- Open a browser and visit a typical heavy page on your site (for example, your homepage or a long blog post with multiple photos).
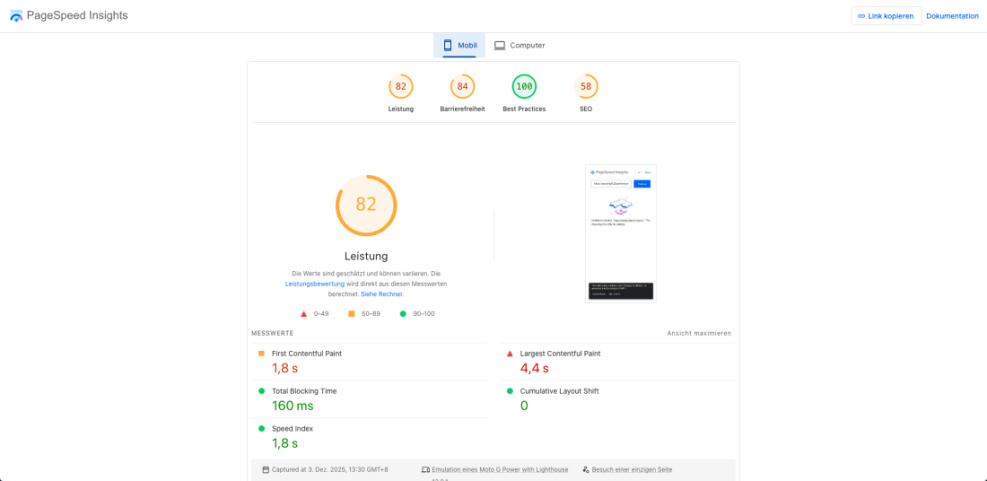
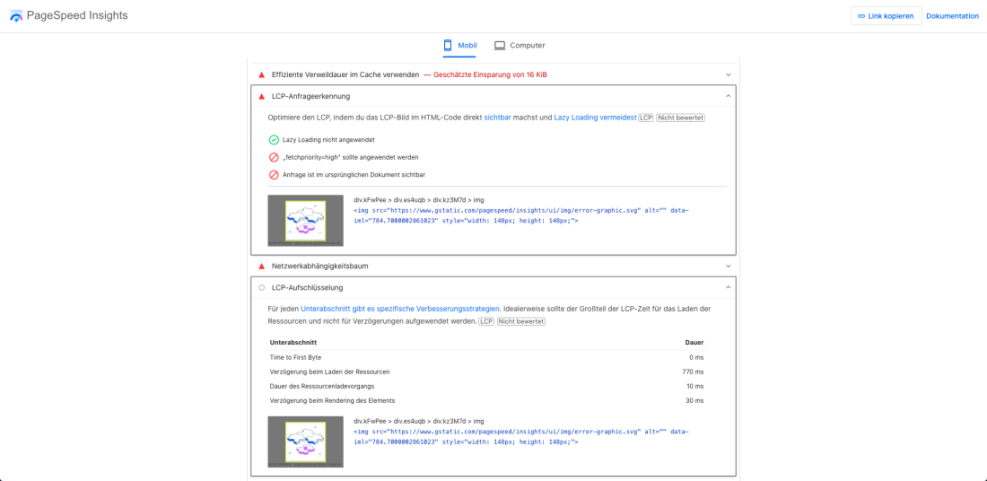
- In a new tab, go to Google PageSpeed Insights (pagespeed.web.dev).
- Paste your page URL into the field and click Analyze.
- When the report loads, note metrics like Largest Contentful Paint (LCP), Total Blocking Time (TBT), and total page size, plus image-related opportunities such as Serve images in next-gen formats, Properly size images, and Defer offscreen images.
As the report loads, scroll to the Opportunities and Diagnostics sections and list every image-related recommendation you see for that page. These hints will guide your image optimization work later in the process.
This step is complete once you have written down your key metrics and saved a screenshot or PDF of the initial report for comparison.
Step 2: Prepare Images Before You Upload
Why preparing images before upload matters
Preparing images on your computer first gives you the biggest savings and keeps your media library lean from day one, which is the foundation of good WordPress image optimization. This pre-upload step is one of the most effective ways to Optimize Images without relying only on plugins.
Resize and compress your images
- Locate the original images you plan to use for your next post or landing page on your computer or cloud storage.
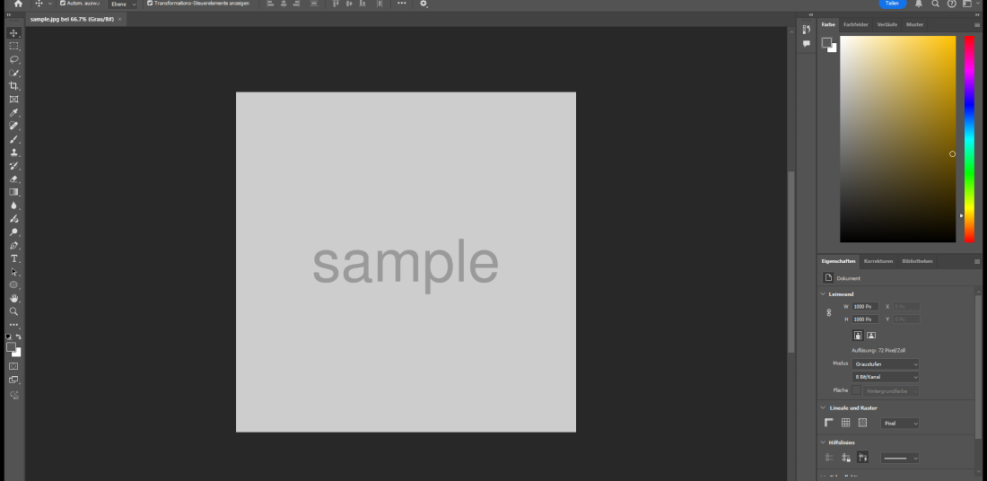
- Open each image in your preferred editor (for example, Photoshop, GIMP, Affinity Photo, or a simple built-in editor).
- Decide how wide each image needs to appear on desktop (hero banner, in-content image, or small thumbnail) and resize accordingly, typically between 800 and 1600 pixels wide for blog content.
- Export photographs as JPEG or WebP, and simple graphics or logos as PNG or WebP, aiming for a visually clean result with significantly reduced file size.
Name images for SEO and clarity
Save each optimized file with a descriptive name that matches your content, such as wordpress-speed-image-optimization-checklist.jpg, instead of generic camera filenames like IMG_1234.JPG. Clear file names help search engines understand your images and support your overall effort to optimize images for SEO.
Consider this step finished once all images you plan to upload are resized, compressed, clearly named, and saved in the correct format as part of your standard way to optimize images for WordPress.
Step 3: Configure WordPress Image Sizes
WordPress generates multiple copies of every image you upload. Setting sensible defaults for these sizes prevents oversized files from bloating your pages and is an easy way to optimize images without touching each file.
- Log in to your WordPress Dashboard.
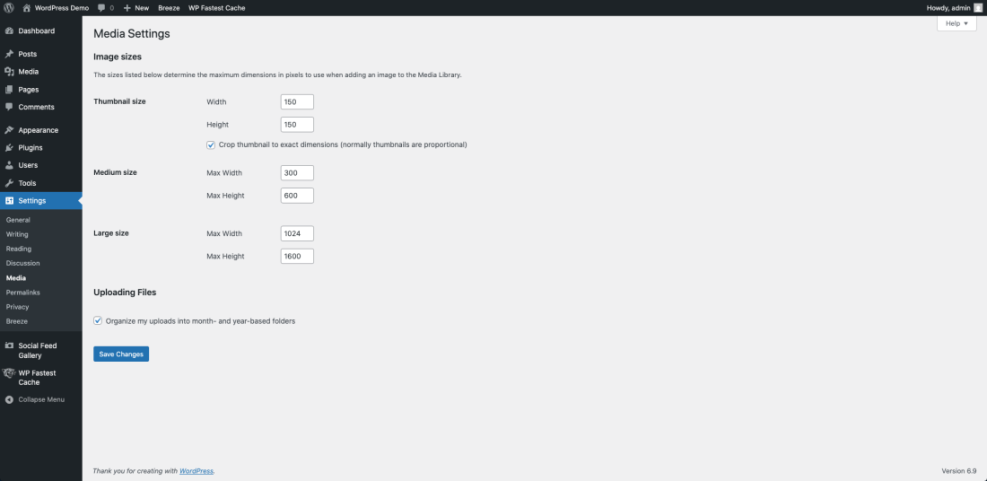
- In the left menu, navigate to Settings » Media.
- Under Image sizes, review the values for Thumbnail size, Medium size, and Large size.
- Adjust these widths and heights to match your theme’s content width. For many blogs, examples might be:
- Thumbnail size: 150 x 150 pixels (cropped).
- Medium size: 300–600 pixels wide.
- Large size: 1024–1600 pixels wide.
- Click Save Changes at the bottom of the page.
Before saving, quickly scan the Image sizes table to ensure no value exceeds the actual width of your content area or main column. Matching these numbers to your layout keeps your visual design clean and supports efficient image optimization in WordPress.
Advanced only: If you want to stop WordPress from generating oversized copies of your images, apply changes via a small code snippet in a custom plugin or your theme’s functions.php. Always test this on a staging site first.
// Disable automatic scaling of very large images in WordPress.
add_filter( 'big_image_size_threshold', '__return_false' );
To confirm your settings, upload a new test image via Media » Add New, then click the image and review its generated sizes. They should match (or stay under) the dimensions you just configured, which means WordPress is now helping you optimize images automatically.
Step 4: Install an Image Optimization Plugin
Choose and install your image optimization plugin
An image optimization plugin automates compression, optional WebP or AVIF conversion, and lazy loading so you do not have to optimize images manually for every single upload.
- From your WordPress Dashboard, go to Plugins » Add New.
- In the search field, type Smush (or your preferred image optimization plugin such as ShortPixel, Imagify, Optimole, or EWWW Image Optimizer).
- Find the plugin in the results list and click Install Now, then click Activate.
- After activation, look for the new plugin menu item in your left sidebar and click it to launch the setup wizard.
Configure settings to optimize images automatically
- In the wizard, enable options like Automatically compress my images, Resize my full-size images, and, if available, Enable WebP conversion and Enable lazy loading, then click Save or Finish Setup.
On the plugin’s setup screen, review which features will run automatically on each new upload before you complete the wizard. This is where you decide how aggressively the plugin should optimize images behind the scenes.
Only run one image optimization plugin at a time. If you already use tools like Optimole, Imagify, or ShortPixel, disable their overlapping features before enabling similar options in a new plugin to avoid duplicate processing.
To verify this step, upload a fresh image via Media » Add New, then open it in the Media Library and look for a status message (such as “compressed” or “smushed”) plus a summary of how many kilobytes were saved. That confirmation shows your plugin is actively helping you optimize images in WordPress.
Key Differences Between Manual and Plugin-Based Image Optimization
Use this comparison to decide when to rely on your own prep work and when to let a plugin handle most of the heavy lifting as you optimize images site-wide.
| Aspect | Manual Optimization | Plugin-Based Optimization |
|---|---|---|
| Where it happens | On your computer before upload (image editor, export settings) | Inside WordPress after upload (runs in the background) |
| Setup time | No plugin setup, but you must adjust export settings for each batch of images | One-time plugin configuration, then mostly automatic afterward |
| Per-image effort | Higher effort per image; you resize, compress, and rename files manually | Low effort per image; upload and let the plugin compress and convert formats |
| Control over quality | Very high; you choose exact dimensions, format, and compression level | Moderate; you choose global settings and profiles, not per-pixel detail |
| Automation | Limited; you must remember to follow your workflow every time | High; new uploads and bulk optimization can run with a single click |
| Server resources | Light; most processing happens before upload on your device | Can be heavy; bulk optimization uses your server or an external API |
| Best for | Creators who want maximum control and work with fewer images | Busy blogs, multi-author sites, and large media libraries |
In practice, a hybrid approach works best: prepare important images manually before upload, then let a plugin optimize images with compression, next-gen formats, and lazy loading at scale.
Step 5: Configure Lazy Loading and Critical Images
Lazy loading defers off-screen images so only what is visible loads first, improving initial page speed while still delivering the full experience as visitors scroll. It is one of the easiest ways to optimize images for user experience.
- Open your image optimization plugin’s settings page (for example, click its Lazy Load section in the sidebar).
- Enable lazy loading for Images, and if available, for Thumbnails and Widgets so most non-critical images load only when needed.
- Locate the option to Exclude certain images from lazy loading (often by CSS class, ID, or location) and exclude your main hero or featured image at the top of the page to protect your Largest Contentful Paint metric.
- Save your changes with the Save or Update Settings button.
In the plugin’s preview, or by opening your homepage in an incognito window, confirm that the top hero image loads immediately while images lower on the page appear as you scroll. That behavior shows lazy loading is working as part of your broader image optimization strategy.
Once above-the-fold images load right away, lower images fade in as you scroll, and your page still looks correct on both desktop and mobile, consider this step complete.
Step 6: Bulk Optimize Existing Images
Run bulk optimization in the Media Library
Now that your defaults are configured, bring your existing media library up to the new standard by compressing and cleaning up older uploads. Bulk image optimization ensures past content benefits from the same performance gains as new posts.
- In your Dashboard, go to Media » Library and switch to List view so you can see optimization details per image.
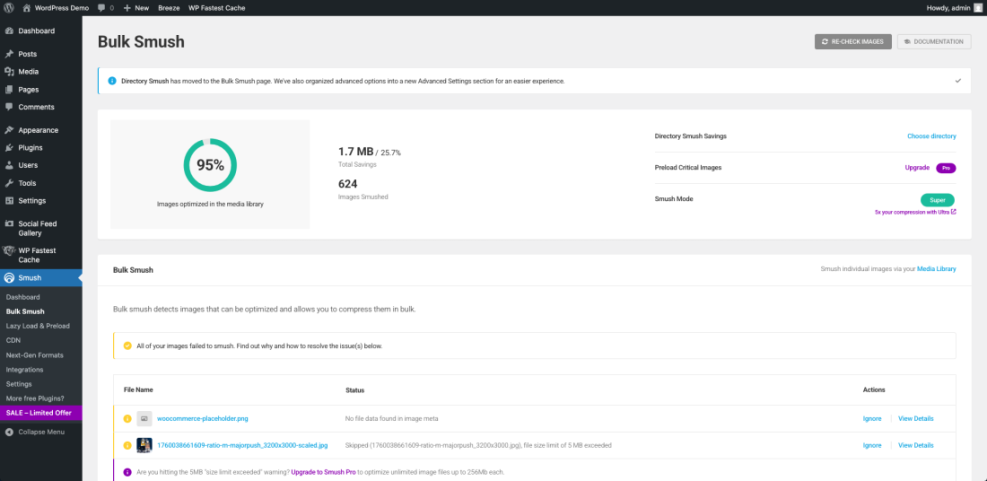
- Open your plugin’s bulk optimization screen (for example, Bulk Optimize or Bulk Smush).
- Review the number of images waiting to be optimized and the default compression settings, then click the main button (such as Bulk Smush or Start optimizing).
- Leave the browser tab open while the plugin processes images and watch the counter until it reaches zero or shows all images optimized.
Bulk optimization can be resource-intensive on shared hosting. Run this during off-peak hours and avoid starting other heavy tasks (like backups or imports) at the same time.
Check results after bulk image optimization
Monitor the plugin’s progress summary as it processes batches of images. You will usually see statistics about how many megabytes or gigabytes you have saved by choosing to optimize images in bulk.
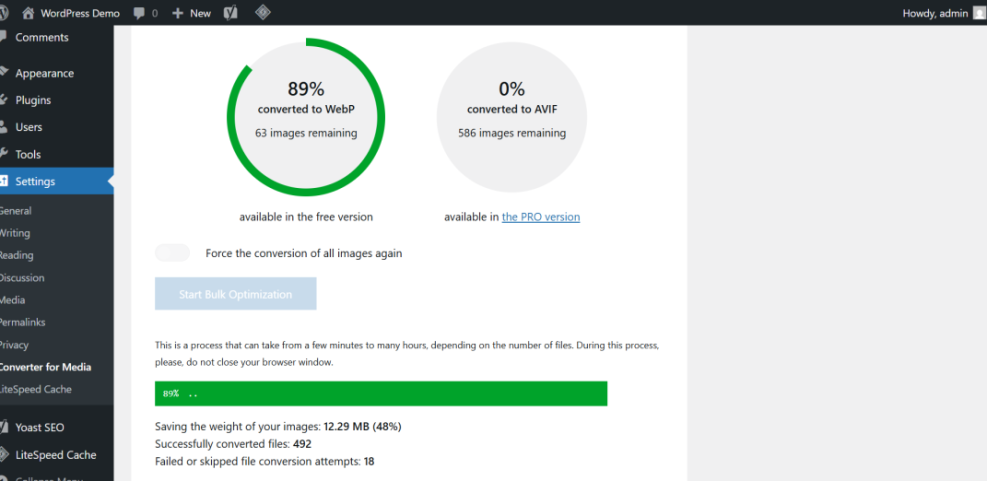
After the tool finishes, check the total savings statistics and spot-check a few key posts to ensure images still look sharp while loading faster.
Step 7: Re-test and Connect Results to Core Web Vitals
Re-test your key pages
With your workflow and plugin in place, repeat your initial benchmark to confirm that your changes actually improved performance and that your effort to optimize images is paying off.
- Return to Google PageSpeed Insights (pagespeed.web.dev).
- Paste the same URL you tested in Step 1:: and click Analyze again.
- Compare metrics like Largest Contentful Paint, total page size, and any image-related opportunities to your original report.
- Repeat the test for one or two other image-heavy pages to ensure improvements are consistent across your site.
Interpret your new Core Web Vitals
Next, review the new report to confirm that image-related warnings are reduced or gone and that your page weight has dropped thanks to compression, better sizing, and lazy loading. Consistent gains across several URLs show that your WordPress image optimization process is working.
For a deeper understanding of how these changes affect your rankings, tie your results into the concepts covered in Beginner guide WordPress speed core web vitals.
Conclusion You Are Ready to Go
By benchmarking your site, preparing images before upload, configuring WordPress media sizes, and installing a single, well-tuned optimization plugin, you now have a reliable process to Optimize Images on every page.
Apply this same workflow for each new post and occasionally re-run bulk optimization on older uploads so your media library never becomes a performance bottleneck again. Over time, your visitors will enjoy faster pages, better user experience, and a smoother path from first click to conversion—all supported by consistent, thoughtful image optimization in WordPress.
Further Reading
- Beginner Guide to WordPress Speed Optimization
- Beginner guide WordPress speed core web vitals
- Beginner guide to WordPress speed optimization
- WordPress speed optimization checklist