If your current hosting is slow, unreliable, or too expensive, you may be ready to move WordPress site to a better provider. This tutorial walks you through a safe, step by step migration so you keep your files, database, and visitors without scary errors.
Even if you are not technical, this guide will show you exactly how to move WordPress site to new host without breaking your site or losing SEO.
This article will keep things simple and repeat the most important actions you must take to move WordPress site in a safe, predictable way.
What You Need to Move WordPress Site to a New Host
- Access to your current hosting control panel and WordPress admin.
- Access to your new hosting account with the ability to create a fresh WordPress site.
- Login to your domain registrar or DNS provider to update nameservers or DNS records.
- A reliable migration or backup plugin installed on the old site, or permission to use FTP/SFTP and phpMyAdmin.
- Enough disk space on both hosts to store at least one full backup of your site.
- Thirty to sixty minutes in a low traffic window for DNS changes and testing.
This checklist will stay useful as you move WordPress site through each stage, from taking backups to updating DNS and testing the live site.
If you still need help choosing a host optimized for WordPress, read How to choose the best WordPress hosting before you begin.
Step 1: Set Up the New Hosting Environment
Before you move anything, prepare a clean environment on the new host. This makes it much easier to move WordPress site smoothly and gives you a safe place to import your site.
- Sign in to your new hosting dashboard and create a new website or WordPress installation for your domain or a temporary subdomain.
- Ensure the new site is running a compatible version of PHP and WordPress, usually the latest stable versions.
- Confirm that SSL (HTTPS) is enabled or can be enabled on the new host once DNS is updated.
- Log in to the new site’s WordPress admin via the temporary URL provided by your host and verify that the default homepage loads.
In your new hosting dashboard, open the list of websites and click Add New Site or the equivalent option.

You can verify this step by visiting the temporary URL in a private browser window. Check that you see the default WordPress homepage and that you can access /wp-admin.
Step 2: Create a Complete Backup Before You Move WordPress Site
A complete backup of your files and database is the core of any safe migration. You will restore this backup with a plugin or import it manually on the new host to move WordPress site without data loss.
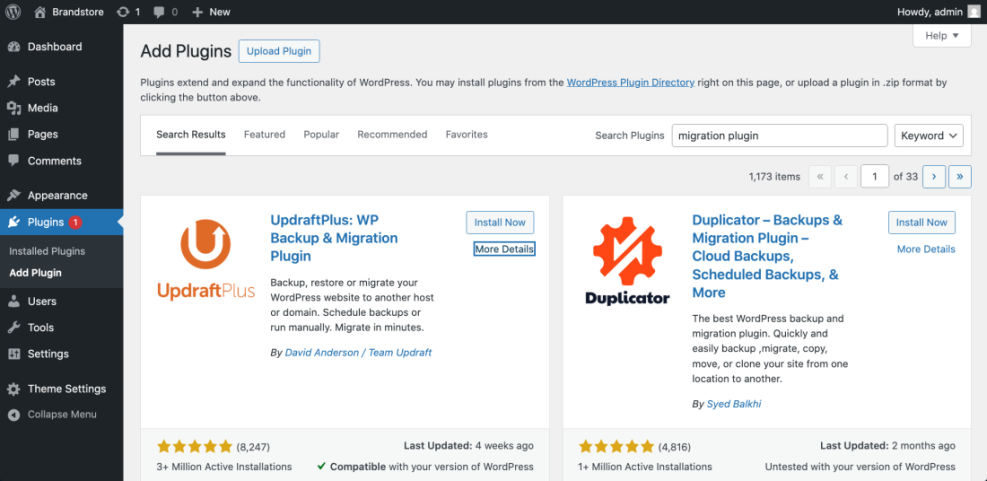
- Log in to your old site’s WordPress admin.
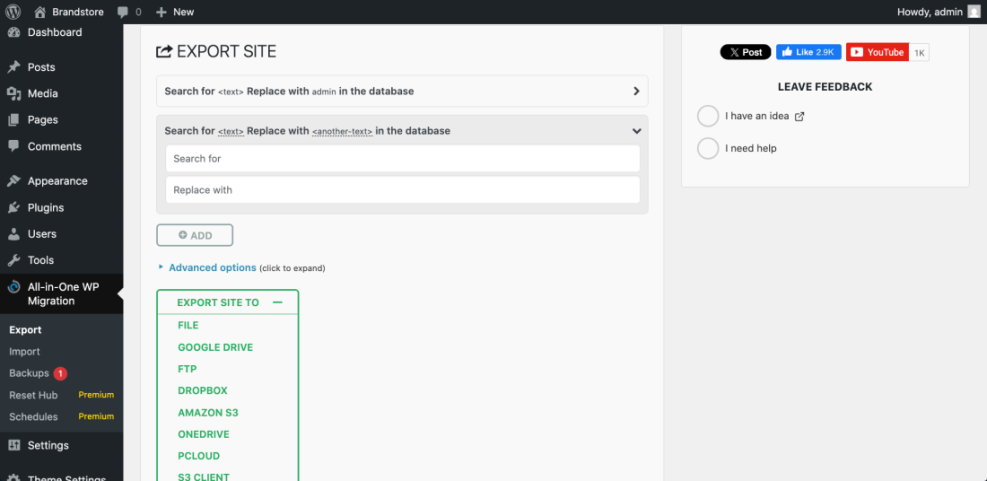
- Go to Plugins » Add New and search for a reputable backup or migration plugin such as All in One WP Migration, Duplicator, or UpdraftPlus.
- Click Install Now, then Activate on your chosen plugin.
- Open the plugin’s menu (for example All in One WP Migration » Export or Duplicator » Packages) and create a full backup that includes both files and database.
- When the backup finishes, download the backup file to your computer and, if possible, save another copy to cloud storage.
In your old WordPress dashboard, open Plugins » Add New, search for the migration plugin, and review its details before installing.
Most small and medium sites can use a plugin safely. For larger or more complex sites, follow the detailed backup instructions in Install WordPress step by step and consider creating a server level backup as well.
You can verify this step by confirming that your migration or backup plugin shows at least one recent backup file and that you have a copy stored off the server.
Step 3: Upload Your WordPress Site to the New Host
Now you will restore the backup on the new hosting account. This is the main step where you actually move WordPress site from the old server to the new one.
The easiest method is using the same migration plugin on both sites. If you prefer, you can also transfer files and the database manually.
Migration Plugin Method (Beginner Friendly)
This method is the fastest way to move WordPress site for most beginners. The plugin handles URLs, files, and the database for you.
- Log in to the new site’s WordPress admin using the temporary URL from Step 1.
- Go to Plugins » Add New and install the same migration or backup plugin you used on the old site.
- Open the plugin’s import or restore page, such as All in One WP Migration » Import or the Restore tab in your backup plugin.
- Upload the backup file you downloaded in Step 2 and start the import process, confirming any overwrite warnings.
- Wait for the restoration to complete, then log in again if the plugin logs you out after replacement.
On the new site, open the migration plugin’s Import or Restore screen before selecting your backup file.
Once the import finishes, your main work to move WordPress site with a plugin is done; from here you only need to test and tidy up on the new host.
You can verify success when the homepage on the temporary URL looks exactly like your live site, including theme, menus, and content.
Manual Migration Method for Advanced Users
If you cannot use a plugin or your site is very large, you can move WordPress site manually by copying files and the database using your hosting tools.
- On the old host, open cPanel or your control panel and launch File Manager. Compress your WordPress folder, often public_html, into a ZIP file and download it, or download files via FTP/SFTP.
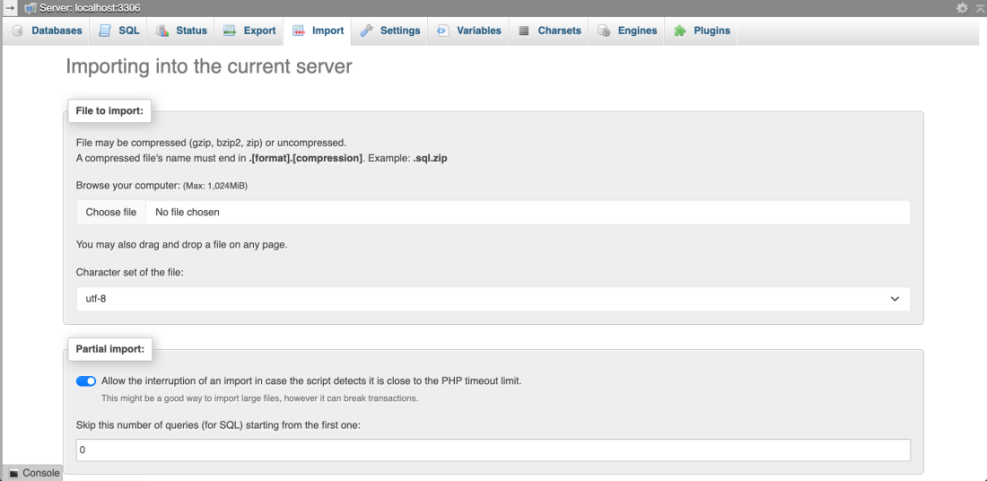
- On the old host, open phpMyAdmin, select your WordPress database, click the Export tab, choose Quick and SQL, then click Go to download the database.
- On the new host, create a new empty database and user, then assign the user to the database with full privileges.
- Upload your ZIP file of WordPress files to the new host’s web root and extract it.
- Open phpMyAdmin on the new host, select the new database, go to the Import tab, choose your SQL file, and click Go to import.
- Edit the wp-config.php file in the new WordPress folder to match the new database name, user, and password.
Open phpMyAdmin on the new host, select the empty database, and use the Import tab to upload your SQL file.
define( 'DB_NAME', 'new_database_name' );
define( 'DB_USER', 'new_database_user' );
define( 'DB_PASSWORD', 'strong_database_password' );
define( 'DB_HOST', 'localhost' );
For deeper guidance on manual migration and URL updates, refer to the official Moving WordPress documentation on WordPress.org.
You can verify success by loading the temporary URL and confirming that the full site works, including logins and basic navigation.
Step 4: Point Your Domain to the New Host After You Move WordPress Site
After your site works correctly on the new server, you must update DNS so visitors reach the new host instead of the old one. This is the final step to fully move WordPress site in the eyes of your visitors and search engines.
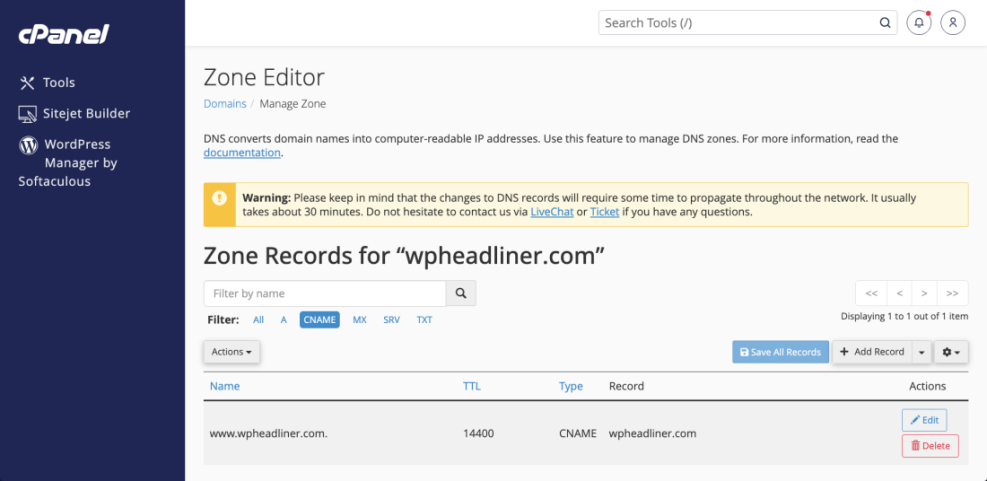
- Log in to your domain registrar or DNS provider account.
- Locate the domain you are moving and open the DNS or Nameservers settings.
- If your new host gave you custom nameservers, replace the old nameservers with the new ones and save.
- If you manage DNS yourself, edit the A record for your domain and point it to the new server’s IP address provided by your host.
- Save the changes and allow some time for DNS propagation across the internet.
In your registrar dashboard, open the domain’s DNS Management page and edit either the nameservers or the main A record value.
You can verify this step using any DNS checker tool and by visiting your domain in a private browser once propagation begins. When the live domain shows the new host’s version of the site, DNS is pointing correctly.
Step 5: Test the New Site and Clean Up the Old Host
Once traffic is flowing to the new host, perform a careful test to make sure everything works. This confirms that your decision to move WordPress site was successful and that nothing broke along the way.
- Open your site in a private or incognito browser window and click through the homepage, key pages, recent posts, and any landing pages.
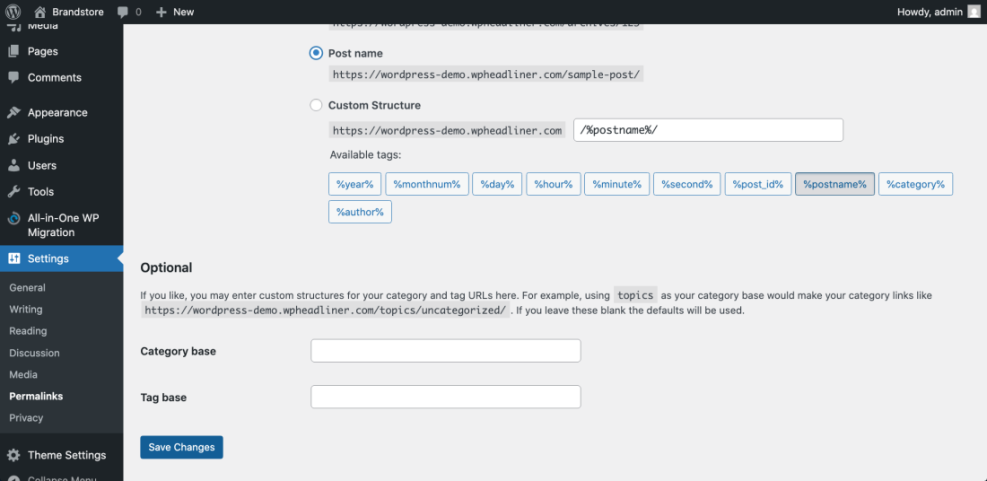
- Log in to WordPress admin on the new host, go to Settings » Permalinks, and click Save Changes once to refresh your permalinks.
- Test all forms, search boxes, and comment submissions to ensure emails and submissions still work.
- If you run WooCommerce or other eCommerce plugins, perform a full test order using a test payment method.
- Monitor your site for 24–48 hours for any errors, slow pages, or missing images.
From your new site’s dashboard open Settings » Permalinks and click Save Changes to regenerate rewrite rules after migration.
As a next step after you move WordPress site, harden performance on the new server with WordPress speed optimization checklist so your upgraded hosting delivers the speed benefits you expect.
Maintenance Options on Your New Host
Once your WordPress site is safely running on the new host, decide how you will handle ongoing maintenance, updates, and checks.
The table below compares common approaches you can mix and match depending on your budget, skills, and how critical the site is.
| Method | Where You Use It | Main Purpose |
|---|---|---|
| DIY Manual Maintenance | WordPress dashboard and hosting control panel | Maximum control over updates, theme and plugin changes, and manual checks for title issues on small or low-risk sites. |
| Managed Hosting Tools | Your host’s control panel or custom dashboard | Simplify routine maintenance with one-click updates, built-in backups, and basic monitoring so template problems are less likely to appear. |
| SEO, Maintenance & Security Plugins | Plugins section inside the WordPress dashboard | Automate repetitive tasks like backups, database cleanup, image optimization, and security scans, while also running periodic audits of titles and meta tags. |
| WP-CLI and Developer Tools | SSH terminal with WP-CLI and deployment tools | Scriptable, fast maintenance for developers managing multiple or complex sites, including scanning themes for legacy header.php markup. |
| Professional WordPress Care Plan | External provider, freelancer, or agency | Hands-off maintenance with proactive monitoring, regular audits, and expert fixes so problems like duplicate titles are caught early. |
Choose at least one primary method and one backup method, such as managed hosting tools plus an external care plan. This helps your freshly migrated site stay healthy and secure over the long term.
Conclusion: Your Site Is Live on the New Host
You have prepared a new hosting environment, created a complete backup, restored your site on the new server, updated DNS, and thoroughly tested everything. At this point you have successfully followed all the steps to move WordPress site to a new host without losing content, visitors, or SEO value.
Keep your backups in a safe location and document the steps you used. Schedule regular maintenance so the next time you move WordPress site or upgrade hosting it will be even easier. For more complex moves, you can build on this basic process with staging, zero downtime cutovers, and more advanced tooling.
When you next move WordPress site to another host or server, you can reuse this same process as a reliable migration checklist.
More Guides on WordPress Migration
- WordPress migration blog guide
- WordPress migration checklist for blogs
- Common WordPress backup errors and how to fix
- Common WordPress backup errors and how to fix
- Install WordPress step by step