When you need to Migrate WordPress to a new host or server, the process can feel risky and confusing. One wrong click can lead to downtime, broken links, or even data loss.
This guide walks you through a simple plugin based workflow to move your entire site, step by step. You will back up your site, export it, import it on the new host, point your domain, and verify everything works before you retire the old server.
What You Need to Start
- Administrator access to your current WordPress dashboard and hosting control panel.
- A new hosting account ready for WordPress with PHP and a MySQL compatible database.
- Access to your domain registrar or DNS provider to update nameservers or DNS records.
- Enough disk space and PHP upload limits on the new host to handle your site archive.
- Time during a low traffic window so you can test everything after the migration.
Step 1: Plan Your WordPress Migration
A short planning phase helps you avoid surprises, downtime, and SEO issues. You want a clear window, a checklist, and access to everything before you move any files.
- Log into your existing hosting control panel and confirm you can see your current domain, file manager, and database tools.
- Make a simple list of what you are moving, including the main site, any subdomains, and key features such as membership or WooCommerce.
- Choose a low traffic time for the migration and notify any team members about a short maintenance window.
- Open your new hosting dashboard in another browser tab and confirm the account is active and ready.
- Optionally, review the WordPress migration checklist for blogs to note any advanced items you may need later.
To verify you are ready, make sure you can log into your current WordPress admin, your old host, and your new host without errors.
Step 2: Back Up Your Existing WordPress Site
Before you touch anything, create a complete backup. This gives you a safe restore point if the migration fails or you need to roll back quickly.
- Log into your current WordPress admin at /wp-admin using an administrator account.
- Navigate to Plugins » Add New and install your preferred backup plugin, such as UpdraftPlus, if you do not already have one configured.
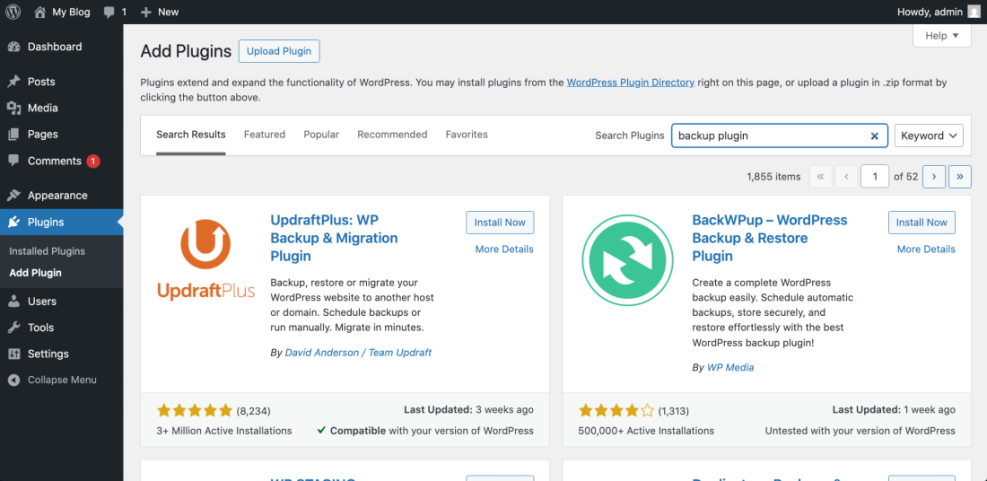
Find and install the UpdraftPlus WordPress Backup & Migration plugin from your WordPress admin panel to prepare for migration. - Use the backup plugin to run a new full backup that includes both Files and Database.
- Download at least one copy of the backup archive to your computer or a cloud storage service you control.
- In your hosting control panel, open the Backup or Snapshots tool and create an additional full account or home directory backup.
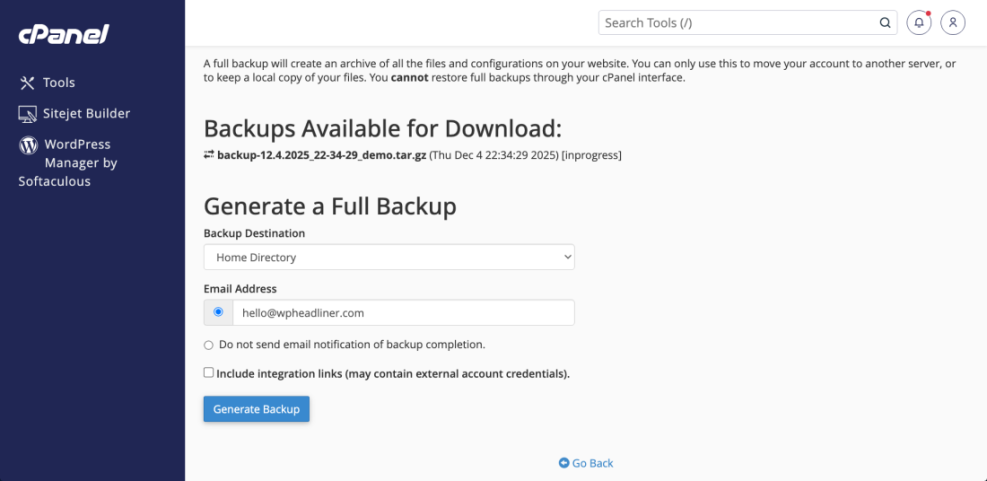
The cPanel interface displays the options for generating a complete backup of a WordPress website, essential for migration or safekeeping.
To verify success, check that your WordPress backup plugin lists a fresh backup and that your host shows at least one recent full backup for the account.
Step 3: Export Your Site With a Migration Plugin
Using a migration plugin is the fastest way to move a typical WordPress site. In this guide you use All-in-One WP Migration to generate a single archive that includes your files and database.
- In your current WordPress admin, go to Plugins » Add New, search for All-in-One WP Migration, then click Install Now and Activate.
- In the left admin menu, click All-in-One WP Migration » Export.
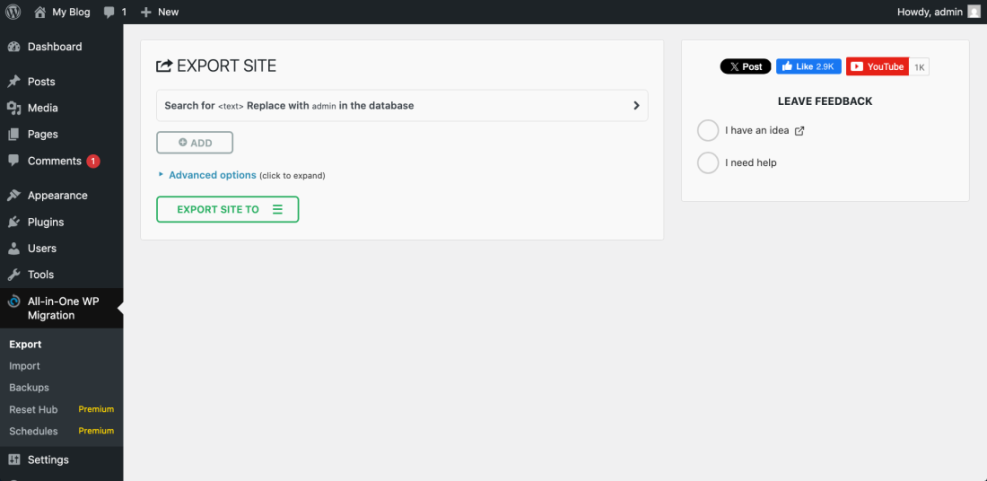
The All-in-One WP Migration plugin’s export interface in the WordPress dashboard. - Click the Export To button and choose File. Wait while the plugin scans your site and builds the export archive.
- When the process reaches 100 percent, click the Download button to save the
.wpressfile to your computer.
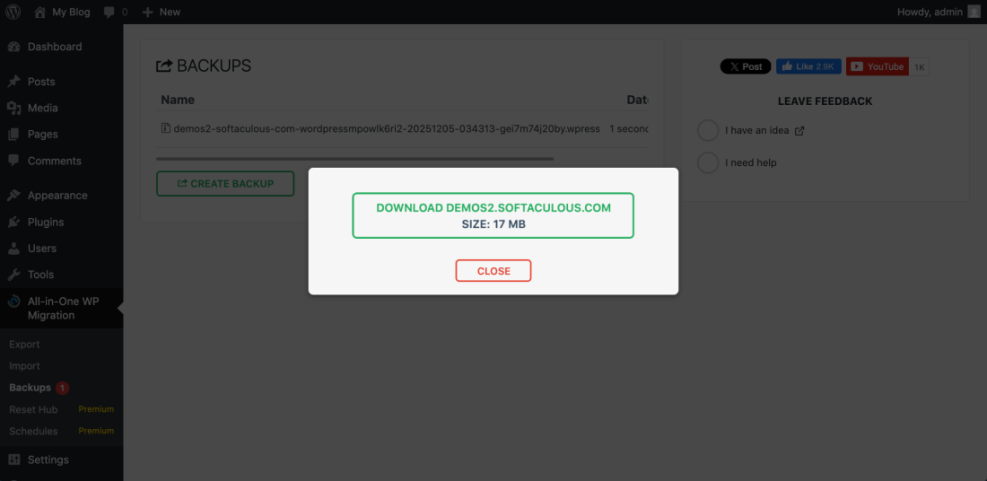
Downloading a WordPress site backup file via the All-in-One WP Migration plugin, a crucial step for safe WordPress migration. - Confirm the download completes and note the folder where the
.wpressfile is stored.
To verify success, confirm that the .wpress file exists on your computer and its file size matches what the plugin reported at the end of the export.
Step 4: Prepare Migrate WordPress on the New Host
Your new host needs a clean WordPress installation ready to receive the imported archive. This ensures the migration plugin has the correct environment and database access.
- Use your hosting control panel’s one click installer or a manual method to install a fresh copy of WordPress on the new server. If you need help, follow How to install a WordPress theme.
- Log into the new WordPress admin at /wp-admin using the credentials you created during installation.
- Navigate to Plugins » Add New, search for All-in-One WP Migration, then click Install Now and Activate.
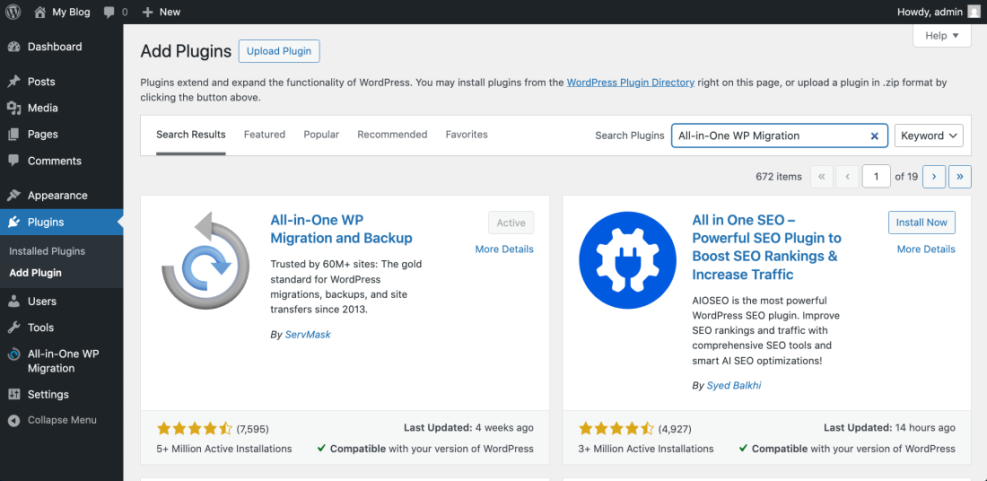
This screenshot displays the WordPress “Add Plugins” page with the “All-in-One WP Migration” plugin shown as active. - Visit Settings » General and confirm the Site Address (URL) matches the domain or temporary URL you will use while testing.
To verify the new environment, open the site’s homepage and a couple of admin screens. Both should load quickly without errors on the new host.
Step 5: Import Your Site to the New Host
Now you will upload the export archive to the new WordPress site and let the migration plugin restore your files and database in one operation.
- In the new site’s WordPress admin, go to All-in-One WP Migration » Import.

The All-in-One WP Migration plugin’s import interface allows you to easily drag and drop your backup file or choose an import source. - Click the Import From button, choose File, then select the
.wpressarchive you downloaded earlier. - Wait while the plugin uploads and processes the archive. This can take several minutes on larger sites.
- If you see a warning that the import will overwrite the existing database, themes, plugins, and media files, click Proceed to confirm.
- When the plugin reports that the import is complete, click the link to log in again. Use the same admin username and password you used on the original site.
To verify a successful import, browse your homepage, a blog post, and a key page such as your contact or shop page. The design, content, and menus should match the old site.
Step 6: Point Your Domain and Fix URLs
Once your site works on the new host, you need to point your domain to the new server and make sure internal URLs and HTTPS settings are correct.
- Log into your domain registrar or DNS provider account where your domain is managed.
- If you are changing hosts, update the domain’s nameservers to the ones provided by your new host, or edit the A record to point to the new server IP.
- Save your changes and note the TTL value. DNS updates can take from a few minutes up to 24 hours to fully propagate.
- While DNS is updating, use the new host’s temporary URL or a local hosts file override to confirm the site loads correctly on the new server.
- After DNS has propagated, make sure your SSL certificate is active and that the site loads over https without browser warnings.
If the site still loads the old address or gets stuck in a redirect loop, you can temporarily define the URLs in wp-config.php near the other constants:
define( 'WP_HOME', 'https://example.com' );
define( 'WP_SITEURL', 'https://example.com' );
https://example.com with your real domain. When everything is stable, you can remove these lines so the values in the database control the URLs. For more ways to adjust site URLs, see the official Moving WordPress documentation on WordPress.org. To verify success, test the site from a different network or mobile connection and confirm the correct domain loads the new host and the WordPress admin works normally.
Step 7: Clean Up and Optimize After Migrate WordPress
With your domain pointing to the new host, finish by cleaning up old references, checking SEO signals, and removing anything you no longer need on the old server.
- In the new WordPress admin, go to Settings » Permalinks and click Save Changes once to regenerate rewrite rules.
- Re enable your caching and security plugins and clear any caches so visitors see the new site immediately.
- Log into your SEO plugin and regenerate the XML sitemap if needed. Then verify your property in Google Search Console and resubmit the sitemap. For a detailed checklist, see WordPress migration checklist for blogs and WordPress migration checklist for blogs.
- Use a broken link checker or manual spot checks to confirm menus, internal links, forms, and checkout flows all work as expected on the new host.
- Once you are confident everything works, remove the old site or lock it behind a password so visitors cannot access outdated content.
To verify the migration is fully complete, keep an eye on error logs, uptime alerts, and analytics over the next few days to catch any missed issues.
Conclusion You Are Ready to Go
You have successfully used a migration plugin to move your WordPress site to a new host, updated your domain, and completed the essential cleanup steps. Your visitors now see the new site, your content and design are intact, and your backups are in place if you ever need to roll back.
From here you can focus on performance, security, and SEO improvements on the new server. Save this workflow and reuse it for future migrations, staging sites, or redesigns so every move is predictable and low stress.
Further Reading
- WordPress migration blog guide
- Install WordPress step by step
- How to move WordPress site to new host
- Advanced developer hooks for WordPress optimization with code
- Install WordPress step by step