A WordPress blog is one of the easiest ways to start publishing online. However, the setup steps can feel confusing when you are brand new. In this guide you will make a WordPress blog from scratch using self hosted WordPress.org, so you own your content and can grow long term.
By the end of this tutorial you will have a working blog on your own domain, a clean theme, essential plugins installed, your first posts ready, and a simple launch checklist. As a result, you will be able to confidently share your new site with the world.
What You Need to Start
Before you touch any settings, it helps to prepare a few basics. This way, the technical steps go much smoother.
- A blog idea and niche you want to write about.
- A unique blog name and a few backup name ideas.
- A domain name you can register with your host.
- A WordPress friendly hosting plan with email access.
- Basic ability to log in to email and follow on screen instructions.
Step 1: Plan Your Blog Niche and Name
Define your ideal reader
Planning your niche and name before you touch WordPress will save you time and rework later. In addition, a clear focus helps your future SEO and content strategy.
- First, write down who your ideal reader is and what problems you will help them solve.
- Next, list 5 to 10 sample post ideas to confirm there is enough you can write about.
Brainstorm and validate your blog name
- After that, brainstorm 5 to 10 blog name ideas that match your topic and are easy to spell.
- Then check that your favorite name is available as a .com domain using your preferred domain registrar or hosting company search.
- Finally, search your blog name in Google to avoid conflicts with existing brands.
Step 2: Choose Domain and Hosting for Your Blog
Your hosting controls speed, security, and uptime for your new WordPress blog. Therefore, choosing a solid beginner friendly host will make the rest of this tutorial much easier.
Pick a beginner friendly WordPress host
- First, open your browser and go to a trusted WordPress host. You can use How to choose the best WordPress hosting and How to choose the best WordPress hosting as reference guides.
- Next, select an entry level shared or managed WordPress plan that includes SSL and at least one free domain if possible.
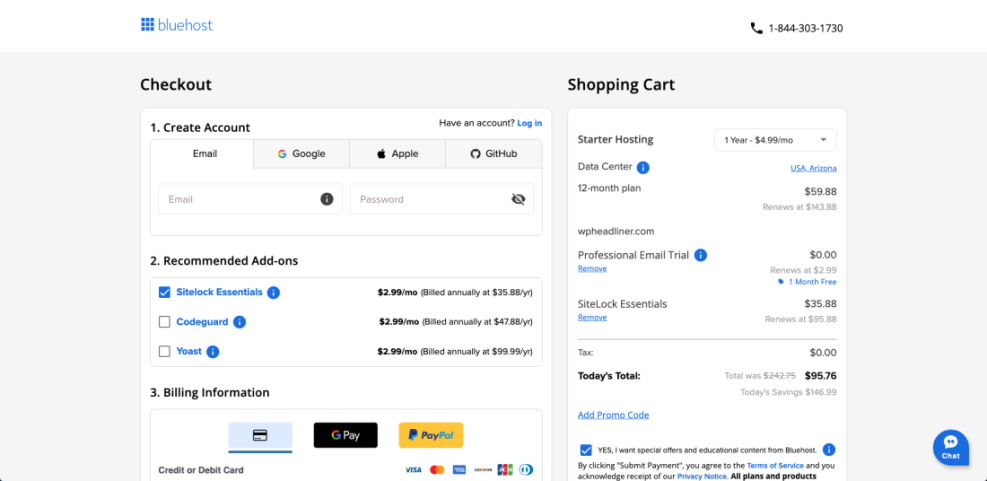
Register your domain and finish checkout
- During checkout, register your chosen domain name or connect a domain you already own.
- Then set your account email and create a strong password for your hosting login.
- Finally, complete payment and wait for the host to show your new account or welcome screen.
Step 3: Install WordPress on Your Hosting Account
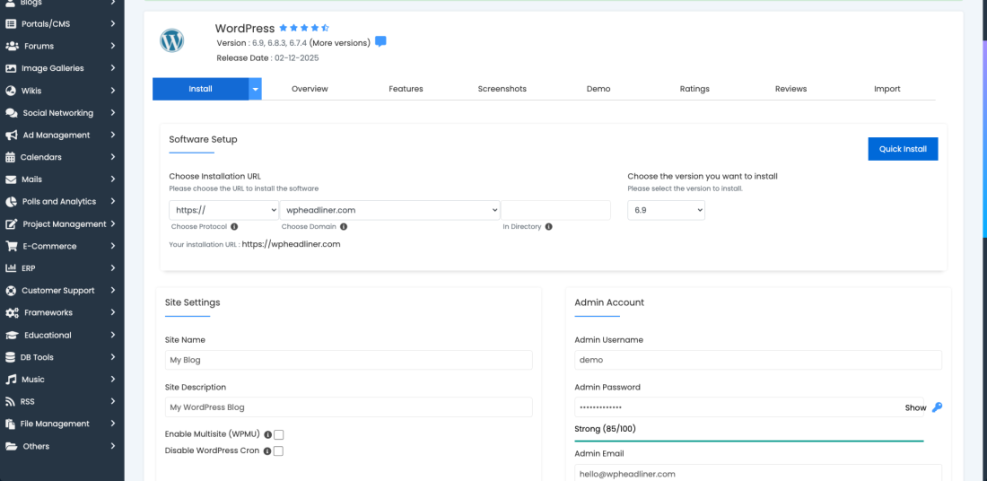
Most hosts provide a one click installer so you can install WordPress without touching code. In short, this step adds the WordPress files and database to your hosting account.
Use the one click WordPress installer
- First, log in to your hosting dashboard using the credentials you just created.
- Then locate the WordPress or Website section, often labeled WordPress Installer, Softaculous, or Auto Installers.
- Click the Install or Set Up WordPress button.
Enter site details and admin login
- Choose your domain from the Domain dropdown and leave the Directory field empty so WordPress installs in the site root.
- Next, enter your Site Title and Tagline (you can change these later in WordPress).
- After that, create a unique Admin Username, a strong Password, and confirm your Admin Email.
- Finally, click Install and wait for the success message with your WordPress Admin URL (usually
https://yourdomain.com/wp-admin).
Step 4: Configure Basic WordPress Settings
Configuring your basic settings right after install gives your WordPress blog a clean structure and correct time zone before you publish anything. In addition, it prevents broken links later.
Set your site identity and timezone
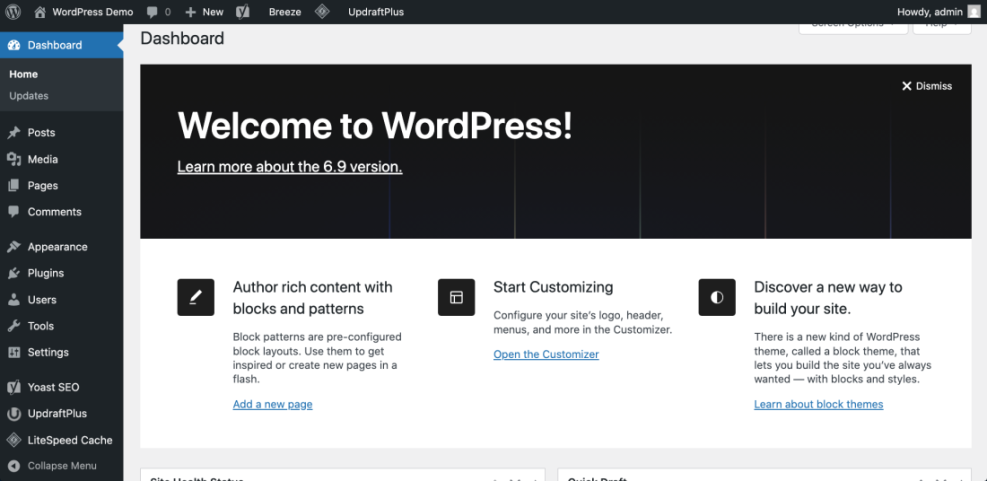
- First, open your browser and go to your admin URL, for example
https://yourdomain.com/wp-admin. - Log in with the Username and Password you created during installation.
- From the left menu, click Settings then General.
- Update your Site Title and Tagline to match your blog name and topic.
- Then confirm your WordPress Address (URL) and Site Address (URL) both use https if SSL is active.
- Set your correct Timezone, Date Format, and Time Format then click Save Changes.
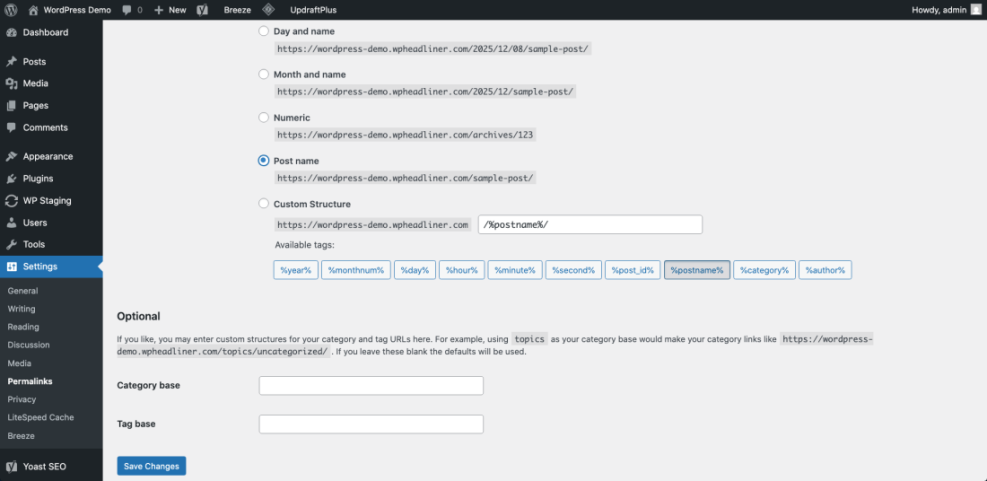
Choose SEO friendly permalinks
- Next, go to Settings then Permalinks and select Post name, then click Save Changes.
Step 5: Choose and Install a Blog Theme
Your theme controls how your WordPress blog looks. Consequently, a lightweight, mobile friendly theme keeps your site fast and easy to read.
Browse and preview WordPress themes
- In the WordPress dashboard, go to Appearance then Themes.
- Click Add New to browse available themes from the WordPress directory.
- Use the Feature Filter or Search themes field to find a simple blogging theme with good reviews.
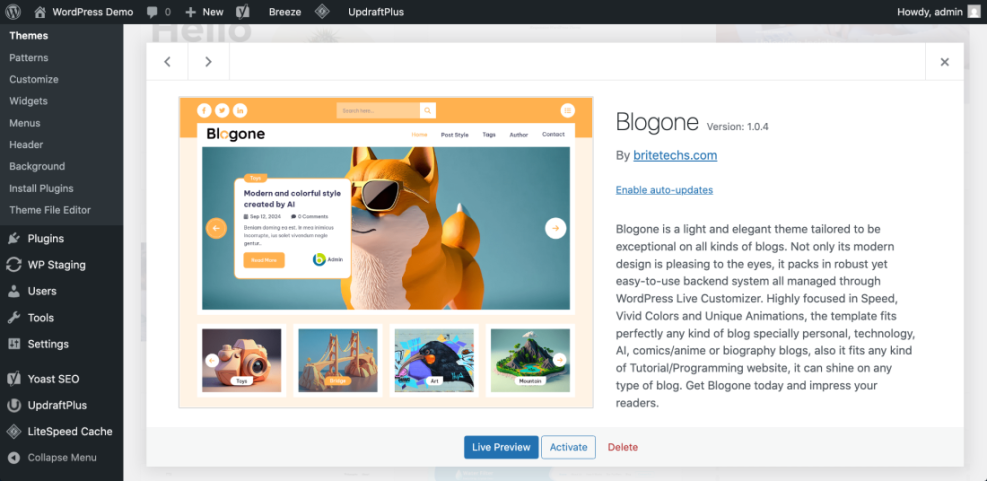
- Next, hover over a theme and click Preview to see how your home and blog pages might look.
- Once you are happy, click Install and then Activate on the theme you like best.
For layout ideas and best practices, you can study the patterns in the WordPress migration blog guide.
Optional: Apply simple typography tweaks
/* Optional simple typography tweaks */
.entry-title {
  font-size: 2.2rem;
}
body {
  line-height: 1.8;
}
Step 6: Customize Your Blog Header and Navigation
Customizing your branding and navigation helps visitors understand your blog quickly and find key content areas. Moreover, it makes your WordPress blog feel unique.
Set your logo and homepage
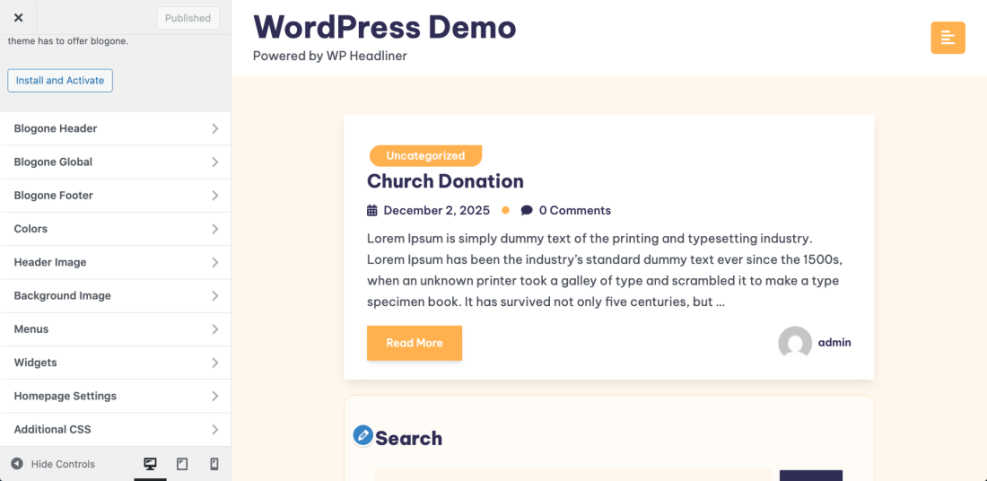
- Go to Appearance then Customize to open the theme customizer.
- Upload your logo under the Site Identity or Header section and set your Site Icon (favicon).
- Decide whether your homepage should show Your latest posts or a Static page in Homepage Settings.
Create your main navigation menu
- Then go to Appearance then Menus and click Create a new menu.
- Name it Main Menu, add pages such as Home, Blog, About, and assign it to the primary display location, then click Save Menu.
Step 7: Install Essential Plugins for Your WordPress Blog
Plugins extend WordPress so you can add SEO, backups, security, caching, and contact forms without coding. However, it is still wise to start with a lean, essential stack.
Find and activate key plugins
- From the dashboard, click Plugins then Add New.
- Use the search box to find a reputable SEO plugin, backup plugin, security plugin, and caching plugin.
- Click Install Now then Activate for each plugin you choose.
Run setup wizards and add a contact form
- Next, follow any setup wizards for your SEO or caching plugins, accepting beginner friendly defaults.
- Then install a contact form plugin and create a basic form for your contact page.
For a curated list of beginner friendly tools, see Developer hooks for optimizing WordPress plugins with code.
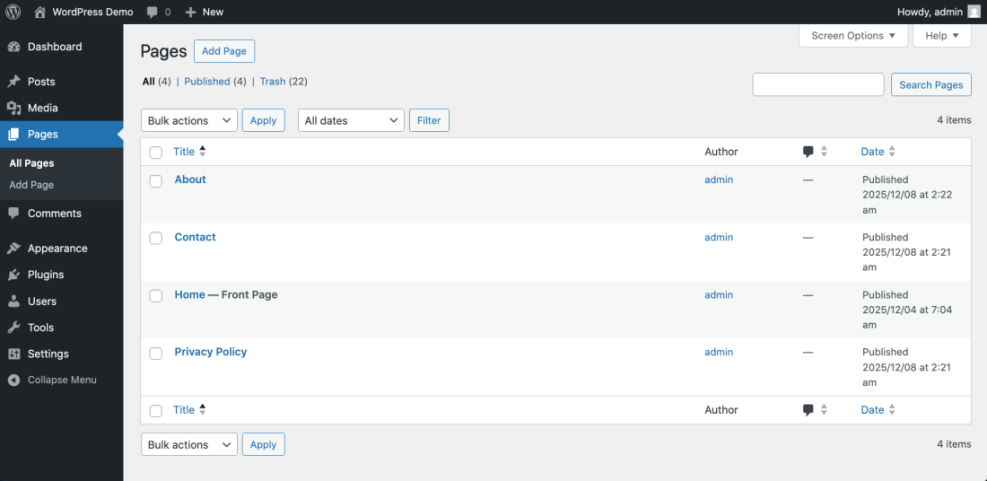
Step 8: Create Your Core Pages
Core pages like About, Contact, and Privacy Policy make your blog look trustworthy and help visitors understand who you are. In addition, they build credibility with brands and advertisers later.
Draft and publish your key pages
- Go to Pages then Add New.
- Create an About page that explains who you are, who the blog is for, and what readers will learn.
- Create a Contact page and insert your form using the form plugin block or shortcode.
- Create a Privacy Policy page using the WordPress template under Settings then Privacy, and customize it for your site.
- Finally, publish each page, then add them to your main menu under Appearance then Menus.
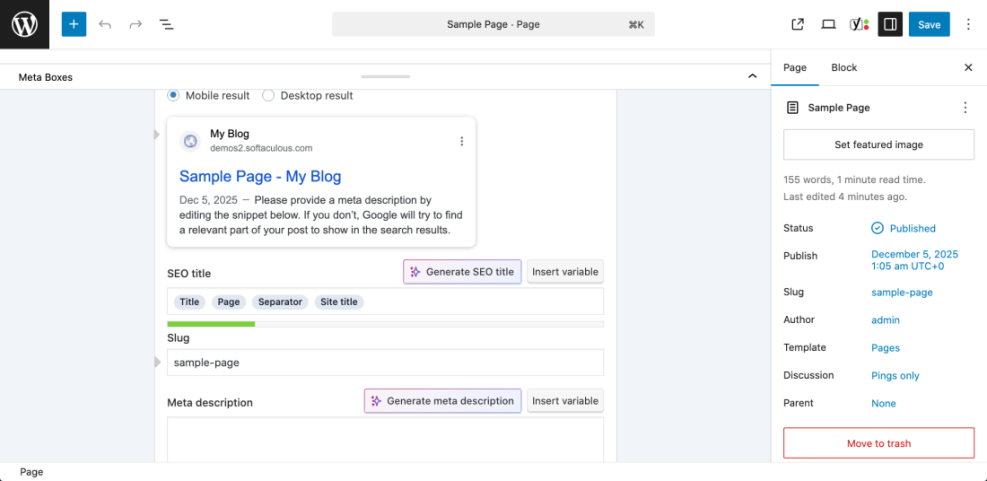
Step 9: Write and Publish Your First Blog Post
Your first posts will give search engines and readers a reason to visit your new WordPress blog. Therefore, focus on useful, evergreen content that solves real problems.
Structure your first post
- Go to Posts then Add New.
- Write a descriptive Post Title that clearly states the benefit of the article.
- Use the editor to add headings, paragraphs, and images that support your topic.
Optimize categories, tags, and featured image
- In the right sidebar, set a Category and relevant Tags. For detailed guidance, use Categories tags beginner guide.
- Then set a compelling Featured image that matches your topic.
- Click Preview to see how the post looks on your site, fix any formatting issues, then click Publish.
For a deeper writing walkthrough, read How to create a blog on WordPress and the official WordPress.org guide to writing posts.
Step 10 Secure, Speed Up, and Launch Your Blog
Before you announce your blog, you should quickly check security, speed, and basic SEO. This way, you start your WordPress blog from a strong foundation.
Lock down security and backups
- In your security plugin, run an initial scan and enable basic protections like firewall and login lockouts.
- Follow the essentials in How to start a blog WordPress so your admin account and backups are safe.
Improve speed and connect analytics
- Next, enable caching in your caching plugin and test your site with an online speed tool.
- Use the steps in WordPress speed optimization checklist for quick wins like image compression.
- Then install an analytics plugin or connect Google Analytics, following Analytics setup WordPress google analytics.
Do a final pre-launch check
- Click through your site as a visitor, test your contact form, and fix any broken links or layout issues.
- Finally, once you are happy, share your new blog with friends, your email list, and social channels.
Conclusion: You Are Ready to Go
You have now planned your niche, set up hosting, installed WordPress, configured key settings, chosen a theme, added essential plugins, created core pages, and published your first post. As a result, your WordPress blog is live and ready to grow with new content and readers.
From here, keep publishing consistently, monitor basic performance, and refine your design and plugins over time. In addition, as you get more comfortable in the dashboard, you can explore more advanced tutorials on SEO, performance, and monetization to take your blog even further.
Further Reading
- Beginner checklist optimizing WordPress blog posts
- Beginner checklist optimizing WordPress blog posts
- Beginner checklist optimizing WordPress blog posts
- WordPress business blog content strategy
- Is WordPress good for seo