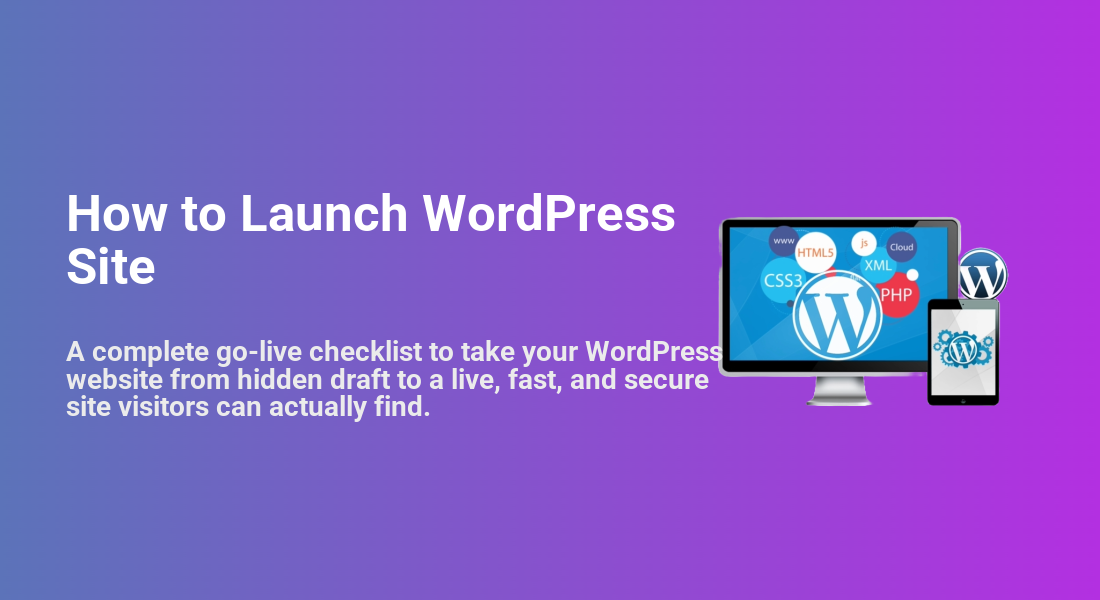
How to Launch WordPress Site
A complete go-live checklist to take your WordPress website from hidden draft to a live, fast, and secure site visitors can actually find.
You’ve installed WordPress, customized a theme, and drafted your core pages. But your site is still hidden behind a temporary URL, “coming soon” page, or maintenance mode. Launching a WordPress site isn’t just clicking Publish — it’s a small but important checklist to make your site public, secure, and ready for real visitors.
In this guide, you’ll follow a step-by-step launch process: confirming your hosting and domain, updating key WordPress settings, making the site visible to search engines, enabling SSL, and setting up basic performance, backup, and security tools. By the end, you’ll have a WordPress site that’s truly live and ready to grow.
If you’re still wrapping your head around how WordPress fits into your overall website strategy, you may also want to read our overview of WordPress guides and tutorials as a companion to this launch checklist.
Prerequisites
Before you launch, make sure a few basics are already in place. This guide assumes your site is built and you’re ready to go live, not just starting from an empty WordPress install.
- A working WordPress installation on your hosting account (staging or live environment).
- Access to your hosting control panel (cPanel, Plesk, or a custom hosting dashboard).
- A registered domain name that you control (for example, yourcompany.com).
- WordPress admin login for the site you’re about to launch.
- Core pages created (Home, About, Contact, main services or blog pages) and a basic navigation menu configured.
Step 1: Confirm your hosting and domain are ready
Your domain and hosting need to point to the same place before launch. If your domain is still showing a parking page or an old site, visitors won’t see your new WordPress website.
- Log in to your hosting control panel. Look for a section called Domains, Domain Manager, or Website.
- Confirm which domain points to your WordPress install. Your primary domain or the domain you want to launch should be mapped to the folder where WordPress is installed (often
public_htmlor a subfolder). - Check DNS settings at your domain registrar. Make sure the nameservers or A records point to your hosting provider, as instructed by your host.
Checkpoint: When you type your domain into a browser, you should see either your WordPress site, a coming soon page from your host, or your staging version — not a parked page from the registrar.
If your site still isn’t ready because you haven’t fully designed it, work through a full build process (for example, following a guide like this step-by-step tutorial for building a WordPress website) before you move on with the launch.
Step 2: Configure essential WordPress settings
Now that your hosting and domain are aligned, configure the basics inside the WordPress dashboard so your live site shows the right name, email, and language.
- Log in to WordPress Admin. Go to
https://yourdomain.com/wp-admin/and sign in. - Open General Settings. In the left menu, go to Settings > General.
- Set the Site Title and Tagline. Use a clear brand name and a short tagline that describes what you do.
- Check the Administration Email Address. Make sure this is a monitored inbox for important notifications.
- Set your time zone, date, and time formats. Choose your local time zone so scheduled posts and logs are accurate.
- Pick a site language. This affects WordPress interface language and some theme text.
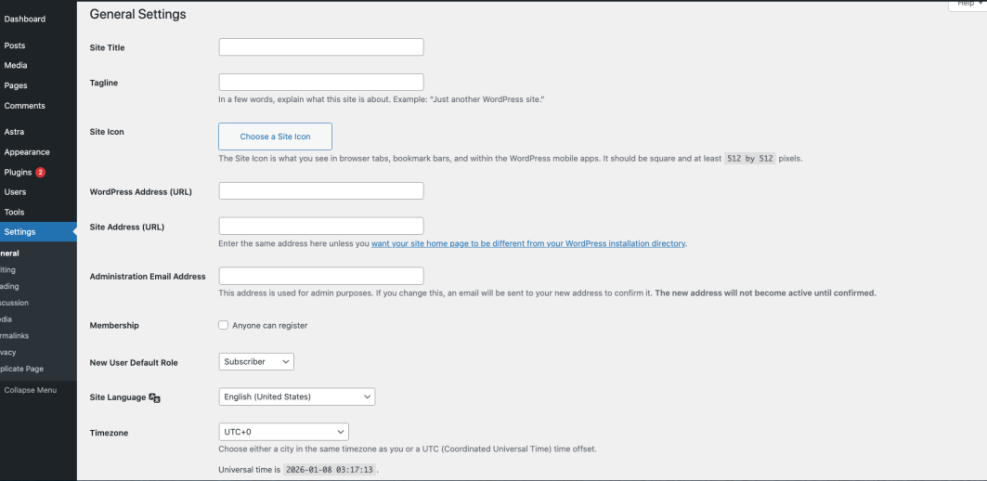
Checkpoint: Visit your homepage and confirm your browser tab title and tagline look correct, not generic.
Step 3: Make your site visible to visitors and search engines
Many site owners build WordPress sites with search engines blocked or with a maintenance mode plugin enabled. Before launch, you need to open the doors to both visitors and search bots.
- Check search engine visibility. In the WordPress dashboard, go to Settings > Reading.
- Find the “Search engine visibility” option. If the box “Discourage search engines from indexing this site” is checked, uncheck it.
- Set your homepage display. In the same screen, choose whether your homepage shows your latest posts or a static page (usually a designed homepage).
- Save Changes. Click Save Changes at the bottom.
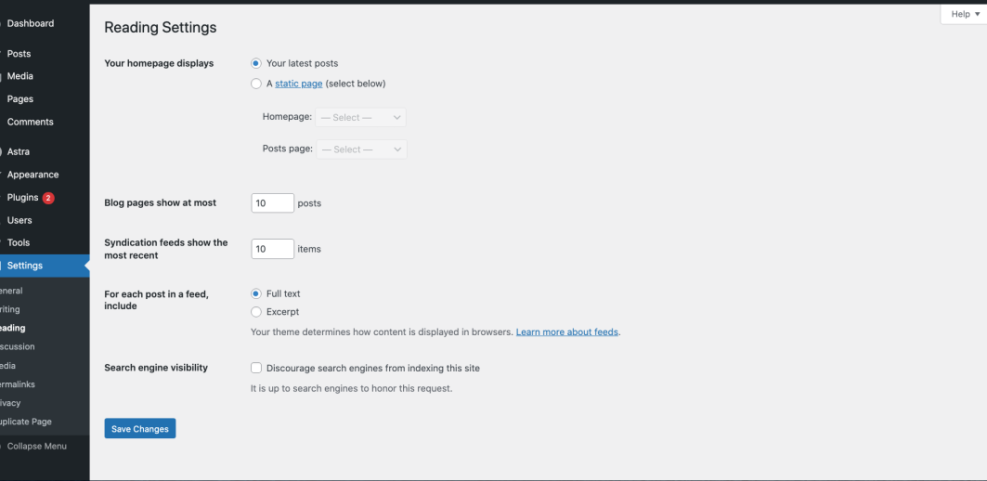
Checkpoint: When you view your site in a private/incognito window, you should see your homepage and navigation without any “coming soon” or maintenance messages.
Step 4: Enable HTTPS and check your site URLs
A proper launch today means your site loads over HTTPS (with a padlock in the browser) instead of plain HTTP. Most hosting providers include free SSL certificates, but you may need to turn them on.
- Enable SSL in your hosting panel. Look for an option called SSL/TLS, Security, or HTTPS. Turn on SSL for your domain and issue a certificate (often via a free Let’s Encrypt option).
- Update WordPress URLs to use HTTPS. In the dashboard, go to Settings > General. Make sure both WordPress Address (URL) and Site Address (URL) start with
https://and use your final domain (not a temporary one). - Save Changes and log in again. WordPress may log you out when you change these values; sign back in over HTTPS.
- Check front-end URLs. Visit a few pages and confirm that the browser shows a padlock and the URL begins with
https://.
If you’re comfortable with the command line and your host provides WP-CLI, you can run this in an SSH terminal (replace the example URLs with your own):
wp search-replace 'http://example.com' 'https://example.com'Checkpoint: Your entire site (front-end and admin) should be accessible only via HTTPS, with no security warnings in the browser.
Step 5: Prepare performance, backups, and security
Launching a WordPress site without basic performance, backup, and security measures is risky. A slow or vulnerable site can undo a great launch on day one.
- Set up caching. Install and configure a reputable WordPress caching plugin to speed up page delivery. Enable page caching and, if available, browser caching and file compression (gzip or Brotli).
- Optimize images. Use an image optimization plugin or an external tool to compress large images before upload. Set a reasonable maximum image width in your theme or media settings.
- Configure automatic backups. Connect a backup plugin to a remote storage service (cloud or off-site) and schedule daily or weekly backups depending on how often your content changes.
- Install a security plugin. Enable basic firewall rules, login protection, and malware scans.
- Harden logins. Change any weak passwords, enforce strong passwords for admins, and consider enabling two-factor authentication where possible.
Checkpoint: After enabling caching and image optimization, test several pages as a logged-out user. They should feel noticeably faster than your unoptimized staging site.
Step 6: Remove maintenance mode and test your live site
With your settings, HTTPS, performance, and security ready, it’s time to actually open the doors. Many sites use a coming soon or maintenance mode plugin during development—don’t forget to disable it.
- Disable maintenance or coming soon mode. If you used a plugin for this, open its settings and look for a switch to turn off maintenance mode. Save and clear your cache if needed.
- Test as a visitor. Open a private/incognito browser window and visit your domain. Browse the homepage, about page, services pages, and at least one blog post.
- Test your forms and signup boxes. Submit your contact form or newsletter signup and confirm emails arrive where they should.
- Check navigation and internal links. Click through your main menu and footer links. Make sure no pages show “404 Not Found” errors.
Checkpoint: Visitors (who aren’t logged in) should see your real site content with working navigation and forms, not a placeholder page.
Step 7: Monitor your new WordPress site after launch
A successful launch isn’t the end of the job. The first hours and days after going live are when issues surface and when you set up tracking to understand your traffic and performance.
- Set up analytics. Install your preferred analytics tool (such as Google Analytics) so you can track visitors, top pages, and user behavior.
- Connect to search tools. Add your site to Google Search Console and submit your XML sitemap so search engines can discover and index your pages more efficiently.
- Enable uptime monitoring. Use a monitoring service that pings your site and alerts you if it goes down after launch.
- Watch performance and errors. Check your hosting logs and analytics for slow pages, 404 errors, or spikes in server errors, and address them quickly.
- Schedule regular maintenance. Plan monthly tasks like updating plugins, checking backups, and reviewing security alerts.
Checkpoint: After a week of being live, you should have analytics data, search impressions, and a clear routine for keeping your site healthy.
Launch Wordpress Site complete: keep improving your WordPress site
Launching a WordPress site is more than flipping a single switch. You’ve aligned your domain and hosting, configured core settings, opened your site to search engines, enabled HTTPS, and put performance, backup, and security foundations in place.
From here, your focus shifts from setup to growth—publishing helpful content, refining your design, and optimizing for search and conversions. With a clean launch and a simple monitoring routine, you’ve set your WordPress website up for long-term success instead of last-minute surprises.
Further Reading
- How to Publish a WordPress Site
- How to Choose the Right WordPress Hosting
- Beginner Guide to WordPress Speed Optimization
- WordPress Maintenance and Backup Plan
Frequently Asked Questions
What’s the difference between launching and publishing a WordPress site?
My domain still shows an old site or a parking page. What did I miss?
Why does my site show ‘Not Secure’ even after launch?
https://, and use a plugin or search-and-replace to update old HTTP URLs. Only launch as “complete” once the padlock appears on all pages.