If your WordPress site is stuck on page two or beyond, it can feel like nobody ever finds your content. In this guide you will learn how to improve Google Ranking WordPress without needing to be a developer or SEO expert.
By the end of this step by step checklist, you will know exactly how to benchmark your current Google Ranking WordPress performance, fix WordPress technical issues, optimize your content, improve internal links, and boost speed so Google has every reason to move your pages higher in the search results.
What You Need to Start
Before you tweak anything, make sure you have the basics in place so every change you make can actually improve Google Ranking WordPress results instead of breaking something on your site.
- Administrator access to your WordPress dashboard.
- An installed SEO plugin such as Yoast SEO, Rank Math, or a similar tool.
- Google Search Console set up for your domain, or access to create it.
- A recent backup of your WordPress site.
- Optional but recommended a staging site where you can test changes safely.
Step 1: Benchmark your current Google Ranking WordPress visibility
Before you change anything, you must know where your site stands today. A simple benchmark makes it easy to see whether your Google rankings improve after you optimize your WordPress site.
- Open your browser and search for your brand name plus your main service or topic (for example, “brand name web design”). Note where your site appears.
- Log in to Google Search Console for your site.
- In the left menu, click Performance » Search results.
- Turn on the metrics for Average position, then click the Pages tab.
- Write down the average position and clicks for your homepage and two to five key pages you care about most.
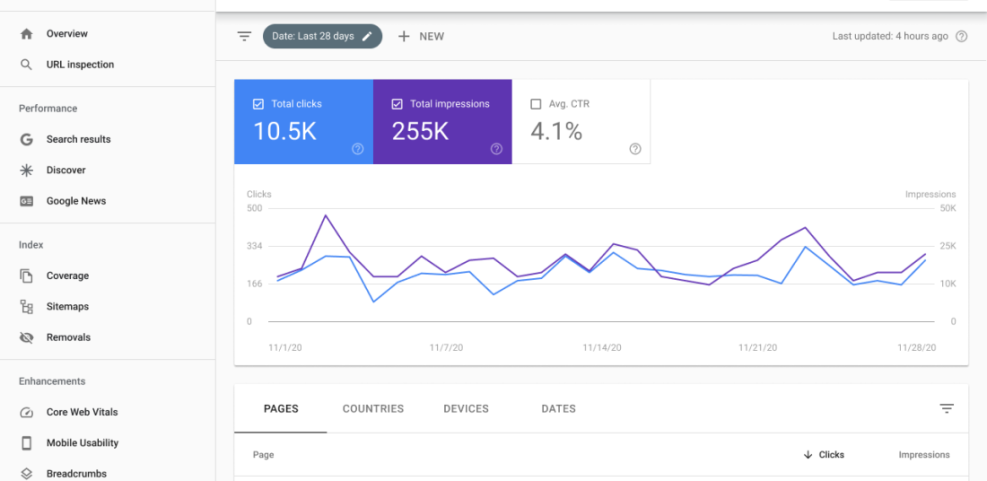
Keep this note in a spreadsheet so you can compare before and after results once you complete the checklist and see how much your Google Ranking WordPress performance has improved.
Step 2: Choose the right keywords for each page
Google can only rank your WordPress content if it understands which search queries each page is supposed to answer. Assigning clear primary keywords per page keeps your site focused and reduces internal competition.
- For each important page, write down the main problem it solves or question it answers in simple language.
- Use free keyword tools or Google auto-suggest to find phrases people actually type (for example, “wordpress speed optimization” instead of just “wordpress speed”).
- Pick one primary keyword and one to three close variations for each page.
- Avoid using the exact same primary keyword on multiple pages to reduce cannibalization.
- Create a simple spreadsheet mapping URL, Primary keyword, and Variations.
You now have a clear keyword plan that will guide your on page optimization in later steps and make it easier to improve Google Ranking WordPress pages in a structured way.
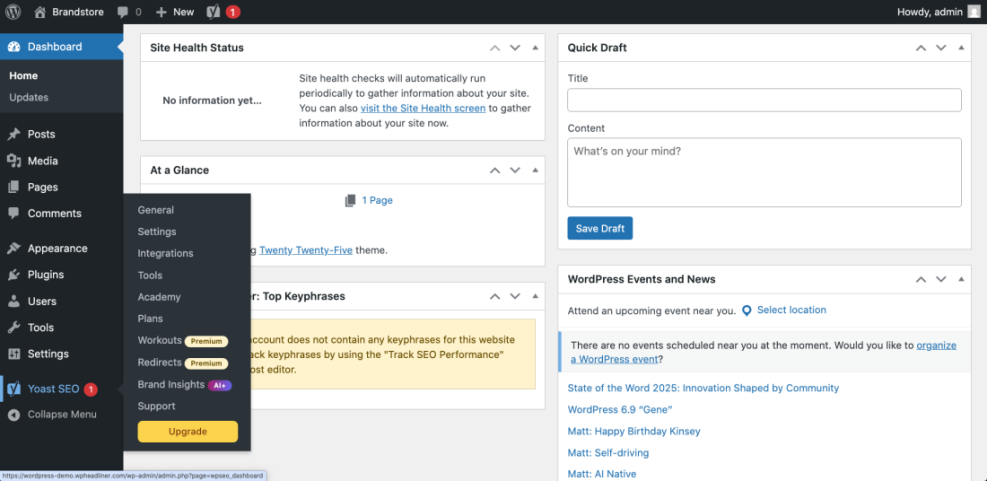
Step 3: Configure your WordPress SEO plugin
An SEO plugin helps WordPress output clean title tags, meta descriptions, sitemaps, and structured data so you can improve Google Ranking WordPress results across your entire site. Proper setup ensures Google can crawl and understand your pages accurately.
- In your WordPress dashboard, go to Plugins » Add New.
- Search for Yoast SEO (or your preferred SEO plugin) and click Install Now, then Activate.
- Open the plugin’s setup wizard from SEO » First time configuration (wording might vary by plugin).
- Set your site type (for example, Blog, Online store, or Business site) and enter your organization or person details.
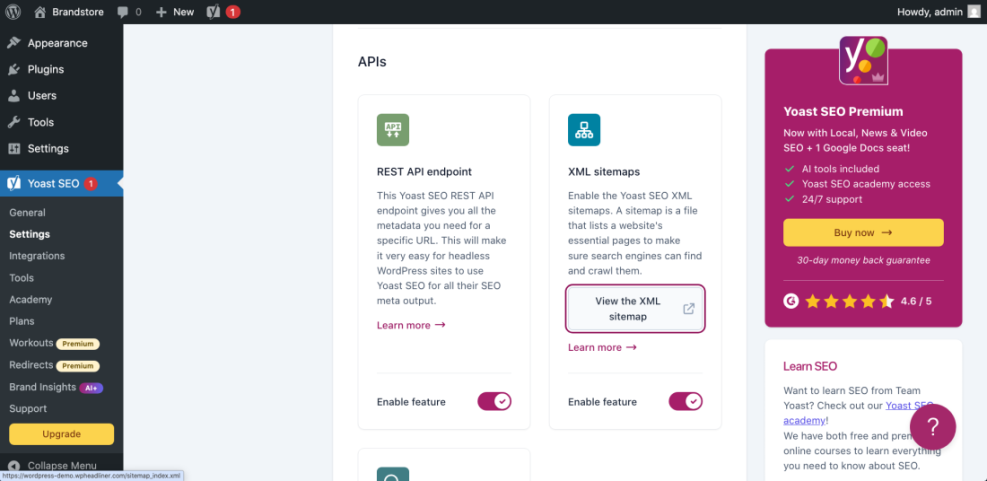
- Make sure XML sitemaps are enabled in the plugin settings so Google can discover your content.
To verify, view your homepage source and confirm you see a clean <title> tag and a meta description generated by your SEO plugin.
Step 4: Fix technical SEO basics in WordPress
Even great content can struggle to rank if Google cannot crawl it efficiently. Fixing a few core technical settings in WordPress helps Google index the right URLs and avoid duplicate content, which is essential for stable Google Ranking WordPress gains.
- Go to Settings » Reading and confirm that Discourage search engines from indexing this site is unchecked.
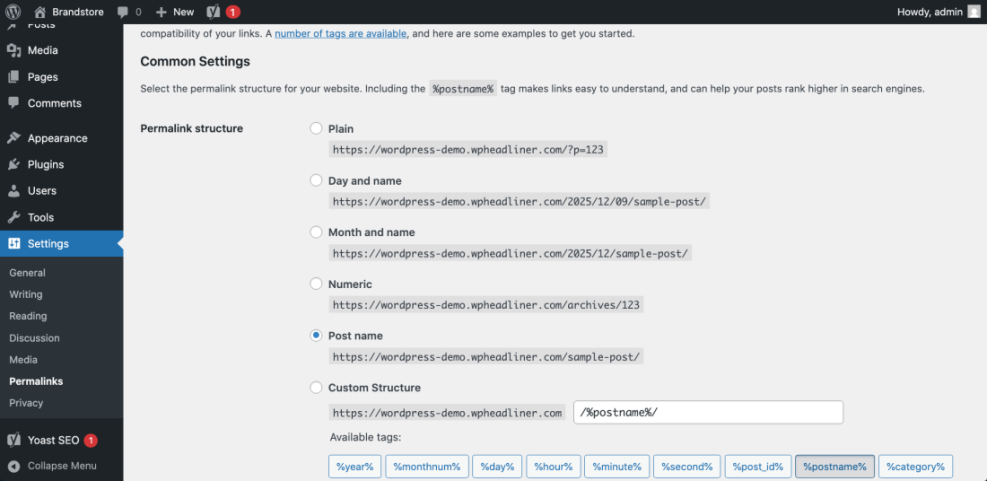
- Next, visit Settings » Permalinks and choose the Post name structure, then click Save Changes.
- In your SEO plugin, confirm that a single XML sitemap index is enabled (often at
/sitemap_index.xml). - Open Google Search Console, go to Indexing » Sitemaps, and submit your sitemap URL.
- Check for HTTPS issues by loading both
http://andhttps://versions of your site and making sure they redirect to a single canonical URL.
If you manage your robots.txt through your SEO plugin, you can use a simple starting template like this:
User-agent: *
Disallow: /wp-admin/
Allow: /wp-admin/admin-ajax.php
Sitemap: https://example.com/sitemap_index.xml
At this point, Google should be able to crawl your important URLs via the sitemap without running into basic technical roadblocks. For a deeper review, schedule a full Technical SEO Checklist for WordPress when you have time.
Step 5: Optimize on page content for intent
On page optimization tells Google exactly which query a page should rank for. Aligning your WordPress content with the keyword plan from step two is one of the fastest ways to improve Google Ranking WordPress pages for specific topics.
- Edit a key page or post in the WordPress editor and scroll to your SEO plugin meta box.
- Enter your primary keyword in the plugin’s Focus keyphrase or Focus keyword field.
- Rewrite the SEO title to include the primary keyword near the beginning while staying natural and compelling.
- Update the meta description to summarize the benefit, include your keyword once, and stay within about 155 characters.
- Review your content so the primary keyword appears in the first 100 words, at least one <h2> heading, and a few times naturally in the body.
- Add descriptive alt text to images that describes the image and, when natural, includes variations of your keyword.
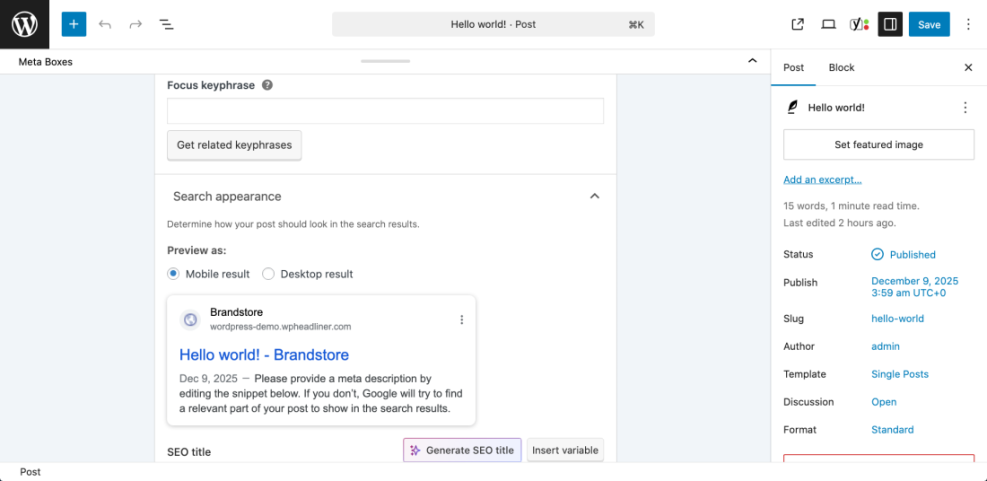
After updating, use the SEO plugin’s preview to confirm your title and description look attractive and do not truncate in typical search snippets.
Types of Links on Your Site
Before you build a full internal linking strategy, it helps to see how different link types work together. The table below compares the main kinds of links you will use on a typical WordPress site.
| Link Type | Where It Appears | Main Purpose |
|---|---|---|
| Internal Link | Body text, menus, sidebars | Connects pages on your own site and supports SEO |
| External Link | Body text, references | Points to other sites and cites sources or tools |
| Navigational Link | Header, footer, main menu | Helps users move between main sections and pages |
| Contextual Link | Inside paragraphs or lists | Guides users to deeper, closely related content |
When you combine these link types — especially strong contextual internal links — you make it easier for visitors and Google to understand your most important pages. In the next step, you will put this into practice with a simple internal linking upgrade that also supports better Google Ranking WordPress results.
Step 6: Improve internal linking and navigation
Internal links help Google understand which pages are most important on your WordPress site and how topics relate to each other, which directly supports better Google Ranking WordPress positions over time.
- List your top three to five “money pages” such as main services, key blog posts, or product category pages.
- Open related posts in the WordPress editor and highlight relevant phrases where a visitor might want more detail.
- Click the Link icon in the toolbar, search for one of your money pages, and select it to create an internal link.
- Repeat this for multiple posts so each important page has several contextual links pointing to it.
- Ensure your main navigation and footer menus link to your most important categories and cornerstone content.

You should now see a clearer site structure where your most valuable pages receive the most internal links, signaling importance to both users and Google and helping your overall Google Ranking WordPress efforts.
Step 7: Speed up WordPress and track progress
Site speed and Core Web Vitals are proven ranking factors. Faster WordPress sites not only perform better in Google but also convert more of the visitors those rankings bring, which indirectly boosts your Google Ranking WordPress potential.
- Test a key page using a tool like PageSpeed Insights or your hosting provider’s performance panel and note the mobile score.
- Install and activate a reputable caching plugin if your host does not already provide server side caching.
- In the caching plugin settings, enable page caching and browser caching, then save changes.
- Compress large images before uploading or use an image optimization plugin to reduce existing file sizes.
- Retest the same URL in your performance tool to confirm improvements in load time and Core Web Vitals metrics.

Finally, return to Google Search Console after a few weeks, compare your average positions to the benchmark from step one, and keep refining pages that still sit below your target positions.
Conclusion You Are Ready to Go
You have now walked through a practical checklist to improve Google Ranking WordPress pages by fixing technical basics, installing and configuring an SEO plugin, aligning content with clear keywords, strengthening internal links, and boosting performance.
SEO is an ongoing process, not a one time task. Keep publishing helpful content, revisit underperforming pages with fresh insights, and repeat this checklist regularly. Over time, these consistent improvements compound into stronger rankings, more organic traffic, and better results from every post you publish whenever you want better Google Ranking WordPress outcomes.
Further Reading
- WordPress seo complete beginners guide
- Internal linking WordPress beginners
- Is WordPress good for seo
- WordPress seo complete beginners guide