Learning how to edit pages in WordPress is a core skill for keeping your website accurate, up to date, and professional. You can change text, images, and layout without touching any code.
In this guide, you will learn how to edit pages in WordPress step by step using the Block Editor (Gutenberg), Quick Edit, and page builders. By the end, you’ll feel confident making changes, previewing them, and publishing updates safely.
What You Need Before Editing Pages
- Access to your WordPress admin dashboard with an Administrator or Editor account.
- At least one existing page you want to update, such as a Home, About, or Services page.
- Basic familiarity with the WordPress dashboard, especially the Pages menu.
- Optional but recommended: a recent backup of your site from your host or a backup plugin.
- Optional: knowledge of whether your site uses the Block Editor, Classic Editor, or a page builder like Elementor or Divi.
Step 1: Open the Pages Screen Before You Edit
Every time you want to learn how to edit pages in WordPress, you will start from the Pages section of your dashboard.
- Log in to your WordPress dashboard at yourdomain.com/wp-admin.
- In the left sidebar, click Pages » All Pages.
- Scroll through the list or use the search box in the top right to find the page you want to edit.
- Hover your mouse over the page title to reveal the action links below it, such as Edit, Quick Edit, Trash, and View.

Verify success when you can see your pages listed and you know which one you’re about to edit. If you’re unsure, click View in a new tab to confirm the content first.
Quick Comparison of Ways to Edit a Page
| Method | Where You Use It | Best For |
|---|---|---|
| Edit (Block Editor) | Pages » All Pages » Edit | Changing text, headings, images, and layout blocks on a page. |
| Quick Edit | Pages » All Pages » Quick Edit | Fast changes to title, slug, date, status, and parent without opening the full editor. |
| Edit with Page Builder | Pages list or front end » Edit with [Builder] | Editing complex layouts built with a page builder like Elementor, Divi, or WPBakery. |
| Template / Page Attributes | Page editor » Page settings sidebar | Switching between different page templates (full width, sidebar, landing page, etc.). |
Step 2: How to Edit Pages in WordPress with the Block Editor (Gutenberg)
Most modern WordPress sites use the Block Editor, also called Gutenberg. In this editor, your page is made up of blocks for paragraphs, headings, images, buttons, and more.
- From Pages » All Pages, hover over the page you want to change and click Edit.
- The Block Editor will open. Your page content appears as blocks stacked down the screen.
- Click any paragraph block to change the text. Type directly into the block to edit it.
- To change a heading, click the heading block, then adjust the text and heading level (H2, H3, etc.) from the toolbar.
- To replace an image, click the image block and use the toolbar button such as Replace to upload or choose a new image.

Adding and Reordering Blocks
- To add new content, click the small + icon in the top left or between blocks.
- Choose the block type you want, such as Paragraph, Heading, Image, List, or Button.
- To move a block up or down, click on the block and use the up/down arrows in the block toolbar.
- To delete a block, click the three dot menu on the block toolbar and choose Remove block.
Verify success when your draft shows the new text, headings, or images in the right order and everything looks clean inside the editor.
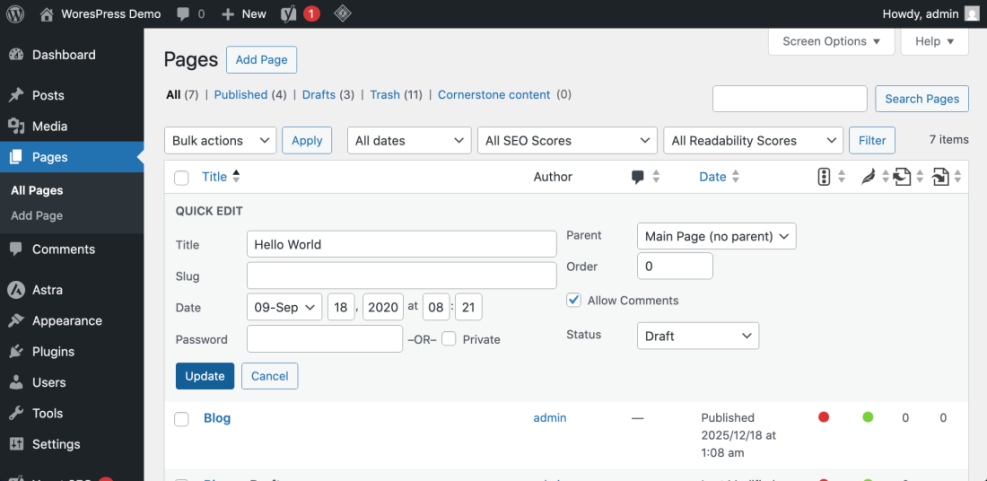
Step 3: Use Quick Edit for Fast Changes
Quick Edit lets you update basic page settings directly from the Pages list without opening the full editor. This is perfect for simple tweaks.
- Go to Pages » All Pages.
- Hover over the page title and click Quick Edit.
- Change the Title or Slug (URL) if needed.
- Adjust the Date, Status (Draft or Published), Parent Page, Order, or Allow Comments from this panel.
- Click Update to save your changes.
Verify success when the page list updates with your new title, URL, or status, and you did not need to open the full page editor.
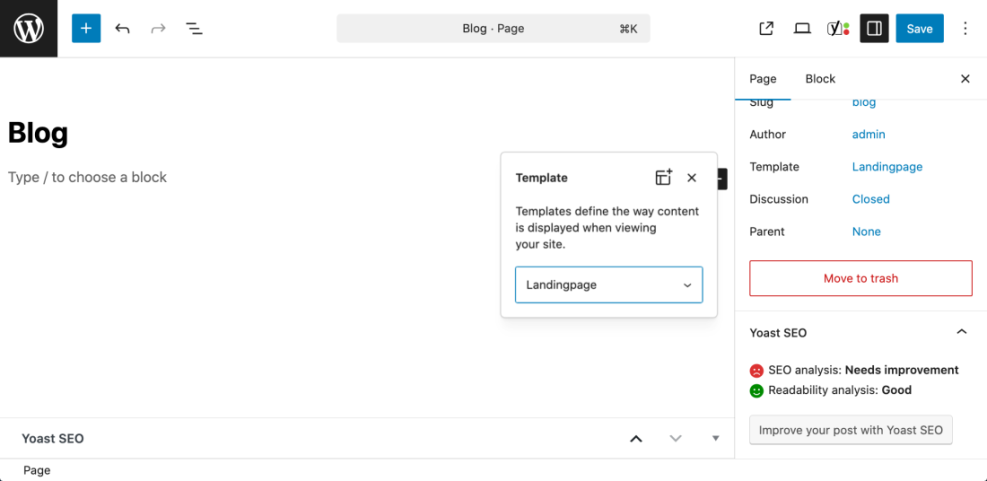
Step 4: Change Page Templates and Layout Options
Many themes provide multiple templates for pages, such as full width, sidebar, or landing page layouts. You can switch these from the page settings in the editor.
- Open the page in the editor by clicking Edit from the Pages list.
- On the right sidebar, locate the Page tab and find the Template or Page Attributes section.
- Use the dropdown to change the template, for example from Default to Full width or Landing Page.
- Review options such as Parent Page and Order if you want to adjust how pages nest in your navigation.
- Click Update or Save draft to apply the new template.
Verify success by clicking View Page and checking that the layout has changed, for example the sidebar is removed on a full width template.
Step 5: How to Edit Pages in WordPress Using a Page Builder
If your site uses a visual page builder such as Elementor, Divi, or WPBakery, the editing experience will look different. In that case, you should always use the builder’s own editor instead of the normal Block Editor.
- Open Pages » All Pages and hover over the page you want to edit.
- Look for an option like Edit with Elementor, Edit with Divi, or your builder’s name.
- Click that option to open the page in the builder interface.
- Use the builder’s tools to edit text, images, sections, and columns as needed.
- Click the builder’s Update or Save button when you are finished.

Verify success when you refresh the front end page and see your visual changes applied without breaking the layout.
Step 6: Use Preview and Revisions to Edit Safely
Editing live pages can be stressful, but WordPress gives you tools to see your changes before visitors do and to roll back if something goes wrong.
Preview Changes
- In the editor, look for the Preview button at the top right.
- Click Preview and choose a device view such as Desktop, Tablet, or Mobile.
- Review the draft page in a new tab to make sure spacing, headings, and images look correct.
Use Revisions to Restore an Older Version
- In the editor, open the Page settings sidebar.
- Look for a Revisions link; click it to open the revisions screen.
- Use the slider to browse previous versions of the page and see what changed.
- Click Restore this revision if you want to roll back to an earlier version.
Verify success when you can confidently preview updates and restore older versions without fear of permanently breaking a page.
Step 7: Troubleshoot Common Page Editing Problems
Sometimes, editing pages in WordPress does not work exactly as you expect. Here are common issues and how to fix them.
- You cannot see the Edit link
Make sure you are logged in with a user role that has permission to edit pages (Editor or Administrator). If needed, ask the site owner to upgrade your permissions. - Changes are not showing on the live site
Check that you clicked Update, not just Preview. Clear any caching plugins and your browser cache, then refresh the page. - The layout breaks after editing
If the page uses a builder, only edit it with the same builder. Mixing the Block Editor and a page builder on the same page can break layouts. - You changed the URL and now links are broken
If you change the slug, set up a 301 redirect from the old URL to the new one using an SEO or redirect plugin so visitors don’t hit 404 pages. - You accidentally deleted content
Use the Undo shortcut (Ctrl+Z / Cmd+Z) or restore an earlier Revision of the page to recover lost content.
Once you understand how to edit pages in WordPress safely, you can keep every important page on your site accurate, optimized, and up to date.
Further Reading on Editing WordPress Pages
- Beginner guide to the WordPress Block Editor (Gutenberg).
- How to create and manage WordPress page templates.
- How to start a blog WordPress
- Beginner guide to WordPress backups and revisions.