If you want to edit WordPress site content and design without breaking anything, this tutorial walks you through every click inside your dashboard. You will see exactly where to log in, how to change text and images, and how to safely update layouts.
By the end, you will be able to edit pages, menus, homepage layout, and theme styling on your own, using the built-in WordPress tools and optional page builders, without touching risky code.
What You Need to Get Started
- A working WordPress site installed on a web host.
- Administrator or Editor login details for your site.
- Access to your site URL (for example, https://example.com).
- Basic familiarity with using a web browser on desktop or laptop.
- Optional but recommended: a recent backup of your site from your host or a backup plugin.
Step 1: Log in to Your WordPress Dashboard
Every edit starts from the WordPress admin dashboard, so first make sure you can log in successfully.
- Open your browser and go to your website address.
- In the address bar, add /wp-admin to the end (for example, https://example.com/wp-admin), then press Enter.
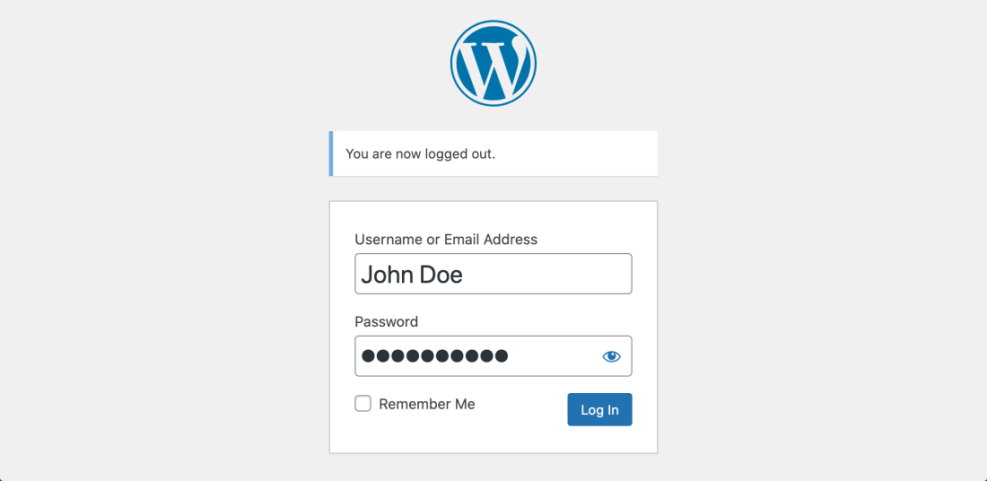
- On the login screen, enter your Username and Password.
- Click the Log In button.
- Wait until you see the WordPress Dashboard with the dark left-hand menu.
Navigate to the login page at /wp-admin and confirm the dashboard loads after you submit your credentials.
If logging in fails or you do not remember the URL, you can review How to integrate WordPress into website for extra troubleshooting steps.
Step 2: Review Your Pages and Posts
Before changing anything, quickly review which pages and posts already exist so you know where to edit text and images.
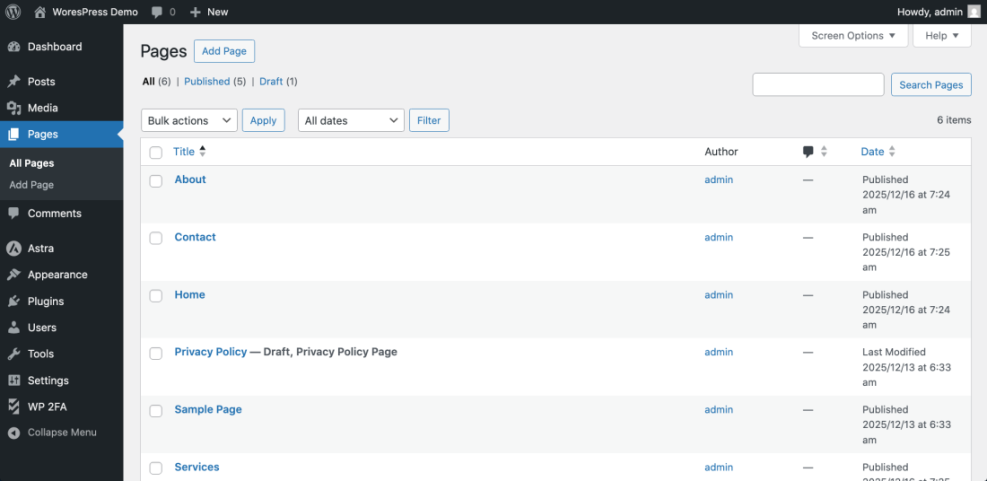
- In the left-hand menu, hover over Pages, then click All Pages.
- Scroll through the list to find important pages such as Home, About, Services, or Contact.
- In the left-hand menu, hover over Posts, then click All Posts to see blog articles if you have a blog.
- Note which items say Front Page or Posts Page in small gray text — these are often tied to your homepage and blog listing.
Navigate to Pages » All Pages and Posts » All Posts to map where your content lives.
To verify, click the View link under a page and confirm that the page you see matches what is currently live on your site.
Step 3: Edit WordPress Site Pages with the Block Editor
Most modern WordPress sites use the block editor, which lets you change text, headings, images, and buttons in a visual way.
- Go to Pages » All Pages.
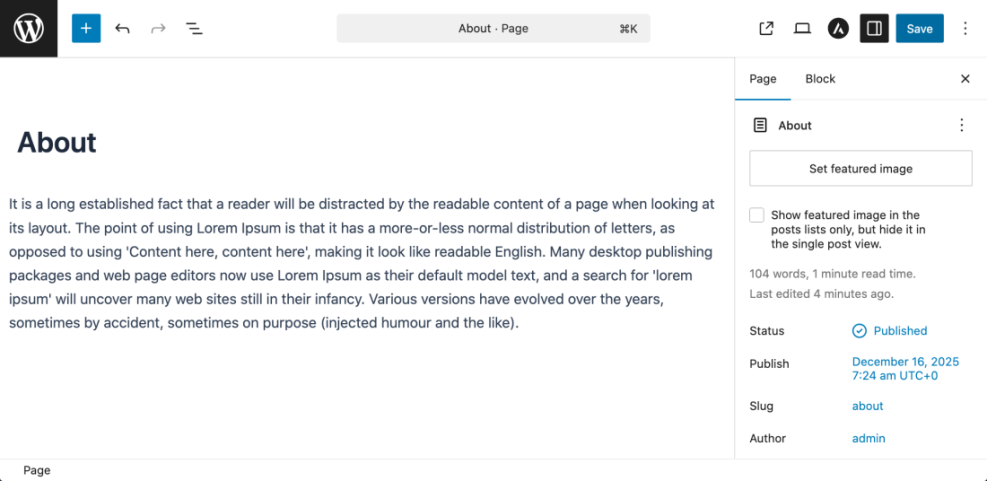
- Hover over the page you want to edit, then click Edit.
- In the editor, click inside a text block and type to update the copy.
- To change a heading, click the heading block, then use the H2, H3 options in the toolbar if needed.
- To replace an image, click the image block, then click Replace » Upload or Media Library and choose a new image.
- Click the Update button in the top right corner when you are finished.
Navigate into a page via Pages » All Pages » Edit and update a text or image block before saving.
Open your site in another browser tab, refresh the page you edited, and confirm the new text or image appears as expected.
Quick Comparison: Ways to Edit a WordPress Site
There are several different tools inside WordPress you can use to edit your site. This table shows where you access each method and what it is best for.
| Method | Where You Use It | Main Purpose |
|---|---|---|
| Edit Pages with Block Editor | WordPress dashboard » Pages » All Pages » Edit | Update key pages like Home, About, and Services with new text, images, and buttons. |
| Edit Blog Posts with Block Editor | WordPress dashboard » Posts » All Posts » Edit | Keep your blog articles current, correct typos, and improve formatting or internal links. |
| Customize Global Design (Site Editor / Customizer) | WordPress dashboard » Appearance » Editor or Customize | Change the overall layout, colors, typography, and templates that affect your whole site. |
| Edit Menus and Navigation | WordPress dashboard » Appearance » Menus or Editor » Navigation block | Control which pages appear in your main menu and adjust the order of navigation links. |
| Update Header and Footer Areas | WordPress dashboard » Appearance » Widgets / Editor » Header/Footer template | Adjust your logo, top bar, and footer text/widgets so contact and brand info stay accurate. |
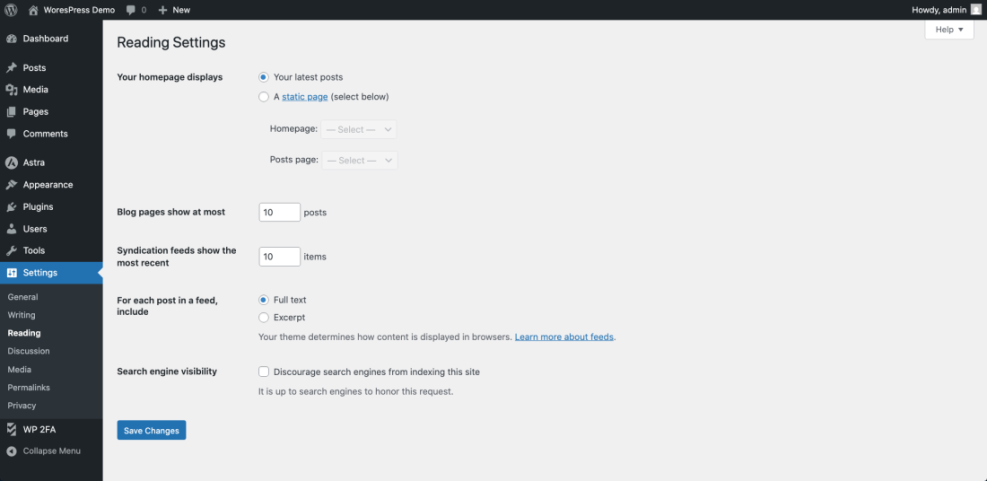
Step 4: Set and Edit Your Homepage Layout
Your homepage can either show your latest posts or a static page. Set this first so you know where to edit.
- In the left-hand menu, click Settings » Reading.
- Under Your homepage displays, choose either Your latest posts or A static page.
- If you choose A static page, select a page from the Homepage dropdown (for example, Home).
- Optionally pick a page from the Posts page dropdown to be your blog listing.
- Click Save Changes at the bottom.
Navigate to Settings » Reading to assign which page is used as your homepage.
To edit the homepage content, go back to Pages » All Pages, open the page selected as your homepage, and change blocks just like in Step 3. Reload your site’s front page in a new tab to confirm the layout updates.
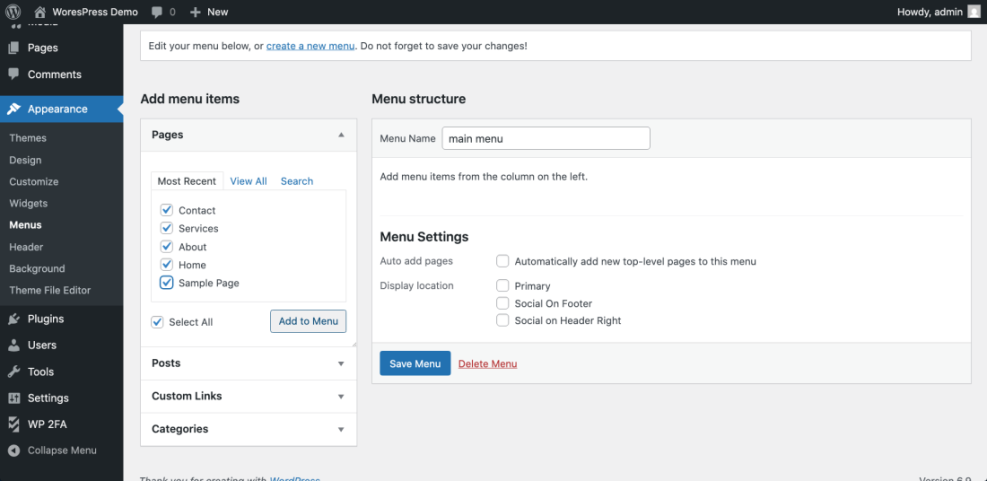
Step 5: Tidy Up Your Navigation Menus
Your menu helps visitors find the pages you just edited, so update it whenever you add or remove important pages.
- In the left-hand menu, hover over Appearance, then click Menus (for classic themes) or Editor (for block themes).
- If you see the classic Menus screen, choose a menu from the Select a menu to edit dropdown, then click Select.
- Under Pages, check the box next to any page you want to add, then click Add to Menu.
- Drag and drop menu items in the Menu structure area to reorder them.
- For block themes, open Appearance » Editor, click the Navigation block, and add or rearrange links within the sidebar panel.
- Click Save Menu or Save in the editor when finished.
Navigate to your menu editor via Appearance » Menus or Appearance » Editor and adjust which pages appear in your primary navigation.
Visit your site homepage and other key pages, and confirm the top navigation links match the structure you configured.
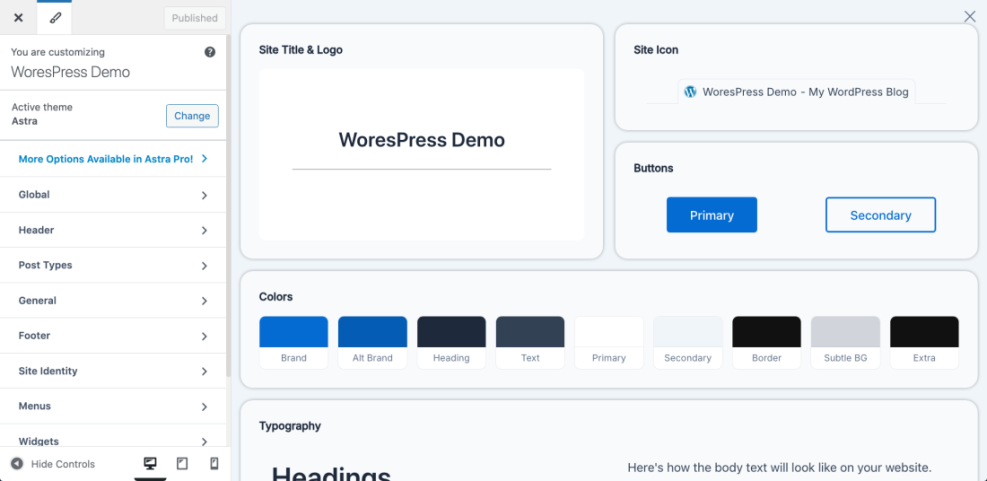
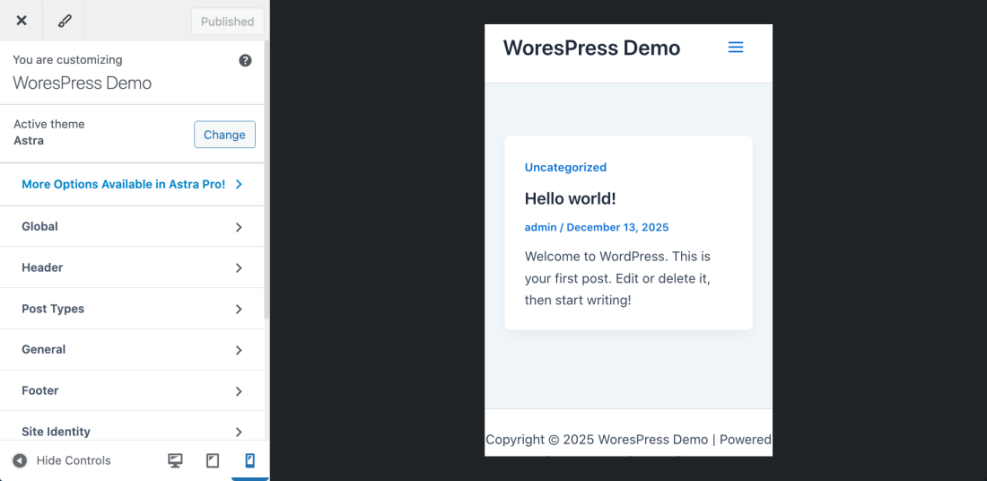
Step 6: Customize Your Site Design and Colors
Once content and menus are in place, you can adjust colors, fonts, and basic layout using the theme Customizer or Site Editor.
- In the left-hand menu, click Appearance » Customize (for classic themes) or Appearance » Editor (for block themes).
- Use panels such as Site Identity, Colors, Typography, or Theme Options to adjust branding.
- Change your Site Title and Tagline under Site Identity if needed.
- Experiment with color settings, but keep enough contrast for readability.
- Click Publish or Save when satisfied.
Navigate to Appearance » Customize or Appearance » Editor to open the live preview where you can adjust theme styles.
If you need fine control, you can add small CSS tweaks without editing theme files directly.
- In the Customizer, click Additional CSS.
- Paste a small CSS snippet into the editor, for example to enlarge your site title.
- Check the live preview to confirm it looks correct.
- Click Publish to save.
.site-title {
  font-size: 2.5rem;
  font-weight: 700;
}
Reload your site in a new tab and confirm the site title style has changed. If anything looks wrong, return to Additional CSS and adjust or remove the snippet.
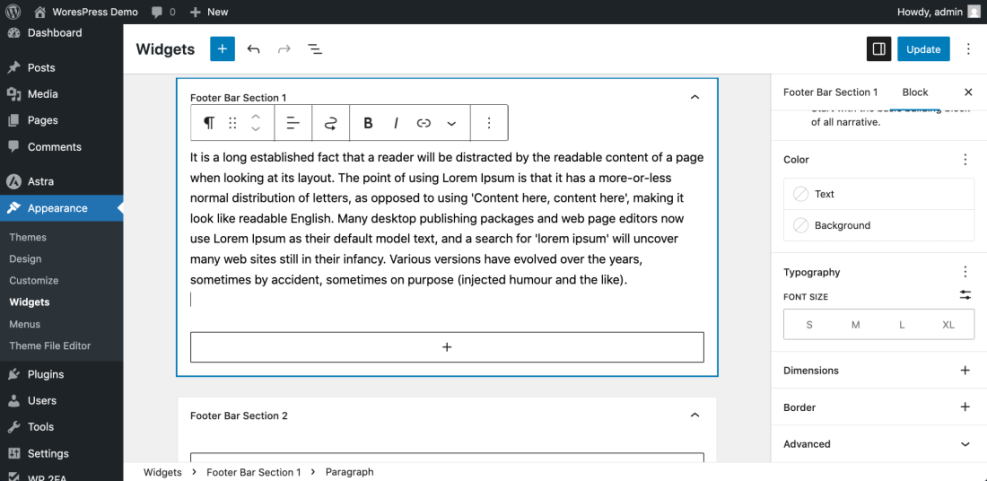
Step 7: Update Widgets and Footer Content
The footer is a common place for contact details, copyright text, and useful links, so align it with your updated content.
- In the left-hand menu, click Appearance » Widgets (for classic themes) or Appearance » Editor for block themes.
- On the Widgets screen, select the Footer widget areas.
- Edit existing widgets by clicking the down arrow and changing the text or settings.
- Add new widgets by dragging items from the Available Widgets list into footer areas.
- For block themes, open the footer template in the editor and edit text or blocks directly.
- Click Update, Publish, or Save when finished.
Navigate to Appearance » Widgets or your footer template in Appearance » Editor to adjust footer text and blocks.
To dive deeper into footer customization, you can follow How to edit WordPress files or, for the top of the site, How to edit WordPress files.
Visit any page on your site, scroll to the bottom, and verify that the footer now shows the updated text, links, or widgets you configured.
Step 8: Preview, Test, and Publish Your Changes
Before you consider your changes complete, test your site like a visitor on both desktop and mobile screens.
- From any page in the editor or Customizer, use the Preview button to open a new tab with your changes.
- Click the device icons (if available) such as Desktop, Tablet, and Mobile to see how the layout responds.
- Navigate through your main menu links to ensure all important pages load and show the updated content.
- Check your contact or lead forms and send a test submission.
- If everything looks good, click Update, Publish, or the main Save button to finalize your edits.
Use the built in preview mode and device icons before pushing major visual changes live to visitors.
Finally, open your site in an incognito browser window and quickly click through key pages to confirm they look correct and load quickly.
Conclusion: You Are Ready to Edit Your WordPress Site
You have learned how to log into your dashboard, locate pages and posts, edit content with the block editor, configure your homepage, adjust menus, customize design, and update footer widgets. These are the core skills you need to regularly edit a WordPress site without relying on a developer.
As you grow more confident, keep making small, tested improvements. Combine clear content, simple navigation, and clean design, and your visitors will have a smoother experience every time they land on your site.
Further Reading
- How to use ai in WordPress
- How to build a website on WordPress
- How do you change your WordPress password
- WordPress migration checklist for blogs
- Beginner checklist optimizing WordPress blog posts
For official reference on editing and design, you can also review the WordPress.org documentation on the WordPress editor and the Customizer.