How to Edit a Footer in WordPress
Step-by-step methods to safely change your WordPress footer (with and without code).
Your footer is the last thing visitors see before they leave your site. It’s where you add copyright text, legal links, contact details, or a final call-to-action. If it looks outdated or shows the wrong information, it can make the whole site feel unprofessional.
In this guide, you’ll learn several safe ways to edit your WordPress footer: using the Site Editor (block themes), widgets and the Customizer (classic themes), and—if needed—directly editing the footer template file. Whether you’re just getting started or already know what WordPress is and how it works, you’ll be able to update your footer without breaking your layout.
We’ll go step by step so you can adjust your footer text, remove “Proudly powered by WordPress,” add links, and test everything on desktop and mobile before going live.
Prerequisites
Before you start editing your footer, make sure you have the basics in place so you don’t lose any work or accidentally break your design.
- WordPress admin access: You must be able to log in to the WordPress dashboard with an Administrator account.
- Theme information: Know which theme you are using and whether it’s a block theme or a classic theme.
- Basic backup: Have at least a recent backup of your site (files and database) so you can restore it if needed.
- Child theme or staging site (for code edits): If you plan to edit theme files, work in a child theme or staging site.
Step 1: Identify Your Theme Type (Block vs Classic)
The way you edit your footer depends on the kind of theme you’re using. WordPress has two main types of themes: block themes (full site editing) and classic themes (Customizer plus widgets and template files).
- Log in to your WordPress dashboard.
- Go to Appearance in the left-hand menu.
- Look at the submenu:
- If you see Editor (sometimes labeled “Site Editor”), you are most likely using a block theme.
- If you see Customize, Widgets, and Menus, you are most likely using a classic theme.
This matters because block themes let you edit the footer directly in the Site Editor, while classic themes rely more on widgets, the Customizer, or PHP template files.
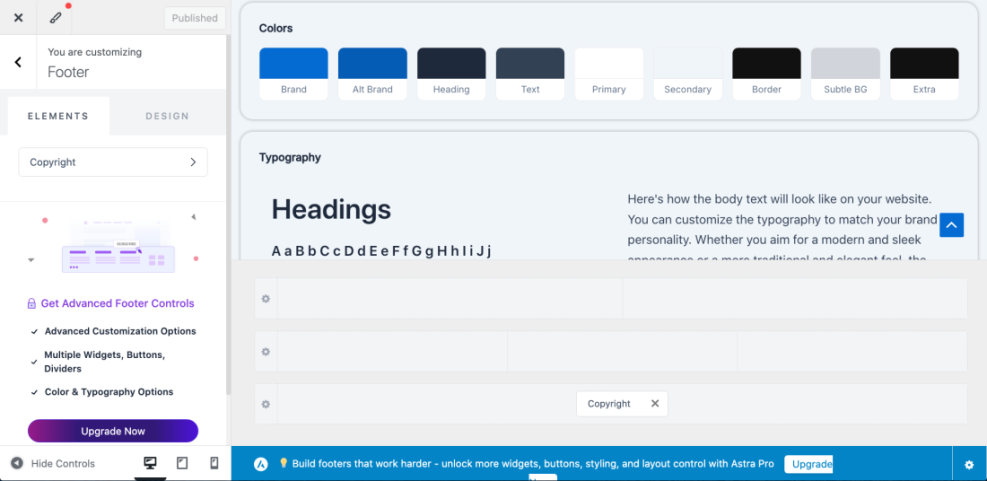
Step 2: Edit the Footer Using the Site Editor (Block Themes)
If you’re using a block theme, the Site Editor gives you a visual way to control your footer across the whole site.
- In the WordPress dashboard, go to Appearance → Editor.
- From the Editor sidebar, open the Templates or Patterns area (this may vary slightly by theme).
- Look for a template or pattern called Footer, Footer Area, or similar, and click it to open.
- Click the text you want to change (e.g., copyright line or links) and edit it directly in the block editor.
- Use the Block Inserter to add new blocks such as navigation menus, buttons, or social icons if your design requires it.
- Click Save, then confirm the changes for the footer template.
After saving, visit a few different pages on your site to confirm that the updated footer appears everywhere you expect it to.
Step 3: Edit the Footer Using Widgets (Classic Themes)
Many classic themes use widget areas to control the footer. Each column in the footer might be a separate widget area like “Footer 1,” “Footer 2,” and so on.
- In the WordPress dashboard, go to Appearance → Widgets.
- Locate the sections labeled Footer, such as Footer 1, Footer 2, or Footer Sidebar.
- Expand these footer areas to see which widgets are currently active (for example, Text, Custom HTML, Navigation Menu, or Recent Posts).
- Click on a widget to edit its content. For a Text or Custom HTML widget, you can change the footer text, HTML links, or even add a small logo.
- When you’re done, click Update or Save inside each widget.
If you’re new to widgets, it can help to get familiar with what they are and how they work. For a deeper introduction, see our guide on what a WordPress widget is and how to use it.
Step 4: Edit the Footer Using the Customizer (Classic Themes)
Some classic themes provide dedicated footer settings inside the Customizer. This is where you might find simple options like a copyright text field, toggle switches for footer menus, or color controls.
- Go to Appearance → Customize in your WordPress dashboard.
- In the Customizer sidebar, look for sections like Footer, Layout → Footer, or Theme Options.
- Open the relevant section and look for fields labeled Footer Text, Copyright, or similar.
- Update the text, links, or settings as needed.
- Use the live preview on the right side to confirm that your changes look correct.
- Click Publish to save the footer changes to your live site.
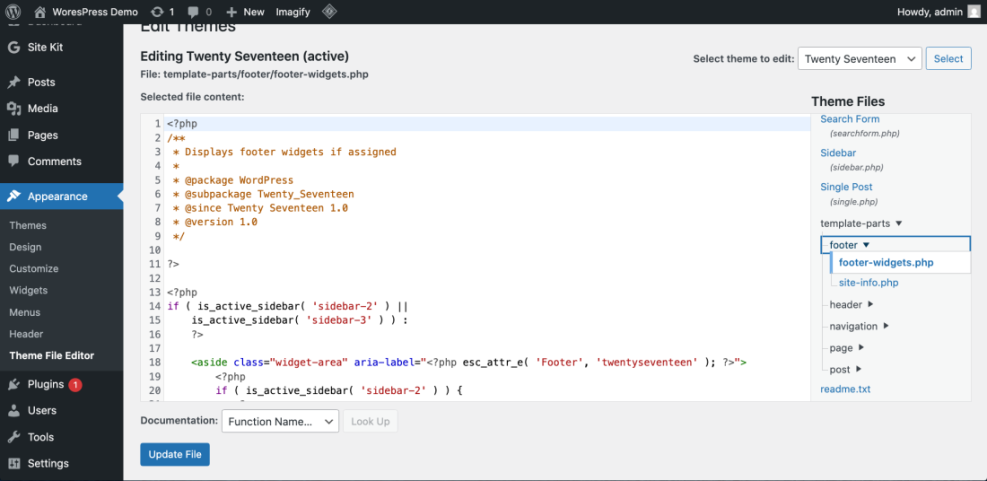
Step 5: Edit the Footer Template File with Code (Advanced)
If your theme does not expose footer options in the Site Editor, Widgets, or Customizer, you may need to edit the footer.php file directly. This is an advanced method intended for users comfortable with PHP and HTML.
- Create or activate a child theme if you don’t already have one, so your changes are update-safe.
- Access your site’s files via cPanel File Manager or an FTP client.
- Navigate to
/wp-content/themes/your-theme/(or your-child-theme). - Locate the file named footer.php and open it in the file editor.
- Look for the section that outputs the copyright text or footer links. It might look like:
<div class="site-info">
© <?php echo date( 'Y' ); ?> Your Site Name. All rights reserved.
</div>
- Carefully edit the text inside the HTML, leaving the PHP functions intact if you still want the year to update automatically.
- Save the file and refresh your site in a new browser tab to see the updated footer.
Step 6: Check Your Footer on Mobile and Multiple Pages
After editing your footer, it’s important to confirm that it still looks good everywhere and doesn’t overlap content or hide links on smaller screens.
- Open your website in a desktop browser and visit:
- Your homepage
- A few blog posts
- A key landing or product page
- Scroll to the bottom of each page and check that:
- The copyright and links are readable.
- Any menus or buttons in the footer still work.
- There is enough spacing between footer elements.
- Use your browser’s responsive mode or your phone to view the site on mobile:
- Ensure text does not wrap in a strange way.
- Check that social icons and menus are easy to tap.
If your theme includes separate mobile options for the footer, adjust them so the content remains clear and accessible on smaller screens.
Common Footer Editing Problems and Fixes
Even with careful editing, a few common issues can make your footer changes hard to see or manage. Here are quick fixes for the most frequent problems.
Footer changes are not showing
- Browser cache: Clear your browser cache or view the site in a private/incognito window.
- Caching plugins: If you use a caching plugin or a CDN, clear the cache there as well.
- Wrong template or pattern: In block themes, ensure you edited the global footer pattern or template, not just one specific page.
Footer text appears twice
- Check both Widgets and footer.php. If both output similar content, remove or disable one of them.
- Some themes have a built-in footer option in the Customizer plus a widget area. Make sure you only use one method for the same content.
Footer overlaps content or looks broken on mobile
- Remove overly large images or long single-line text in the footer.
- Split long lists into multiple columns or add margins/padding using your theme’s design settings.
- Test again after clearing cache and refreshing your CSS if your theme offers that option.
If you’re also customizing your site’s navigation or header, you may find it useful to review how to adjust your menus in a similar way using a guide on editing the WordPress navigation bar so the header and footer feel consistent.
Wrap Up Your WordPress Footer Customization
Editing your footer in WordPress doesn’t have to be risky or confusing. By first identifying whether you’re using a block or classic theme, you can choose the safest method—Site Editor, widgets, Customizer, or direct code edits—that matches your comfort level.
Once your copyright, links, and calls-to-action are updated, checking on multiple pages and devices ensures your footer supports your brand instead of distracting from it. With a few careful steps and a backup in place, you can confidently maintain a professional, useful footer as your site grows.
Further Reading
- How to Customize a WordPress Theme
- WordPress Guides and Tutorials Overview
- How to Edit a WordPress Website
- How to Change a Logo in WordPress