SEO for WordPress is how you help your blog posts show up in search results without paying for ads. When you set up your blog correctly and follow a simple workflow, every new article you publish can attract the right readers over time.
In this guide you will learn a practical, repeatable process to optimize a WordPress blog. You will prepare your settings, install an SEO plugin, research keywords, optimize each post, improve internal links, boost speed, and track results so you can keep growing.
What You Need to Start
- A self hosted WordPress blog where you can log in as an administrator.
- Access to your hosting control panel or FTP in case you need to fix mistakes.
- A modern browser so you can keep several WordPress tabs open while you work.
- A free Google account so you can set up Google Search Console and Google Analytics later.
- 30 to 60 minutes to walk through the initial setup, plus time each week for new posts.
Step 1: Prepare Your WordPress SEO Settings
Before you touch plugins or content, prepare your core WordPress settings. Clean URLs, correct site visibility, and a clear site name make it easier for search engines to understand your blog.
- Log in to your WordPress dashboard at /wp-admin with your administrator account.
- Navigate to Settings » General.
- Set Site Title to a clear brand name plus a main keyword, for example “Travel Coffee Blog”.
- Write a short, human friendly Tagline that explains what your blog covers.
- Scroll to Timezone and set it to your local time so scheduled posts and logs are correct.
- Click Save Changes.
- Navigate to Settings » Reading.
- Make sure “Discourage search engines from indexing this site” is not checked for a live blog.
- Click Save Changes again.
- Navigate to Settings » Permalinks.
- Select the Post name option so each blog URL uses the title instead of numbers.
- Click Save Changes. If you had an old site structure live for months, plan redirects before changing this.
Navigate to Settings » Permalinks again and confirm that Post name is still selected after the page reloads.
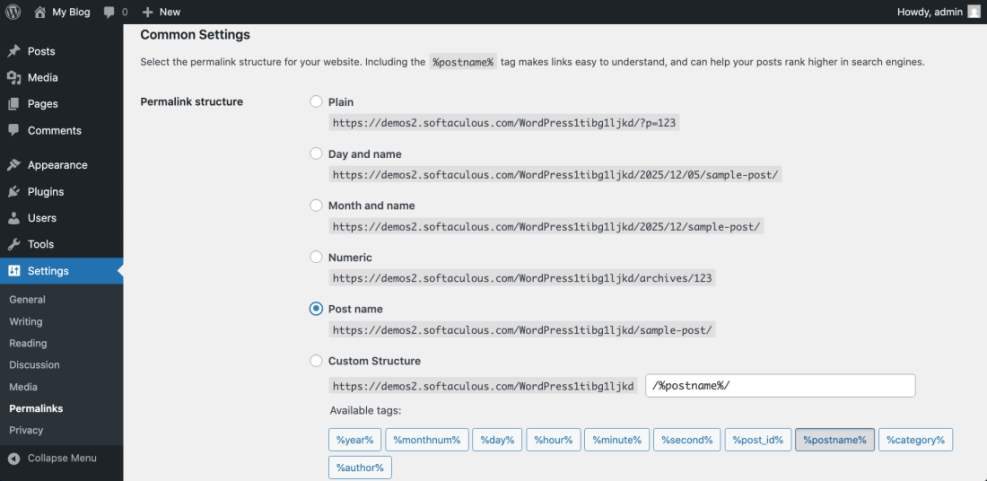
To verify everything works, open your site in a new tab and click a recent post. The URL should look like example.com/my-blog-post, and the browser tab should show your chosen Site Title. If you want more detail, review the official WordPress permalink settings.
Step 2: Install and Configure an SEO Plugin
An SEO plugin helps you control titles, meta descriptions, sitemaps, and technical tags without editing code. You only need one SEO plugin active at a time.
- In your WordPress dashboard, navigate to Plugins » Add New Plugin.
- In the search box, type SEO.
- Choose a reputable plugin such as Yoast SEO, All in One SEO, or Rank Math.
- Click Install Now on your chosen plugin, then click Activate when the button changes.
- Look for the new SEO menu item in your dashboard, then click it to open the setup wizard.
- In the wizard, set your site type to Blog when asked about your website type.
- Enter your organization or personal name if requested so structured data is accurate.
- Enable the XML Sitemap option so search engines can discover all of your posts.
- Save each step of the wizard and finish the configuration.
Navigate to Posts » Add New and scroll under the editor until you see the new SEO meta box for titles and descriptions.
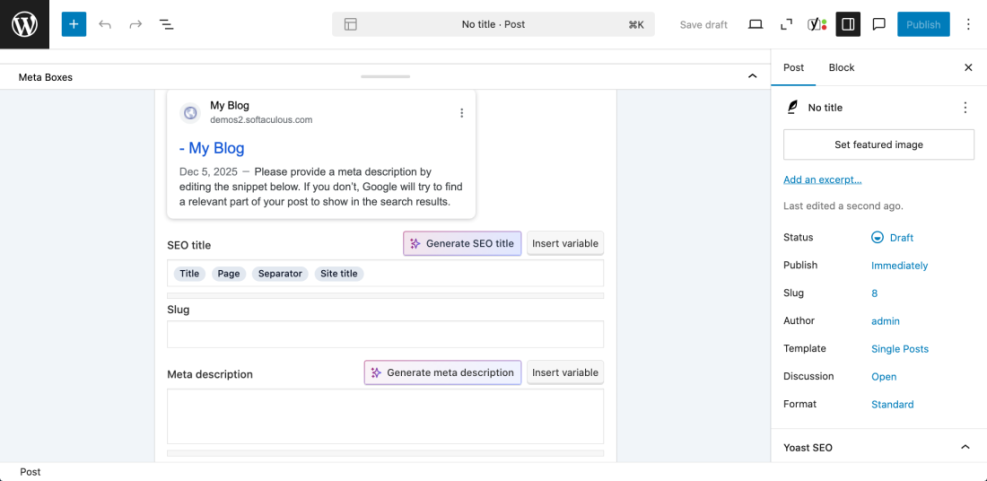
To verify success, create a test draft post and check that the SEO box lets you edit the SEO title, meta description, and slug. Your plugin may also show a live preview of how the post will look in search results.
Step 3: Plan Keyword Strategy for Your Blog
A clear keyword plan saves you from randomly publishing posts that never rank. You want each article to target real phrases your audience searches for.
- Write down three to five main topics your blog covers, such as “WordPress tutorials” or “budget travel”.
- For each topic, brainstorm five to ten questions or phrases your readers might type into Google.
- Use a keyword tool of your choice to expand each phrase with related suggestions and search volumes.
- Group similar keywords into clusters that could be covered in one strong blog post.
- Open a spreadsheet and create columns for Keyword, Search Intent, Post Title Idea, and Status.
- Fill the spreadsheet with the most relevant keywords you want to target in the next few months.
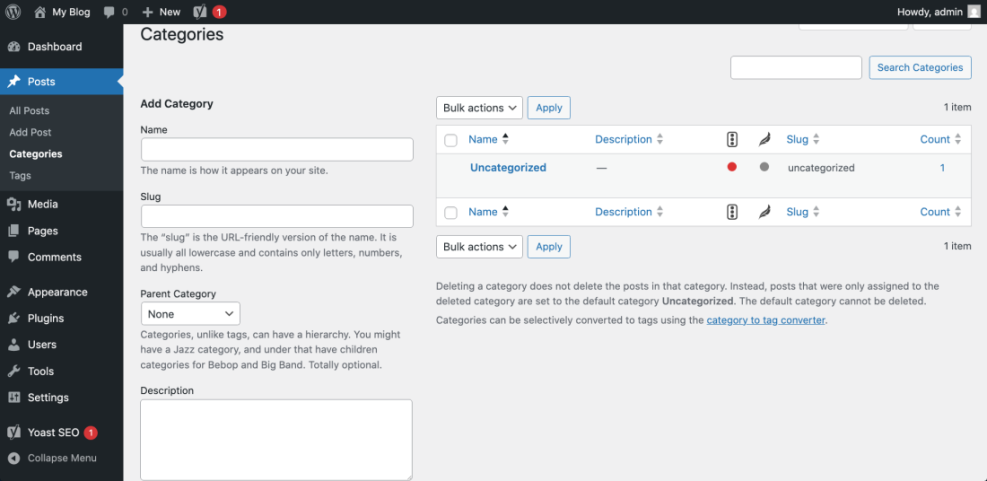
- Back in WordPress, navigate to Posts » Categories and make sure your categories roughly match your main topics.
Navigate again to Posts » Categories to confirm that each main topic has a clear, human friendly name and a simple slug.
For more detail on finding good phrases, follow the dedicated guide Keyword Research Basics. That tutorial walks through practical tools and examples tailored to WordPress site owners.
Step 4: Optimize Every Blog Post Before Publishing
Most of your SEO gains come from consistently optimizing each post. Use a simple checklist each time you write to keep quality high and make it easy for search engines to understand your content.
- In your dashboard, navigate to Posts » Add New or edit an existing draft.
- Write a clear headline that promises a benefit and naturally includes your primary keyword.
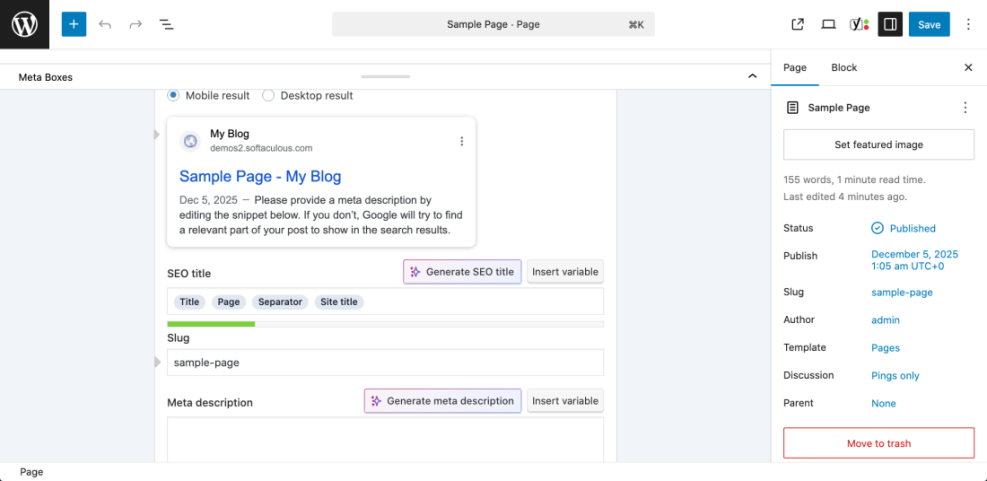
- In the SEO plugin box, customize the SEO Title and Meta Description so they read naturally and include your main keyword once.
- Use your main keyword in the first 100 words of the introduction and at least one H2 heading.
- Break long sections into short paragraphs and bullet lists so the content is easy to scan.
- When you add images, fill the Alt Text field with descriptive phrases that fit the image and topic.
- Set one relevant Category and a small set of focused Tags instead of dozens of overlapping tags.
- Scroll to the Slug field and shorten it to a few relevant words, removing stop words like “the” and “and”.
- Preview the post to check headings, spacing, and links before publishing.
Navigate to Posts » All Posts, hover over your optimized post, and click View to confirm the URL, title, headings, and images look correct on the front end.
For images, follow the step by step recommendations in Image SEO Checklist for WordPress Content so your visuals support rankings instead of slowing pages down.
Step 5: Improve Internal Linking on Your Blog
Internal links help search engines understand which posts are most important and help readers discover more of your content. A simple habit of linking new posts to relevant older ones can noticeably improve rankings.
- Open your new blog post in one browser tab.
- In another tab, navigate to Posts » All Posts.
- Use the search box above the posts table to find older posts that cover related topics.
- Open each relevant post in a new tab and skim for sentences where a link to your new guide would help the reader.
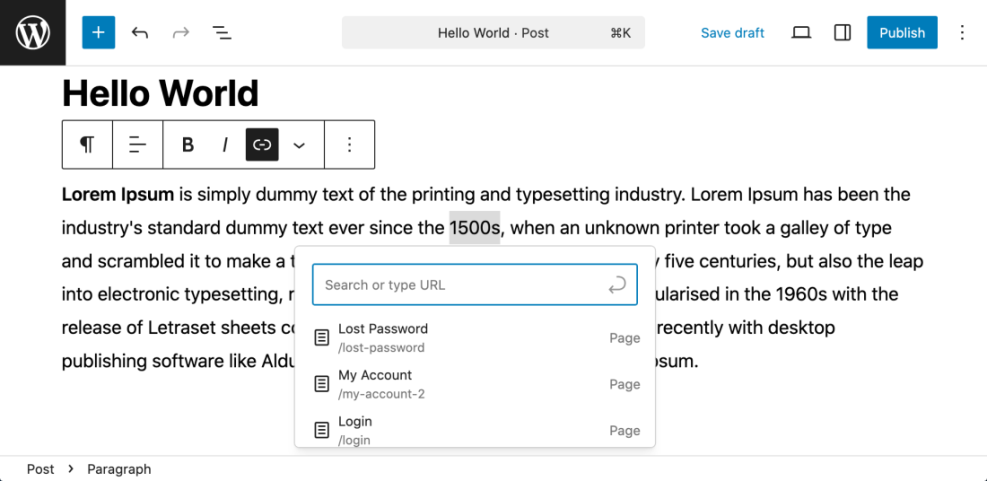
- Highlight a short, descriptive phrase in the older post and click the Insert link button in the editor toolbar.
- Paste the URL of your new post, then click Apply to save the link.
- Update the post and repeat this for two to five older posts per new article.
Navigate again to Posts » All Posts, filter by your main category, and confirm that several posts link in and out of each other.
For a deeper strategy you can reuse each month, follow the tutorial Internal Linking Strategies for Small WordPress Blogs. It shows how to map pillar content and supporting posts in a simple diagram.
Step 6: Speed Up Your WordPress Blog
Search engines favor fast sites because they offer a better experience. Basic speed optimizations on your WordPress blog help visitors stay longer and reduce bounce rates.
- In your dashboard, navigate to Appearance » Themes and make sure you are using a lightweight, actively maintained theme.
- Navigate to Plugins » Add New Plugin and search for cache.
- Install and activate a well reviewed caching plugin from the official WordPress.org plugin directory.
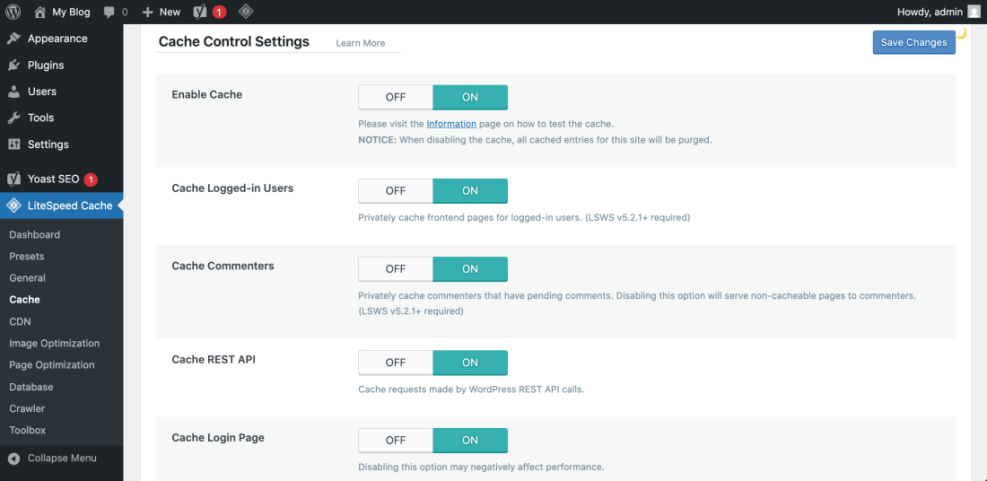
- Open the new Caching or plugin settings menu and enable basic page caching.
- Turn on Browser Caching and GZIP Compression options if your plugin supports them.
- Install an image optimization plugin or use your existing tool to compress large images before upload.
- Remove unused heavy plugins by navigating to Plugins » Installed Plugins, deactivating anything you no longer use, and clicking Delete.
Navigate to a few different posts on the front end while logged out or using a private browser window to confirm pages still load correctly after enabling caching.
For a more advanced walkthrough, use the dedicated reference WordPress Speed Optimization Guide, which covers testing tools and fine tuning.
Step 7: Track SEO Performance and Improve Over Time
SEO is not a one time setup. You need to watch how your posts perform and adjust topics, titles, and internal links based on real data.
- Set up Google Search Console for your domain so you can see which queries bring traffic and which pages get impressions.
- Log in to Search Console weekly and review the Performance report for your blog.
- Note posts that get impressions but low clicks and consider improving titles and meta descriptions.
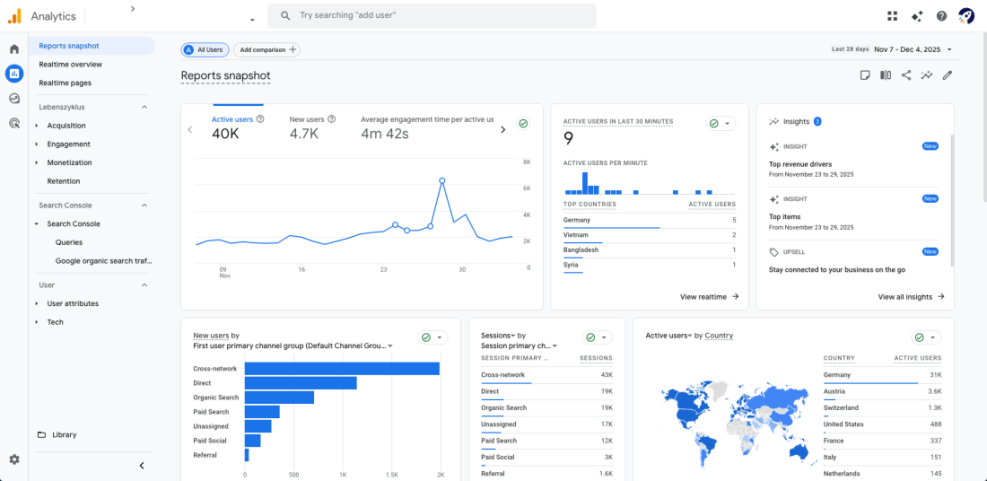
- Set up Google Analytics on your WordPress site so you can see how long readers stay and what they click.
- Create a simple spreadsheet to log key metrics each month, such as total organic sessions, top landing pages, and average position for your main keywords.
- Schedule a monthly SEO review to decide which posts to update, which topics to expand, and which new keywords to target.
Navigate to your analytics dashboard and filter traffic to only Organic Search so you can clearly see how SEO efforts perform compared to other channels.
If you have not connected analytics yet, follow the step by step instructions in Beginner Guide To WordPress Analytics Setup. Once connected, check results at least monthly and update your plan.
Conclusion You Are Ready to Go
You have prepared your WordPress settings, installed an SEO plugin, planned keywords, optimized posts, improved internal linking, tuned speed, and set up basic tracking. This is the foundation of sustainable SEO for a WordPress blog.
From here, your main job is consistency. Keep using the same optimization checklist for every new post, schedule a regular time to update older content, and watch your analytics to learn what readers actually enjoy. Over time, this steady process will grow your search traffic and make your blog easier to find.