If you want to design a professional website with WordPress, you can build a complete website with WordPress without writing much code. The key is to plan your structure, choose the right theme, and configure your layout, colors, and typography in a deliberate way.
In this step by step tutorial you will plan your content, select a design friendly theme, customize your homepage and inner pages, and test your responsive design so your website with WordPress looks polished on desktop, tablet, and mobile.
What You Need to Start
- An installed WordPress site with admin access to /wp-admin.
- A basic idea of your site goal such as blog, business, or portfolio.
- A logo or simple text brand name ready to upload or type.
- Brand colors you would like to use or at least one main accent color.
- Some draft content for your homepage and at least one inner page.
- Optional but recommended: a staging site if you are redesigning a live site. You can use Create WordPress blog as a reference.
Step 1: Plan your website structure
Before you touch any design settings, plan the structure of your website with WordPress so every layout decision supports a clear goal. A simple sitemap avoids clutter and makes design choices easier.
- Open your favorite notes app or a piece of paper.
- Write your main goal such as “get service inquiries” or “grow email list”.
- List your top level menu pages such as Home, About, Services, Blog, Contact.
- Under each page, note 3–5 key sections such as “Hero, Services grid, Testimonials, Call to action”.
- Decide which one or two actions you want on every page such as “Call now” or “Request a quote”.
Verify this step by checking that every planned page and section supports your main goal. If a page does not help your goal, remove or merge it before you start designing.
Step 2: Choose and install a design friendly theme
Your WordPress theme controls the base layout, typography, and styling of your website with WordPress. Choosing a lightweight, flexible theme makes the rest of your design work much easier and faster.
- Log in to your WordPress Admin dashboard.
- Navigate to Appearance » Themes.
- Click Add New at the top of the page.
- Use the Search themes box to look for popular, well rated themes that match your site type.
- Click a theme card, review the Preview, then click Install.
- After installation, click Activate to apply the theme to your site.
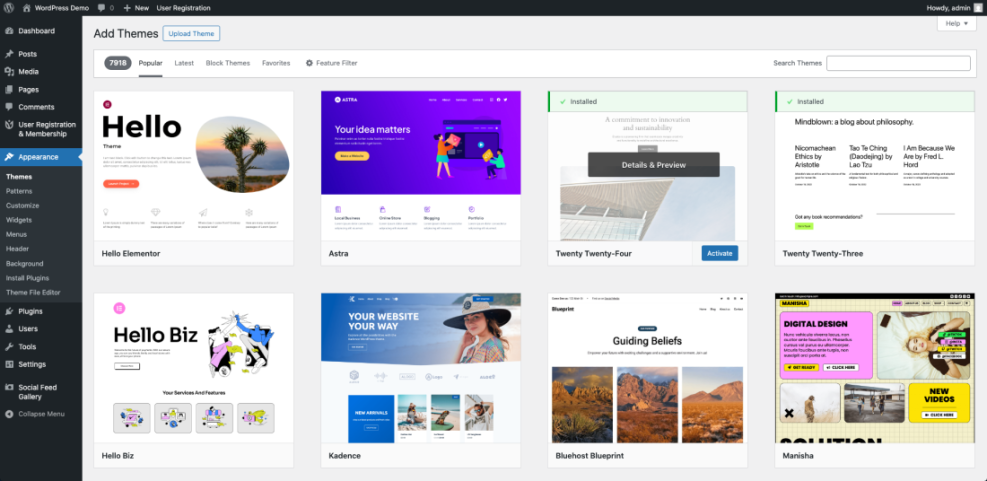
The WordPress dashboard’s ‘Add Themes’ page showcases numerous theme options for users to select and customize their website’s appearance.Verify success by visiting your homepage in a new browser tab. You should see the new theme styling applied. Use the browser refresh to ensure you are not seeing a cached version.
Step 3: Configure global branding colors and typography
Global design settings control the colors and fonts that appear across your website with WordPress. Set these first so every page you design feels consistent and on brand.
- In WordPress Admin, navigate to Appearance » Customize or Appearance » Editor depending on your theme.
- Look for options labeled Site Identity, Colors, and Typography.
- Under Site Identity, upload your logo or type your Site Title and Tagline.
- Open the Colors section and set a main accent color plus neutral background and text colors.
- Open the Typography section and choose a clean, readable font for headings and another for body text if your theme allows it.
- Click Publish or Save to store your changes.
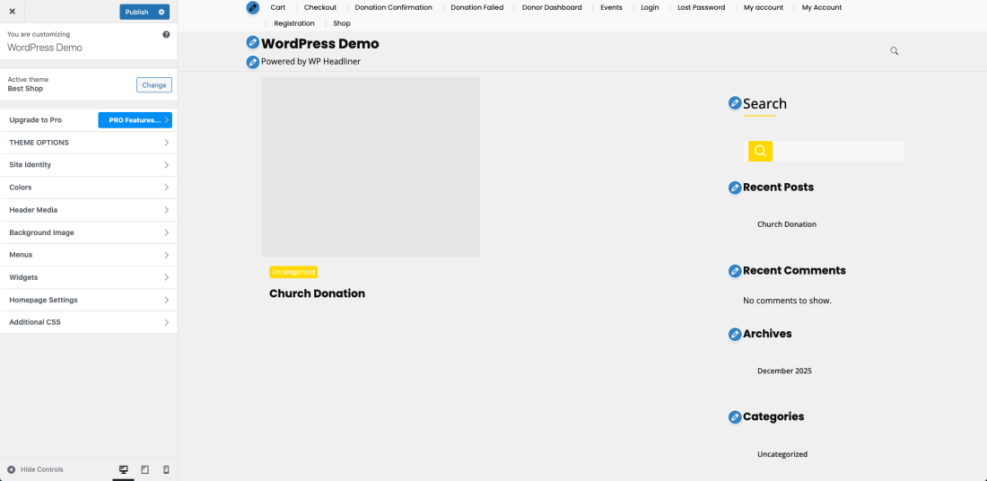
The WordPress Theme Customizer provides real-time options to design and preview your website’s appearance.Verify your branding by visiting a few pages and checking that headings, buttons, and links use your chosen colors and fonts. If any element looks off, return to the customizer and adjust.
If your theme supports additional CSS, you can refine small details like button styles.
/* Example button style tweak */
.wp-block-button__link {
  border-radius: 9999px;
  font-weight: 600;
  text-transform: uppercase;
}
After adding custom CSS, refresh your homepage and confirm that buttons now use the updated shape and font weight.
Step 4: Design a conversion focused homepage for your website with WordPress
Your homepage often gets the most traffic, so design it first. Focus on a clear hero section, simple navigation, and one main call to action that matches your goal.
- From WordPress Admin, navigate to Pages and either edit your existing Home page or click Add New and name it “Home”.
- Open the page in the Block Editor or your preferred page builder.
- Add a Group or Cover block for your hero section with a short headline, one supporting sentence, and a clear Button block.
- Below the hero, add sections for your main services or content categories using Columns or Image plus Heading blocks.
- Include a Testimonials or Social proof section if available.
- Finish with a strong Call to action section that tells visitors exactly what to do next.
- Click Update or Publish to save.
Verify your homepage design by visiting the URL in a new tab. Read from top to bottom and check whether your main action is obvious and repeated. If you want layout inspiration, study Best WordPress seo plugins and tools for proven patterns.
Step 5: Design key interior pages for your website with WordPress
Interior pages such as About, Services, and Blog posts should reuse the same visual language as your homepage. This keeps your website with WordPress looking cohesive and easy to navigate.
- In WordPress Admin, navigate to Pages and open your About page.
- Use a simple hero with a short headline and one sentence that explains what you do.
- Add sections that tell your story, share your process, and show photos or team profiles.
- On your Services page, use Columns or Media & Text blocks to describe each offer with clear pricing or next steps.
- On your Blog page, make sure there is a clear list of posts and, if possible, a short intro that explains who the blog is for.
- Add a simple call to action block at the bottom of each page to lead visitors to your contact or booking page.
Verify your interior page design by clicking through the main menu from top to bottom. The colors, fonts, and button styles should feel identical between pages. For more layout ideas, see WordPress migration blog guide.
Step 6: Test responsive design and usability
Modern visitors browse on phones, tablets, and large screens. You must test how your WordPress design behaves at different sizes and fix any layout issues before launch.
- Open your homepage in a desktop browser.
- Use the browser’s Developer Tools or Responsive Design Mode to switch between mobile, tablet, and desktop views.
- Check that menus are easy to tap, text remains readable, and buttons are large enough on small screens.
- Adjust any blocks that look cramped by adding Padding or rearranging columns into stacked sections.
- Test key actions such as form submissions and click to call buttons on your real phone.
- Repeat for your main interior pages.
Verify this step by asking a friend or colleague to complete your main action on their phone without instructions. If they hesitate or get confused, note where they struggled and simplify your design.
Conclusion Your Website with WordPress Is Ready to Go
You have planned your structure, chosen a design friendly theme, set global branding, designed a focused homepage, styled your interior pages, and tested your responsive layout. Your new website with WordPress is now visually consistent, goal driven, and ready for real visitors.
As you create new content, reuse the same layout patterns, colors, and typography so every page strengthens your brand. Over time, you can refine details, but you now have a solid design foundation in place.
Further Reading
- How to create a website with WordPress
- How to choose WordPress theme
- WordPress migration blog guide
- Best WordPress seo plugins and tools
- Beginner guide to WordPress speed optimization
For official documentation on block patterns, layouts, and theme controls, review the WordPress Editor support guide and the Theme Developer Handbook on WordPress.org.