If you want to backup a WordPress site safely, the worst time to think about it is right after something breaks. A good backup strategy protects you from hacked sites, bad plugin updates, server issues, or simple human mistakes.
In this guide, you’ll learn what to back up, how to use a backup plugin, how to make a manual copy of your files and database, how to schedule automatic backups, and how to test a restore so you know your backups actually work.
What You Need Before You Backup a WordPress Site
- A working WordPress site with administrator access.
- Access to your hosting control panel (cPanel, Plesk, or a custom panel).
- FTP or file manager access so you can download site files if needed.
- Access to your database tool (often phpMyAdmin) or SEO and UX, and where you will see it in daily work.”>WP-CLI.
- An offsite location to store backups: cloud storage, email, or at least your local computer.
Step 1: Understand What a WordPress Backup Includes
Before you backup a WordPress site, it’s important to know which parts you need to copy. WordPress has two main components:
- Files – These include:
- Core WordPress files (in the root folder, like
wp-adminandwp-includes). - Your wp-content folder (themes, plugins, uploads).
- Configuration files like
wp-config.php.
- Core WordPress files (in the root folder, like
- Database – This stores:
- Posts, pages, and custom post types.
- Comments and users.
- Settings, menus, and other dynamic data.
A full WordPress backup includes both the files and the database. Many issues can be fixed with only the database or only the files, but it’s safer to have everything.
Step 2: Use a Backup Plugin to Backup a WordPress Site
The easiest way to backup a WordPress site is to use a dedicated backup plugin. Most backup plugins can run automatic schedules and send backups to remote storage.
- In your WordPress dashboard, go to Plugins » Add New.
- Search for “backup” and choose a reputable plugin with recent updates and good reviews.
- Click Install Now, then Activate.
- Open the plugin’s Settings or Backups page from the new sidebar menu.
- Choose what to back up: database only, files only, or full site (recommended).
- Click the button to run a manual backup and wait for the process to complete.
- Download the backup archive (or make sure it’s safely stored in your configured remote location).
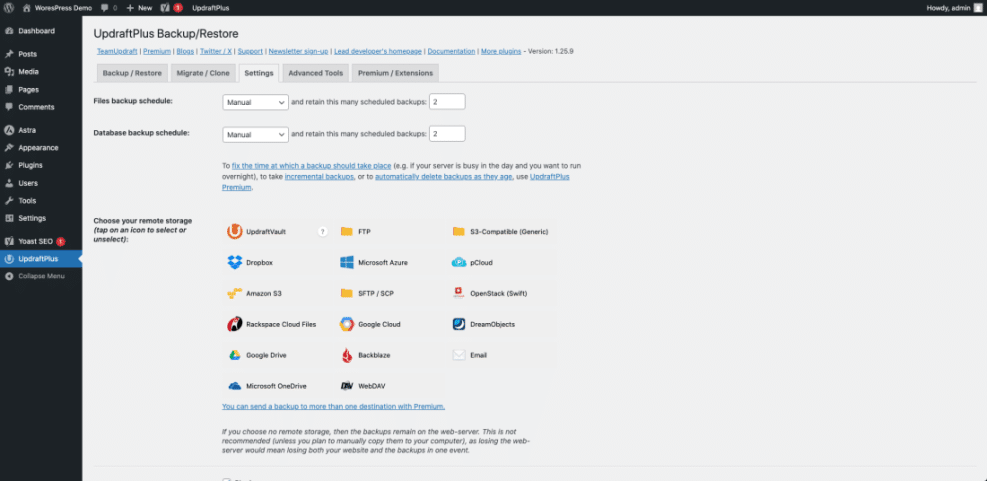
Step 3: Set Up Automatic Backup Schedules
Manually backing up is easy to forget. Once you’ve made at least one full backup of your WordPress site, set up a schedule so backups happen automatically.
- Open your backup plugin’s Schedule or Settings tab.
- Choose how often to backup the database:
- Daily for active blogs or stores.
- Weekly for smaller, static sites.
- Choose how often to backup files (weekly or monthly is usually enough unless you upload lots of media daily).
- Set the retention (number of backups to keep), e.g., last 7 or last 30 backups.
- Select a remote storage option: Dropbox, Google Drive, S3, or another cloud provider.
- Save your settings and confirm that the next scheduled backup time looks correct.
Step 4: Manually Backup WordPress Files (via File Manager or FTP)
If you prefer not to use a plugin—or want an extra safety copy—you can backup your WordPress files manually using FTP or your host’s file manager.
- Log in to your hosting control panel and open File Manager (or connect via FTP using a client like FileZilla).
- Locate your site’s root folder, often called public_html, www, or the folder named after your domain.
- Select all files and folders inside this directory, including wp-admin, wp-content, wp-includes, and core files.
- Create a compressed archive (ZIP) of the site files, or download them directly to your computer.
- Rename the archive with the date, e.g.,
mysite-files-backup-2026-01-02.zip. - Move the backup file off the server, e.g., download it to your computer or upload it to cloud storage.
Step 5: Manually Backup the WordPress Database
To fully backup a WordPress site, you also need a copy of the database. This is usually done with phpMyAdmin or WP-CLI.
- Log in to your hosting control panel and open phpMyAdmin.
- In the left sidebar, click the database that belongs to your WordPress site (check
wp-config.phpif you’re not sure which one it is). - Click the Export tab at the top.
- Choose Quick export method and SQL format for a simple backup.
- Click Go to download the database file to your computer.
- Rename the file with the date, for example:
mysite-db-backup-2026-01-02.sql.
If you’re comfortable with the command line and have WP-CLI installed, you can also run:
wp db export mysite-db-backup-2026-01-02.sql Step 6: Store Your WordPress Backups Offsite
A backup is only helpful if you can access it when your host has a problem. That’s why you should save at least one copy off your main server.
- Choose a secondary location: cloud storage (Google Drive, Dropbox, S3), an external hard drive, or a password-protected shared drive.
- Upload your files backup ZIP and database backup SQL/ZIP to that location.
- Organize backups into folders by site name and year (for example,
backups/mysite/2026/). - Keep a simple spreadsheet or note listing which backups correspond to which dates and site versions.
- Periodically clean old, obsolete backups so you don’t run out of space.
Step 7: Test Restoring a Backup of Your WordPress Site
A backup that you’ve never tested is a theory, not a safety net. The best way to be sure your backup process works is to restore it to a staging site.
- Create a staging site or subdomain (for example, staging.example.com) through your host.
- Install a fresh WordPress instance on the staging site.
- Use your backup plugin’s Restore or Migrate feature to upload and restore the backup to staging.
- If you made manual backups:
- Upload the files backup to the staging site’s root and extract it.
- Import the database backup into a new database and update
wp-config.php. - Use a search-and-replace plugin or script to change URLs from the live domain to the staging domain.
- Browse the staging site to confirm pages, posts, media, and logins all work as expected.
Quick Comparison of Ways to Backup a WordPress Site
Use this table to choose the best backup method based on your skills and how often your site changes.
| Method | Where You Use It | Main Purpose |
|---|---|---|
| Backup Plugin | WordPress dashboard » Plugin settings | Automate backups (files + database) on a schedule and send them to remote storage. |
| Manual File Backup | Hosting file manager or FTP | Create a one-off copy of all site files, especially wp-content. |
| Manual Database Export | phpMyAdmin or WP-CLI | Save a snapshot of your database (content, users, settings). |
| Host-Level Backup | Hosting control panel (Backups/Snapshots) | Use provider snapshots to roll back the entire account or site quickly. |
| Staging Restore Test | Staging subdomain or separate install | Verify that backups restore correctly before relying on them in an emergency. |
Conclusion: You Can Now Safely Backup a WordPress Site
You’ve learned how to backup a WordPress site using plugins, manual file and database exports, automatic schedules, and offsite storage. You also know how to test a restore on a staging site so you’re confident your backups actually work.
Make backups part of your regular maintenance routine instead of a one-time task. That way, when something goes wrong—whether it’s a bad update, a hacked site, or a broken plugin—you’ll have a clean restore point ready in just a few clicks.
Frequently Asked Questions About Backing Up WordPress
How often should I backup a WordPress site?
Can I rely only on my web host’s backups?
Do backup plugins slow down my site?
Where should I store my WordPress backups?
Is a database backup alone enough?
wp-content folder).