Best WordPress Caching Plugins
Speed up your site with safe, proven cache tools
WordPress caching plugins are one of the easiest ways to speed up your site without touching code. They store pre-generated versions of your pages, so visitors see content faster and your server handles more traffic without struggling.
In this guide to WordPress caching plugins, you will see how caching works, which features actually matter, and how to choose a safe plugin for your setup. The guide also walks through a simple configuration workflow, common issues to avoid, and practical tips that work on real WordPress websites.
Best WordPress Caching Plugins
Why Caching Matters for WordPress Speed
A good caching plugin reduces database work and PHP processing, so each page loads in fewer steps. As a result, visitors see your content sooner and you can handle more users on the same hosting plan. Faster pages also support better search rankings and higher conversions.
Which Cache Plugin Is Best for Your Site?
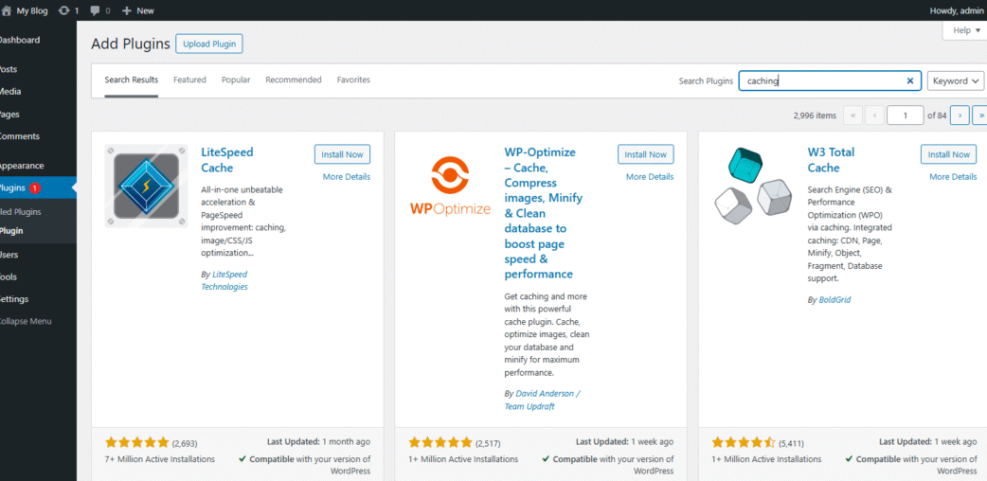
Most small to medium sites do well with a simple, battle-tested plugin such as WP Super Cache, WP Fastest Cache, or Cache Enabler. For more control, you can use W3 Total Cache or WP-Optimize. If you prefer a paid, all-in-one tool, WP Rocket and LiteSpeed Cache are strong options.
Can You Use Multiple Cache Plugins Together?
You should run only one page caching plugin at a time. Two tools that both generate cached pages or minify scripts will often conflict, create errors, or even slow your site. Instead, combine one cache plugin with a quality host, a CDN, and separate image or database optimization tools.
How Caching Speeds Up WordPress Sites
What Is Page Caching in WordPress?
Page caching saves a ready-made HTML version of each page, so the server does not rebuild it for every visitor. This reduces database queries, lowers CPU usage, and cuts response time. In practice, that means less waiting, fewer timeouts, and a smoother browsing experience.
How Does Browser Caching Help WordPress Performance?
Browser caching tells your visitor’s browser to store static assets, such as images, CSS, and JavaScript, for a while. When the user comes back or visits a second page, the browser can reuse those files instead of downloading them again. This saves bandwidth and reduces visual flicker.
Do You Still Need Good Hosting With Caching Plugins?
Even the best caching plugin cannot fully fix very slow or overloaded hosting. Caching hides some problems, but it cannot replace a modern PHP version, fast disks, or decent CPU resources. After basic speed work, you should still compare plans from quality providers or upgrade later.
Official WordPress caching documentation gives a deeper technical overview if you want to understand each cache layer more precisely.
Key Features in Cache Tools for WordPress
Must-Have Features in a Cache Plugin
At minimum, your plugin should handle page caching, cache preloading, and automatic cache clearing when you update content. It should also let you exclude specific URLs, such as cart and checkout pages, so dynamic content always stays fresh and accurate for users.
Nice Extra Features in Cache Plugins
Many plugins bundle extra features, including HTML, CSS, and JavaScript minification, database cleanup, and image lazy loading. These can remove bloat and cut the amount of data each page sends. However, you should test each extra feature one at a time to avoid breaking layouts.
How CDNs Work With WordPress and Caching
Some caching plugins integrate directly with CDNs like Cloudflare or QUIC.cloud. This makes it easier to rewrite asset URLs, purge cache across regions, and manage everything from WordPress. When your audience is global, that combination often delivers the biggest speed improvement.

Top WordPress Caching Plugins Compared
Comparison Table: Features and Pricing
The table below gives a quick overview of popular WordPress caching plugins, their best use cases, and typical pricing. You can use it as a shortcut when deciding where to start for your website.
| Plugin | Best For | Pricing |
|---|---|---|
| WP Super Cache | Beginners on shared hosting | Free |
| WP Fastest Cache | Simple setup with extras | Free + premium |
| W3 Total Cache | Advanced control and granular rules | Free + premium |
| LiteSpeed Cache | Sites on LiteSpeed server | Free |
| Cache Enabler | Lightweight basic caching | Free |
| WP-Optimize | Cache plus database cleanup | Free + premium |
| WP Rocket | All-in-one premium solution | Paid |
Most sites can start with one of the free options, then move to a premium tool if they need more automation, better support, or specific ecommerce features.
Short Reviews of Popular Caching Plugins
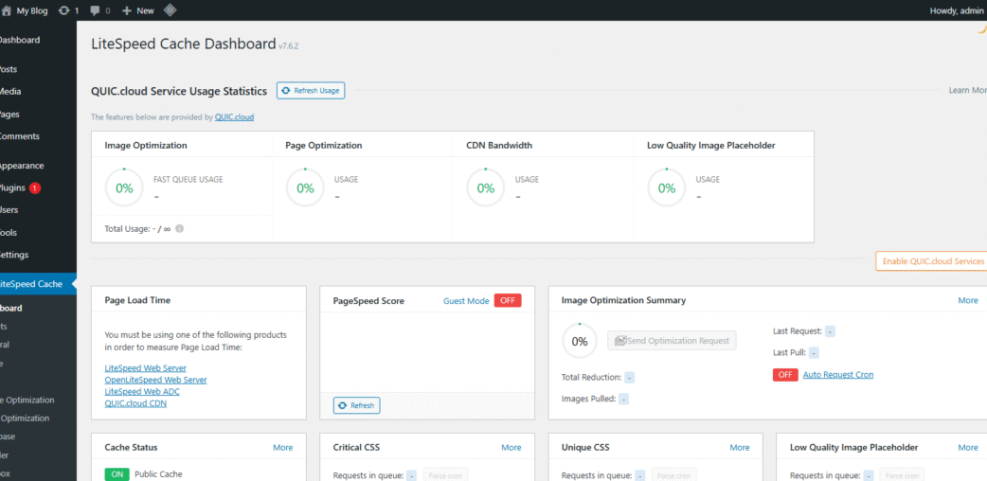
WP Super Cache and WP Fastest Cache focus on simple interfaces that suit beginners. W3 Total Cache offers fine-grained control for page, object, and database caching, which experienced users appreciate. LiteSpeed Cache shines when your host uses LiteSpeed, because it taps deeper server-level features.
Which Cache Plugin Tends to Be Fastest?
There is no single winner for every site. Different hosts, themes, and plugin stacks respond differently to each caching tool. A practical approach is to test one plugin at a time with tools like WebPageTest or PageSpeed Insights and compare repeat-visit load times.
WordPress optimization docs and Core Web Vitals guidelines explain how caching supports better performance metrics.
Choosing the Right Cache Plugin for Your Site
How To Pick a Cache Plugin for Small Sites
For a personal blog or small business site, focus on stability and simplicity. WP Super Cache, WP Fastest Cache, or Cache Enabler usually provide enough speed without a steep learning curve. You can combine one of these with a basic CDN and still get a very responsive site.
Caching Options for WooCommerce Stores
Online stores need careful cache rules to keep carts, checkout, and personalized areas fresh. Therefore, you should choose a plugin that supports ecommerce exclusions and dynamic fragments. WP Rocket, LiteSpeed Cache, and W3 Total Cache handle this well when configured correctly.
Cache Plugin Options for Managed Hosting
Many managed hosts already run server-level caching or restrict specific plugins. In that case, you should follow their allowed plugin list and documentation. Sometimes, you only need a small helper plugin to control purge rules, or you let the host manage everything for you.
Cache Plugin Setup and Configuration Basics
Basic Setup Steps for a Cache Plugin
You can configure most WordPress caching plugins with a short checklist. The general process looks similar across tools, even if the wording changes.
- Install and activate your chosen caching plugin from the Plugins screen.
- Enable page caching and save the default settings.
- Turn on cache preloading or warmup if the plugin provides it.
- Exclude cart, checkout, and account pages when you run an online store.
- Browse your site in a private window and confirm that pages still look correct.
After the basics work, you can enable optional features like minification and lazy loading. You should always test your contact forms, checkout flow, and login pages again before leaving the settings page.
How To Test Your WordPress Site After Enabling Caching
Before and after each change, run a speed test from the same region and connection type. Compare the first and repeat view to see how caching helps. In addition, keep an eye on metrics such as Time to First Byte and Largest Contentful Paint, because they reflect real user experience.
Which Cache Settings Should You Avoid Changing?
Advanced options like database cache, object cache, and opcode cache can cause problems if your host already manages them. Unless you know your server stack well, leave those options off. Instead, focus on page caching, browser caching, and light minification first.
Fixing Common Cache Plugin Problems
Why Do Cached Changes Not Show Immediately?
When cache works, it often serves older copies of your pages until you purge or refresh it. If you edit a post and do not see updates, clear the plugin cache and your browser cache. In addition, some CDNs keep their own copies, so you may need to purge cache in more than one place.
How To Fix Broken Layouts Caused by Caching Plugins
Minification and file combination features sometimes change the order of scripts and styles. This can break sliders, menus, or fonts. To fix this, disable minification, then re-enable it piece by piece. You can also exclude specific files from optimization if you know which ones cause trouble.
When To Disable Your Cache Plugin Temporarily
During heavy design work, theme changes, or plugin debugging, caching makes it harder to see true behavior. In those cases, it is easier to turn caching off temporarily. After you finish, you can enable it again, clear the cache, and re-run your performance tests.
For a structured approach, you can follow a dedicated Speed checklist that covers caching, images, database, and theme tuning in a logical order.
Conclusion: Getting the Most From Caching
What To Do Next With Caching
Your next step is simple: choose one of the recommended WordPress caching plugins that matches your skill level, enable the basic options, and measure the results. After you see a stable speed gain, layer in a CDN and image optimization. Over time, you can refine settings, but you should always favor reliability and easy maintenance over experimental tweaks.
More WordPress Speed & Caching Guides You Might Like
How To Use These WordPress Speed Resources
Once you have caching under control, you can tackle other bottlenecks such as images, database size, and hosting quality. The planned guides below fit together as a roadmap for building a faster, more resilient WordPress site.
- WordPress seo complete beginners guide
- Beginner WordPress security best practices guide
- How to use cdn in WordPress
- WordPress speed optimization checklist
- Safely Testing Plugins on a Staging Site
As these guides go live, you can bookmark them as a regular maintenance routine to keep your site fast and secure over the long term.