Beginner Guide to WordPress Speed Optimization
Step by step fixes for a faster beginner friendly site
WordPress Speed Optimization helps beginners fix slow loading pages without touching complex code. If your WordPress site feels sluggish, visitors leave, conversions drop, and search rankings suffer. The good news is that you can dramatically improve speed with a few safe, repeatable steps.
In this beginner friendly guide, you will measure your current site speed, clean up slow settings, optimize images, configure caching, and make simple Core Web Vitals improvements. Follow each step in order, and by the end you will have a noticeably faster and more stable WordPress site.
What You Need to Start
- Admin access to your WordPress dashboard.
- Access to your hosting control panel or support chat.
- A recent full backup of your site created with a reliable backup plugin or host tool.
- 10–20 minutes of quiet time to run speed tests and update settings.
- Optional but recommended access to a staging site so you can test changes safely.
Step 1: Measure your current WordPress speed
Before you start changing anything, establish a clear baseline. This helps you see which changes actually improve your WordPress Speed Optimization efforts and prevents random tweaking.
- Open a new browser tab and go to Google PageSpeed Insights.
- Paste your homepage URL into the field labeled Analyze URL and click Analyze.
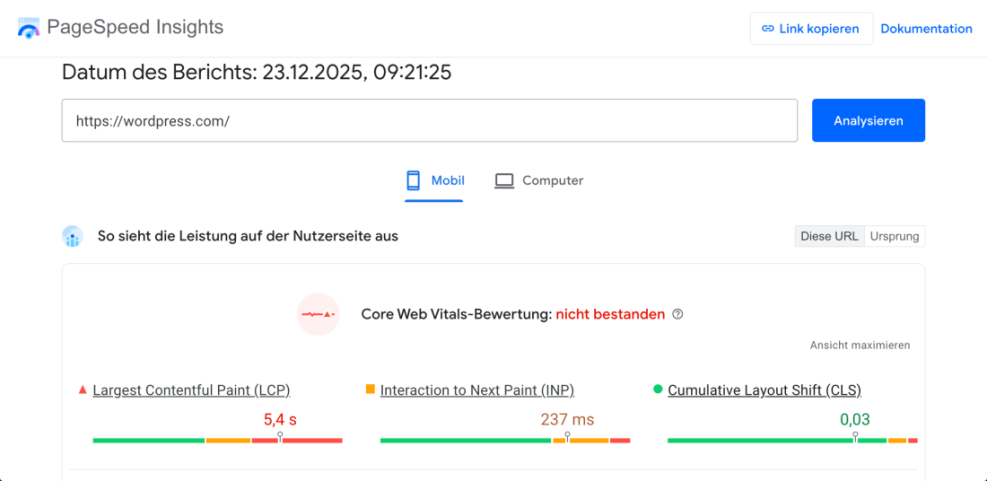
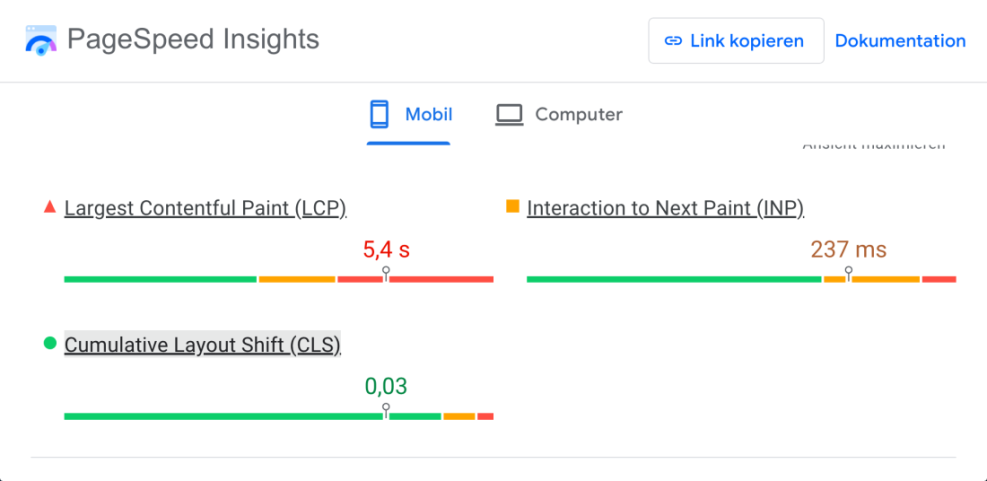
- Scroll down to view metrics such as Largest Contentful Paint and First Contentful Paint. Write down the main scores.
- Repeat the same test for your most important landing page or blog post.
You know this step is successful when you have saved your current scores and screenshots or notes for at least two key pages. You will later compare new scores against this baseline after optimization.
Step 2: Check hosting and basic site health
Your hosting and basic configuration are the foundation of WordPress performance. Even perfect caching and images cannot fully fix slow, overloaded servers or outdated PHP versions.
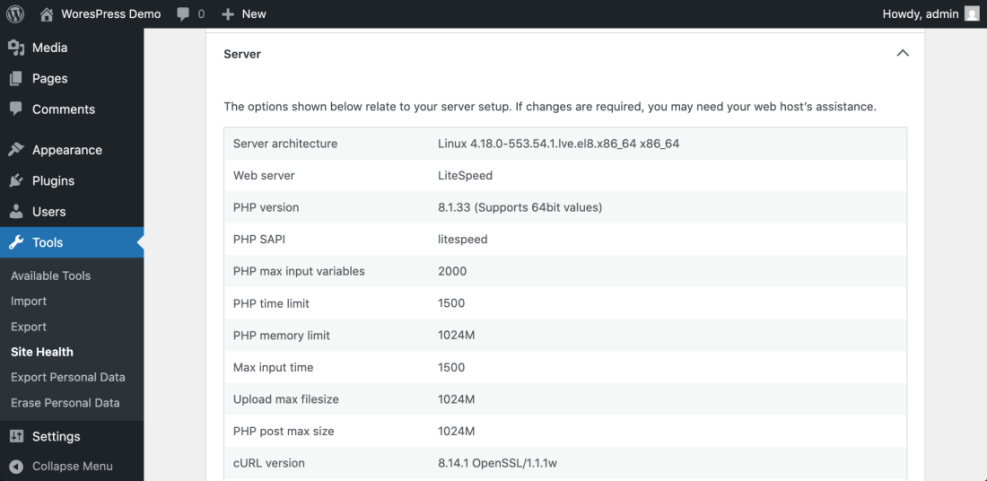
- Log in to your WordPress dashboard and go to Tools » Site Health.
- Click the Info tab, then expand the Server section to confirm your PHP version and Server type.
- Switch to the Status tab and review any items flagged as Performance or Recommended improvements.
- Login to your hosting control panel and confirm that you are not on the very lowest tier if traffic is growing.
- If your host offers a one click PHP selector, switch to the latest stable PHP version supported by WordPress, then click Save.
You know this step is successful when Site Health shows no major performance warnings and your server runs a recent PHP version.
Step 3: Clean up themes, plugins, and homepage
Bloated themes, unnecessary plugins, and busy homepages add extra weight to every page load. Simplifying here often delivers the fastest beginner wins.
- In the dashboard, go to Appearance » Themes and make sure only your active theme and one default fallback theme are installed. Delete any others using the Delete link.
- Go to Plugins » Installed Plugins and sort by Active. Deactivate plugins you no longer need, then click Delete on unused ones.
- Check for multiple plugins that do similar tasks (for example, several contact forms). Keep the one you actually use and remove duplicates.
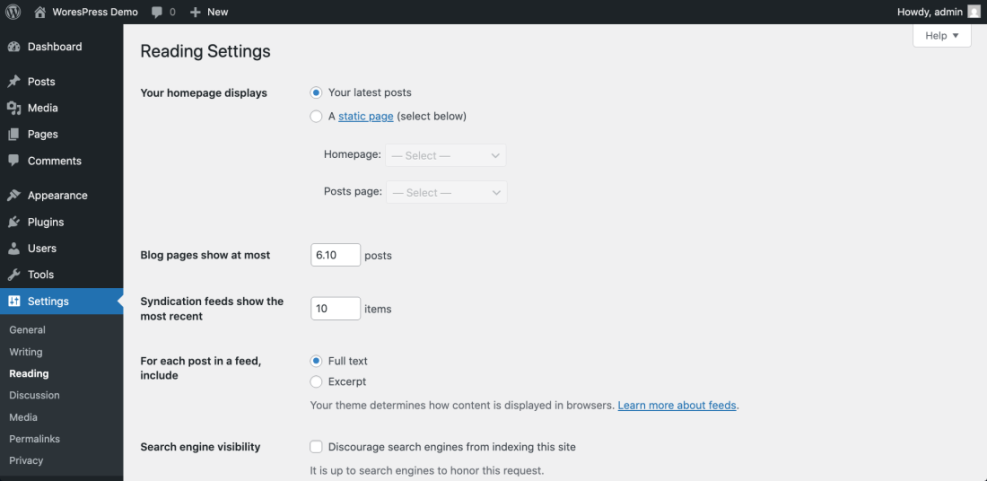
- Visit Settings » Reading and confirm your homepage is not loading a very long list of posts. Set Blog pages show at most to a reasonable number like 6–10.
After cleanup, browse your homepage and main pages. If everything still works and the admin area feels snappier, this step is successful.
Step 4: Optimize images and media
Uncompressed, oversized images are one of the most common reasons for slow WordPress Speed Optimization sites. Proper image optimization can dramatically reduce page size without hurting quality.
- Install a reputable image optimization plugin from Plugins » Add New by searching for terms like image optimization or WebP, then click Install and Activate.
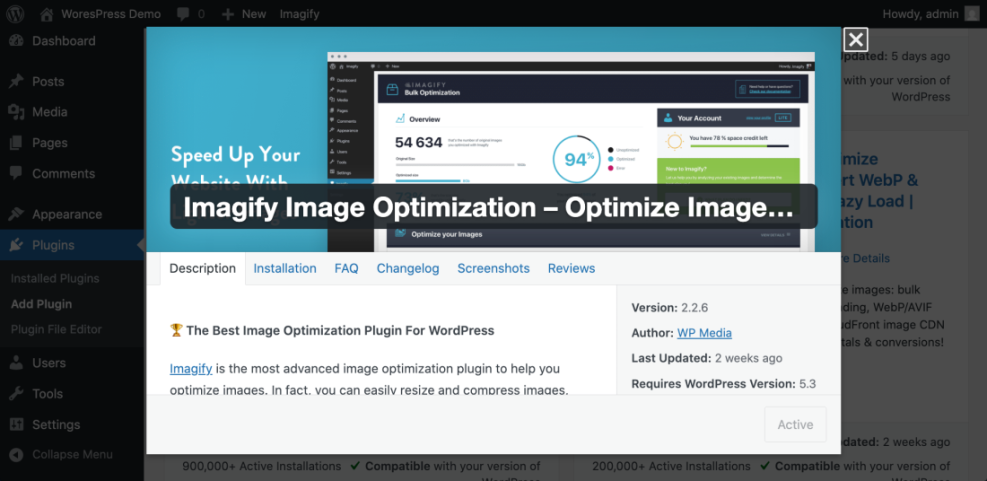
- Open the plugin’s settings from Settings or its own menu and enable automatic compression on upload and WebP conversion if available.
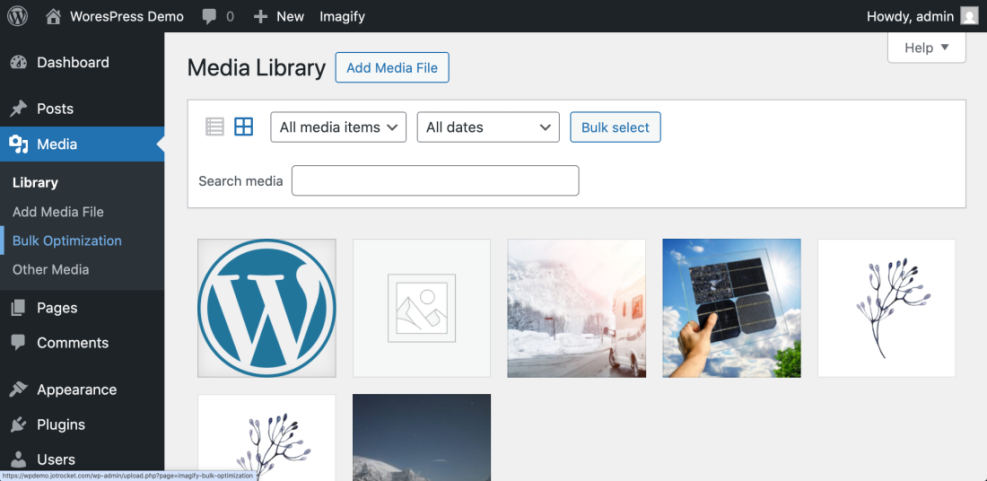
- Run the plugin’s Bulk optimize or Bulk compress tool to process existing images in your media library.
- Edit your homepage in the editor and make sure hero and banner images are not much larger than their display size (for example, around 1600px wide for full width banners).
Step 5: Configure a beginner friendly caching plugin
Caching stores prebuilt versions of your pages so visitors do not wait for the database on every request. A well configured caching plugin is one of the biggest speed boosts you can apply.
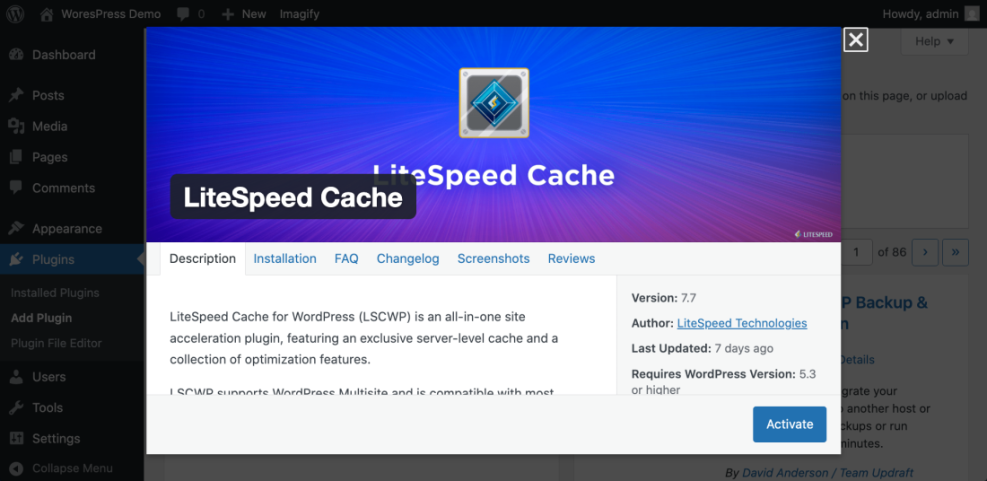
- From the dashboard, go to Plugins » Add New and search for a popular caching plugin recommended by your host.
- Click Install and then Activate.
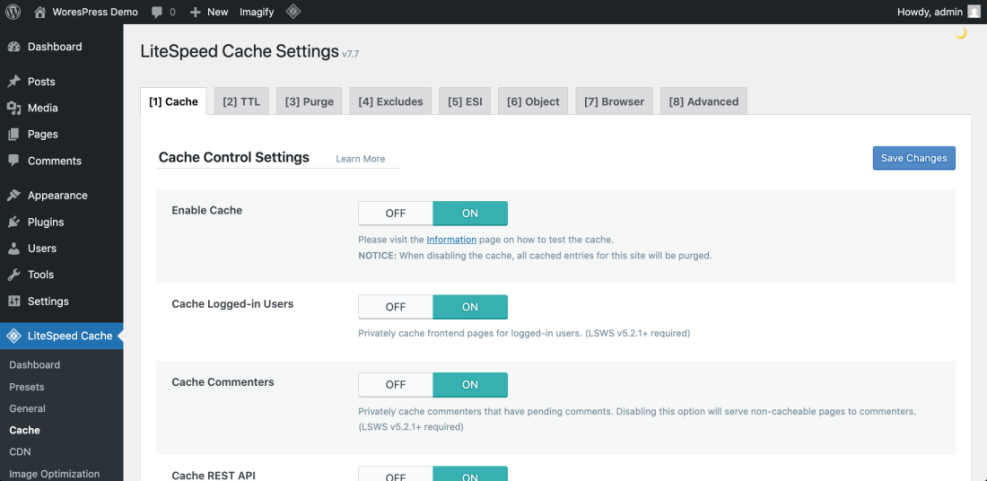
- Open the plugin’s settings page, usually under Settings or its own menu name.
- Enable Page cache or Enable caching, then save changes.
- If your plugin offers Browser cache and GZIP or Compression options, turn those on and save.
Advanced users sometimes add small code snippets to remove unnecessary overhead. If you are comfortable using a code snippets plugin or child theme, you can safely disable emojis being loaded on every page:
add_action( 'init', function() {
    remove_action( 'wp_head', 'print_emoji_detection_script', 7 );
    remove_action( 'wp_print_styles', 'print_emoji_styles' );
} );This step is successful when your pages load faster on second visit and PageSpeed Insights shows improved scores for repeat views.
Step 6: Tidy Core Web Vitals basics
Core Web Vitals measure how quickly your page becomes usable and stable for real visitors. You can improve these metrics with a few simple layout and script adjustments.
- In your editor, make sure the main heading and primary content appear as high on the page as possible, above large sliders or carousels.
- Use your theme options or page builder settings to enable lazy loading for images and videos below the fold.
- Remove unnecessary animations, autoplay carousels, or large background videos from the top of the page.
- If your caching or performance plugin offers a simple toggle like Delay JavaScript execution or Optimize CSS delivery, enable the beginner or recommended preset rather than experimental options.
Re run your PageSpeed Insights tests and compare Largest Contentful Paint and other vitals to your earlier notes. If they improved and the page still looks correct, you have successfully tightened your Core Web Vitals fundamentals.
Conclusion You Are Ready to Go
By following this beginner guide, you measured your starting point, fixed hosting and configuration basics, removed bloat, optimized images, configured caching, and improved Core Web Vitals. Together, these steps form a practical WordPress Speed Optimization process you can repeat whenever your site grows.
Keep your site fast by repeating quick tests monthly, removing unused plugins, and reviewing new features on a staging site before going live. Over time, these habits will protect your user experience, conversions, and search rankings.