In this guide, you will learn how to install WordPress theme files safely so your site uses a professional design instead of the plain default look. You do not need to touch code, and you can follow everything from inside your WordPress dashboard.
By the end, you will be able to install WordPress theme designs in several ways: searching the official directory, uploading a theme ZIP file, manually copying files, and even running WP CLI commands if your host supports them.
What You Need to Install a WordPress Theme
Before you install WordPress theme files on your site, there are a few things you should have in place so the installation goes smoothly and you can switch designs without stress.
- An installed WordPress.org site on your hosting account. If you still need to set this up, follow How to install a WordPress theme first.
- Your WordPress admin login details. If you are not sure how to sign in, see How to integrate WordPress into website.
- A theme you want to use:
- Free themes from the official WordPress.org directory, or
- A premium or custom theme as a .zip file from the developer or marketplace.
- Basic access to your hosting control panel or SFTP if you plan to use manual upload for large themes.
Theme Installation Methods for Installing a WordPress Theme
There is more than one way to install WordPress theme files, and each method fits slightly different situations. The table below compares the main methods so you can quickly choose the one that feels easiest and safest for your site.
| Method | Where You Use It | Main Purpose |
|---|---|---|
| Search and Install from Dashboard | Appearance » Themes » Add New | Quickly install free themes from the official WordPress.org directory. |
| Upload Theme Zip | Appearance » Themes » Add New » Upload Theme | Install premium or custom themes you downloaded as a .zip file. |
| Manual Upload (SFTP / File Manager) | Hosting File Manager or SFTP client | Install large themes or fix uploads that fail due to server limits. |
| WP CLI | SSH terminal with WP CLI installed | Scriptable, fast theme installs for developers and power users. |
Step 1: Open the Themes Screen Before You Install a WordPress Theme
Every method you use to install a WordPress theme starts from the same place in your WordPress dashboard. In this step you will open the Themes screen where you can manage and add designs.
- Open your browser and go to your WordPress login URL, usually https://yourdomain.com/wp-admin.
- Enter your username and password, then click the Log In button.
- In the left-hand admin menu, hover over Appearance.
- Click Themes. This opens the list of installed themes.
- At the top of the screen, click the Add New Theme button to open the theme browser.

To verify this step, confirm you can see a grid of themes and a Search themes box, plus filters such as Featured, Popular, and Latest across the top.
Step 2: Search and Install a Free WordPress Theme from the Dashboard
One of the easiest ways to install a WordPress theme is to use the free themes from the official WordPress.org directory, which you can access directly in your dashboard.
- On the Add Themes screen, click the tabs such as Featured or Popular to browse themes.
- Use the Search themes field in the top right to search by theme name or keyword, for example “blog” or “portfolio”.
- Hover your mouse over a theme card to see the options.
- Click Preview to see how the theme might look on your site using sample content.
- If you like the theme, click the Install button on the card or in the preview window to begin the WordPress theme installation.
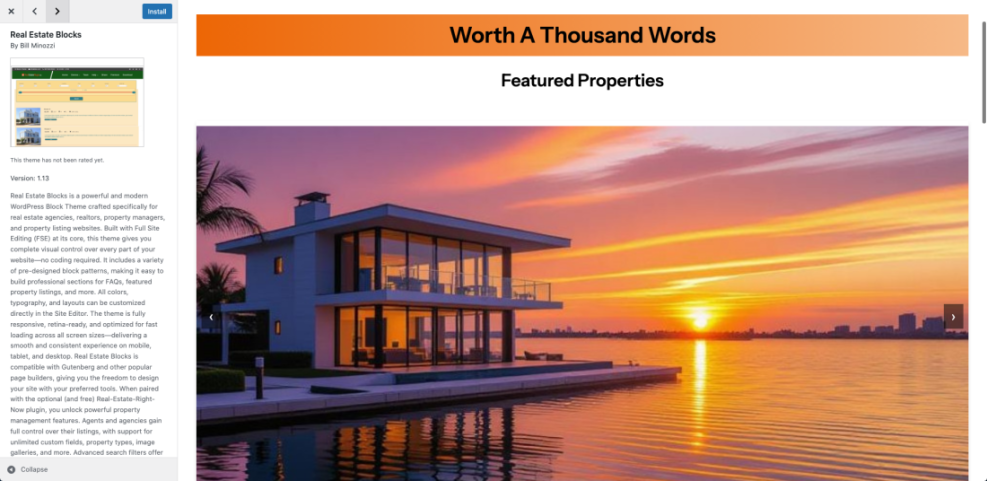
Once installation finishes, the button changes from Install to Activate. The theme is now installed but not yet active; you will turn it on in a later step. If you want expert suggestions while you install WordPress theme designs, you can also explore Best ftp clients for WordPress users while you are browsing.
Step 3: Upload and Install a WordPress Theme from a Zip File
When you want to install a WordPress theme that you bought from a marketplace or developer, you’ll usually receive it as a .zip file that you can upload in the dashboard.
- Download the theme package from your theme provider and save the .zip file somewhere easy to find on your computer.
- In your WordPress dashboard, go to Appearance » Themes, then click Add New Theme.
- At the top of the Add Themes page, click the Upload Theme button.
- Click Choose File, locate the theme .zip file on your computer, and select it.
- Click the Install Now button to upload and unpack the theme on your site.

After a few seconds, you should see a message that the theme installed successfully along with options to Live Preview, Activate, or Return to Themes page. If you see an error about a missing style.css file, make sure you are uploading the actual theme zip and not a larger package with documentation.
Step 4: Manually Install a WordPress Theme with SFTP or File Manager
If your host times out while you install a WordPress theme through the dashboard, you can complete the same WordPress theme installation manually by copying the theme folder directly to your server.
- Open your hosting control panel and launch its File Manager, or connect to your server using an SFTP client such as FileZilla.
- Navigate to your WordPress installation folder, then open
wp-content/themes. - On your computer, unzip the theme package so you have a folder that contains
style.cssand other theme files. - Upload this entire theme folder into the
wp-content/themesdirectory on your server.
When the upload is complete, return to your WordPress dashboard, go to Appearance » Themes, and confirm that the new theme appears in the list and is ready to be activated.
Step 5: Activate and Test Your Newly Installed WordPress Theme
Installing a theme does not change your front-end design until you activate it. In this step you will turn on your new theme and confirm that your key pages still display correctly.
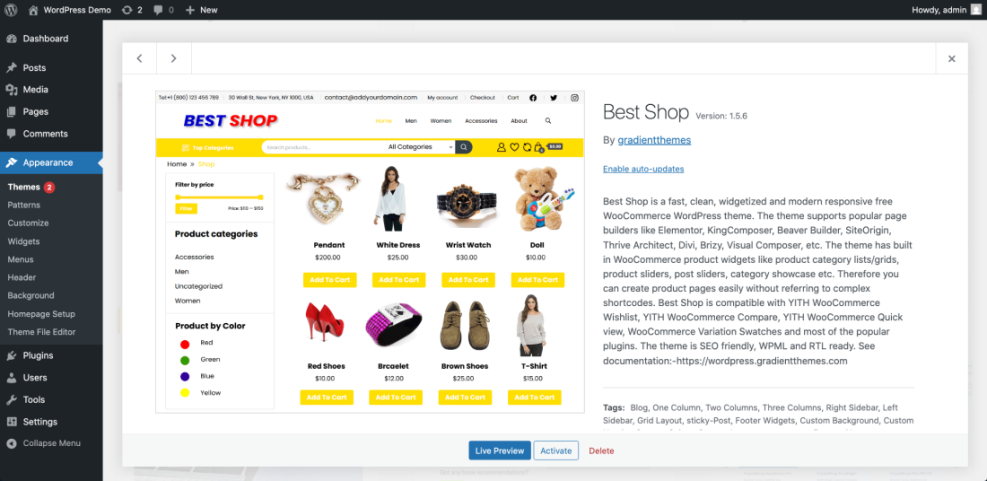
- From the dashboard, go to Appearance » Themes.
- Hover over the theme you just installed and click Live Preview. This opens a preview of your site using the new design.
- Use the preview to check your homepage, blog posts, and menus. Ensure everything is readable and nothing important disappears.
- If you are happy with the preview, click the Activate button in the sidebar or on the theme card.
- Click your site name in the top-left admin bar or open your homepage in a new tab to view the live site.
After activation, the theme shows an Active label on the Themes screen. Visit several pages, including your blog index and a single post, to make sure everything loads as expected. If this is a brand-new site, now is a good time to follow Beginner guide to WordPress speed optimization to add your first content.
Step 6: Customize Your Site After You Install a WordPress Theme
Most modern WordPress themes include customization options for your logo, colors, fonts, and homepage layout. Configuring these basics right away helps your new design feel consistent with your brand.
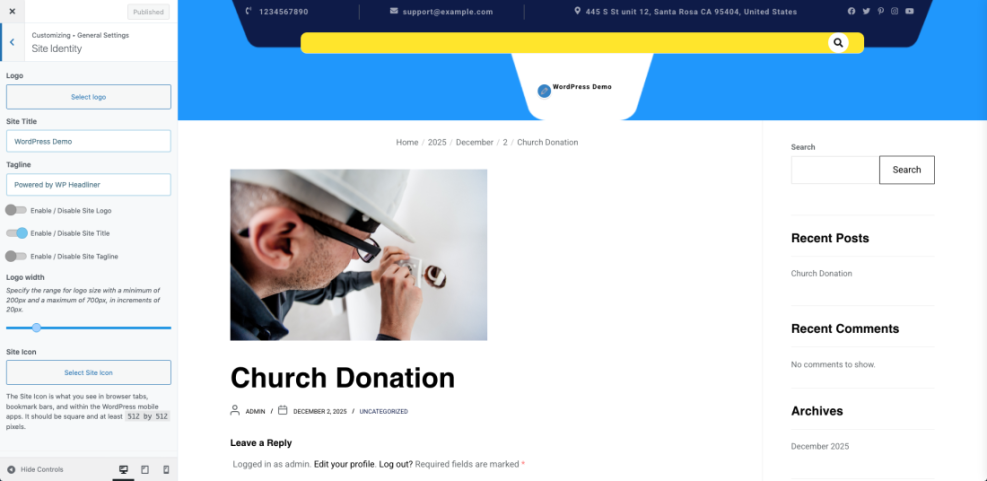
- In the dashboard, go to Appearance » Customize or open the theme’s own Theme Options panel if it provides one.
- Open the Site Identity section and upload your logo, set the Site Title, and adjust the Tagline.
- Configure global styles under sections like Colors or Typography to set your brand colors and font pairings.
- Set your homepage behavior by choosing between a blog-style list or a static page in Homepage Settings or under Settings » Reading.
- When you are satisfied, click Publish or Save to apply your changes.
Reload your site in a new tab to verify that your logo, colors, and fonts match what you set in the Customizer. For deeper layout ideas, especially for blogs, you can review WordPress migration blog guide and expand your design step by step. As you add plugins for forms or SEO, Best contact form plugins for WordPress will help you choose solid options.
Step 7: Use WP CLI to Install a WordPress Theme from the Command Line
If your host supports SSH and WP CLI, you can install themes directly from the command line. This is ideal for developers or anyone managing multiple WordPress sites who wants a faster, scriptable workflow.
- Connect to your server over SSH using the details from your hosting provider.
- Run
wp --infoto confirm that WP CLI is installed and working. - Use the
cdcommand to move into your WordPress installation directory, for examplecd public_html. - Run a command to install and activate a theme by its slug. For example, to install the Twenty Twenty-Three theme, enter:
wp theme install twentytwentythree --activateIf the command succeeds, WP CLI prints a Success message confirming the theme was installed and activated. You can then log into your dashboard and go to Appearance » Themes to verify that the theme is active.
For more examples of options such as installing from a zip file or skipping requirements, see the official wp theme install documentation on WordPress.org.
Conclusion You Are Ready to Go
You have now seen several ways to install WordPress theme files on your site, from the simple dashboard search to advanced manual and WP CLI methods. You can safely add free themes from the official directory, upload premium designs, activate them with confidence, and adjust the basics so your brand looks consistent.
As you grow more comfortable with themes, you can experiment on a staging site, change designs as your brand evolves, and refine layouts with additional plugins and settings. With your new theme in place, you are ready to focus on creating content and growing your audience.
Further Reading
- Best free WordPress blog themes
- How to choose WordPress theme
- How do you change your WordPress password
- How to change WordPress username
- Woocommerce performance tips for faster stores