If you want your WordPress posts to show up in Google, you must understand Onpage SEO. The good news is that with the right settings and an SEO plugin, you can optimize every post without touching code.
In this guide you will install an SEO plugin, configure WordPress settings, and walk through a repeatable checklist to optimize titles, URLs, headings, content, images, and internal links so each post is ready to rank.
What You Need to Start
- A working WordPress site with access to the Dashboard.
- An account with the Administrator role so you can install plugins.
- At least one draft or published post you can edit for practice.
- A short list of topics or phrases your audience might search for.
- A modern browser so you can keep the editor open in one tab and Google in another.
Step 1: Install and Activate an SEO Plugin
You will use an SEO plugin to manage titles, descriptions, and many Onpage SEO checks inside WordPress. This keeps everything in one place and avoids editing theme files.
- Log in to your WordPress Dashboard as an Administrator.
- Navigate to Plugins » Add New.
- In the search box, type SEO and choose a popular plugin such as Yoast SEO or a trusted alternative.
- Click Install Now, then click Activate.
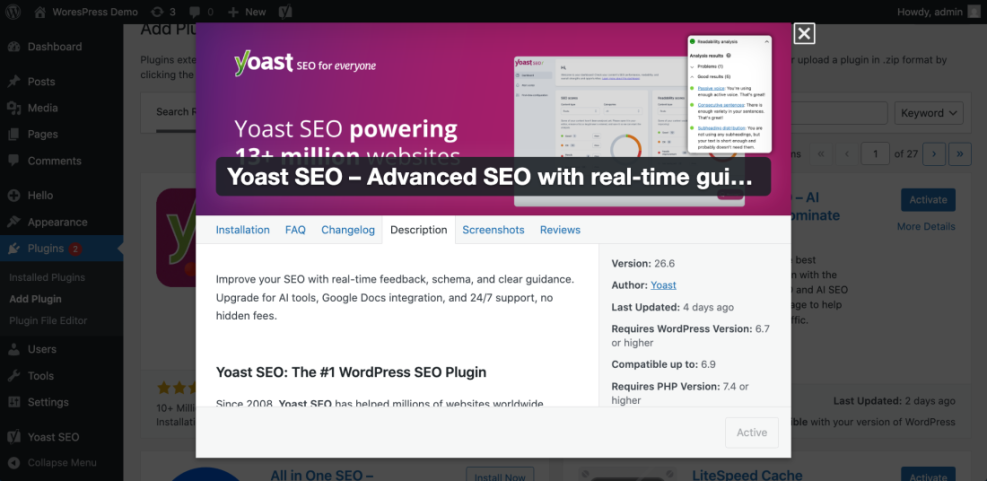
To verify success, look for a new SEO or plugin-specific menu item in the left-hand sidebar of your dashboard.
Step 2: Configure Core WordPress SEO Settings
Before optimizing individual posts, configure a few global WordPress settings so your URLs and basic metadata are search-engine friendly.
- Navigate to Settings » General.
- Check that Site Title and Tagline clearly describe your brand or topic.
- Navigate to Settings » Permalinks.
- Select the Post name option so URLs use readable words instead of numbers.
- Navigate to Settings » Reading and make sure Search engine visibility is unchecked.
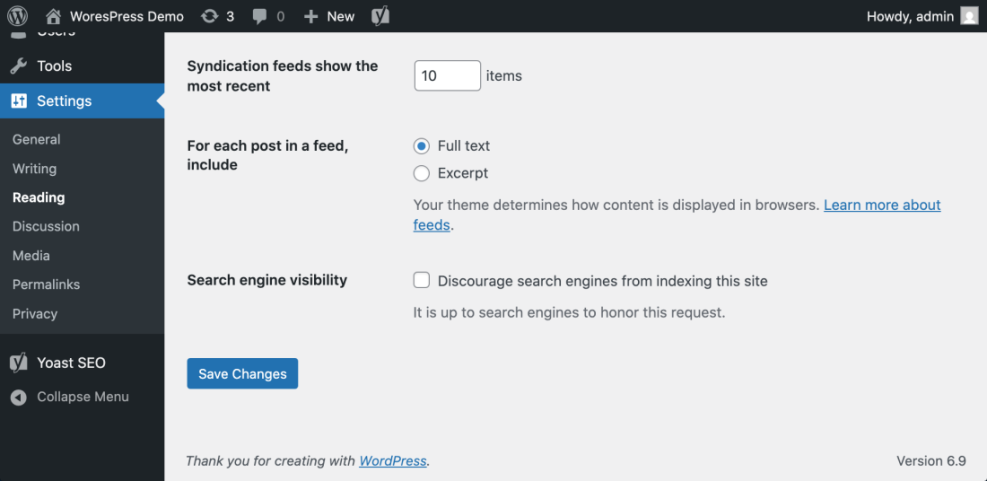
To verify, open any post on the front-end and confirm the URL is clean (for example, /my-onpage-seo-tips/) and the site appears in Google when you search your brand name.
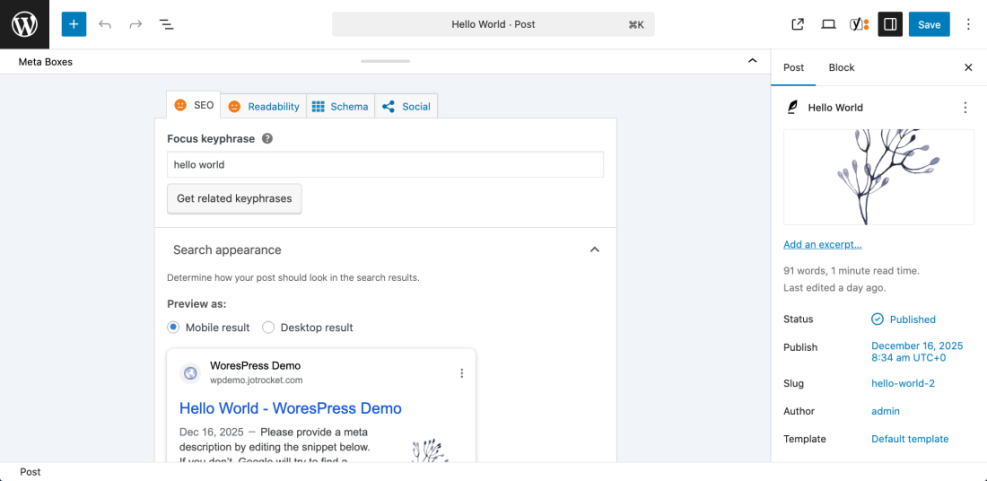
Step 3: Choose a Focus Keyword for Each Post
Onpage SEO works best when each post targets a clear search phrase. You will pick one main keyword and tell your SEO plugin to use it for checks and recommendations.
- Open a post in the Post editor by navigating to Posts » All Posts and clicking the title.
- Think about what a reader would type into Google to find this post, such as “best beginner guitar chords”.
- Scroll to your SEO plugin panel and locate the Focus keyphrase or similar field.
- Enter your chosen phrase exactly, using natural language rather than a list of keywords.
- Optionally, keep a separate list of secondary phrases and synonyms for use in headings and body text.
If you need help finding terms, read Best keyword research tools for seo for a beginner-friendly process.
To verify, confirm that the keyword appears in your SEO plugin panel and that the plugin now shows feedback or color indicators based on that phrase.
Step 4: Optimize Title URL and Meta Description
Now you will optimize the pieces searchers see first in Google results: your title tag, URL slug, and meta description. These strongly affect clicks and relevance.
- In the editor, refine your post Title so it includes your focus keyword and a clear benefit. Example: “How to Do Onpage SEO in WordPress Without Confusion”.
- Under the title, locate the Permalink or URL Slug field and edit it to a short, hyphenated version, such as how-to-do-onpage-seo.
- Scroll to your SEO plugin panel and click the snippet or SEO title field to customize the search result title.
- Edit the Meta description field to summarize the post in 1–2 sentences, including the focus keyword and a call to action.
- Keep your SEO title roughly 50–60 characters and your description around 150–160 characters so they display well in results.

To verify, use your plugin’s snippet preview to confirm the title, URL, and description look clear and that your focus keyword appears at least once in the title and description.
Step 5: Improve Headings Body Content and Keyword Use
Headings and body copy help search engines understand your topic and help readers scan quickly. You will structure content with clear sections and natural keyword use.
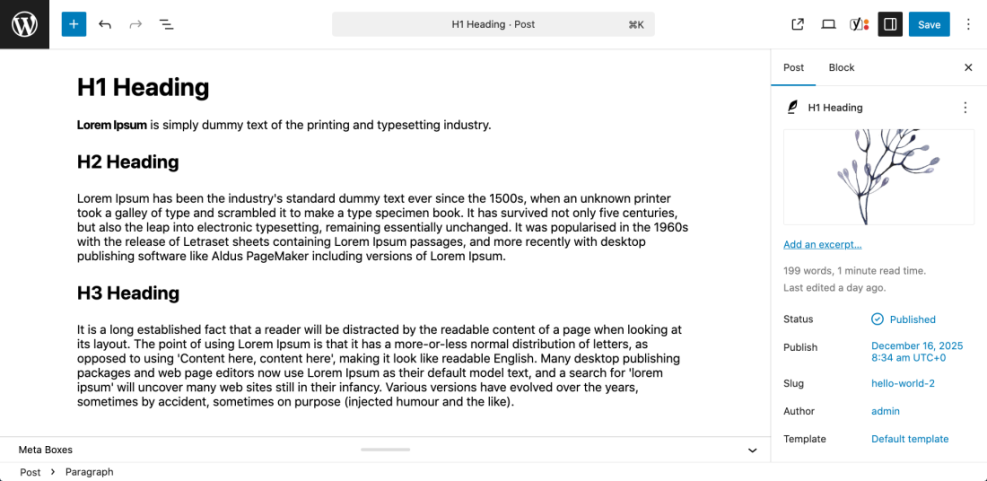
- In the editor, ensure your main post title becomes the single H1. WordPress handles this automatically for posts.
- Break your article into sections using H2 headings for main points and H3 headings for sub-points.
- Include your focus keyword (or a close variation) in at least one H2 heading and in the first 100 words of the article.
- Write short paragraphs (2–4 sentences) and use bullet or numbered lists to explain processes or checklists.
- Aim to use your focus keyword a few times naturally, plus related phrases, without stuffing or repeating it in every sentence.
To verify, scan your post from top to bottom. You should see a clear heading hierarchy, readable paragraphs, and keyword usage that feels natural when read aloud.
Quick Reference: Onpage SEO Actions in WordPress
Here is a quick reference table showing where you apply each Onpage SEO method inside WordPress and what it mainly helps you achieve.
| Method | Where You Use It | Main Purpose |
|---|---|---|
| Configure SEO Plugin | WordPress dashboard » Plugins » Installed Plugins / SEO menu | Enable titles, meta descriptions, and content analysis tools so every post can be optimized in a consistent way. |
| Optimize Title & Meta Description | Post editor » SEO plugin snippet preview | Increase click-through rate and relevance in Google by writing keyword-focused, persuasive titles and descriptions. |
| Improve Headings & Body Content | Post editor » Heading and Paragraph blocks | Clarify page structure for readers and search engines with a logical hierarchy and natural keyword usage. |
| Optimize Images | Post editor » Image block » Alt text | Describe visuals for accessibility and image search, while reinforcing the topic with relevant but natural phrases. |
| Add Internal Links | Post editor » Link button in toolbar | Connect related posts, spread link equity, and help visitors discover more useful content on your site. |
Step 6: Add Images Internal Links and Final SEO Checks
Images, internal links, and final checks round out your Onpage SEO. They improve user experience and help search engines crawl related content on your site.
- Set a Featured image using a clear, relevant graphic or photo that represents your topic.
- Click any image block, open the Alt text field, and describe the image in plain language, optionally including a keyword variation if it fits naturally.
- Highlight a relevant phrase in your content and click the Link button in the editor toolbar.
- Add at least two links to other helpful posts, such as Internal linking strategies WordPress or Is WordPress good for seo.
- Scroll to your SEO plugin panel and review any remaining suggestions, such as adding the keyword to the first paragraph or adjusting content length.
To verify, click your internal links to ensure they work, check that images have alt text, and confirm your SEO plugin shows most key checks in green or “good” status.
Conclusion You Are Ready to Go
You have learned how to do Onpage SEO in WordPress using a simple, repeatable process. By installing an SEO plugin, configuring core settings, choosing a focus keyword, and optimizing titles, URLs, content, images, and links, each post becomes easier for search engines and readers to understand.
Save this workflow as a personal checklist and apply it every time you publish. Over time, your posts will build topical authority, attract more organic traffic, and support the broader SEO strategy you develop for your WordPress site.
Further Reading
- How to add keywords in WordPress without hurting
- Reusable Onpage SEO Checklist
- Is WordPress good for seo
- WordPress migration checklist for blogs
- WordPress SEO Roadmap for New Blogs: From Zero to First Rankings
For additional background on how WordPress handles permalinks and posts, see the official documentation for the Permalinks Settings Screen and Writing Posts on WordPress.org.