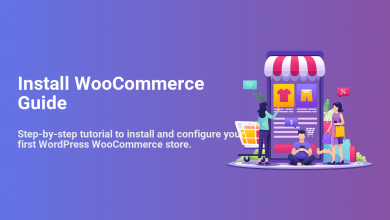
Step by Step WooCommerce Store Setup
Turn a basic WordPress site into a sales-ready WooCommerce store, one clear step at a time
Turning a regular WordPress website into a working online store can feel overwhelming the first time you see all the WooCommerce settings. Taxes, shipping, payments, emails, product data – there are a lot of moving parts.
This step-by-step WooCommerce store setup guide walks you from a clean WordPress install to a fully functioning store that’s ready to take real orders. You’ll prepare your site, install WooCommerce, configure payments and shipping, add products, test checkout, and finally launch with confidence.
If you’re still unsure how WooCommerce fits into the WordPress ecosystem, you can first read about the difference between WordPress and WooCommerce, then come back to follow this setup checklist from start to finish.
Prerequisites
Before you start clicking through settings, make sure you have a solid foundation. WooCommerce depends on a healthy WordPress install and basic business information.
- A working, self-hosted WordPress site (latest stable version recommended).
- A custom domain name and an SSL certificate (your site should load over https://).
- Administrator access to the WordPress dashboard.
- Basic business details: store name, address, email, phone, target country, and currency.
- At least one payment account (e.g., Stripe, PayPal, or a local payment provider) you can connect.
- Product information: names, prices, descriptions, images, and any variations (size, color, etc.).
Step 1: Prepare Your WordPress Site for WooCommerce
Before installing WooCommerce, tidy up your WordPress environment so you don’t run into compatibility or performance issues later.
- Log in to your WordPress admin dashboard (typically
/wp-adminon your domain). - Go to Dashboard → Updates and update WordPress core, themes, and plugins.
- Navigate to Settings → General and confirm your site title, tagline, timezone, and admin email are correct.
- Go to Settings → Permalinks and choose Post name for cleaner, SEO-friendly URLs.
- Confirm your site loads over HTTPS (look for the padlock icon in the browser). If not, enable SSL in your hosting panel and update the WordPress Address and Site Address to use
https://.
Step 2: Install and Activate the WooCommerce Plugin
WooCommerce is a free plugin that adds e-commerce features to your existing WordPress site. Installing it is similar to any other plugin.
- In the WordPress dashboard, go to Plugins → Add New.
- In the search box, type WooCommerce.
- Locate the official WooCommerce plugin by Automattic.
- Click Install Now, then click Activate once installation completes.
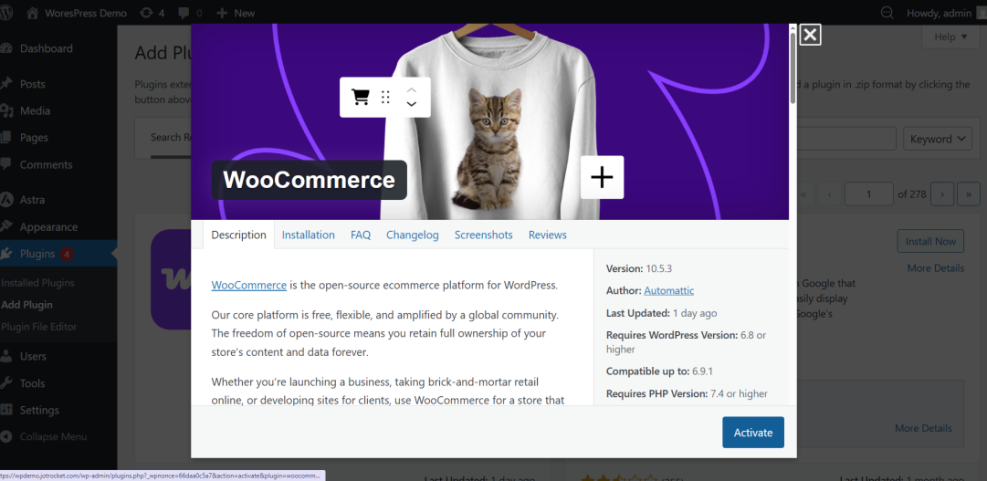
After activation, WooCommerce will usually launch a setup wizard automatically. If you close it by mistake, you can always return to it later from WooCommerce → Home or WooCommerce → Settings.
Step 3: Run the WooCommerce Setup Wizard
The setup wizard configures your store’s basics: address, currency, product types, and optional features. Taking a few minutes here saves a lot of troubleshooting later.
3.1 Store details
- From the wizard, enter your Store Address, including country, city, and postal code.
- Select your Country/Region where most customers are located.
- Confirm your Currency (for example, USD, EUR, GBP) and the types of products you plan to sell (physical, digital, subscriptions, or a mix).
3.2 Business details and features
- Answer questions about your business size and whether you’re setting up a new store or migrating an existing one.
- WooCommerce may suggest optional features (like automated tax calculation, marketing tools, or shipping extensions). Enable only what you actually plan to use at first; you can always add more later.
3.3 Theme selection
- WooCommerce will ask how your store should look. You can keep your current theme, choose a free WooCommerce-ready theme, or confirm a premium theme you already installed.
- For now, it’s fine to keep your existing theme as long as it supports WooCommerce. You’ll refine the design later in this guide.
Step 4: Add Your First Products
Your store needs products before you can test checkout or launch. Start with a handful of representative products rather than trying to upload your entire catalog at once.
- Go to Products → Add New in the WordPress dashboard.
- Enter a clear, descriptive Product name and a detailed Product description in the main editor area.
- Scroll to the Product data box and choose the product type (usually Simple product to start).
- Set the Regular price (and optional Sale price).
- Click the Inventory tab to manage stock (SKU, stock quantity, backorders, etc.).
- If the product is physical, use the Shipping tab to enter weight and dimensions.
- Add attributes (like size or color) under the Attributes tab, and convert them to variations if needed using the Variations tab.
- Set a Product image and optional Product gallery on the right-hand side.
- Assign the product to appropriate Product categories and tags to keep your catalog organized.
- Click Publish to make the product live.
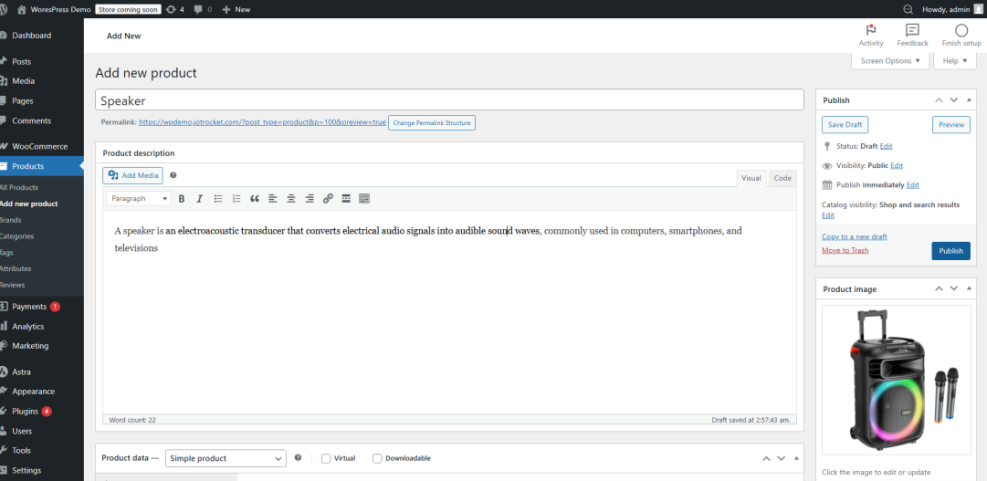
Repeat this process for several key products so you can properly test various price points, product types, and shipping scenarios later.
Step 5: Configure Payment Gateways
Payment gateways connect your WooCommerce store to your bank or payment processor, allowing you to accept credit cards, PayPal, and other methods securely.
- Go to WooCommerce → Settings → Payments.
- You’ll see a list of available gateways (such as WooCommerce Payments, Stripe, PayPal, Cash on delivery, and bank transfer).
- Toggle Enabled on for the methods you want to offer.
- Click Set up or Manage next to each gateway to configure details (API keys, account email, allowed card brands, test mode, etc.).
- Save changes for each gateway before moving on to the next.
Step 6: Configure Shipping Zones and Rates
Shipping configuration tells WooCommerce how to charge for delivering physical products. You can set up different rules by region, method, and order value.
- Navigate to WooCommerce → Settings → Shipping.
- Click Add shipping zone and give it a clear name, like “Domestic” or “EU”.
- Select the Regions (countries or states) that belong to this zone.
- Click Add shipping method and choose from:
- Flat rate – fixed fee per order or per item.
- Free shipping – useful for promotions or orders over a certain amount.
- Local pickup – for customers collecting orders in person.
- Edit each method to define pricing rules (e.g., flat fee, percentage based, or class-based rates).
- Repeat for additional zones (for example, international shipping with different prices).
Step 7: Choose and Configure a WooCommerce-Friendly Theme
Your theme controls how your product listings, product pages, and cart look. A WooCommerce-compatible theme ensures layouts and templates display correctly without custom code.
- Go to Appearance → Themes and confirm your current theme supports WooCommerce.
- If not, click Add New and filter by Feature Filter → eCommerce to find WooCommerce-ready themes, or upload a premium theme you’ve purchased.
- Activate your chosen theme.
- Open Appearance → Customize to adjust:
- Shop page layout (grid vs. list, number of products per row).
- Typography and colors for headings, buttons, and product prices.
- Header, footer, and navigation menus that expose key store pages (Shop, Cart, Checkout, My Account).
Spend a little time here to ensure your store is easy to browse on desktop and mobile, with clear calls to action on every product page.
Step 8: Test Checkout and Order Emails
Never launch a new WooCommerce store without end-to-end testing. You need to confirm that customers can add products to cart, pay, receive emails, and that orders appear correctly in your dashboard.
- Create or identify at least one low-priced “test product” that you can use repeatedly.
- Ensure at least one payment gateway is in test mode and that shipping is correctly configured for your address.
- Open your site in an incognito/private browser window.
- Add the test product to the cart, then proceed to Cart and Checkout.
- Fill in billing and shipping details and use the gateway’s test card or sandbox credentials.
- Place the order and confirm:
- You see a Thank you page.
- You receive order confirmation emails.
- The order appears in WooCommerce → Orders with the correct status.
Step 9: Launch and Monitor Your WooCommerce Store
Once testing looks good, you’re ready to open your store to real customers. Launching isn’t just flipping a switch – it’s also setting up ongoing monitoring and maintenance.
- Disable any test mode settings in payment gateways and confirm live credentials are in place.
- Remove placeholder products and pages you used for testing.
- Double-check your legal pages: Terms and Conditions, Privacy Policy, and Refund/Returns policy.
- Review your Cart and Checkout flows on mobile and desktop one last time.
- Set up basic analytics and conversion tracking so you can monitor sales and funnel performance over time.
- Schedule regular backups and security checks (daily backups are strongly recommended for stores).
As traffic grows, you’ll want to fine-tune speed and scalability. A dedicated WooCommerce optimization guide will help you squeeze more performance out of your store configuration, hosting, and caching.
Security is just as important as speed. Use a structured WooCommerce hardening checklist to lock down your store, reduce fraud risk, and protect customer data as you grow.
Wrap Up Your WooCommerce Store Setup
By following this step-by-step WooCommerce store setup, you’ve gone from a plain WordPress site to a fully configured store with products, payments, shipping, and a tested checkout flow. That’s the foundation you need to start accepting real orders with confidence.
From here, your focus shifts to continuous improvement: refining product pages, speeding up your site, hardening security, and building traffic through email and SEO. Treat this guide as your baseline setup checklist, and revisit individual steps whenever you add new payment options, expand into new regions, or redesign your theme.
Further Reading
- Best WordPress Backup Plugins for Online Stores
- WooCommerce Performance Tips for Faster Stores
- WooCommerce Performance for Faster Checkouts
- Best WooCommerce WordPress Themes
- Best WordPress E-Commerce Plugins