How to Secure WordPress Website Step by Step
Protect logins backups and data without needing a developer
If you run a WordPress site, learning how to secure WordPress website properly is one of the most important tasks you can complete for your business or blog. A few simple changes to hosting, logins, backups, and configuration can block most common attacks and keep your content safe.
In this guide you will harden your hosting, lock down admin logins with two factor, set up automatic backups, add a security plugin, and monitor your site for problems. By the end you will have a repeatable checklist you can follow for every WordPress install you manage.
What You Need to Start
- Access to your WordPress admin account with Administrator role.
- Login details for your hosting control panel or server dashboard.
- The ability to install and activate new WordPress plugins.
- A few minutes without visitors making big changes on the site.
- Optional but recommended access to a staging copy of your site.
Step 1: Choose secure hosting and backups
A secure WordPress website starts with a secure host. Good hosting provides firewalls, SSL, and reliable backups so you are not trying to protect a weak base with plugins alone.
- Log in to your hosting account and open your site management area or Control Panel.
- Confirm that an SSL certificate is enabled and your primary URL loads over https. If not, enable a free Let’s Encrypt or similar SSL from your hosting dashboard.
- Locate the backup section for your site and turn on at least daily automated backups of files and database.
- Set the backup retention period so you keep several recent restore points, for example seven to thirty days if your host allows it.
- If your host offers web application firewall or malware scanning, enable those protections for this WordPress install.
In your hosting control panel open the backup configuration screen for this WordPress site to confirm the schedule.
Visit your site in a private browser window and check that the address bar shows https with a padlock. Then review your backup list and confirm that at least one recent backup exists.
Step 2: Keep WordPress core and plugins updated
Outdated WordPress core, themes, and plugins are one of the most common ways attackers break into sites. Keeping everything updated closes known vulnerabilities before they can be exploited.
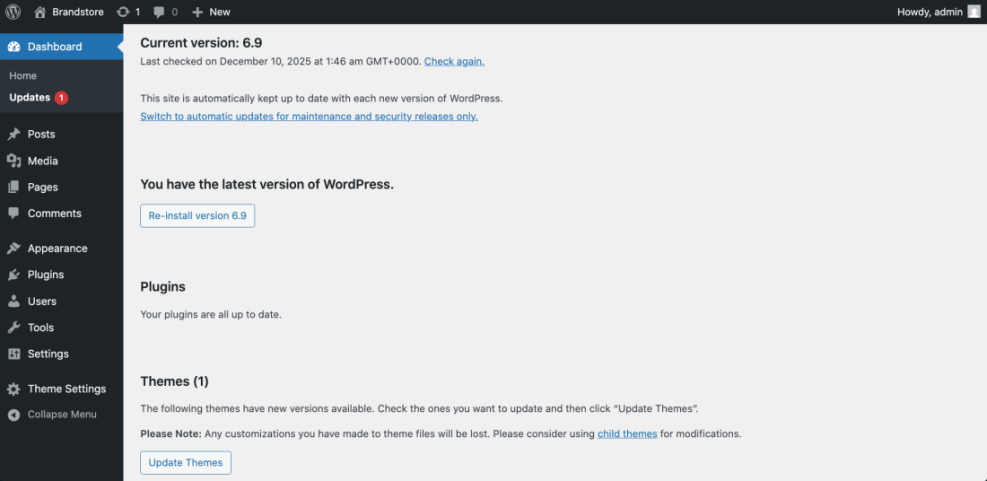
- Log in to your WordPress admin and go to Dashboard » Updates.
- Click Update Now if a new WordPress core version is available.
- Scroll down to Plugins, select all outdated plugins, and click Update Plugins.
- Repeat the same process for outdated themes under Appearance » Themes.
- Open Plugins » Installed Plugins and deactivate and delete any plugins you no longer use.
Navigate to Dashboard » Updates again to confirm that no remaining updates are listed.
Check a few key pages on the front end of your site in a private window to verify everything still loads correctly after the updates. If you want a gentler introduction to this process, read the Beginner WordPress security best practices guide for more context.
Step 3: Secure logins and enable two factor
Brute force attacks try thousands of username and password combinations until they find one that works. Strong credentials and two factor authentication make those attacks almost impossible to succeed.
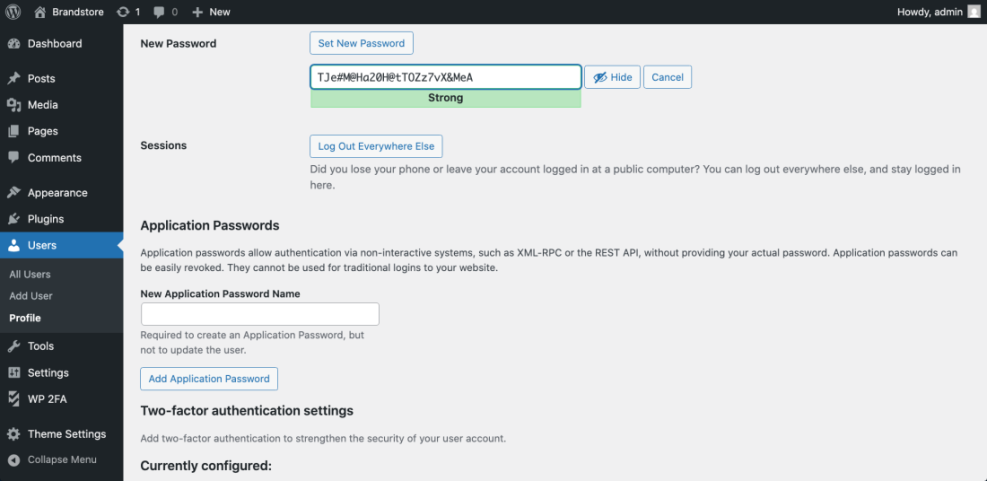
- In WordPress go to Users » Profile and ensure your username is not a generic value such as admin. If it is, create a new administrator user with a unique username and delete the old one.
- Use your browser or a password manager to generate a long unique password of at least sixteen characters for all administrator accounts.
- Install a login security or two factor plugin from Plugins » Add New if your main security plugin does not already include this feature.
- Follow the plugin wizard to enable two factor for your own admin account using an authenticator app or SMS as recommended.
- Require all other administrators and editors to set up two factor on their accounts as well.
Open Users » All Users and confirm that administrator accounts show two factor as active according to your chosen plugin.
Test logging out of WordPress and signing back in to confirm two factor is working. For a deeper walkthrough of this login hardening process review How do i secure my WordPress downloads which focuses on this area in more detail.
Step 4: Install and configure a security plugin
A dedicated security plugin helps automate firewall rules, brute force protection, file scanning, and other tasks that would be difficult to manage manually on every site.
- From your WordPress dashboard go to Plugins » Add New.
- Search for a reputable security plugin recommended by your host such as one from the official WordPress.org plugin directory.
- Click Install Now then Activate on your chosen plugin.
- After activation look for the new Security menu item added by the plugin in your admin sidebar.
- Run any setup wizard, choosing options to enable firewall, login protection, file change detection, and automatic malware scanning.
Open the main dashboard page for your chosen security plugin from the new Security menu to review its status widgets.
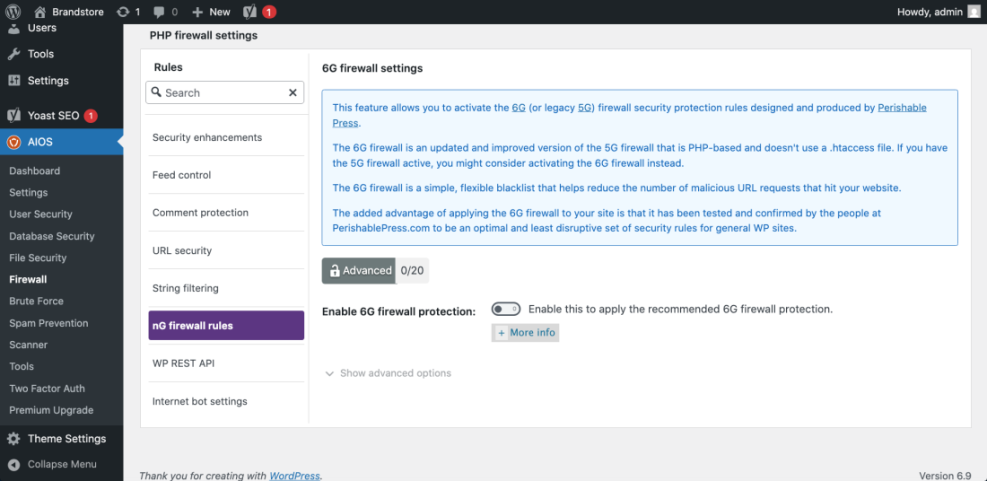
Ensure there are no critical warnings displayed. Most plugins include a list of recommended actions to improve protection; work through those suggestions one by one. When in doubt, prefer safer defaults and document any changes you make for later review.
Step 5: Harden key WordPress configuration files
Hardening adds security rules at the WordPress configuration level so that even if someone gains partial access they cannot easily edit files or use hidden entry points.
wp-config.php or .htaccess. A small typo can bring your site down until it is corrected or restored. - In your hosting control panel open the File Manager for your site or connect with SFTP.
- Locate wp-config.php in the root of your WordPress install and download a copy to your computer as a backup.
- Edit wp-config.php and add the following line near the top after the opening PHP tag:
define( 'DISALLOW_FILE_EDIT', true );- Save the file and upload it back to your server, overwriting the old version.
- Optional For Apache servers add rules in .htaccess to block direct access to sensitive files according to your host or security plugin recommendations.
Use your WordPress admin to navigate to Appearance » Theme File Editor. You should now see a message that file editing is disabled for security reasons.
For additional official hardening recommendations you can also read the Hardening WordPress guide on WordPress.org.
Step 6: Set up reliable backups and restore tests
Security is not just about preventing attacks. It also means being able to recover quickly when something does go wrong. Reliable automated backups protect you from hacks, user mistakes, and server failures.
- From your WordPress admin go to Plugins » Add New and search for a backup plugin that supports scheduled backups and offsite storage.
- Click Install Now then Activate, and open the new Backup or plugin menu added to your dashboard.
- Create a backup schedule that runs at least once per day for active blogs or stores, and at least once per week for low change sites.
- Configure the plugin to send backups to offsite storage such as cloud drive or object storage, not just your local server.
- Run a manual backup now and wait for it to complete so you know the configuration works.
Open the backup history screen in your chosen backup plugin to verify that your first backup completed without errors.

At least once test restoring a backup onto a staging site to confirm you can recover the site quickly if the worst happens.
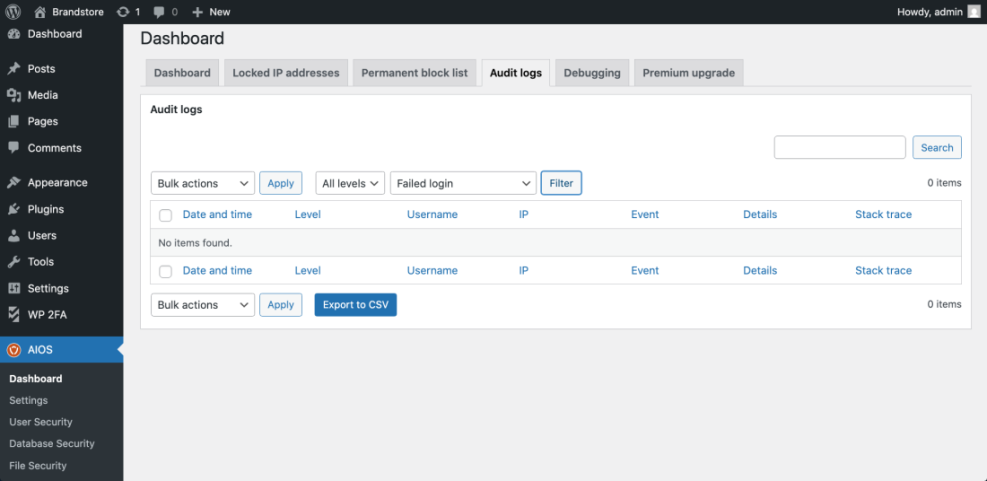
Step 7: Monitor activity uptime and security alerts
Ongoing monitoring helps you catch suspicious changes before they become full incidents. When you know quickly that something is wrong you can restore or fix it before visitors are affected.
- In your security plugin enable email notifications for critical events such as failed login lockouts or file changes.
- Install a logging plugin if your security suite does not include one so that admin actions such as plugin changes are recorded.
- Sign up for an uptime monitoring service and point it at your primary WordPress URL so you are alerted when the site goes offline.
- Set a simple weekly calendar reminder to log in and review recent logs, updates, and backup status.
- Document where alerts are delivered so your team always knows which inbox to check if something seems wrong.
Open the activity log page in your security or logging plugin to confirm events are being recorded as you log in and make changes.
For a combined view of ongoing security and uptime, review the ideas in How to start a blog WordPress and adapt them to match your own workflow.
Conclusion You Are Ready to Go
You have now strengthened your hosting, closed obvious login gaps, configured a security plugin, hardened configuration files, set up reliable backups, and enabled basic monitoring. These steps dramatically reduce the chance of a successful attack and make it much easier to recover if something still goes wrong.
Security is a process rather than a one time task. Save this checklist and repeat it on a regular schedule alongside your normal maintenance routine. Over time you will build the confidence that every WordPress site you manage follows the same safe baseline.
Further Reading
- WordPress security complete overview
- Beginner WordPress security best practices guide
- How to publish WordPress site
- How to publish WordPress site
- WordPress migration checklist for blogs