Your audience probably doesn’t all speak the same language, but your default WordPress installation is monolingual. If you only publish in one language, you’re leaving traffic, leads, and revenue on the table. The good news: you can translate WordPress website without rebuilding it from scratch.
In this guide, you’ll learn how to plan your multilingual setup, install and configure a translation plugin, translate your content, and make sure everything still works for visitors and search engines. You don’t need to be a developer, but you should be comfortable working in the WordPress dashboard.
We’ll focus on a plugin-based workflow that works with most popular translation plugins (WPML, Polylang, TranslatePress, and similar), and we’ll also touch on when a Multisite network might be a better fit for your project.
Prerequisites
Before you start translating, make sure your WordPress site is stable and ready. Changing languages affects URLs, menus, and content structure, so you want a clean baseline.
- A working WordPress site with administrator access.
- Ability to install and activate plugins (or access to someone who can).
- A recent full backup of your site (files + database).
- A clear list of target languages (e.g., English > Spanish & French).
- Decisions about who will translate (you, staff, freelance translator, or machine translation).
Step 1: Decide How You Want to Translate
There are three common ways to translate a WordPress site. Choosing the right approach now avoids painful migrations later.
Option 1: Single site + translation plugin (recommended for most)
This is the most popular approach. You keep one WordPress install and use a translation plugin to store multiple language versions of each page, post, and menu. It’s easier to manage and usually integrates well with SEO plugins.
Option 2: WordPress Multisite network
With Multisite, each language can live in its own site (for example, example.com for English and example.com/es/ or es.example.com for Spanish). This is powerful for complex organizations that need different plugins, themes, or admins per language. To understand when this structure makes sense, read more about what WordPress Multisite is before committing to it.
Option 3: Separate sites on separate domains
Some brands run fully separate sites per language or country (for example, example.fr and example.de). This gives maximum flexibility but is more expensive and time-consuming to maintain.
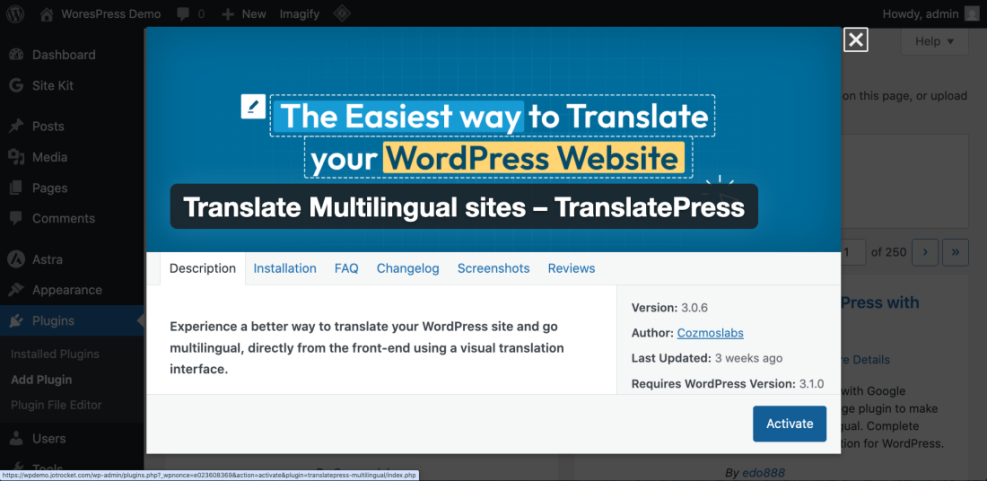
Step 2: Install and Activate Your Translation Plugin
Once you’ve chosen your strategy, it’s time to install a translation plugin on your WordPress site.
- Log in to your WordPress dashboard as an administrator.
- Go to Plugins > Add New.
- Search for your preferred translation plugin by name, or simply type “translate” to see popular options.
- Click Install Now, then Activate.
If you’re new to plugin management, you can follow our dedicated guide on installing a WordPress plugin for more detail on the process.
Most translation plugins will launch a setup wizard after activation, asking you for your current site language and which new languages you want to add.
Optional: Install via WP-CLI (advanced)
If you have SSH access and WP-CLI installed, you can install a plugin from your terminal instead of the dashboard:
# Run this in your SSH terminal inside the WordPress directory
wp plugin install polylang --activate
Step 3: Configure Site Languages and URL Structure
Next, you’ll define your default language, add other languages, and choose how your multilingual URLs will look. This is critical for both user experience and SEO.
1. Confirm your default site language
- Go to Settings > General.
- Find the Site Language dropdown.
- Set it to your primary content language (for example, English (United States)).
This is the baseline WordPress uses for admin screens and some theme strings.
2. Add new languages in the plugin settings
Each plugin has its own menu, but typically you’ll find it under Settings or in a new top-level menu like Languages or Translate. Add each language you plan to support and set a language code (e.g., en, es, fr).
3. Choose URL structure per language
You will usually have three options for multilingual URLs:
- Subdirectories:
example.com/es/(most common and easy to maintain). - Subdomains:
es.example.com. - Custom domains:
example.es,example.fr, etc.
Most site owners should pick subdirectories unless there’s a strong business or branding reason to use subdomains or separate ccTLDs.
Step 4: Translate WordPress Website, Pages, Posts, and Taxonomies
With languages configured, you can start translating your content. Most translation plugins add language controls directly to the post and page editor.
1. Translate WordPress Website key pages first
- In the dashboard, go to Pages > All Pages or Posts > All Posts.
- Locate a high-value page such as your homepage, services page, or most-visited blog posts.
- Click the + icon or Translate link under the language you want to add.
You’ll see a new editor screen where you can enter the translated title, content, excerpt, and sometimes the URL slug.
2. Translate slugs, categories, and tags
Where your plugin allows it, translate the URL slug to match the new language instead of leaving the original slug. This improves click-through rates and helps users trust your content. Many plugins also let you translate categories and tags so archive pages appear correctly in each language.
3. Review machine translations
If you use automatic translation, don’t publish blindly. Read through each translated page, fix obvious errors, and adapt idioms, currency, and units (for example, miles vs kilometers) so the text feels natural to native speakers.
Step 5: Translate Menus, Widgets, and Theme Strings
Translating only the content area isn’t enough. Navigation labels, buttons, and widget titles need to match the user’s language as well.
1. Menus
- Go to Appearance > Menus.
- Select the menu for your default language.
- Use the translation plugin’s menu options (often language tabs or a “Synchronize” feature) to create a version of that menu for each language.
- Translate each menu item label and assign the translated menu to the correct theme location (e.g., Main Menu, Footer Menu).
2. Widgets
Some plugins let you show or hide widgets per language or translate widget titles directly. In Appearance > Widgets or the site editor, look for language visibility settings or translation fields tied to your plugin.
3. Theme and plugin strings
Strings such as “Read more”, “Add to cart”, or “Search” are often stored in theme or plugin language files. Your translation plugin may include a String Translation screen where you can search for these phrases and provide translations without editing code.
Step 6: Test the Front-End Language Switcher
Visitors need a simple, obvious way to switch languages. Most translation plugins offer a language switcher you can place in a menu, header, footer, or as a floating button.
1. Place the language switcher
- Open your plugin’s Language Switcher settings.
- Choose the style (dropdown, list of flags, text labels, or both).
- Assign the switcher to a menu location, widget area, or specific block in your header.
2. Test every language
- Visit your homepage while logged out (or in an incognito browser tab).
- Switch to each language using the language switcher.
- Click through key pages to confirm you’re seeing the correct translations and menus.
- Test on mobile to make sure the language switcher is visible and usable in the responsive menu.
Step 7: Optimize Multilingual SEO
Translating your site is only half the job. You also need clean URL structures, correct metadata, and language signals so search engines know which version to show to which users.
1. Translate SEO titles and meta descriptions
If you use an SEO plugin like Yoast SEO or Rank Math, make sure it integrates with your translation plugin. Translate the SEO title and meta description fields for each language, not just the visible page content.
2. Enable hreflang and multilingual sitemaps
Many translation plugins automatically output hreflang tags and multilingual XML sitemaps. Verify that each language version of a page points to its alternates and that your Search Console property is reading the correct sitemap for your main domain.
3. Localize keywords and on-page content
Don’t just translate keywords literally. Research how people in each market search for your products and services, then adapt headings, introductions, and calls to action accordingly. For more ideas, see our guide to local SEO for small businesses and apply the principles to your translated pages.
Wrap Up Your WordPress Translate WordPress Website Project
Translating a WordPress website can feel intimidating, but when you break it into clear steps—choosing an approach, installing a translation plugin, configuring languages and URLs, translating content and navigation, and tuning SEO—it becomes a manageable project.
Start with a small group of high-impact pages, test your language switcher thoroughly, and refine your process before translating your entire site. Over time, a well-structured multilingual site will help you serve international visitors better, build trust, and grow traffic from new markets.
Further Reading
- How to Start a WordPress Website
- WordPress Backup Strategy
- How to Do On-Page SEO in WordPress
- WordPress SEO: Complete Beginner’s Guide
- WordPress Speed Optimization Step by Step