If you have built your pages but still do not know how to publish WordPress site, you are not alone. The good news is that making your site live is mostly a checklist of small settings you can follow step by step.
In this guide you will connect your domain, adjust core WordPress settings, make your site visible to visitors and search engines, and run final launch checks so you can confidently share your new website with the world.
What You Need to Start
- An active WordPress installation either on your live host, a staging site, or a local development environment.
- Access to your hosting control panel or dashboard so you can see where WordPress is installed.
- Access to your domain registrar account to update DNS records or nameservers.
- Your WordPress admin username and password so you can change settings inside the dashboard.
- At least one finished homepage or starter content so visitors have something to see when you go live.
- Optional but recommended a basic backup plugin already installed and a recent backup of your site.
If you are still choosing a server or plan you can compare options in the Managed WordPress hosting guide before you publish your site.
Step 1: Understand Where Your Site Lives
Before you can publish WordPress site you need to know exactly where it is installed and which domain it should use. This avoids broken links or visitors seeing the wrong version of your site.
- Log in to your hosting account and find the list of websites or domains. Confirm which domain or folder currently contains your WordPress installation.
- Open your browser and go to the temporary or working URL you use, such as https://example.host.com or https://example.com/staging, to confirm the site loads correctly.
- Log in to your WordPress dashboard by visiting https://yourdomain.com/wp-admin/ or the current URL plus /wp-admin and sign in with your admin account.
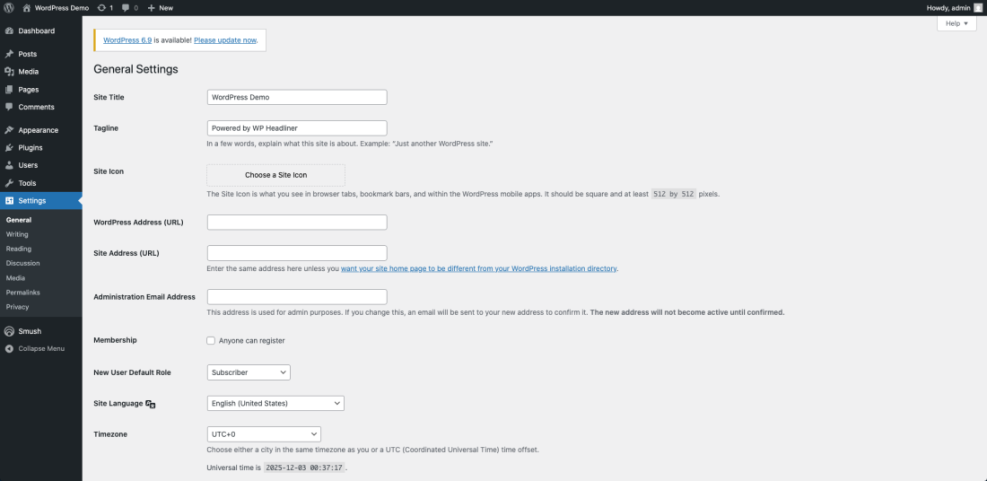
- Inside WordPress go to Settings » General and note the values for WordPress Address (URL) and Site Address (URL).
Navigate to Settings » General again to double check the current URLs before changing anything.

To verify this step make sure you can log in to WordPress and you clearly know whether your site is on a temporary URL, subfolder, or its final domain.
Step 2: Connect Your Domain to Your Hosting
Your visitors will use your real domain name to reach your site, so you must point that domain to the hosting account where WordPress is installed. You do this by updating DNS settings at your domain registrar.
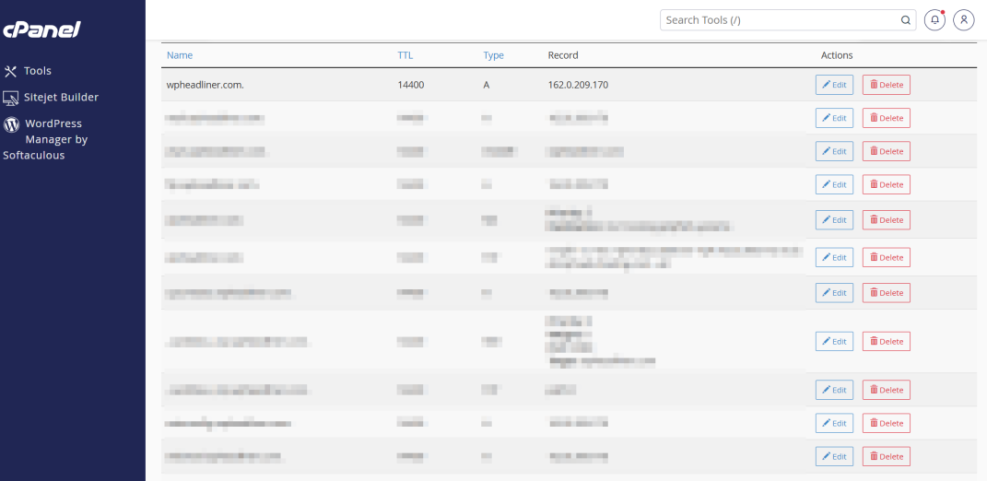
- Log in to your domain registrar and open the Domain or My Domains management screen.
- Find the DNS or Nameservers section for your domain.
- If your host gave you nameservers, replace the existing nameservers with the ones from your hosting account and save.
- If your host uses an IP address instead, edit the A record for @ and point it to your hosting server IP, then save the DNS zone.
- Allow 15 minutes up to 24 hours for DNS changes to spread worldwide.
In your registrar dashboard open the DNS or Nameservers screen to confirm the records now match the values provided by your host.
To verify this step type your domain into a browser. When DNS has finished updating you should see your WordPress login page or site content loading from the correct hosting account.
Step 3: Update WordPress URLs and Site Identity
Once your domain points to the right server you must tell WordPress to use that domain. This prevents redirects, mixed content warnings, and visitors landing on an old temporary address.
- In your WordPress dashboard go to Settings » General.
- In WordPress Address (URL) enter your final URL including https://, such as https://yourdomain.com.
- In Site Address (URL) enter the same URL unless your WordPress core files live in a different directory for advanced setups.
- Confirm your Site Title, Tagline, Timezone, and Date Format so they look correct for visitors.
- Scroll to the bottom and click Save Changes.
Navigate again to Settings » General to check that both address fields now show your real domain with https.
For deeper reference you can review the official WordPress.org documentation on changing the Site URL which explains how these fields work.
To verify this step log out of WordPress and visit your domain again. You should be redirected to the secure https version and be able to log back in at https://yourdomain.com/wp-admin/ without error.
Step 4: Make Your WordPress Site Public
Many new sites are blocked from search engines or hidden behind a coming soon page during development. Before you publish WordPress site you must remove these blocks so visitors and Google can see it.
- In your dashboard go to Settings » Reading.
- Find the Search engine visibility option and make sure the box Discourage search engines from indexing this site is unchecked.
- Under Your homepage displays choose A static page and select the page you want as your Homepage plus a Posts page if you run a blog.
- Click Save Changes.
- Go to Appearance » Menus and assign your main menu to the correct Display location such as Primary, then click Save Menu.
- If you use a coming soon or maintenance plugin open its settings and disable Maintenance mode so the front end shows your real pages.
Open Settings » Reading once more to confirm search engines are allowed and your homepage is set correctly.

wp option update blog_public 1To verify this step open a private or incognito window and visit your homepage. You should see your real site, not a maintenance screen, and basic navigation should work.
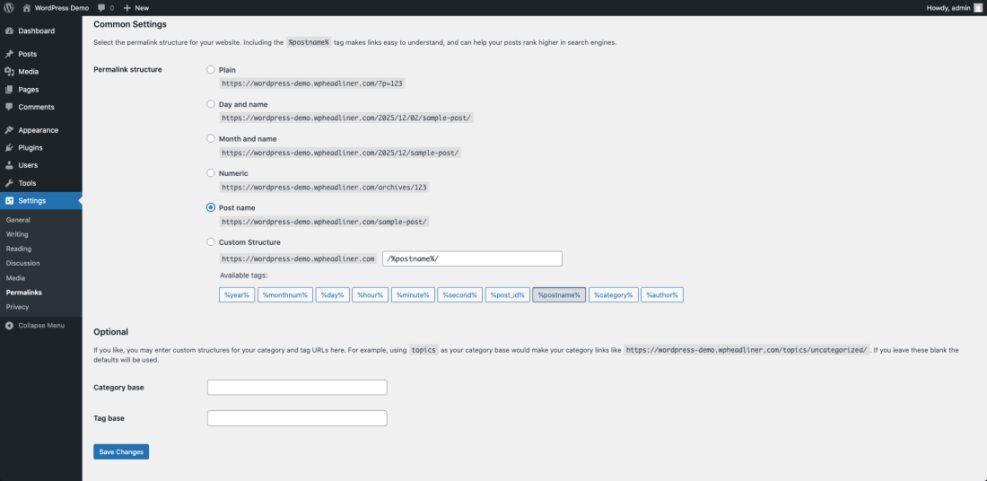
Step 5: Configure Permalinks and Check Key Pages
Clean URLs and working links are essential for a professional site launch. By setting your permalink structure and testing important pages you prevent 404 errors on the day you publish.
- From your dashboard go to Settings » Permalinks.
- Select the Post name option so your URLs use readable words instead of numbers.
- Scroll down and click Save Changes.
- In a new browser tab visit your homepage, a sample blog post, and your contact page to make sure each URL loads without errors.
- Use your main menu to click through every important page that new visitors should see.
Go back to Settings » Permalinks whenever you add custom structures or need to confirm the current setting.
For a deeper explanation of permalink options read the Beginner guide to WordPress speed optimization which covers structures and best practices in more detail.
To verify this step copy one of your new URLs and paste it into a private browser window. It should load the same content with no redirect loops or 404 errors.
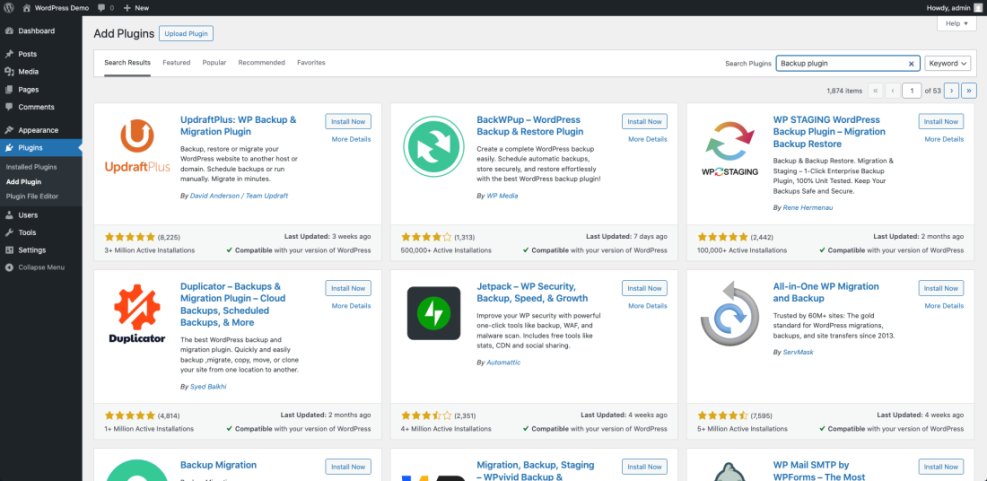
Step 6: Create Backups and Plan Ongoing Maintenance
Once you publish your WordPress site you want to protect it from mistakes, hacks, or bad updates. A reliable backup and maintenance routine gives you a safety net before you start promoting your new site.
- Install and activate a trusted backup plugin from Plugins » Add New if you have not set one up already.
- Use the plugin controls to run a full backup of your database and files and download a copy to your computer or cloud storage.
- Create a simple document listing your domain registrar, hosting login, and WordPress admin URL so you can access everything quickly.
- Add a recurring reminder to your calendar, such as monthly, to log in, update plugins and themes, and check that backups are still running.
Open Plugins » Installed Plugins to confirm your backup plugin is active and has a recent backup listed.
To plan a more detailed routine you can later follow the WordPress migration checklist for blogs which walks through regular tasks for live sites.
To verify this step make sure you can see at least one recent backup stored safely outside your hosting account.
Key Differences Between WordPress and WooCommerce
Use this comparison to keep the roles of each part clear in your mind.
| Aspect | WordPress | WooCommerce |
|---|---|---|
| Type | Website platform and content management system | WordPress plugin for ecommerce |
| Main purpose | Manage content, pages, design, and users | Manage products, carts, checkout, and orders |
| Required for the other | Works alone with or without WooCommerce | Requires WordPress to work at all |
| Typical use | Blogs, portfolios, company sites, landing pages | Online stores, bookings, memberships, digital products |
| Extensibility | Themes and plugins for many features | Extensions for payments, shipping, subscriptions, and more |
Conclusion You Are Ready to Go
By following these steps you have connected your domain, updated critical WordPress settings, opened your site to visitors and search engines, and put basic backups in place. Your WordPress site is now published and ready for traffic.
From here you can focus on creating new content, improving speed and security, and promoting your brand knowing that the technical launch pieces are already done.
Further Reading
- How to publish WordPress site
- WordPress migration checklist for blogs
- Beginner Guide to WordPress Backup and Restore Strategies
- WordPress speed optimization new bloggers
Frequently Asked Questions
Do I need hosting to publish WordPress site
How long does it take for my domain to show the new site
Can I publish my WordPress site from localhost
Should I disable maintenance mode before or after changing URLs
How do I turn off the discourage search engines option
What should I do before making big changes on a live site
redesigns. Whenever possible use a staging site to test updates, then push them to the live site only after you confirm everything works as expected.